Gallery
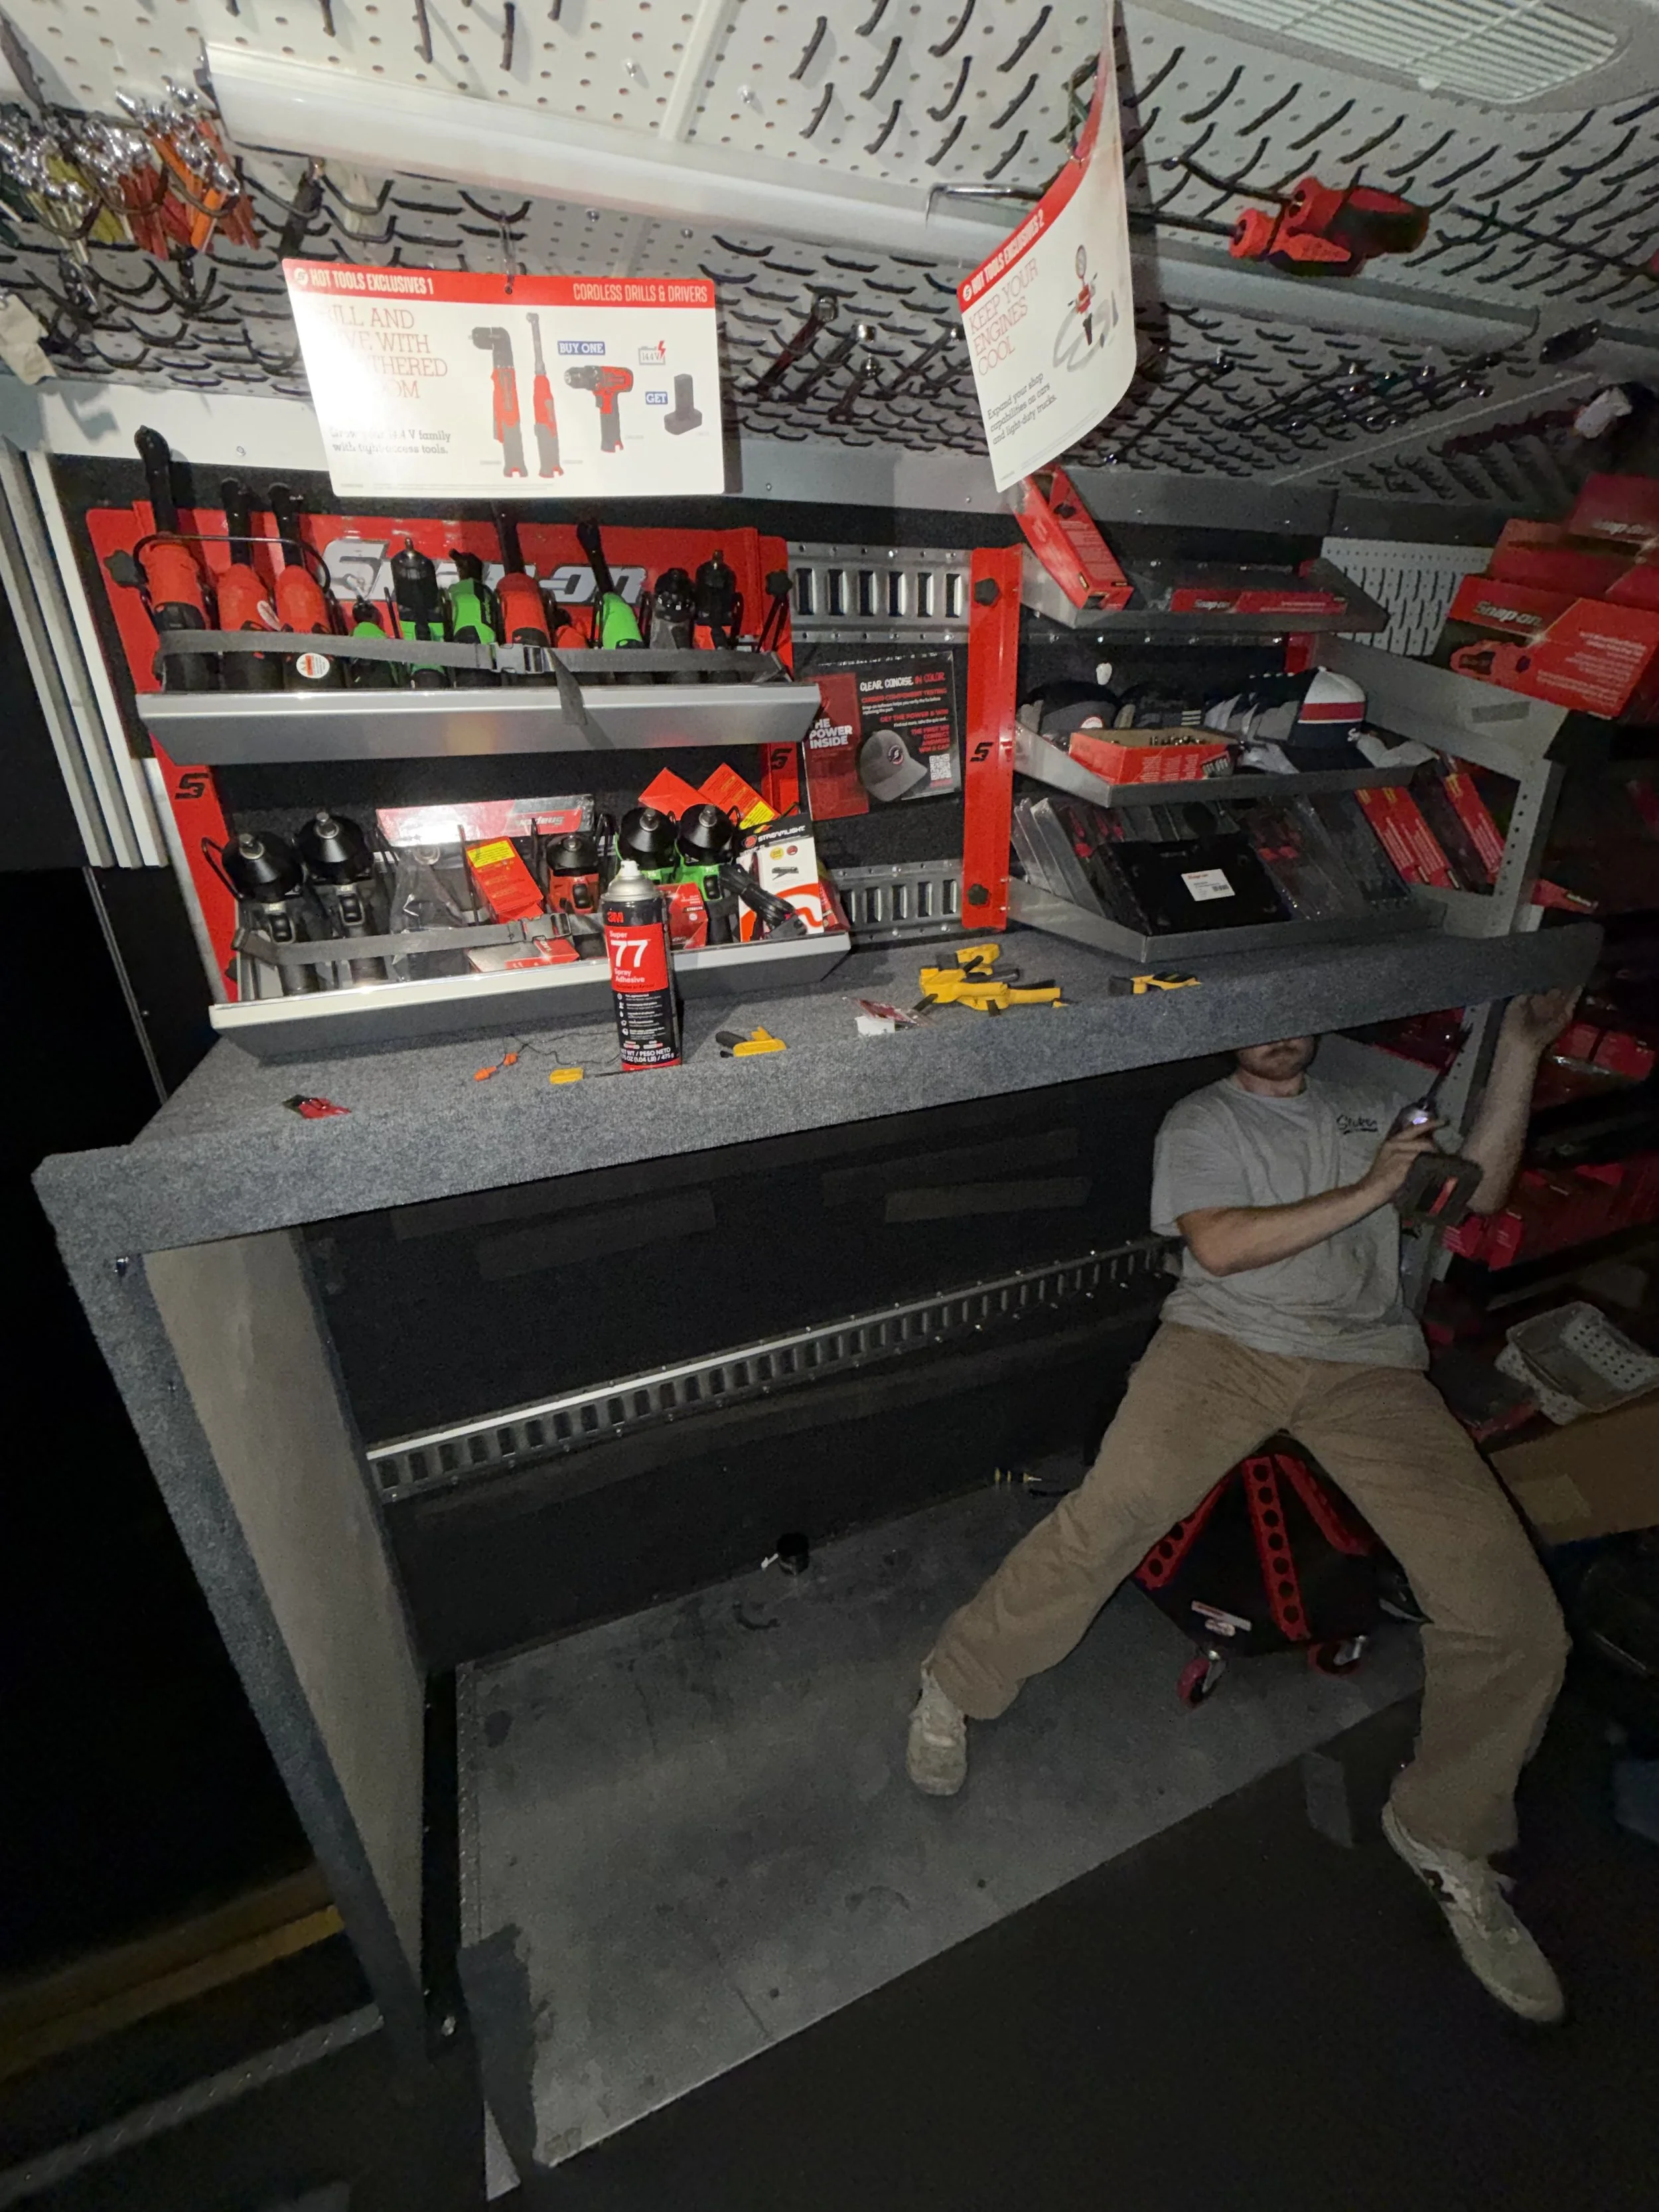
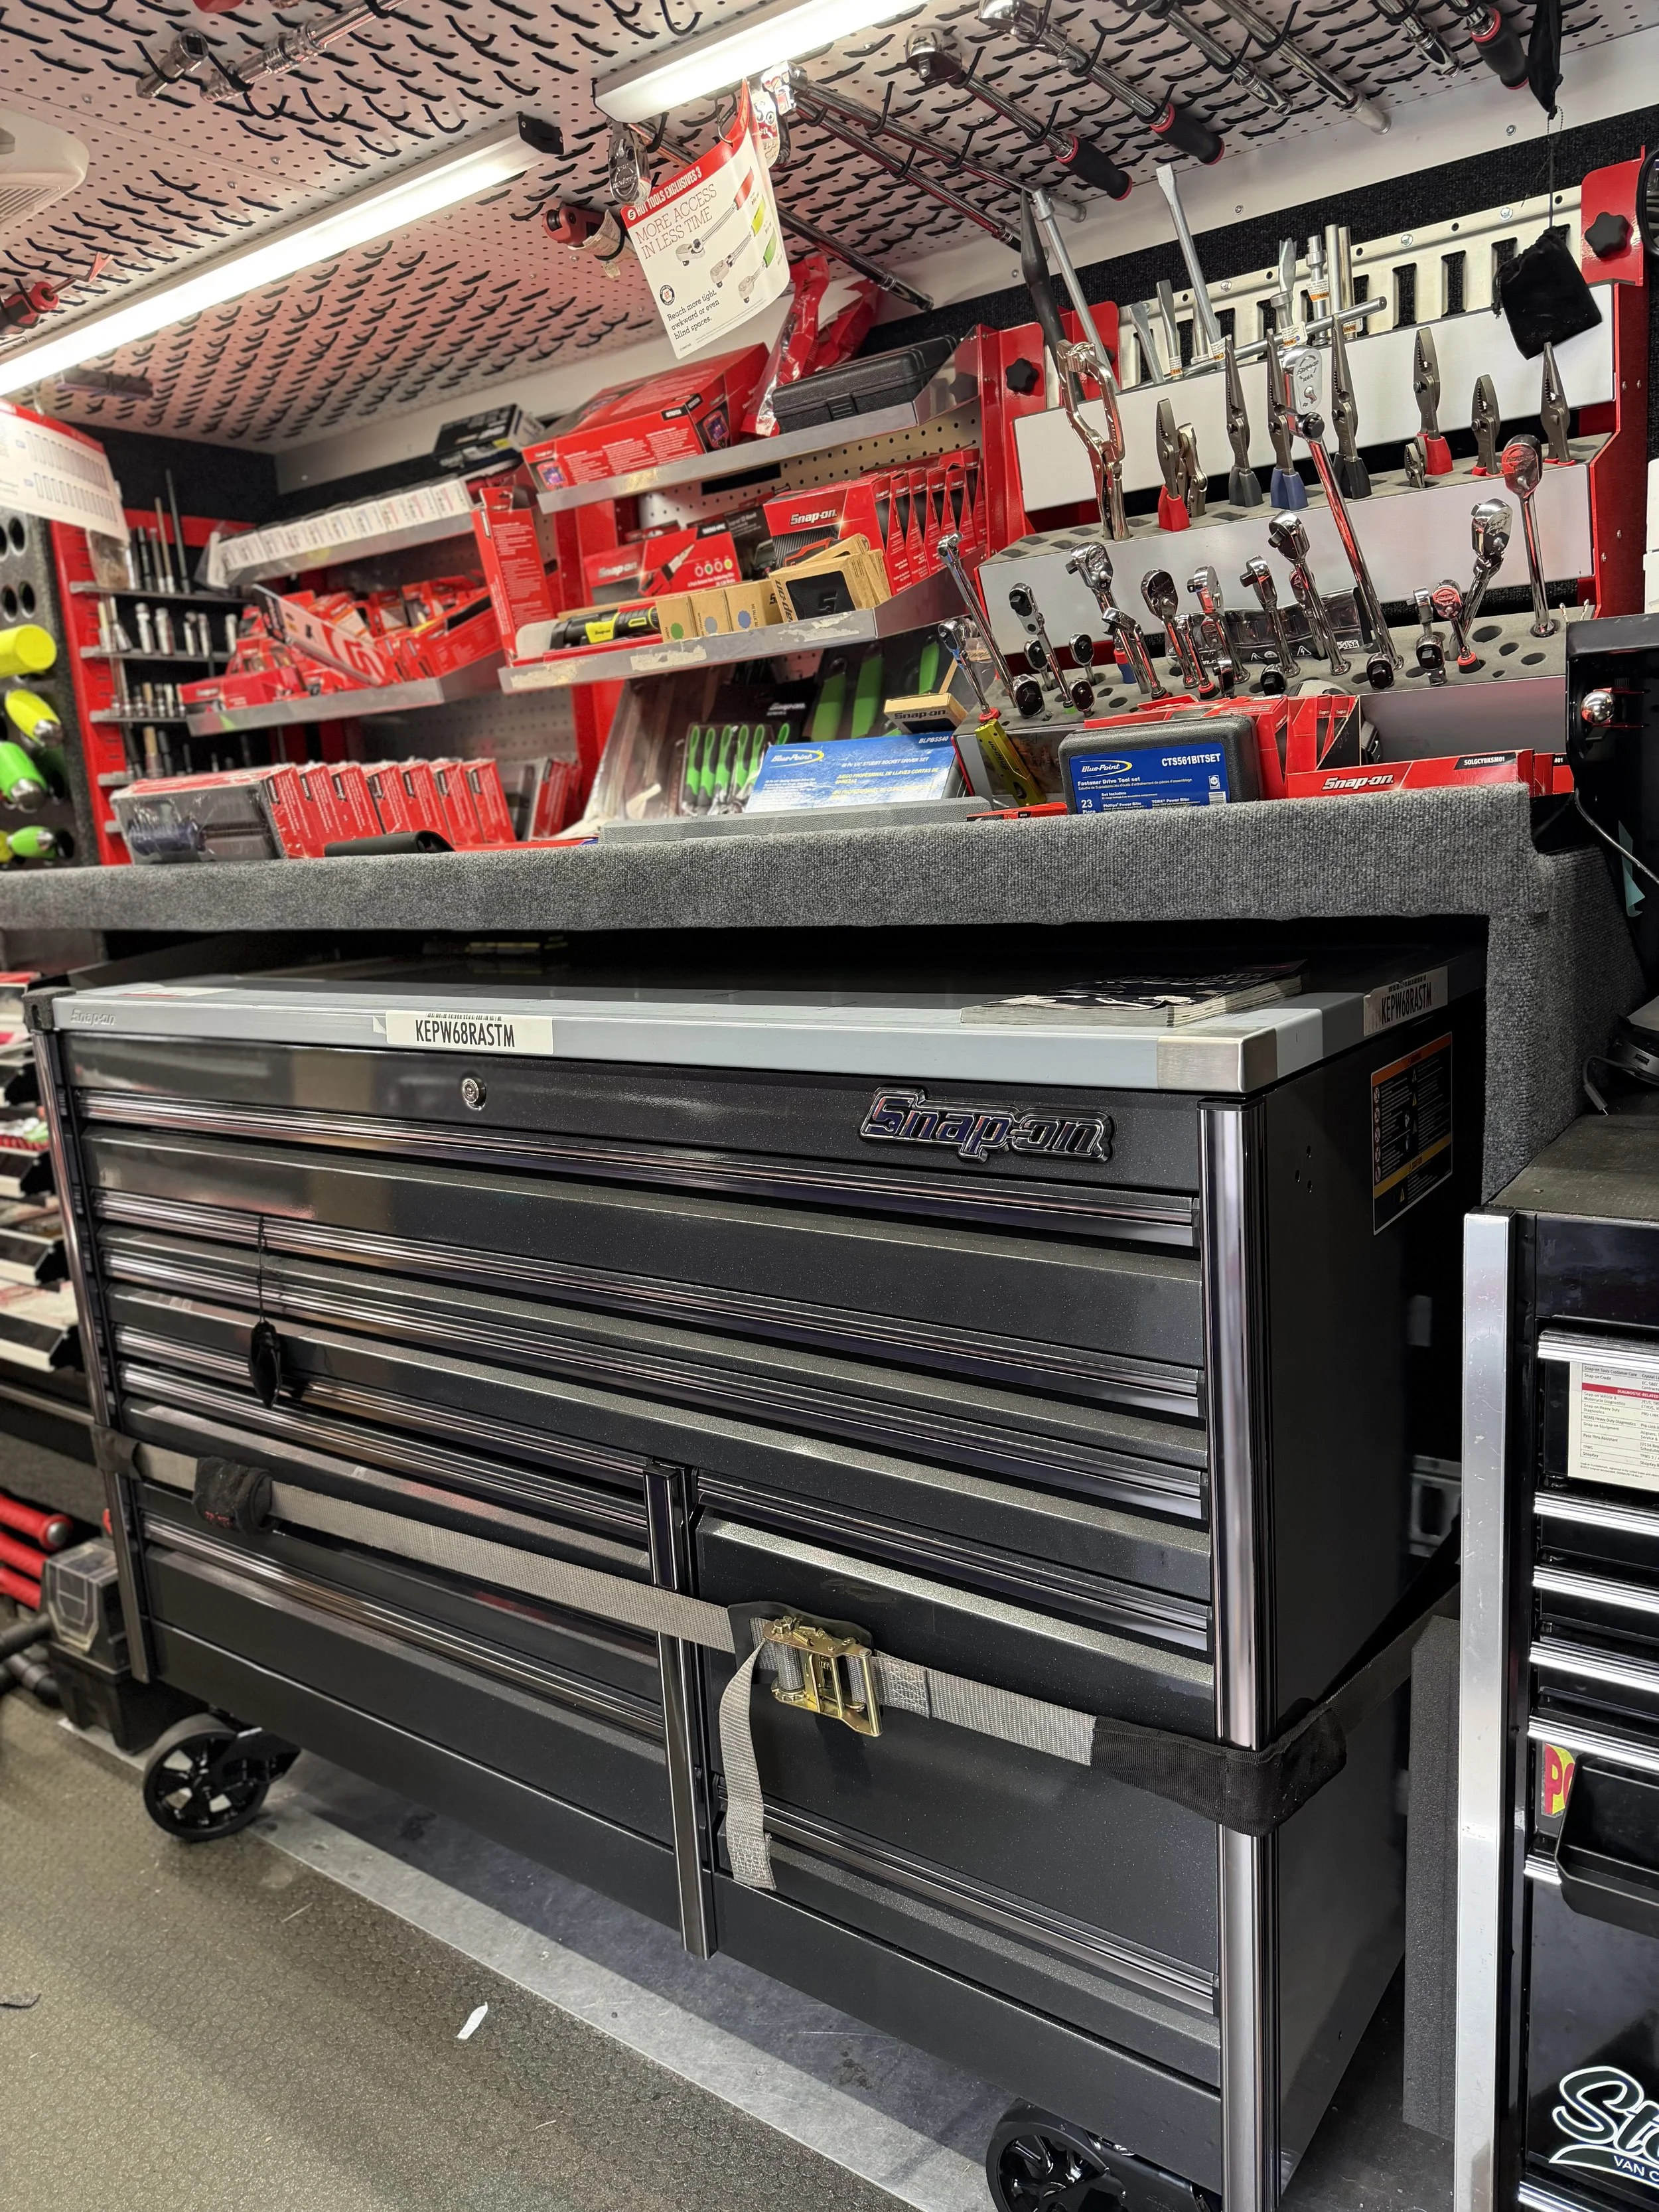
SNAP-ON tool truck shelving The goal was two shelves that would allow tool storage on top but allow for the transportation of large tool boxes below
Both of these shelves were built start to finish in a 24 hour span
Shelf 1 was 77" long
Shelf 2 is 90" long
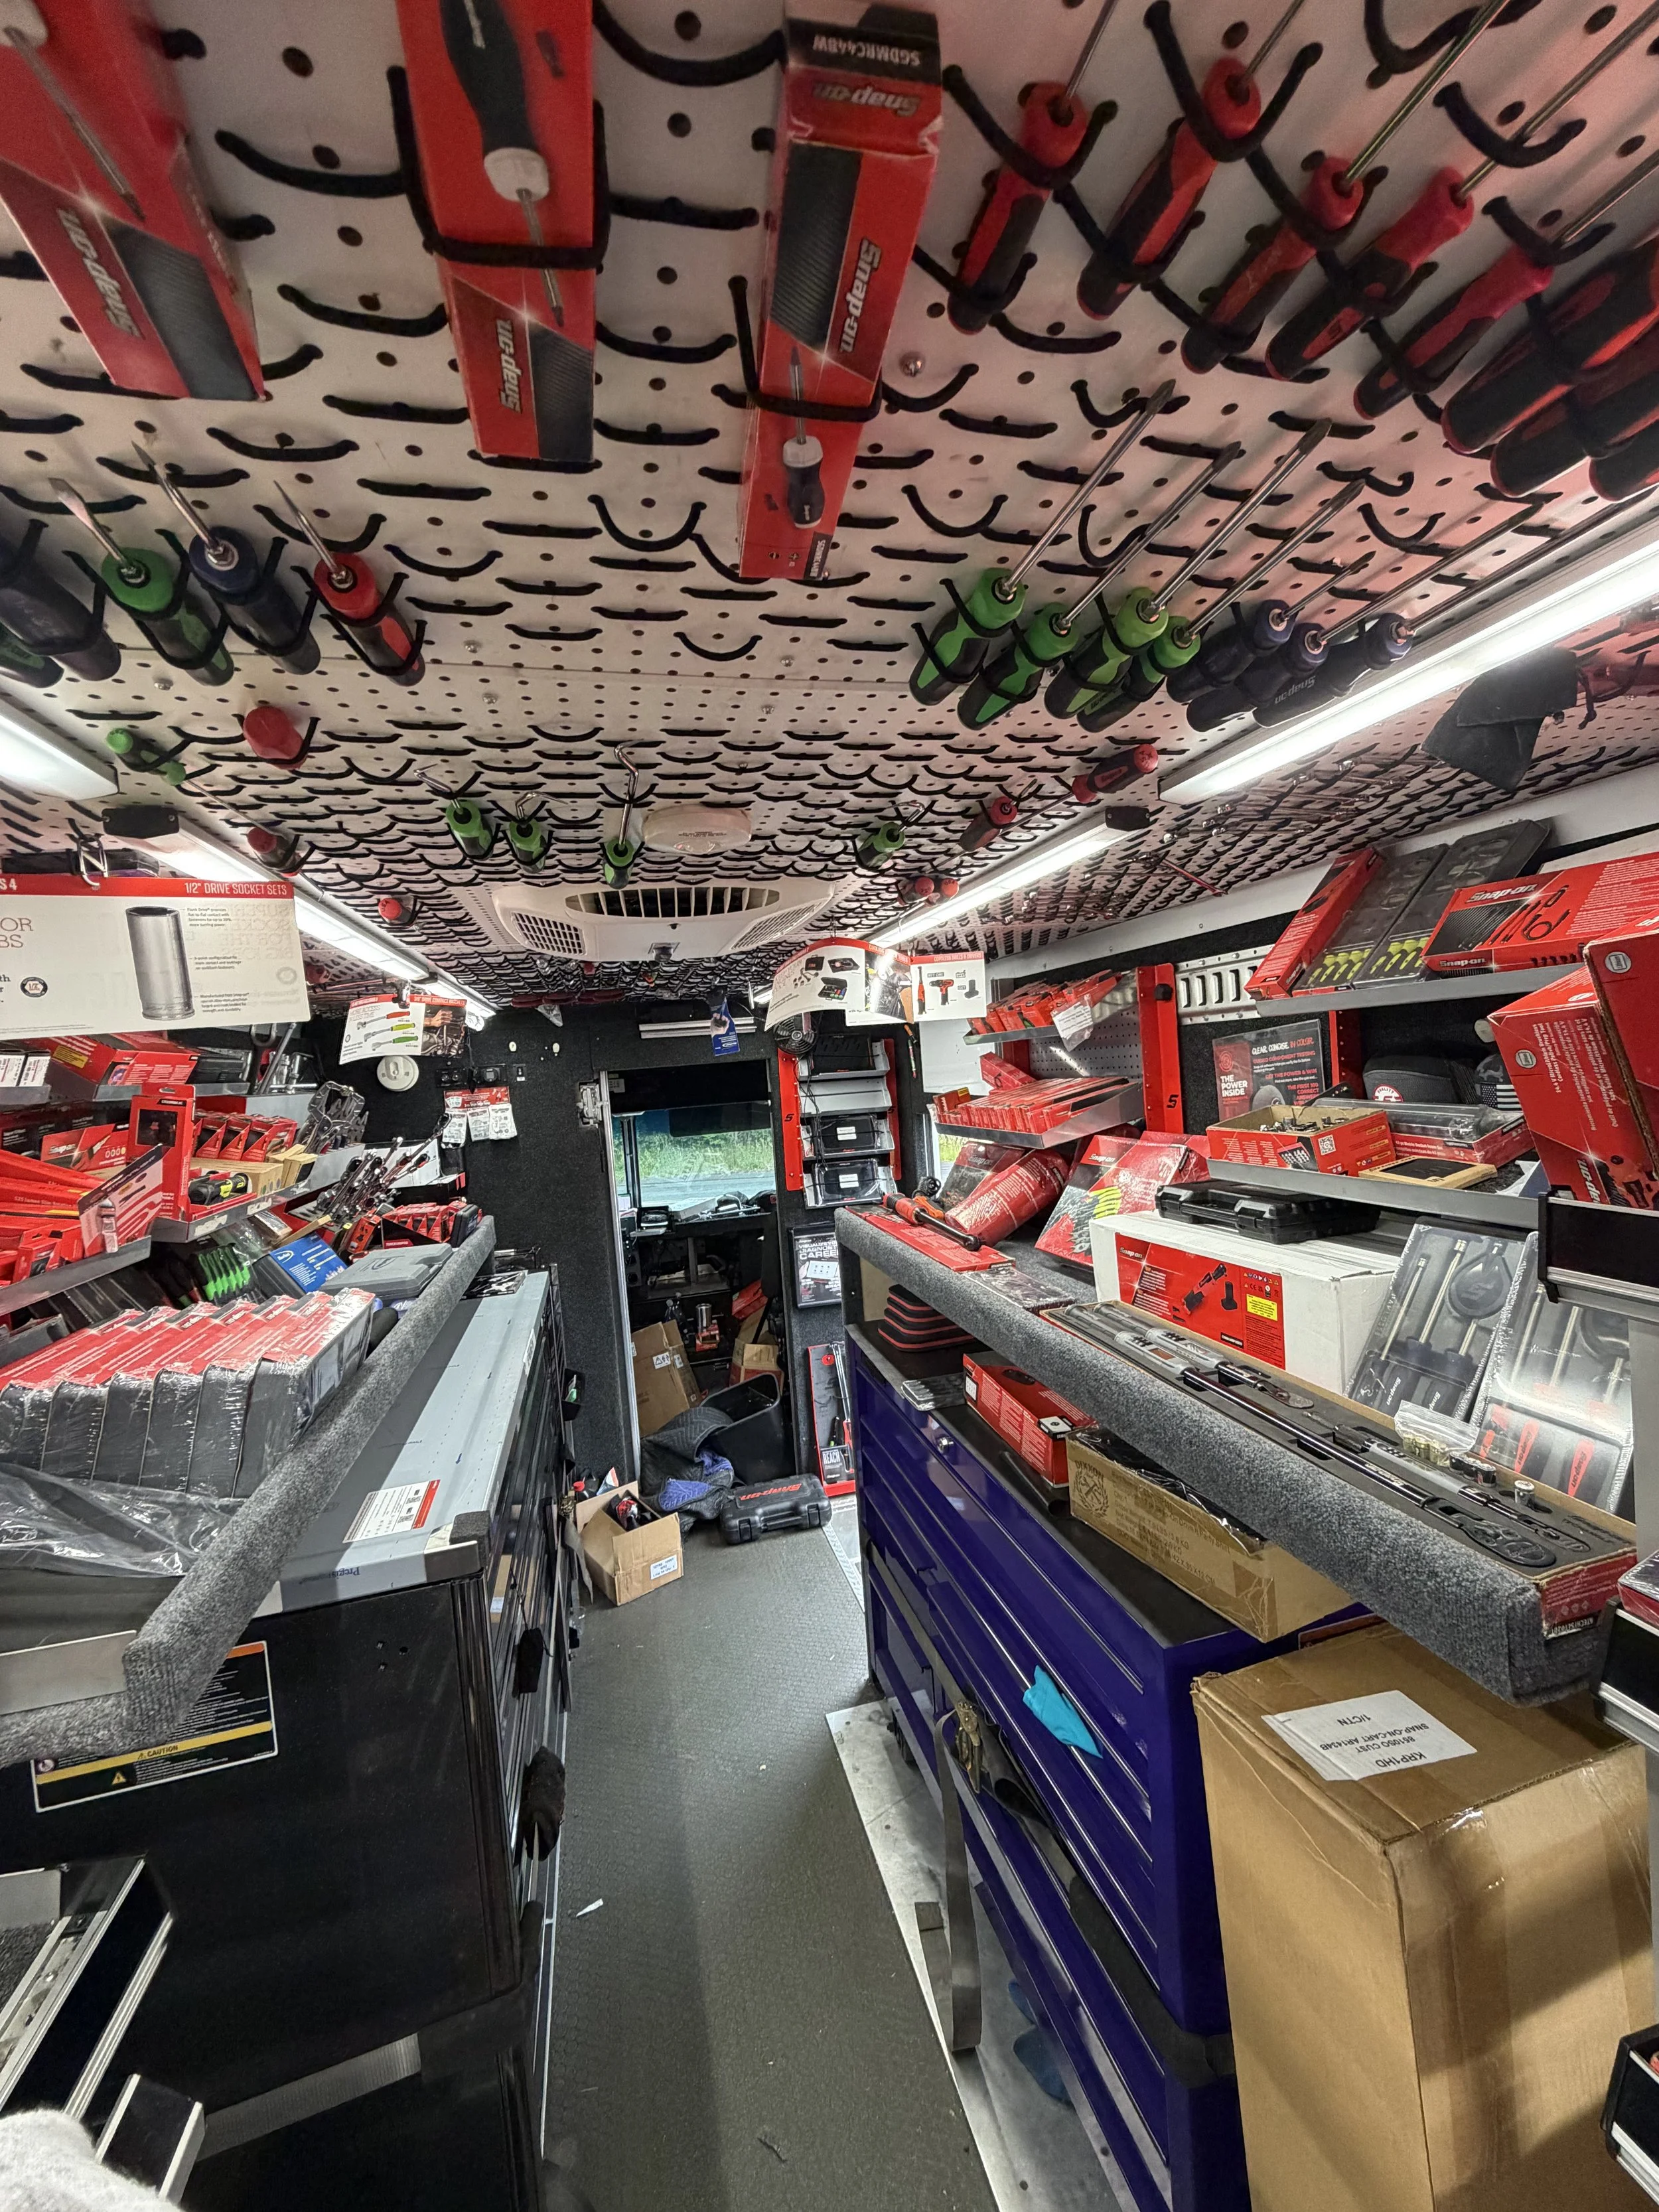
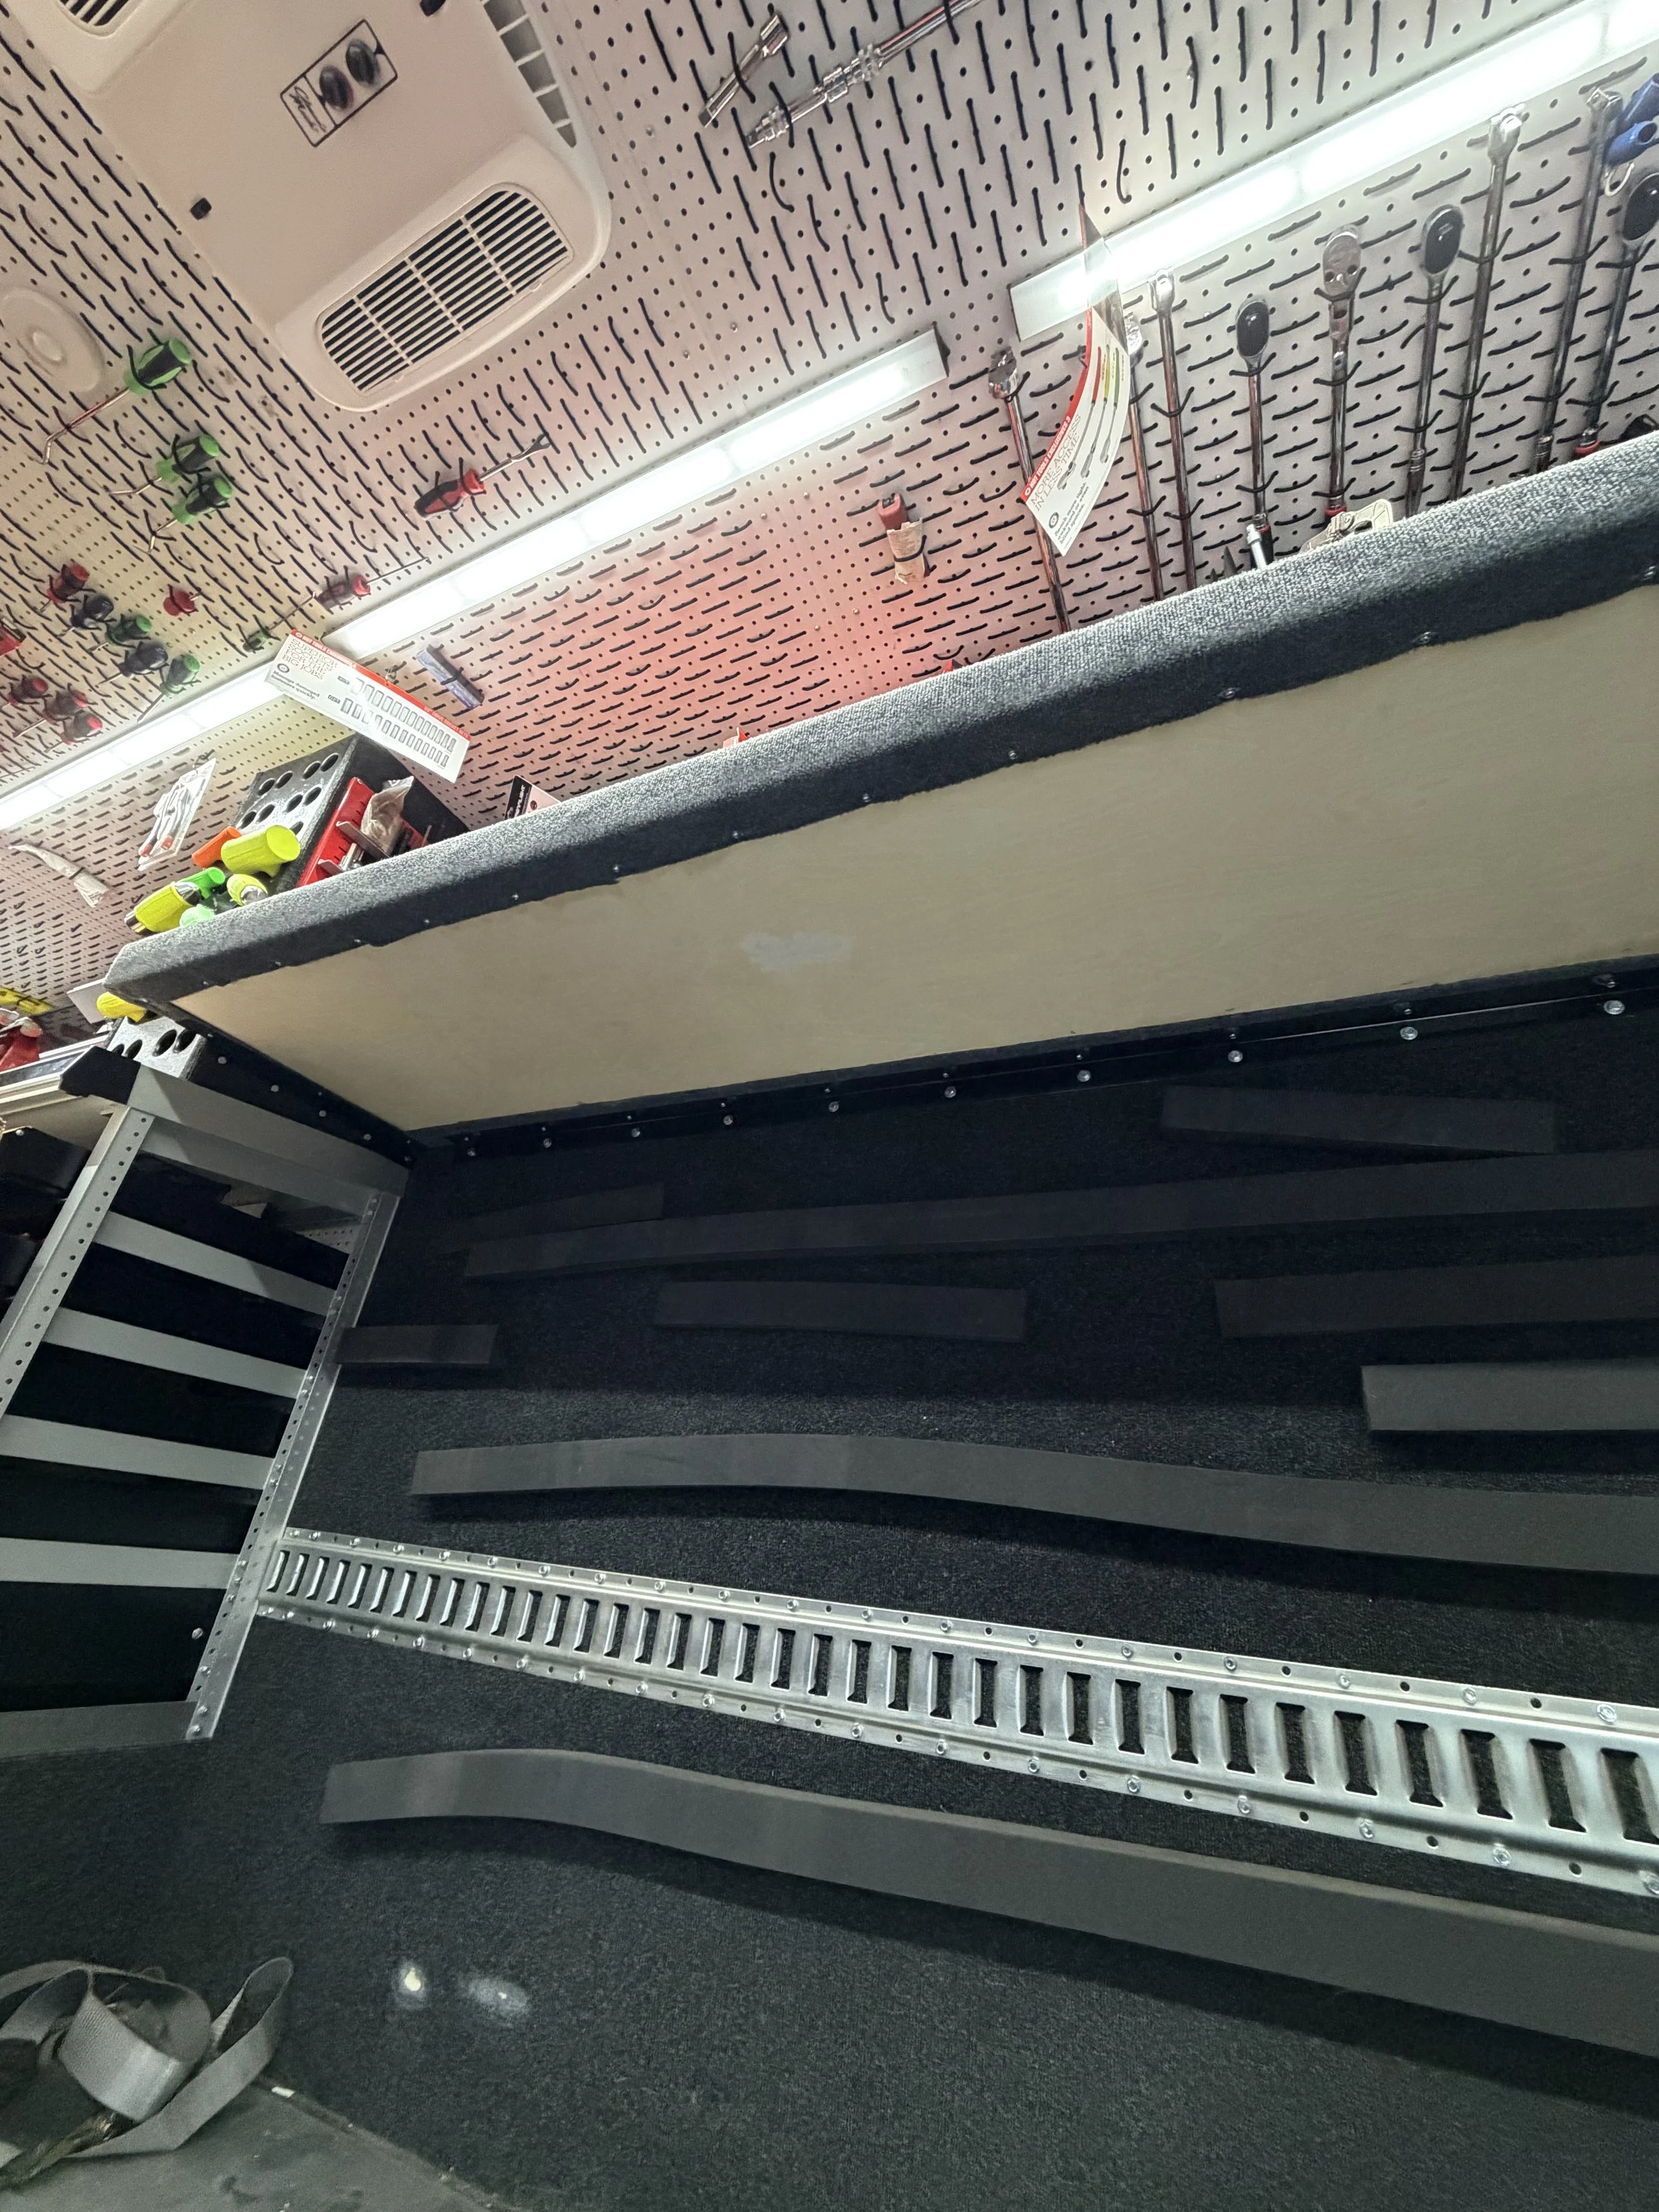
Due to the length of the shelves and the amount of weight that was going on them, we used some high quality material to minimize sag
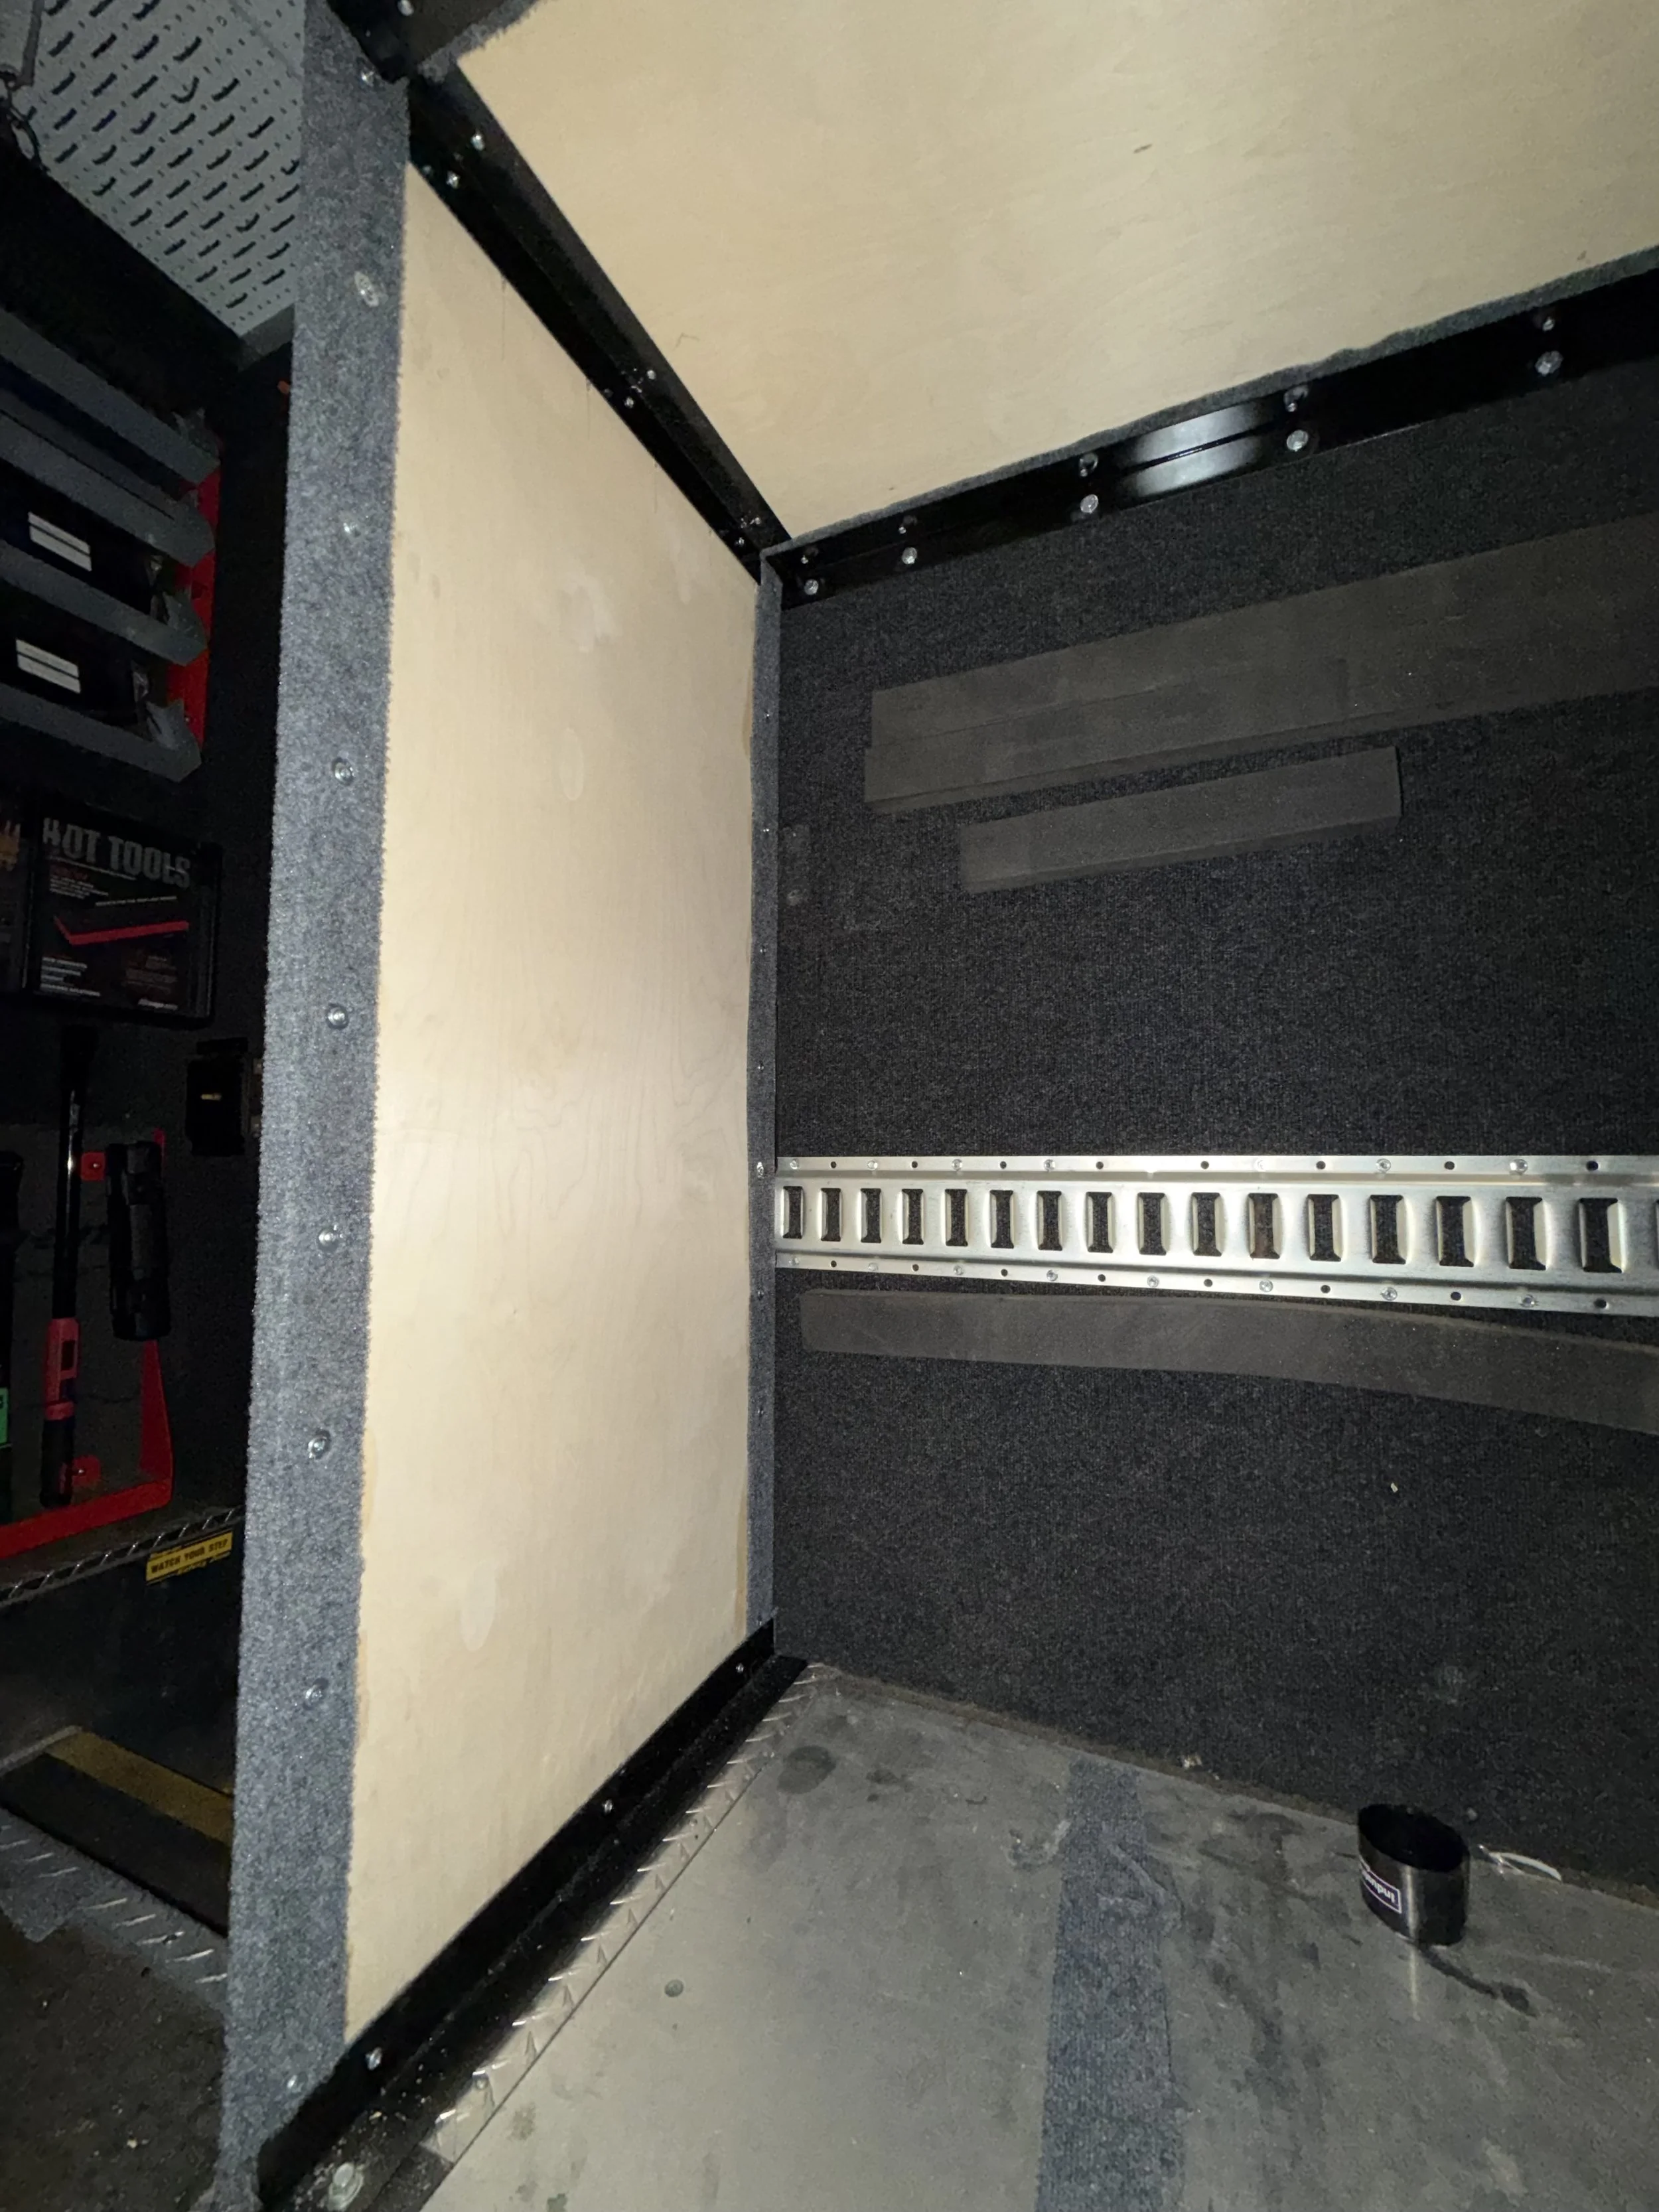
Sourced raw angle iron 1/8" thick, cut each piece to length, drilled mounting holes, cleaned the pieces and painted black for a nice finished look
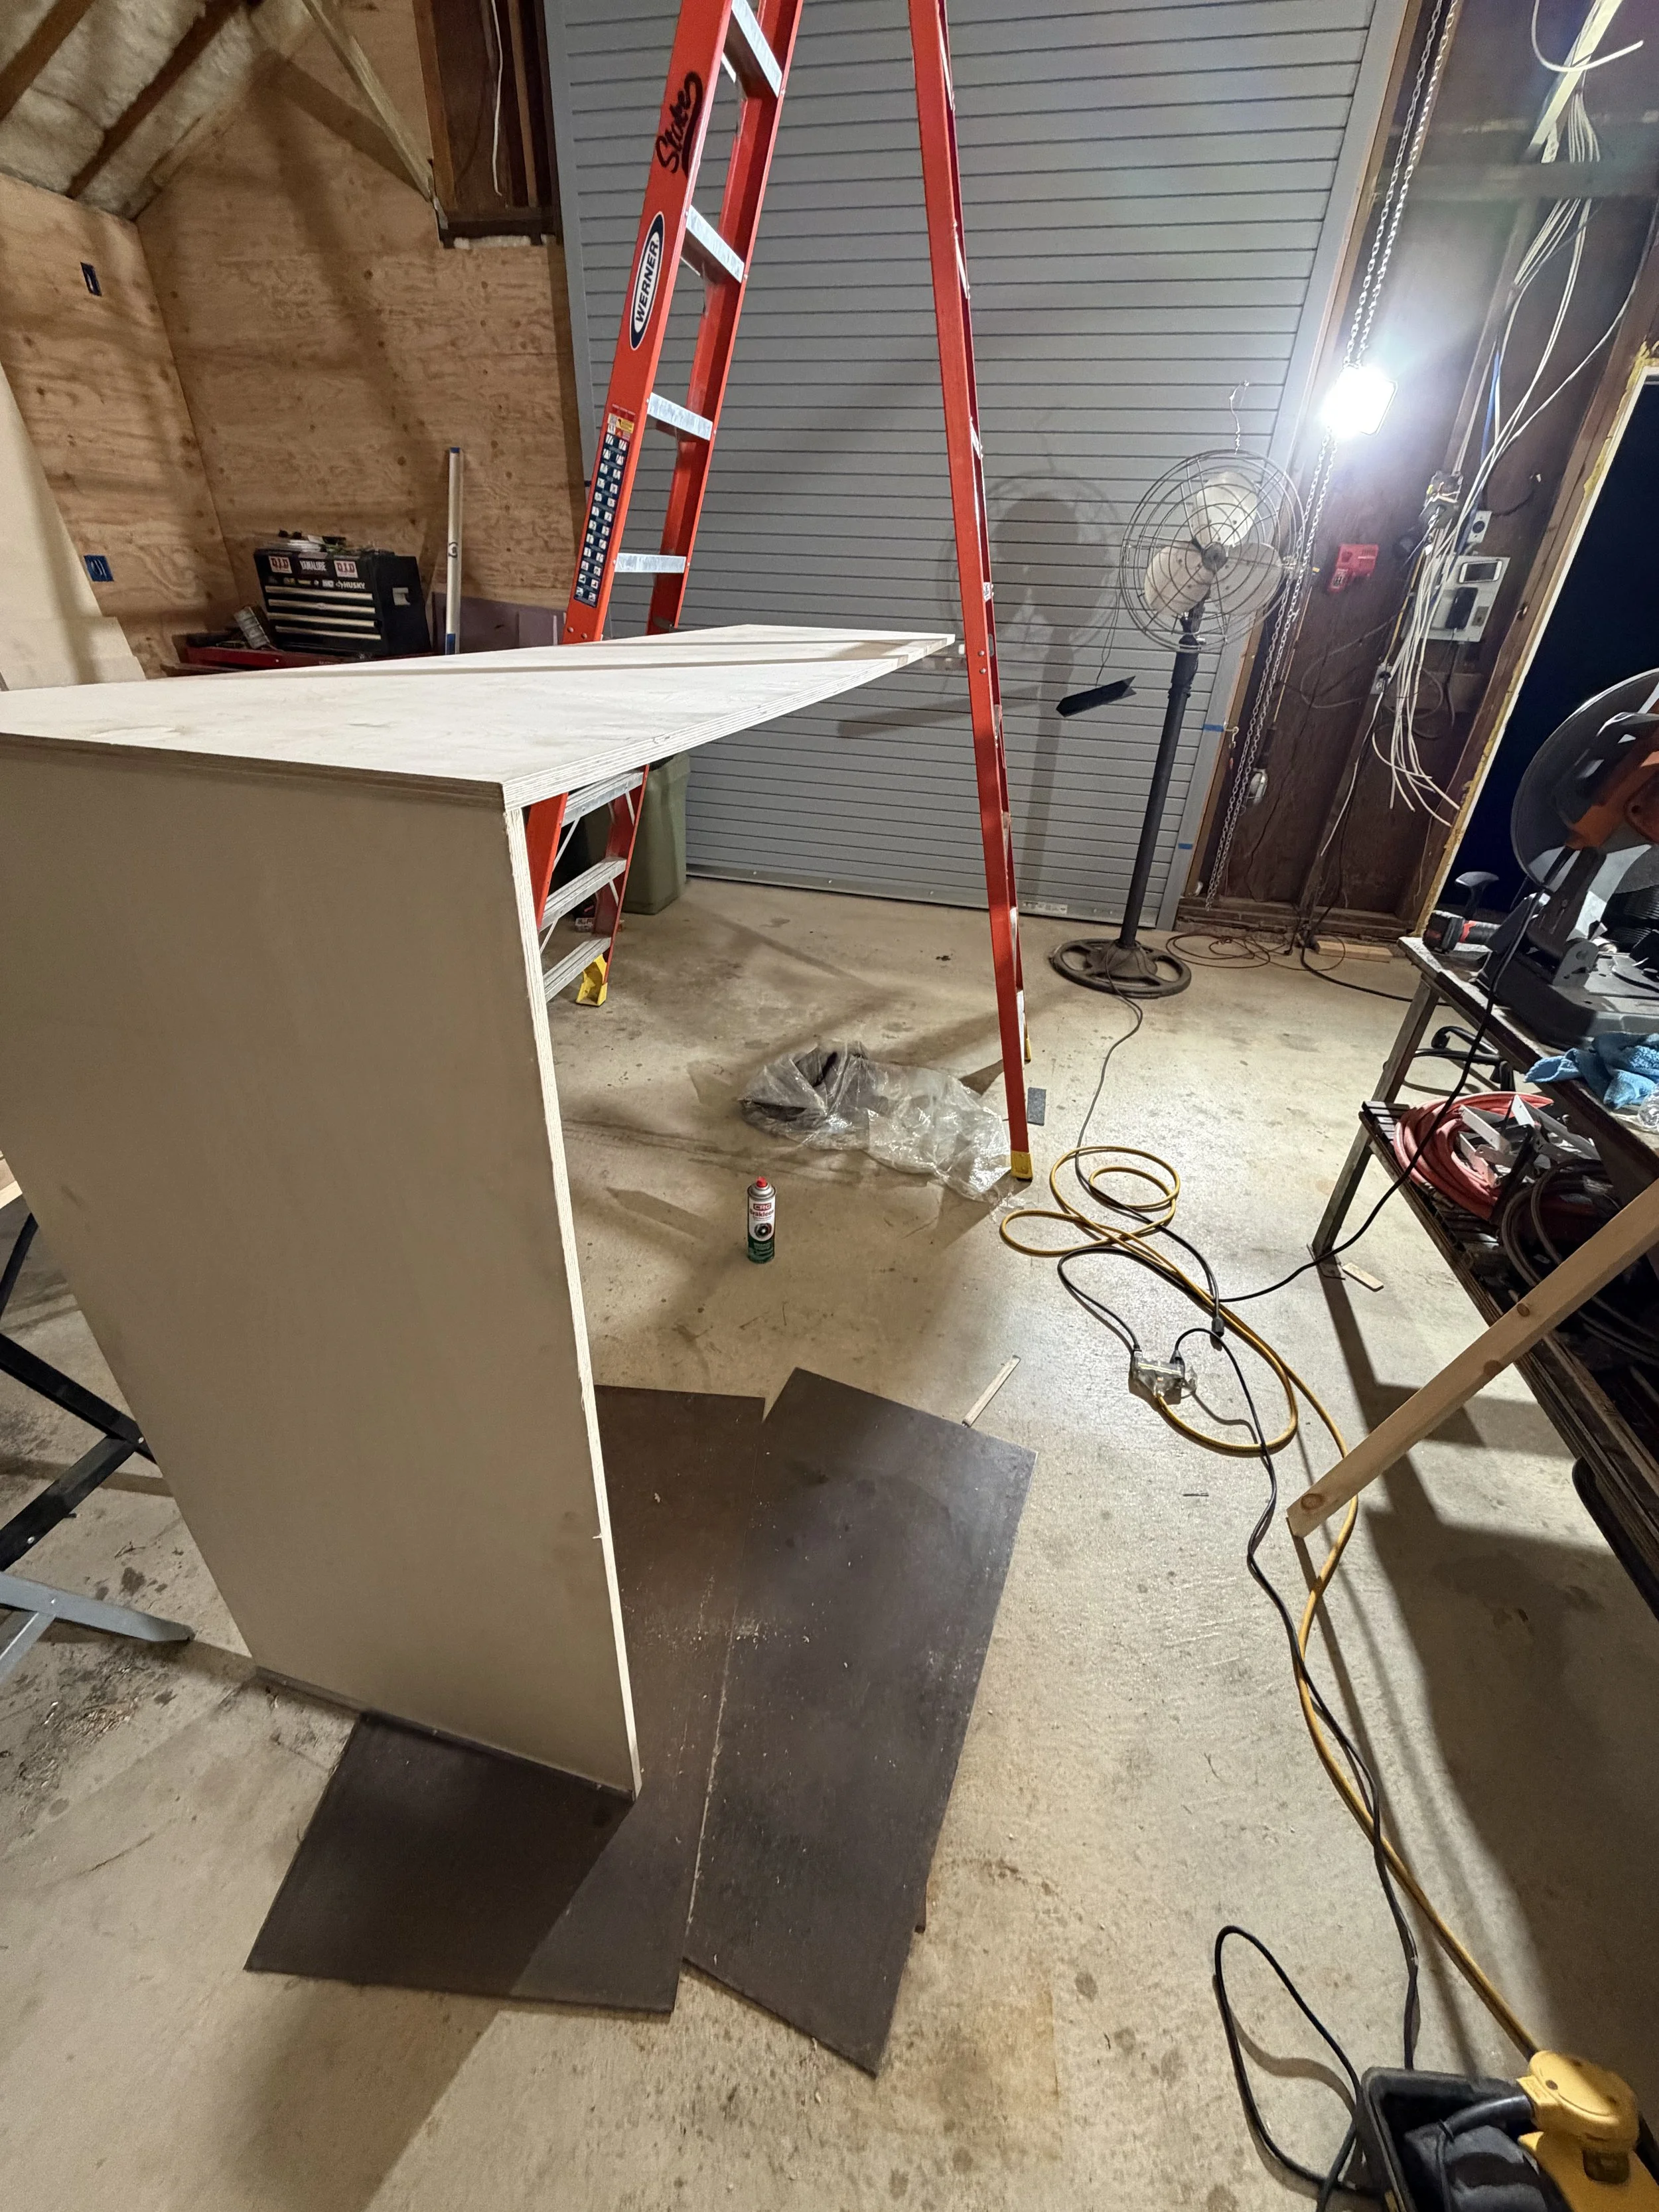
We sourced 3/4" baltic birch plywood to use as the shelf itself
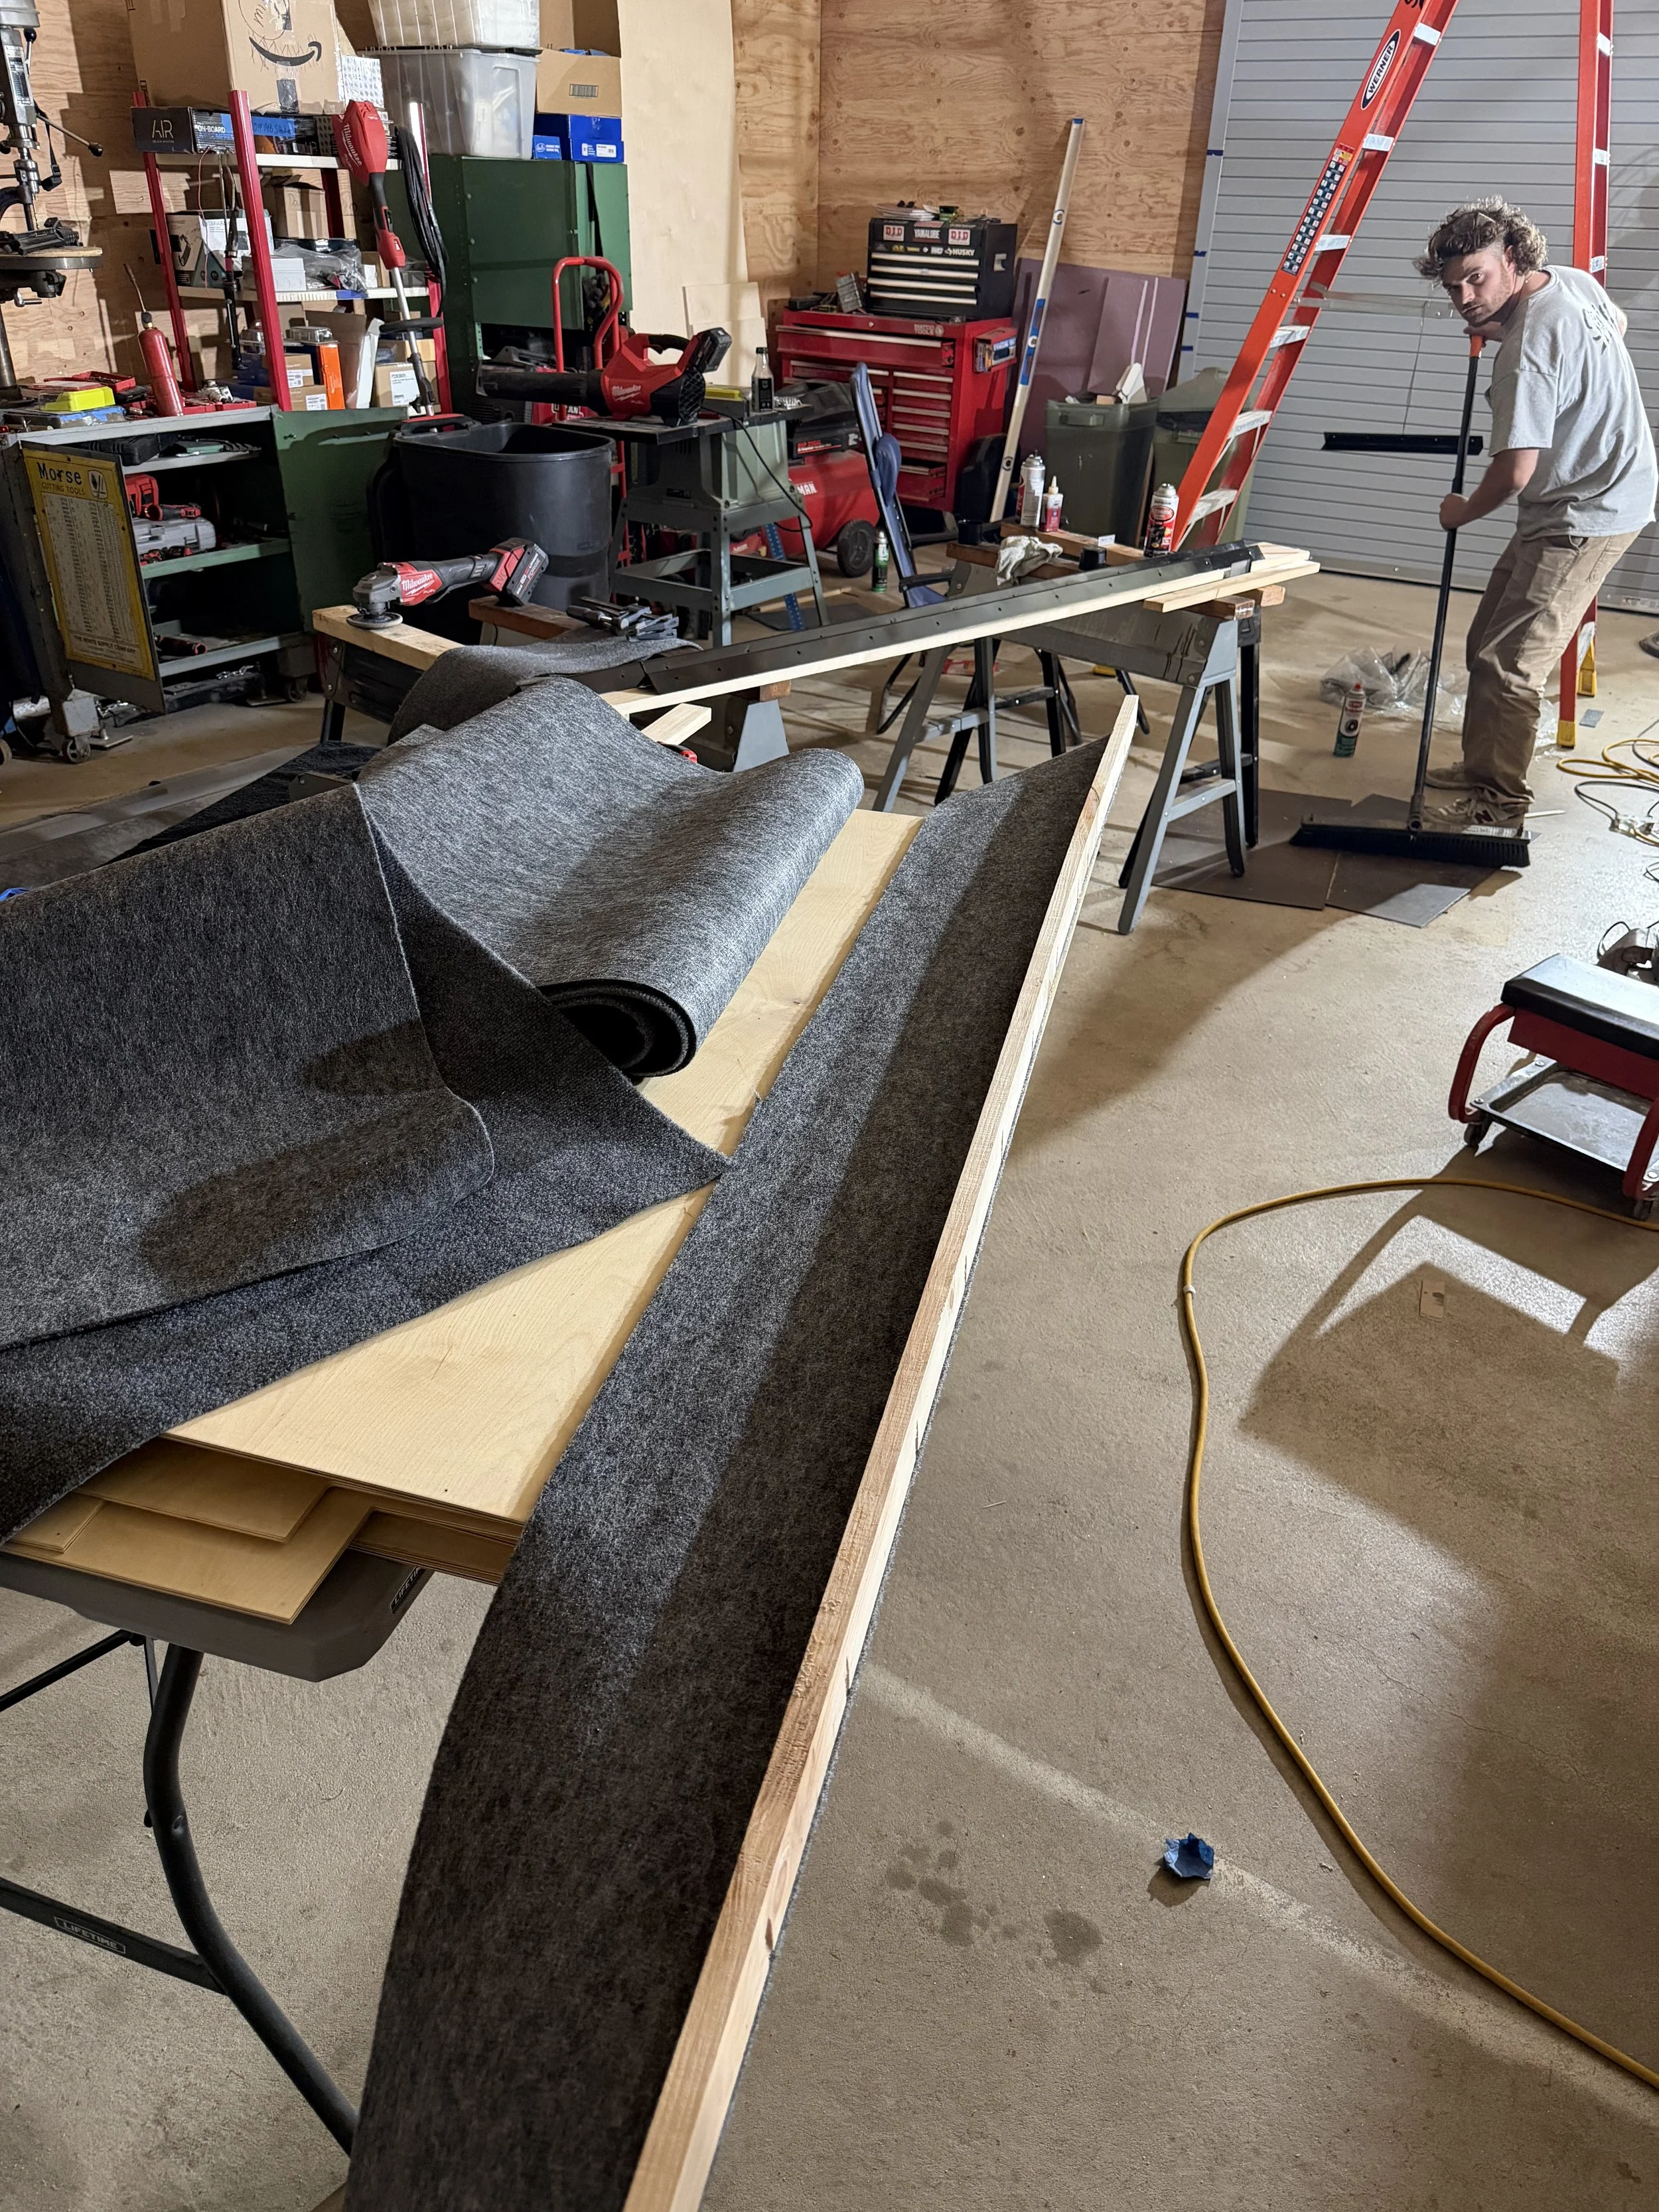
Made a lip to go on the shelves to hold tools and material on the shelves during travel

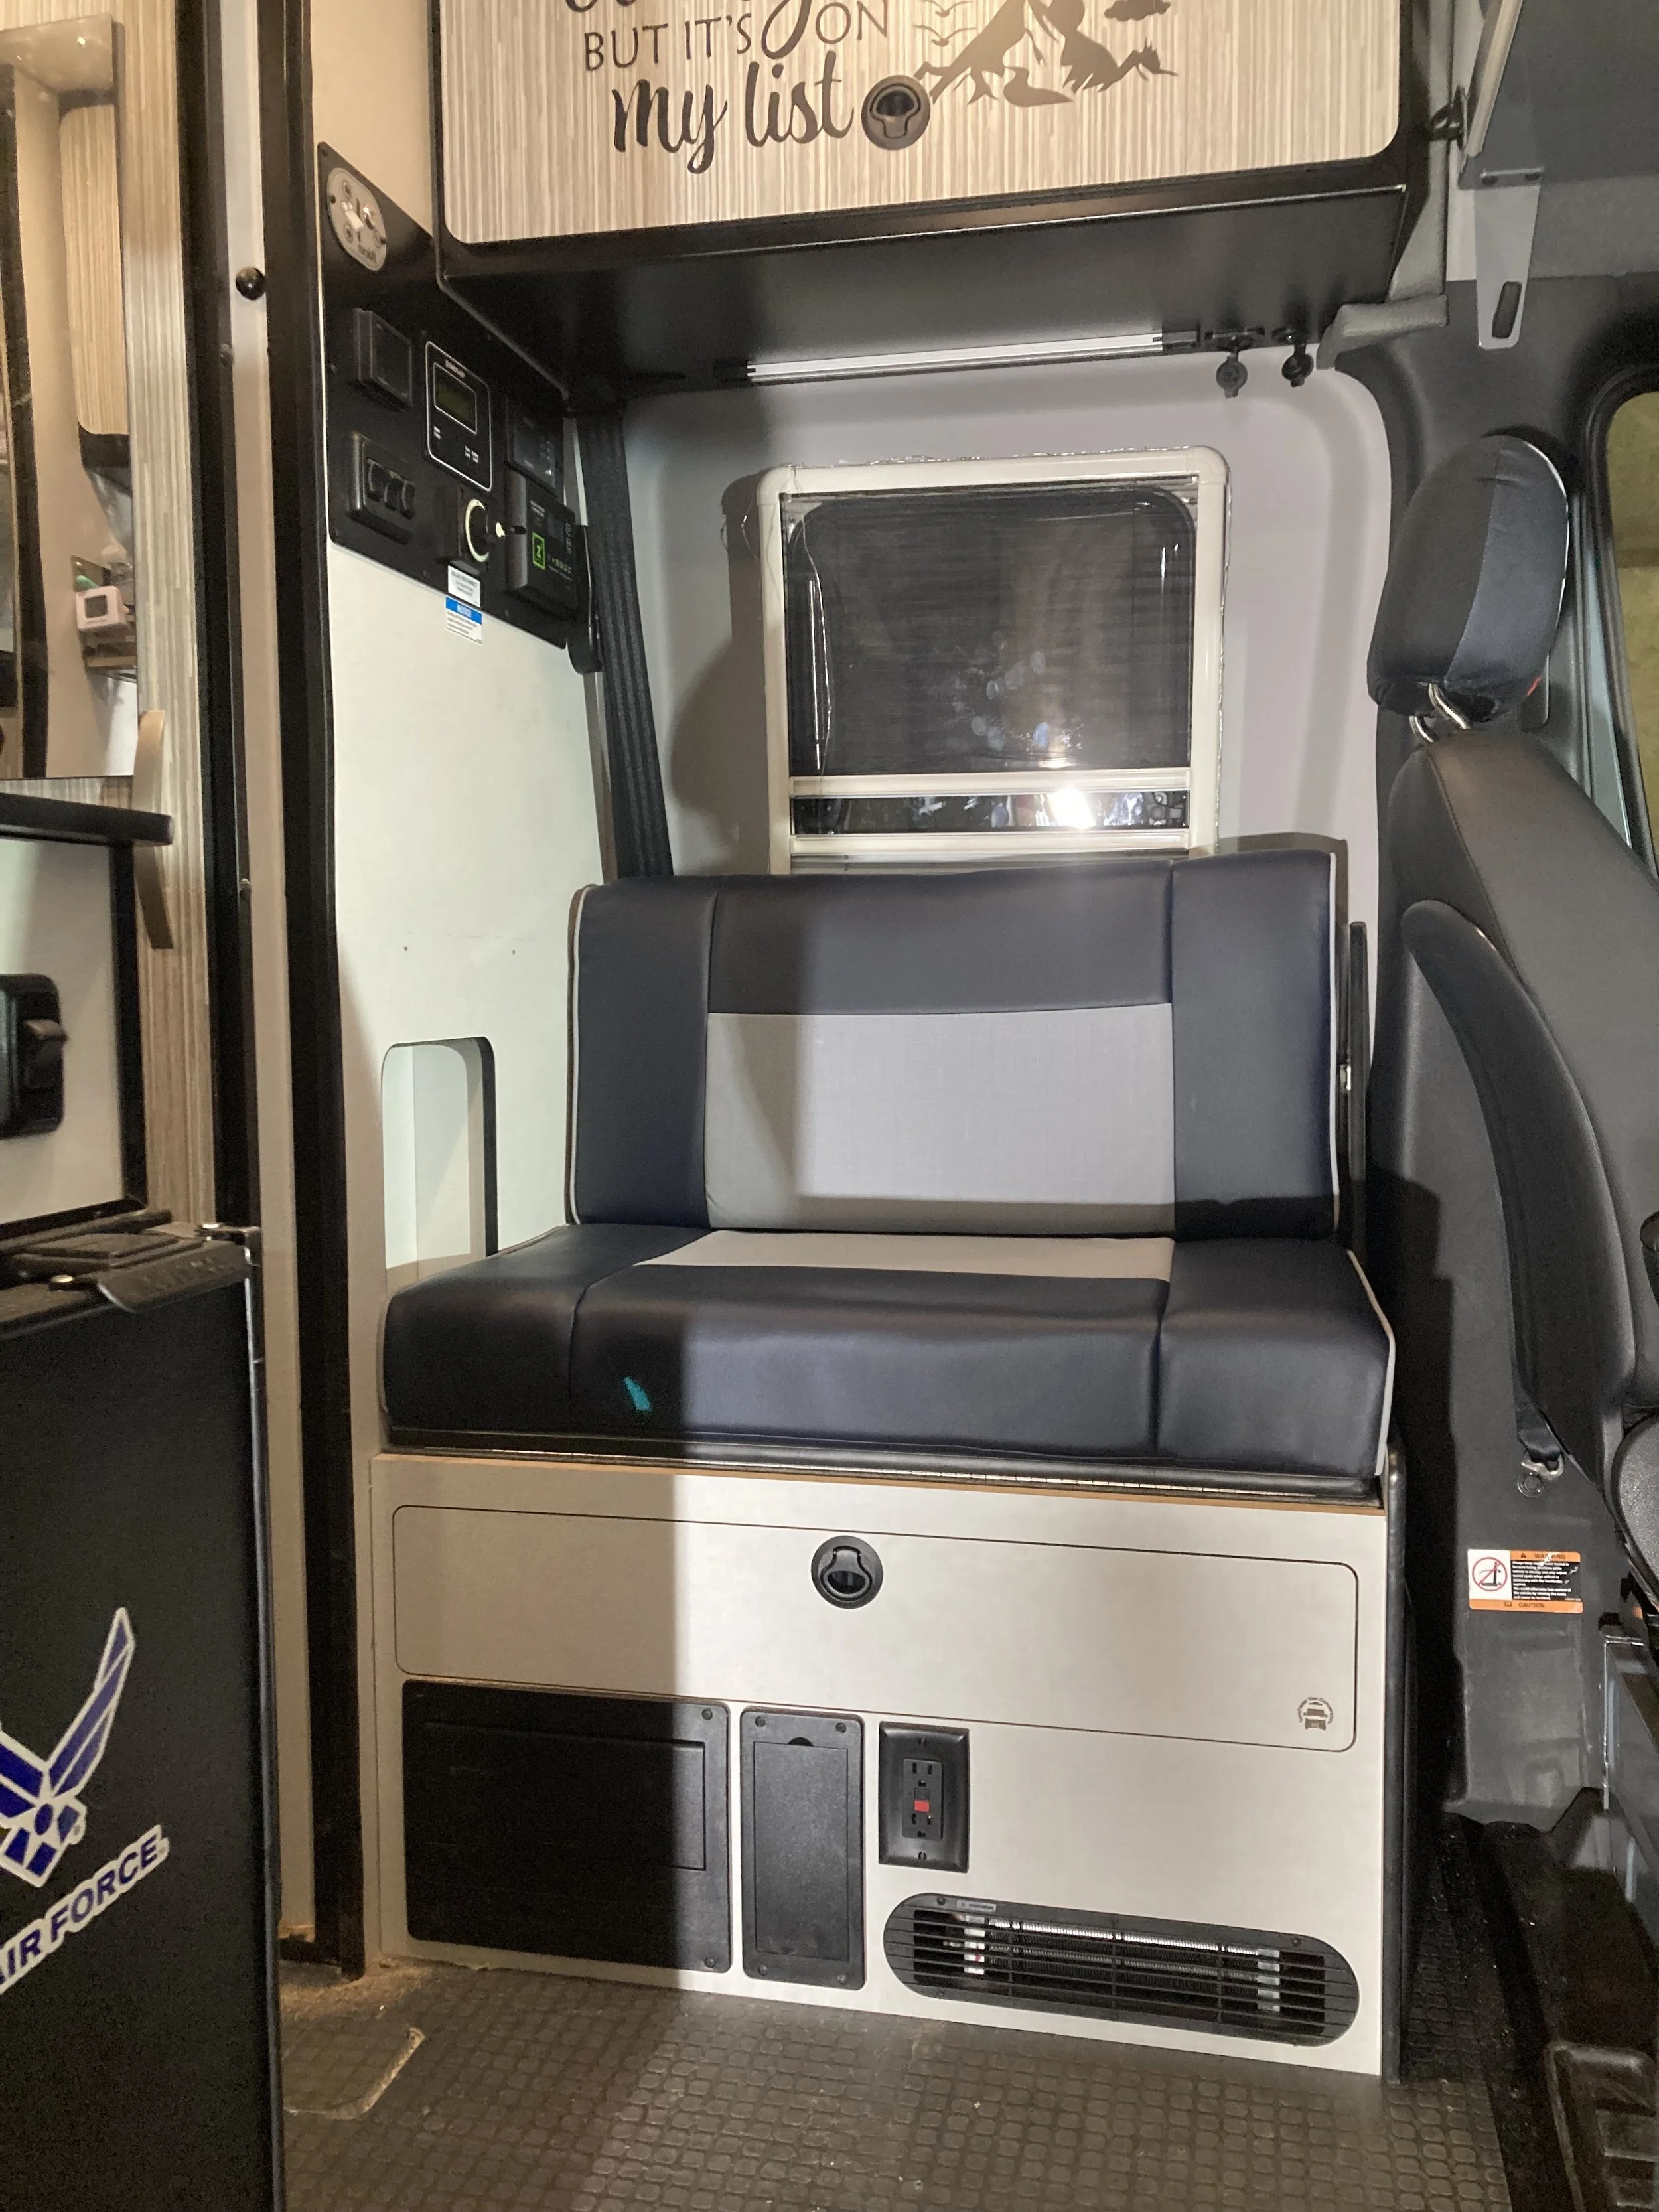
2025 Revel 44E Sunchaser Vans Bench Rotation kit
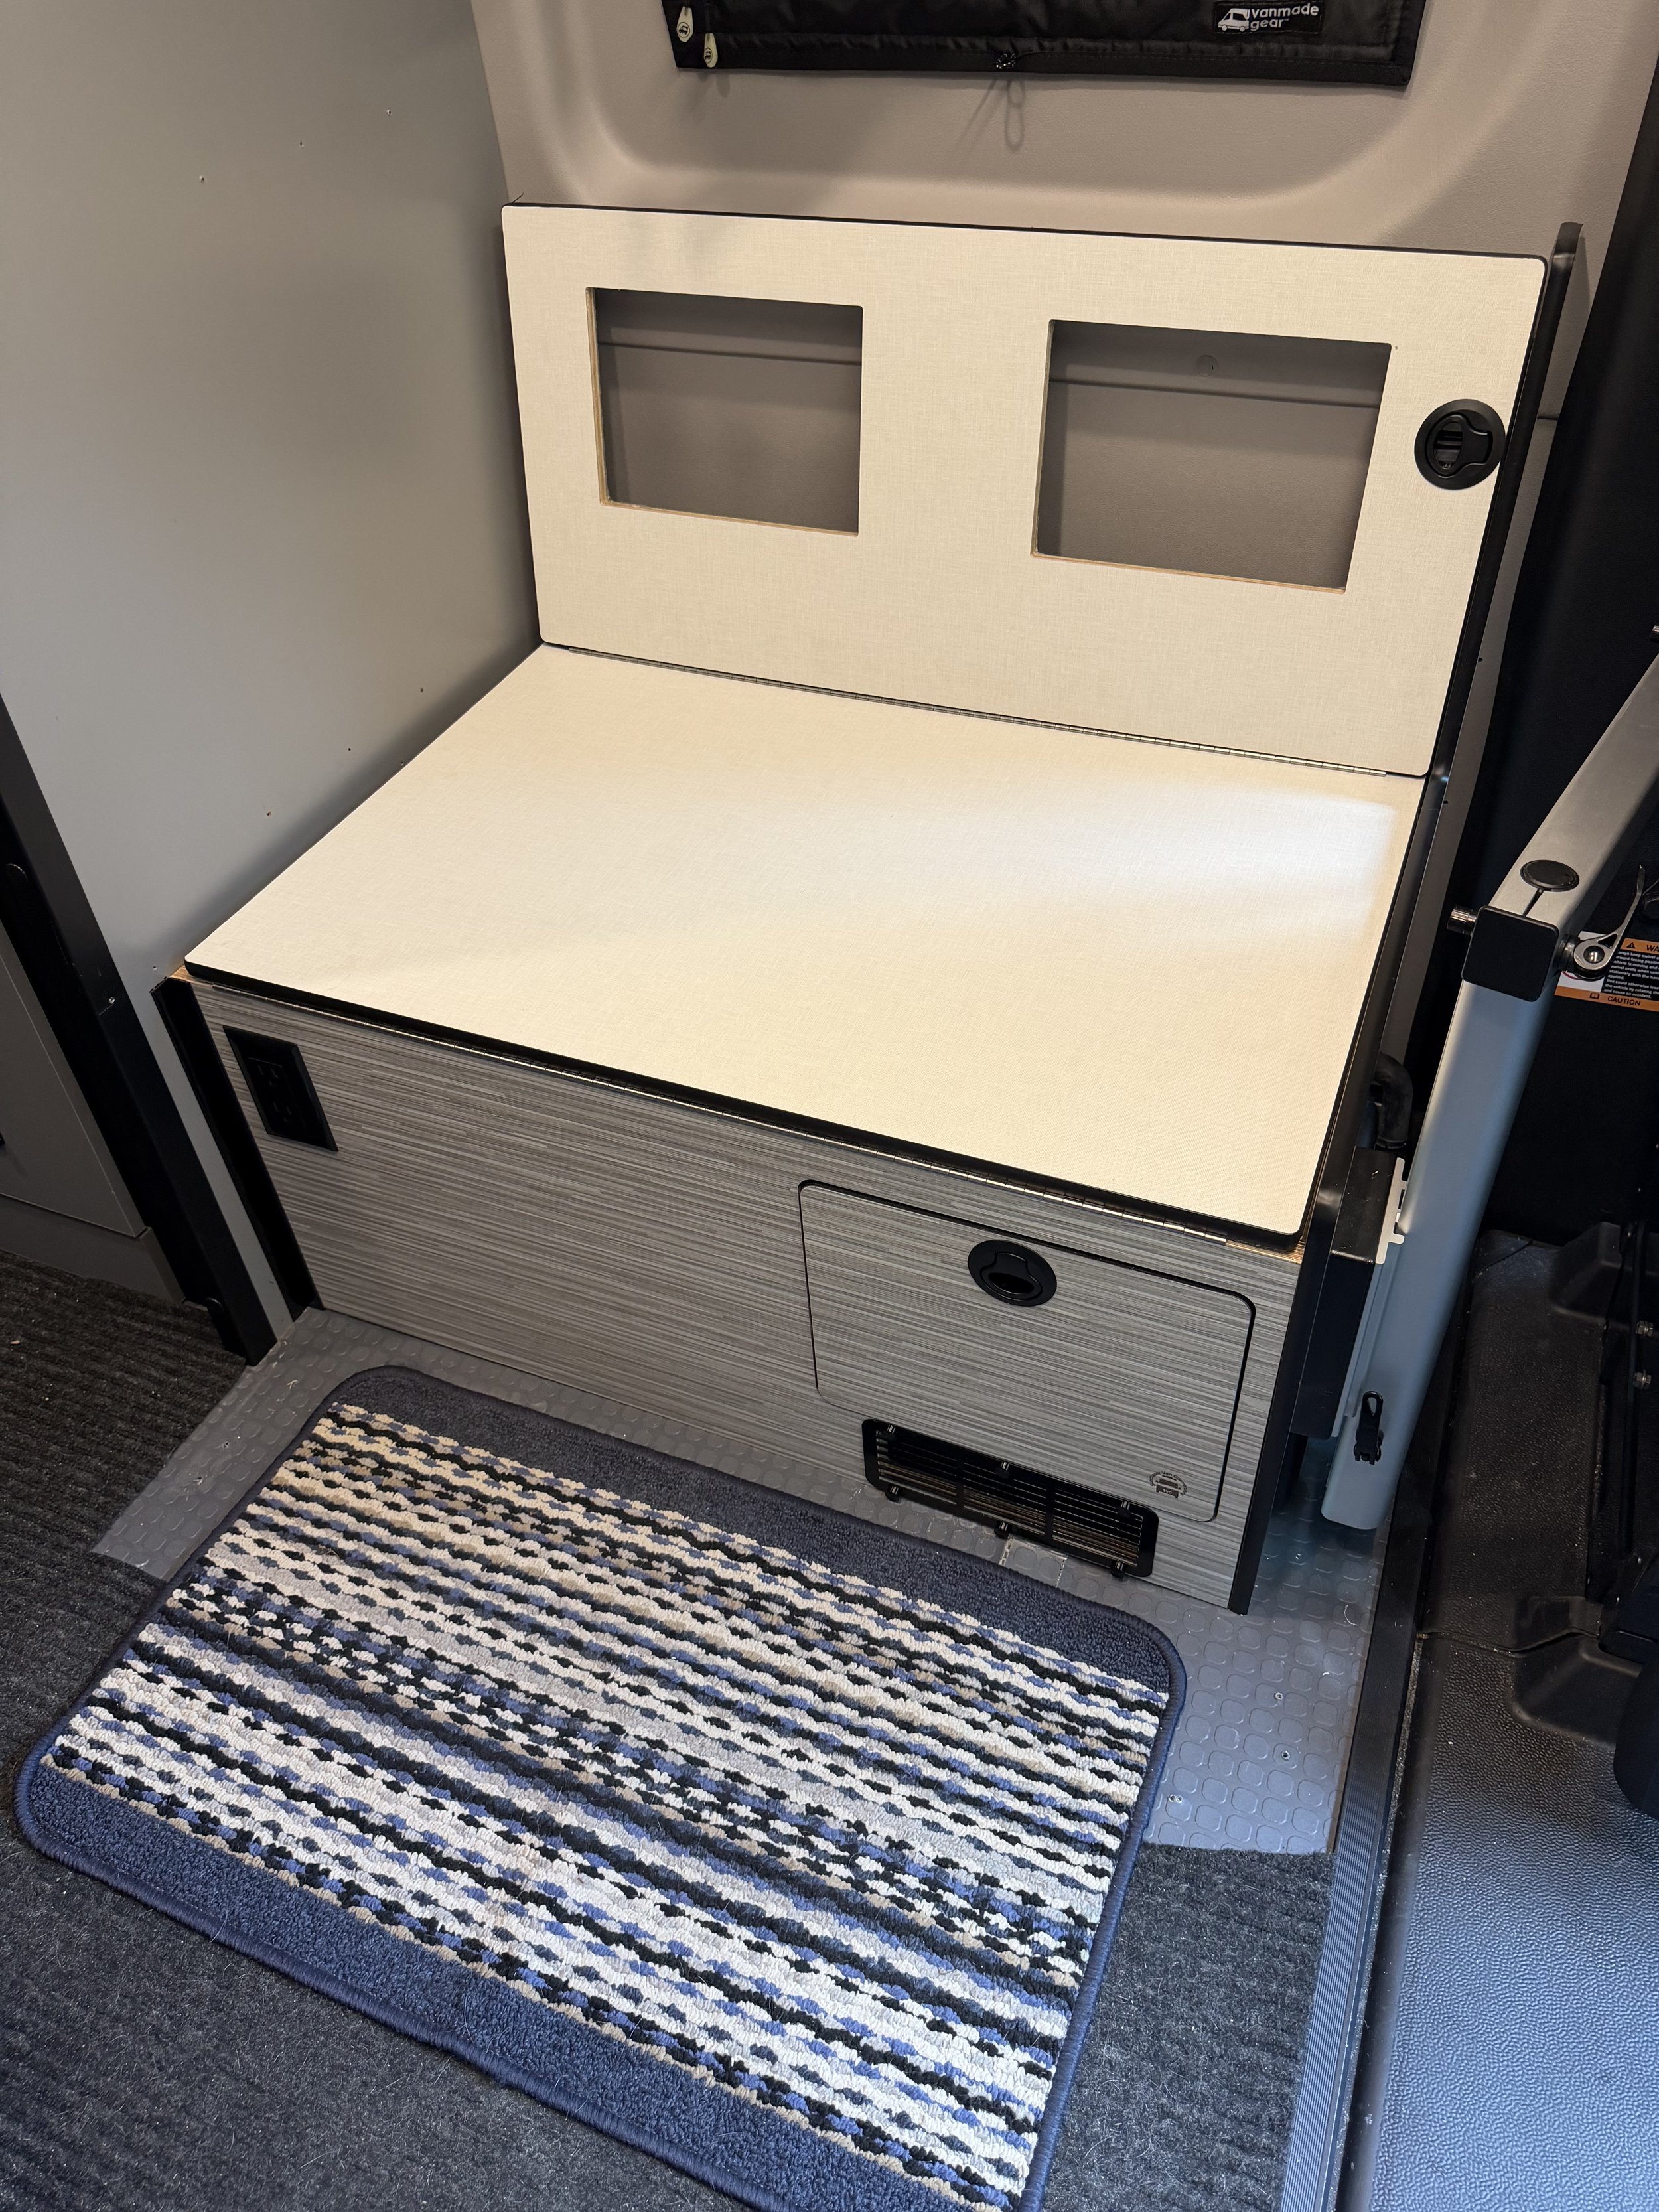
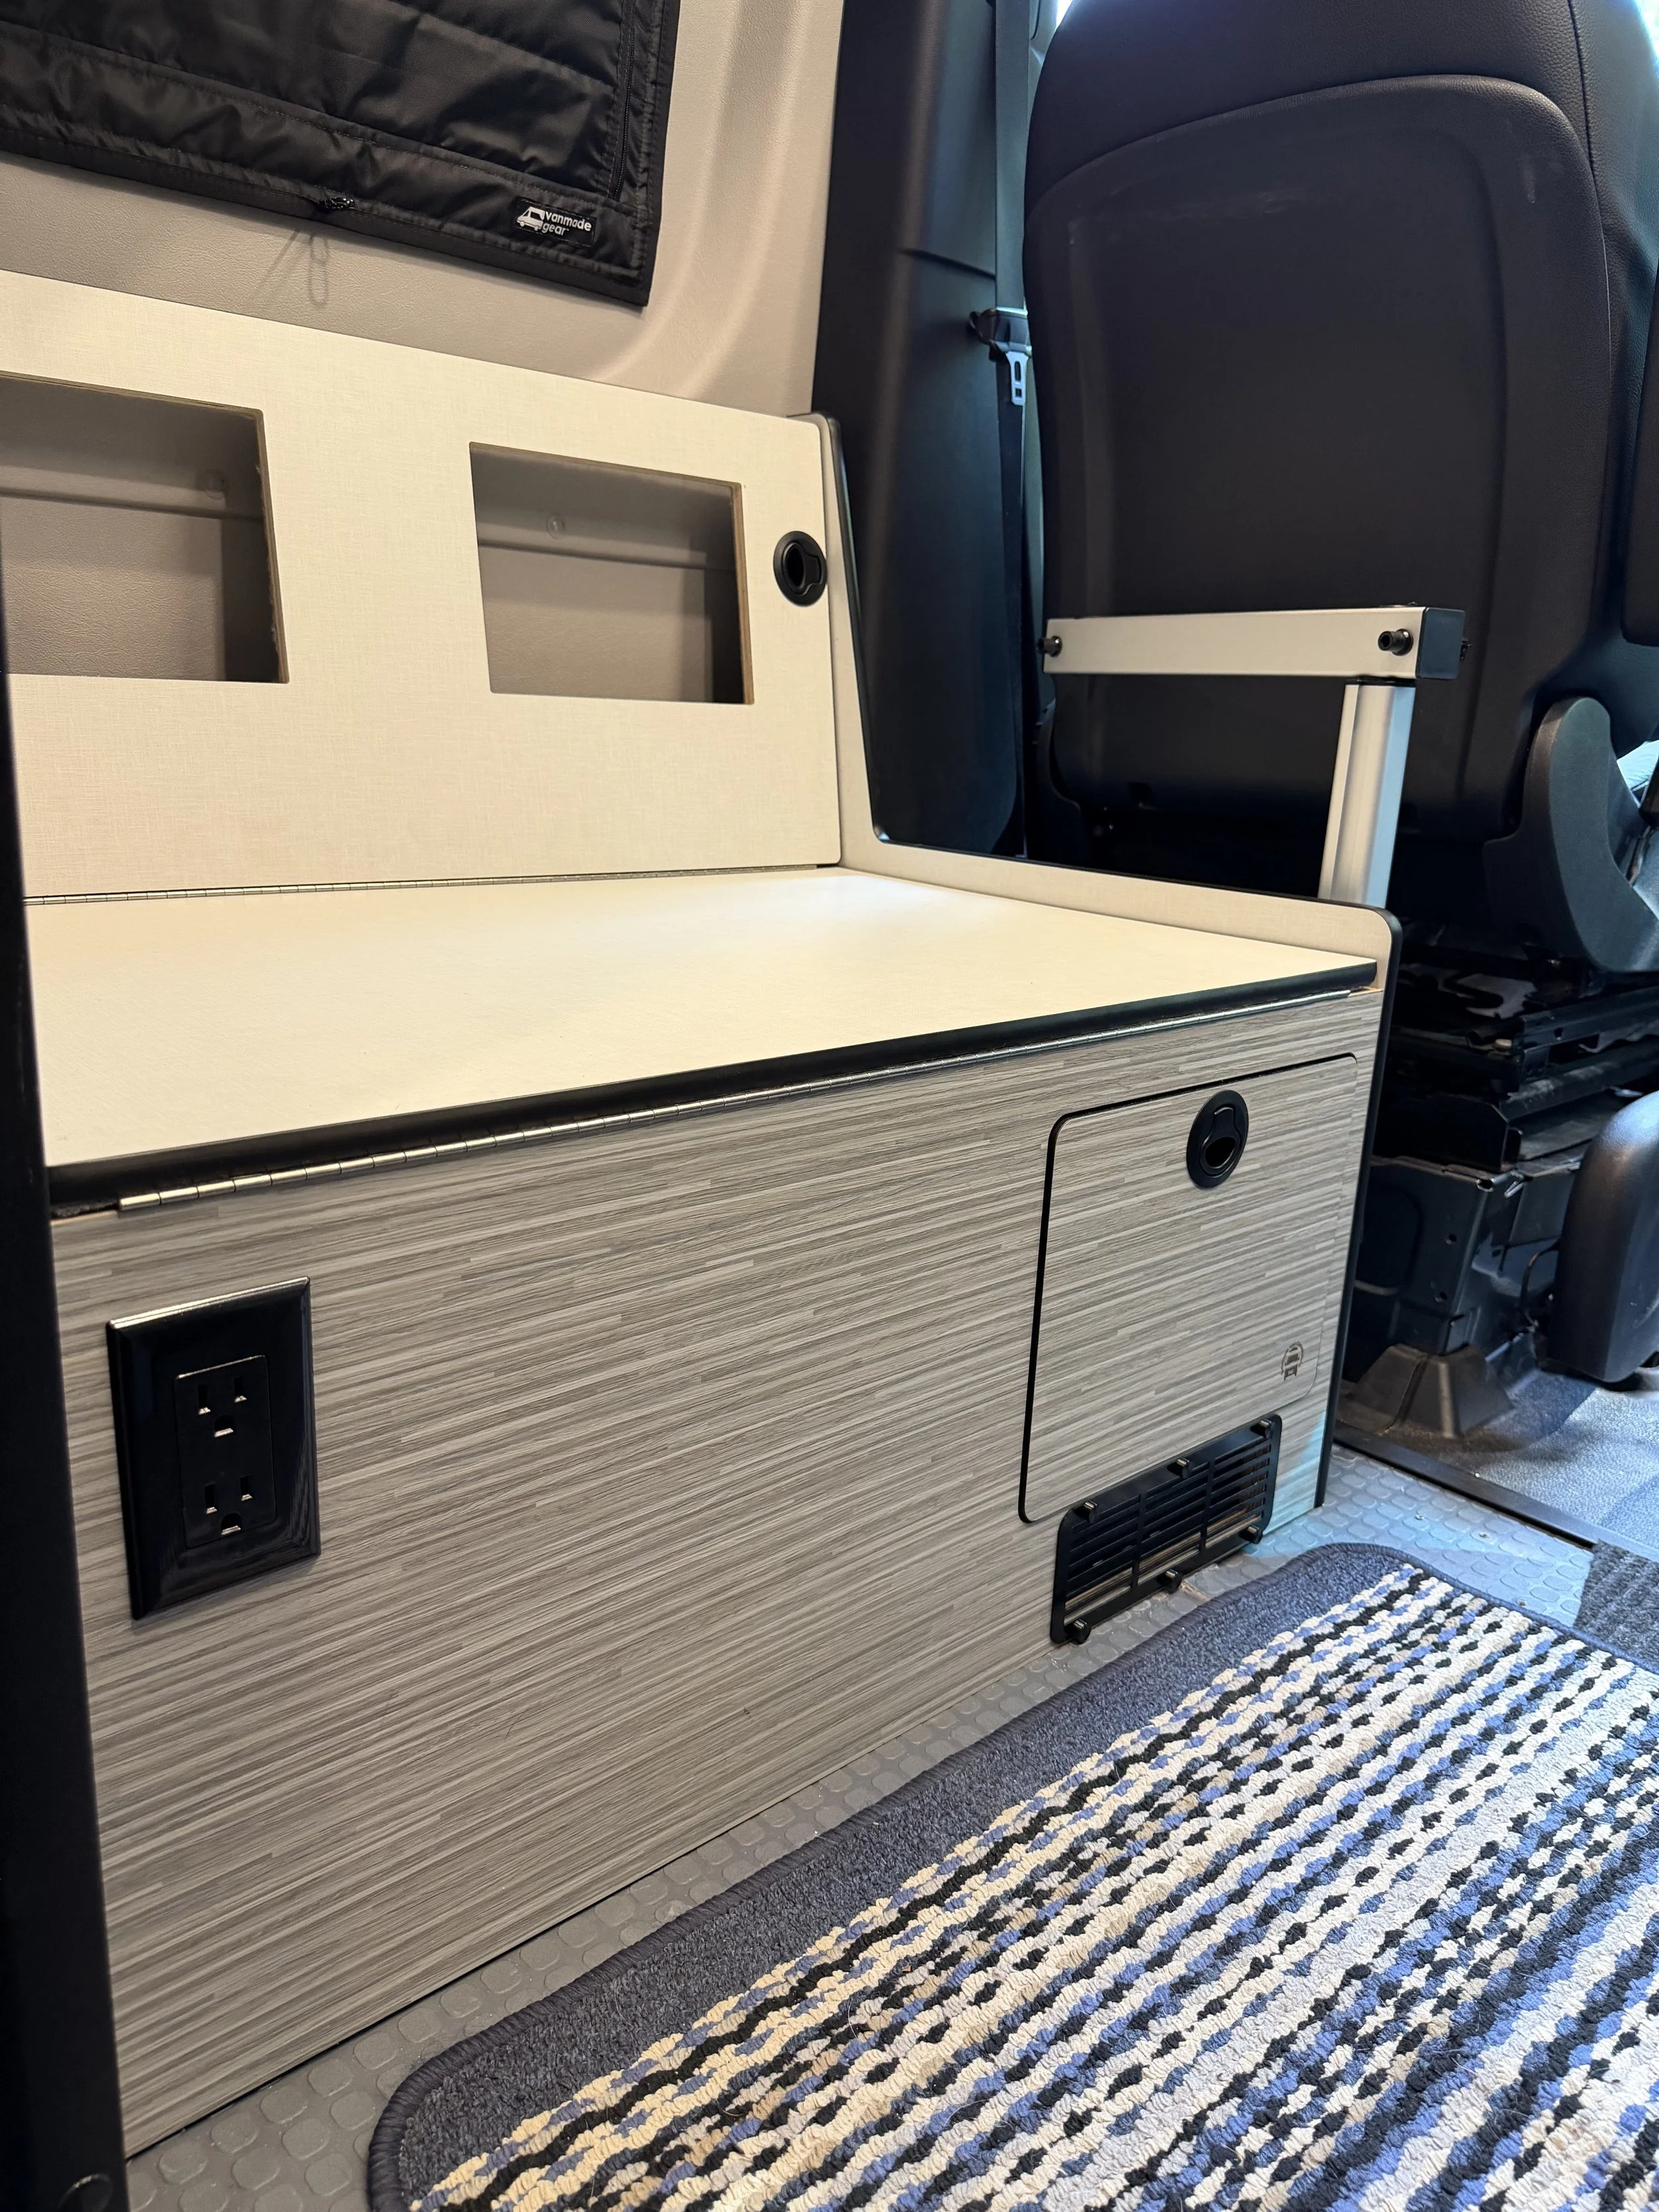
120v receptacle can be re-located to this location on the front of the bench. Or on the side of the bench right behind the driver seat
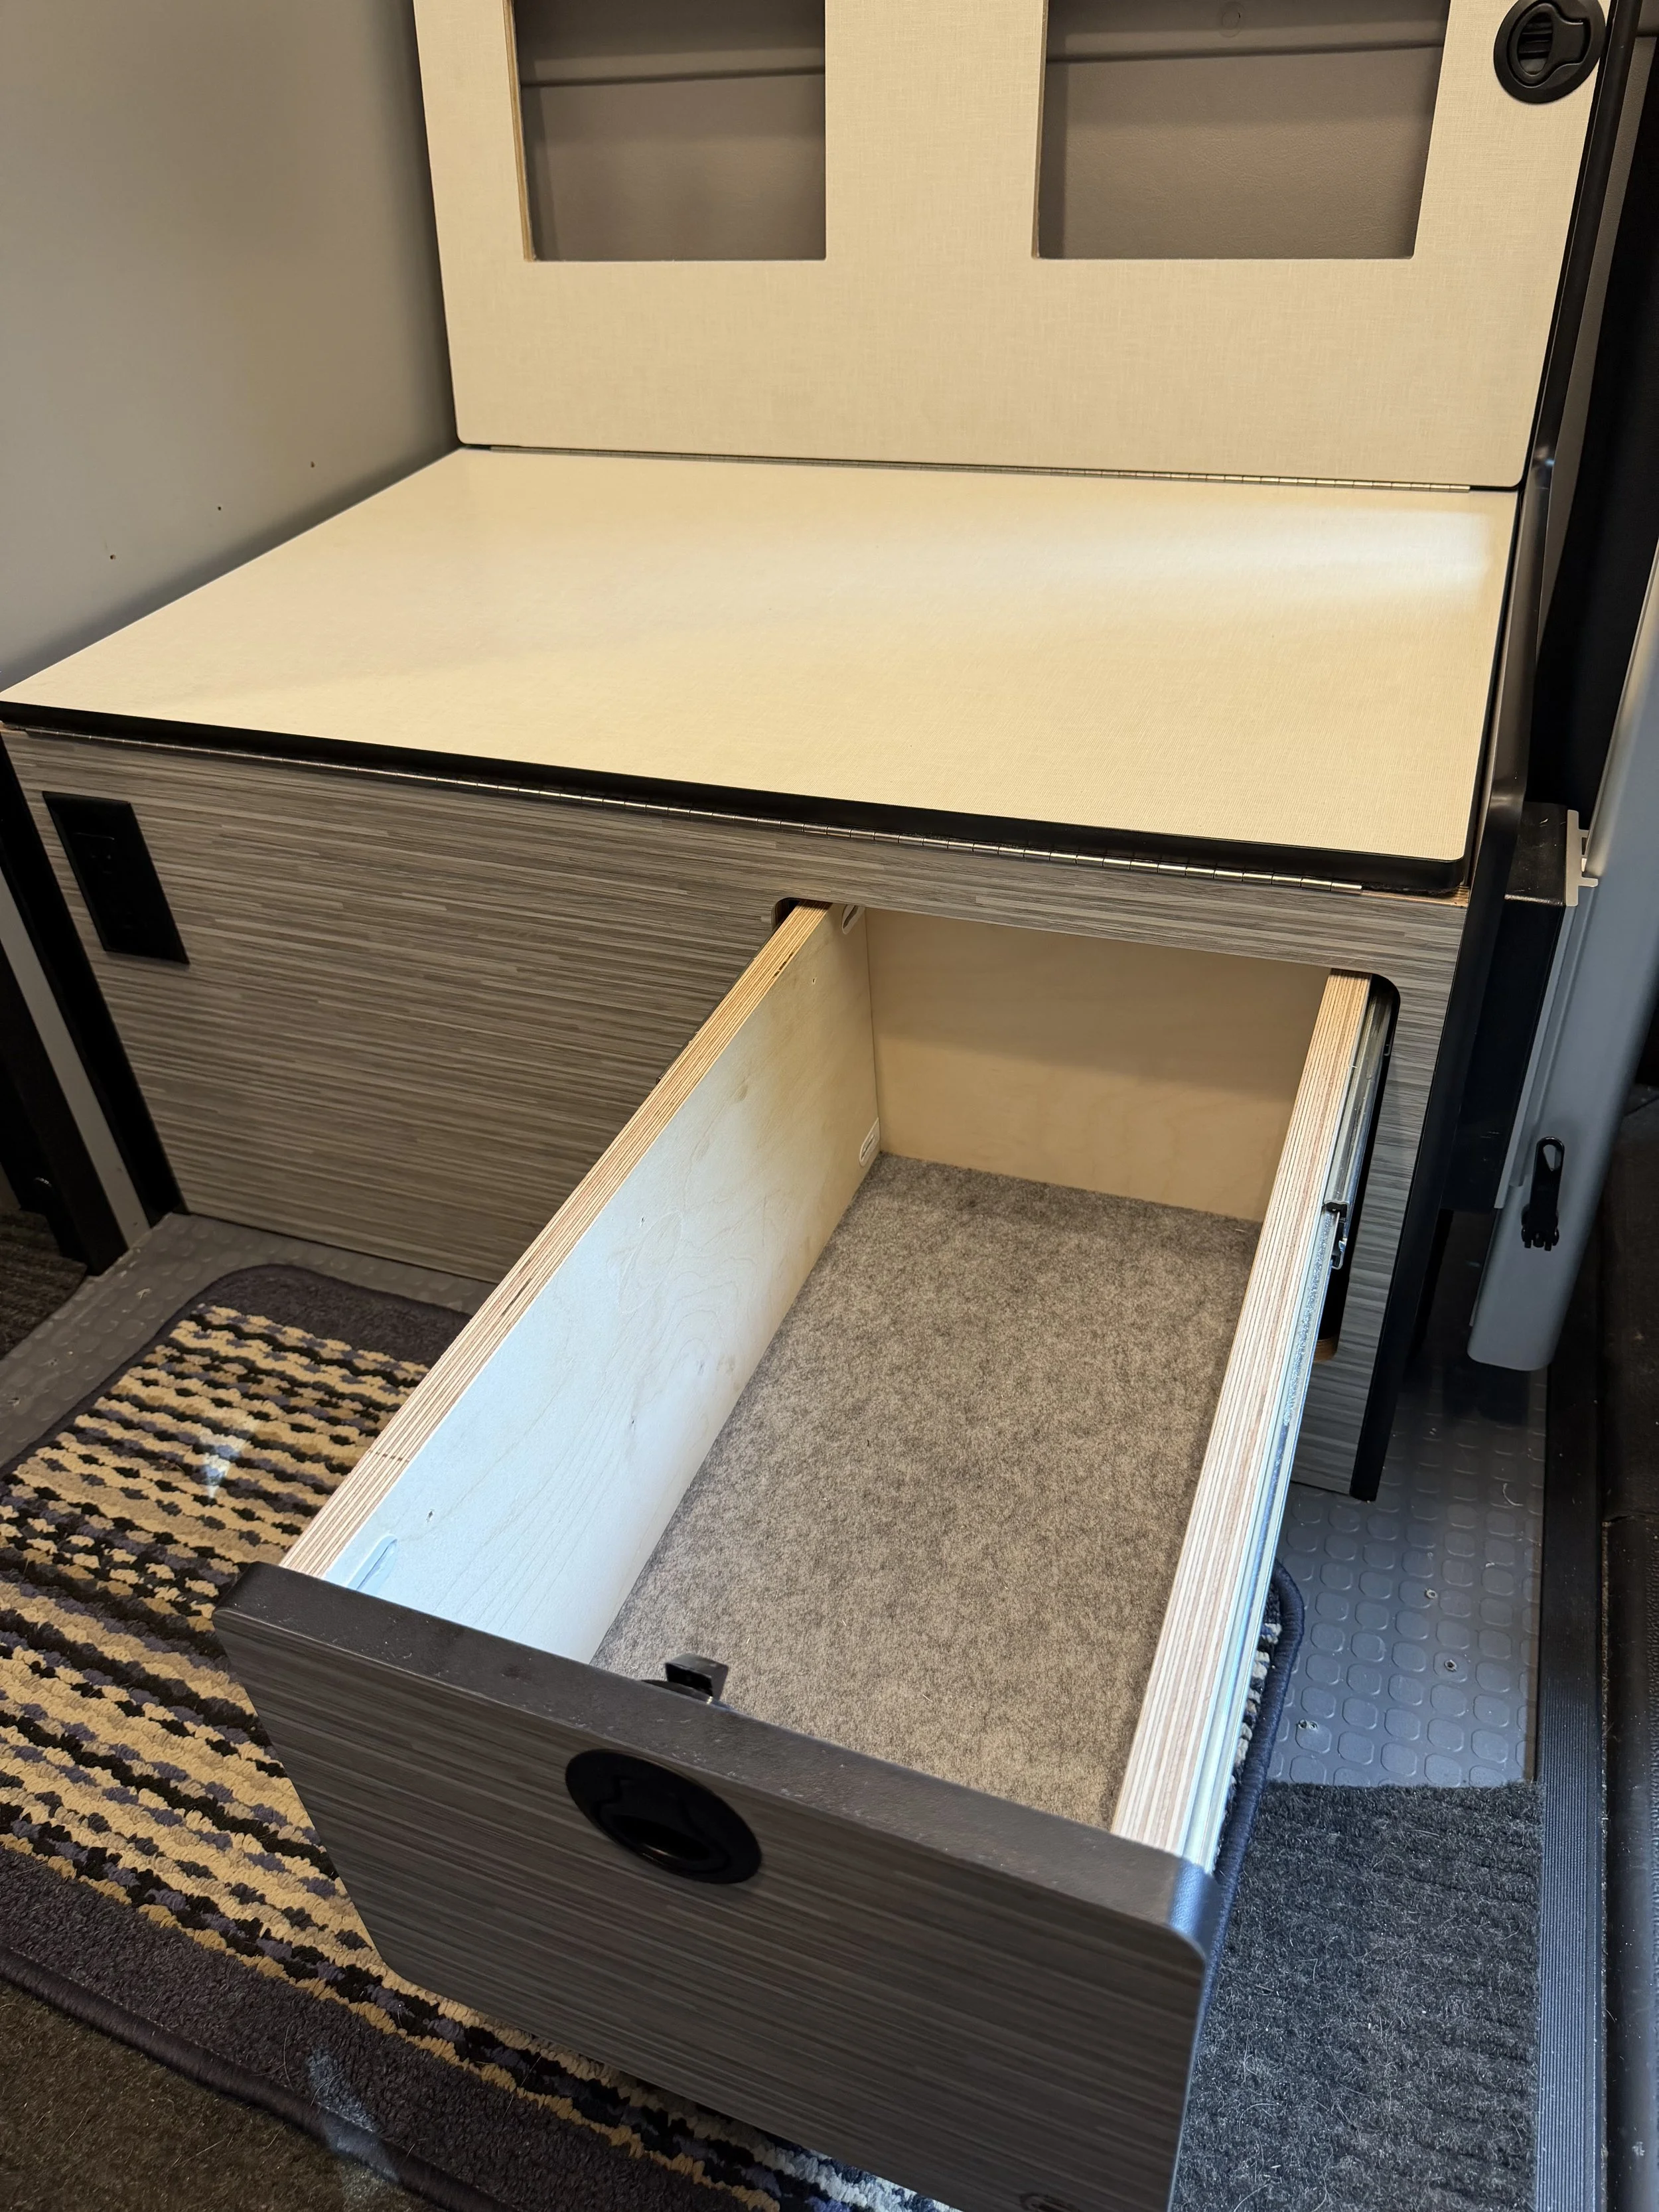
Large Storage drawer
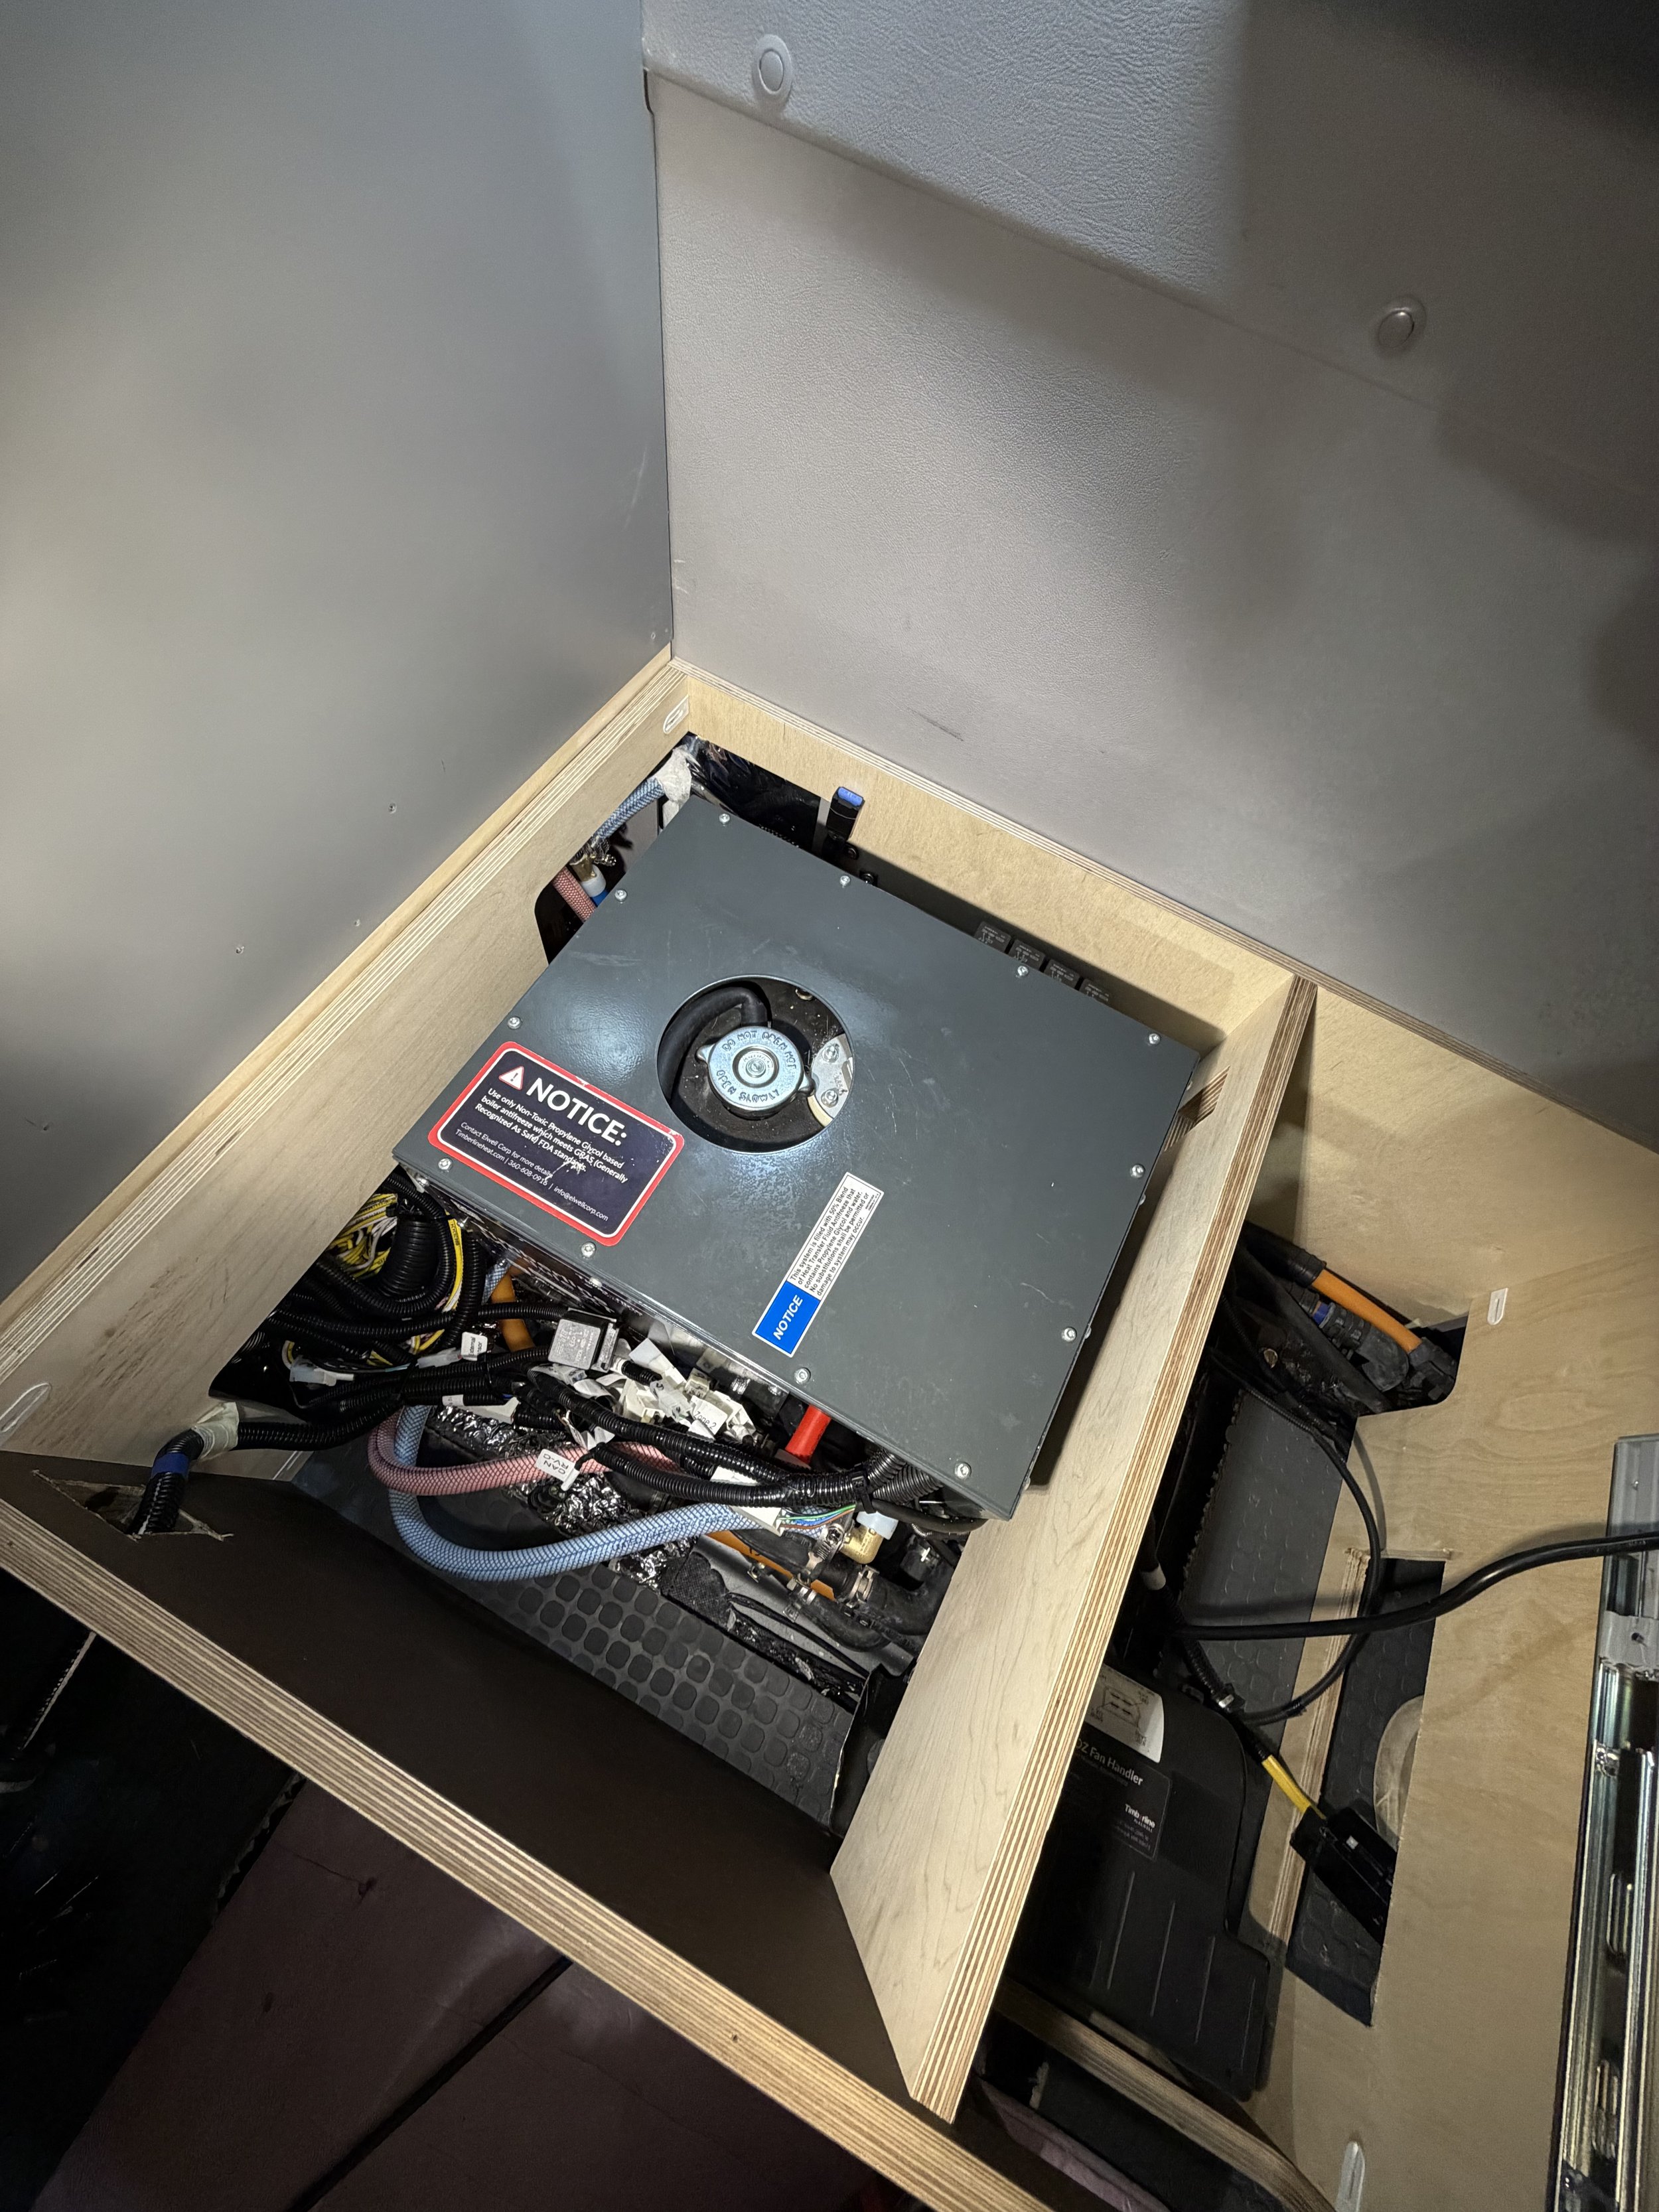
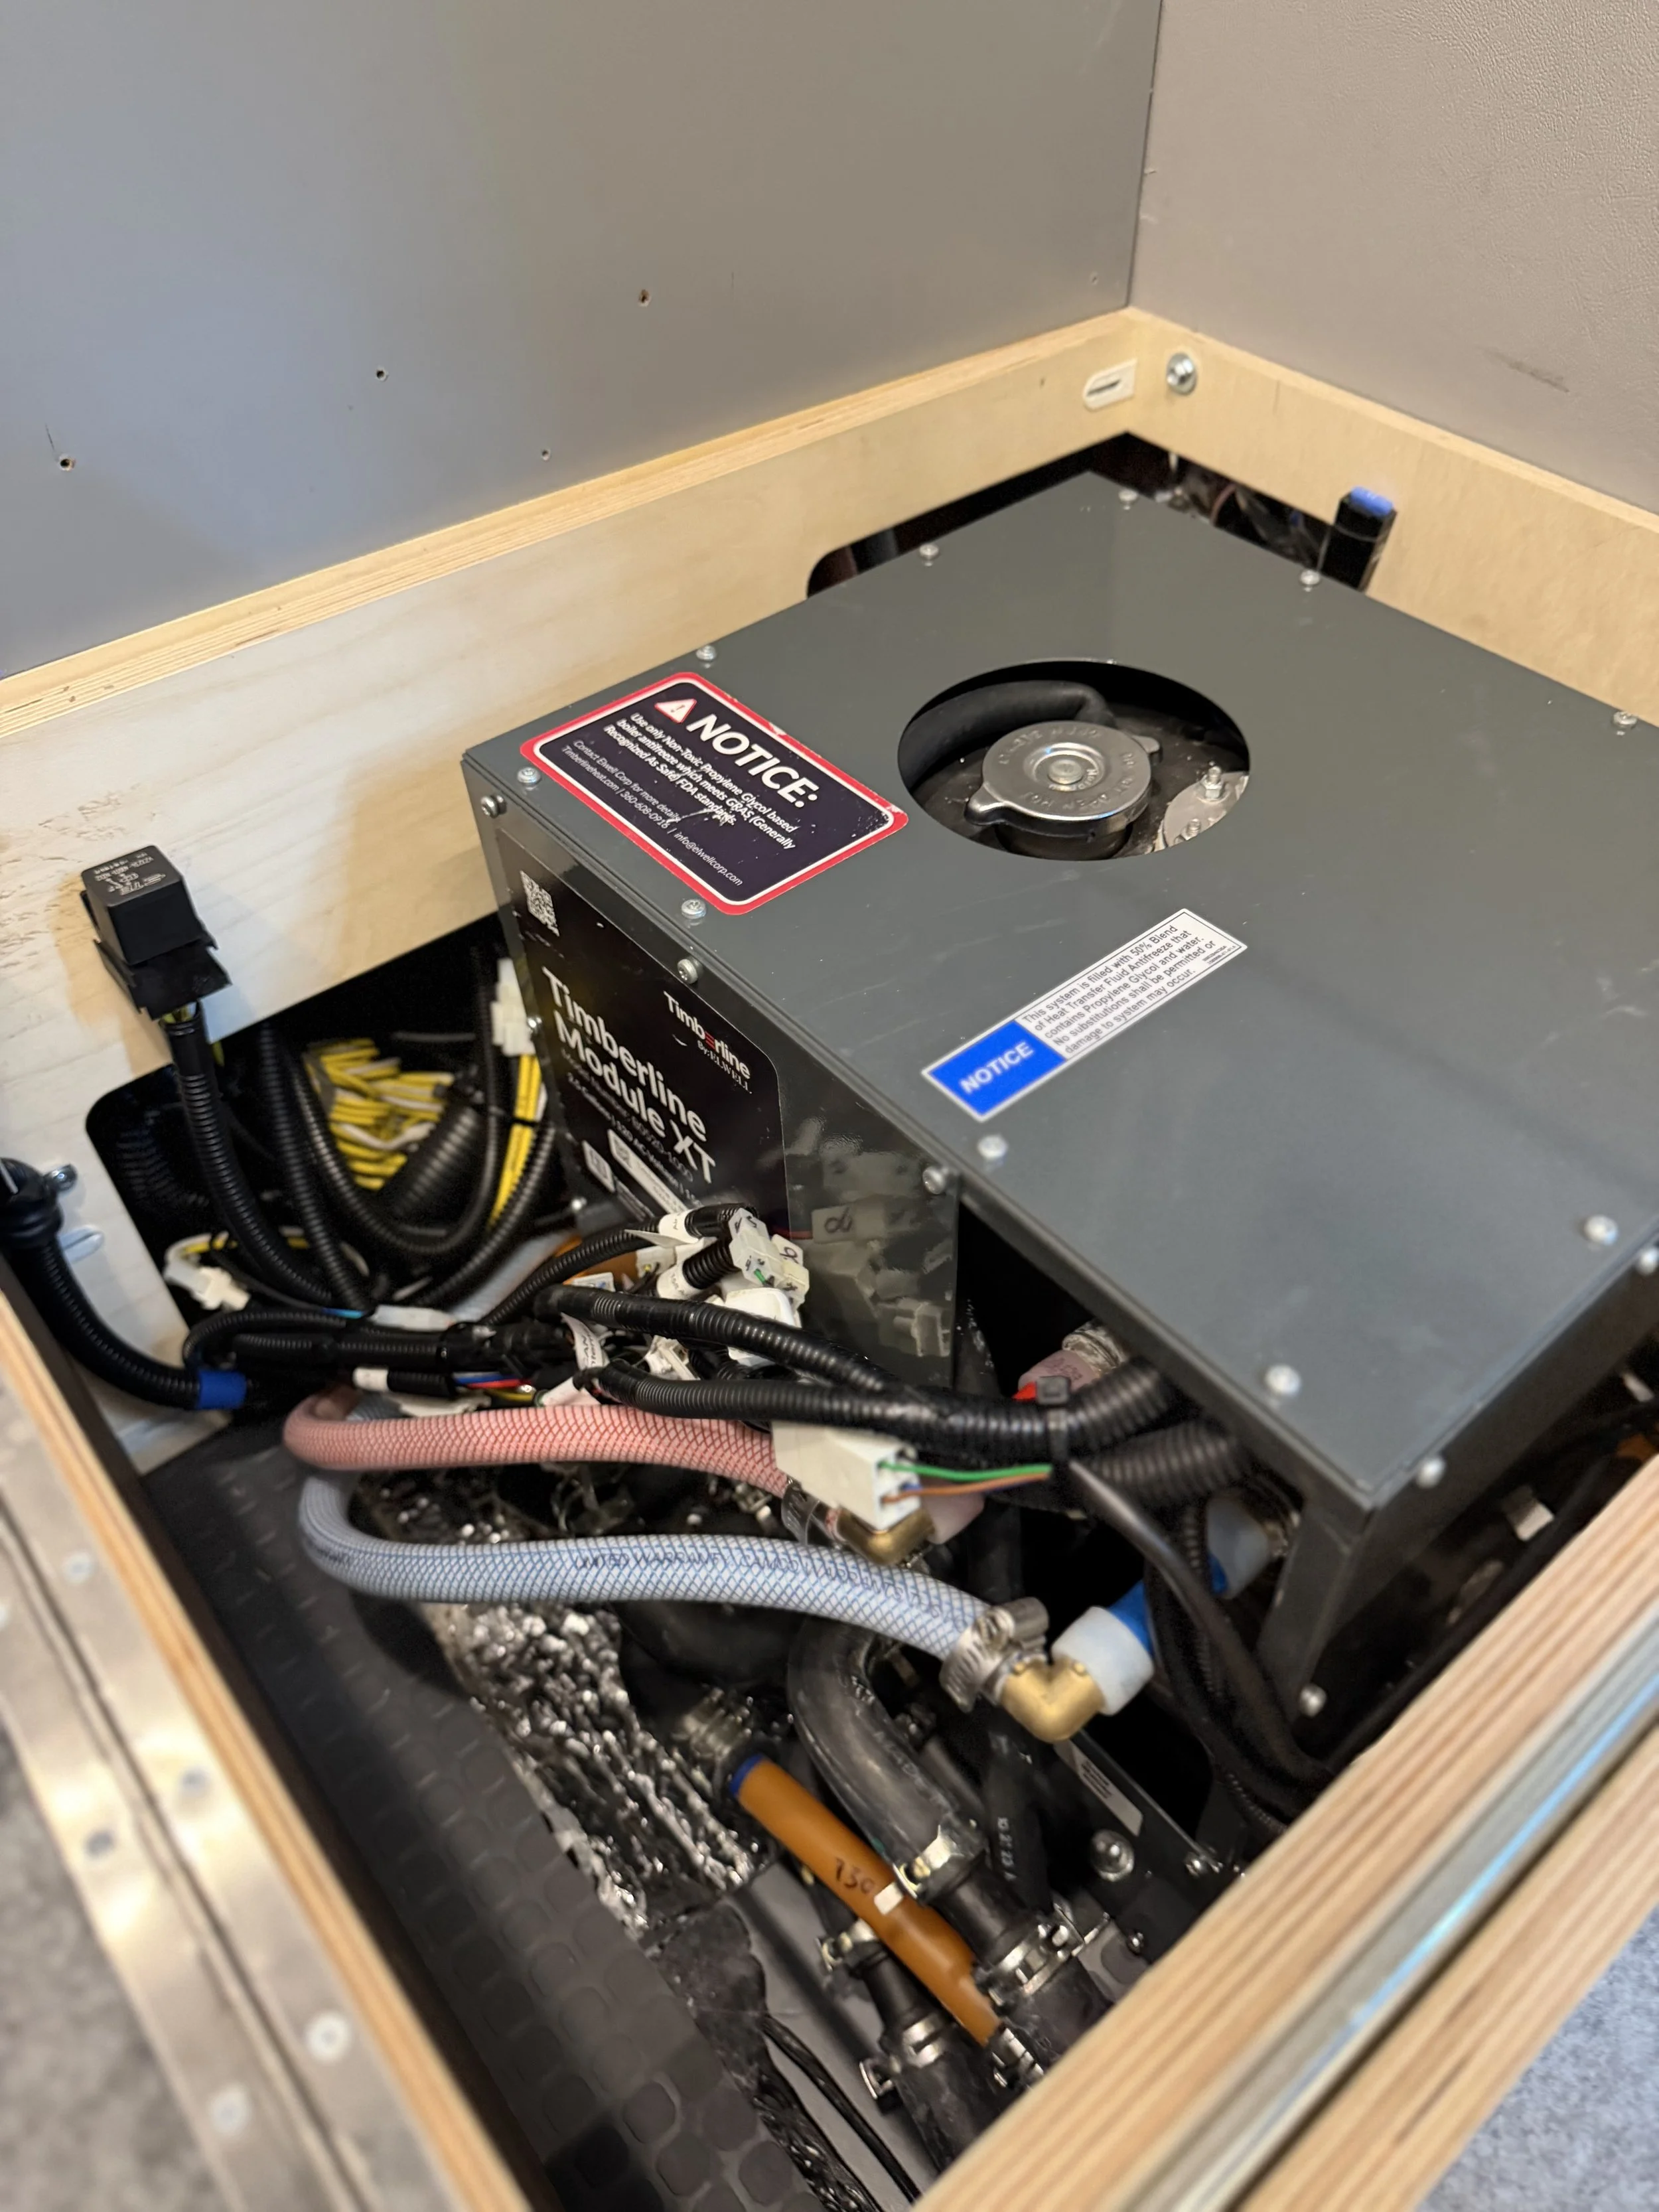
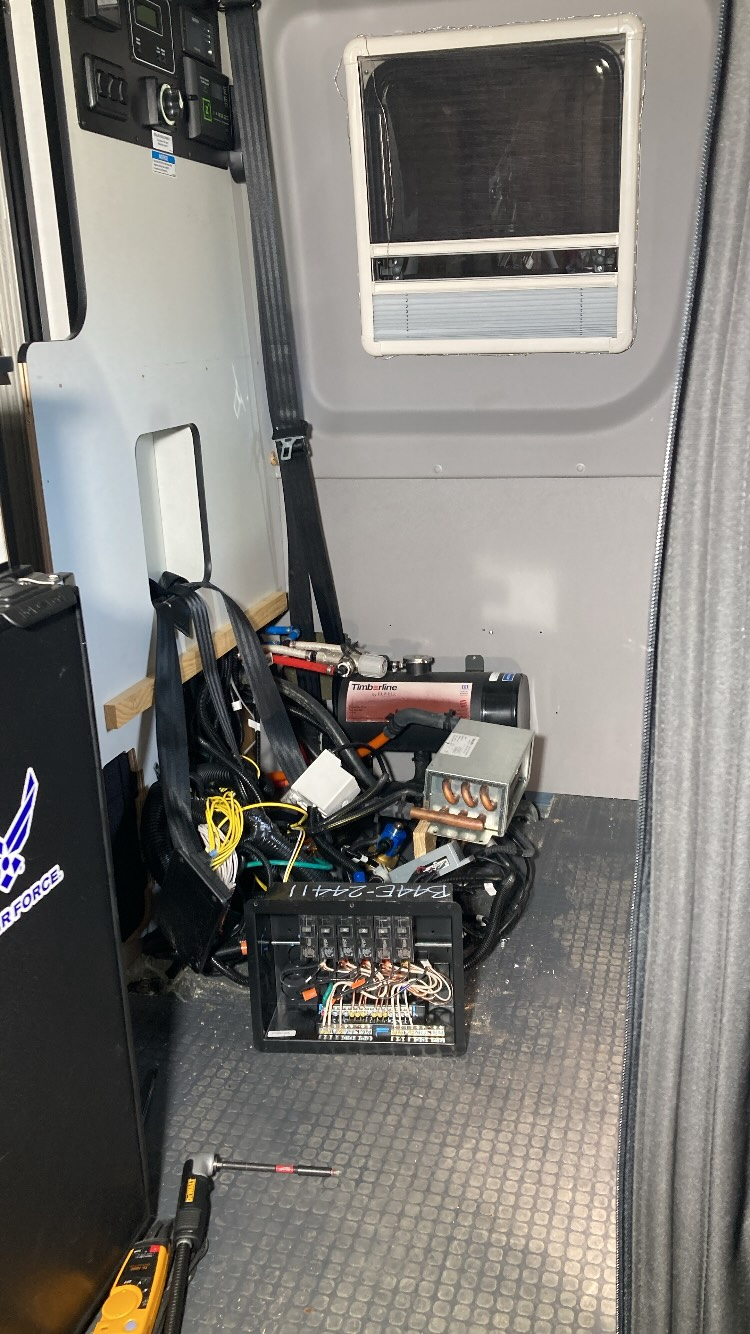
Heater Lines are shortened so it can be moved into a location that works with the bench.
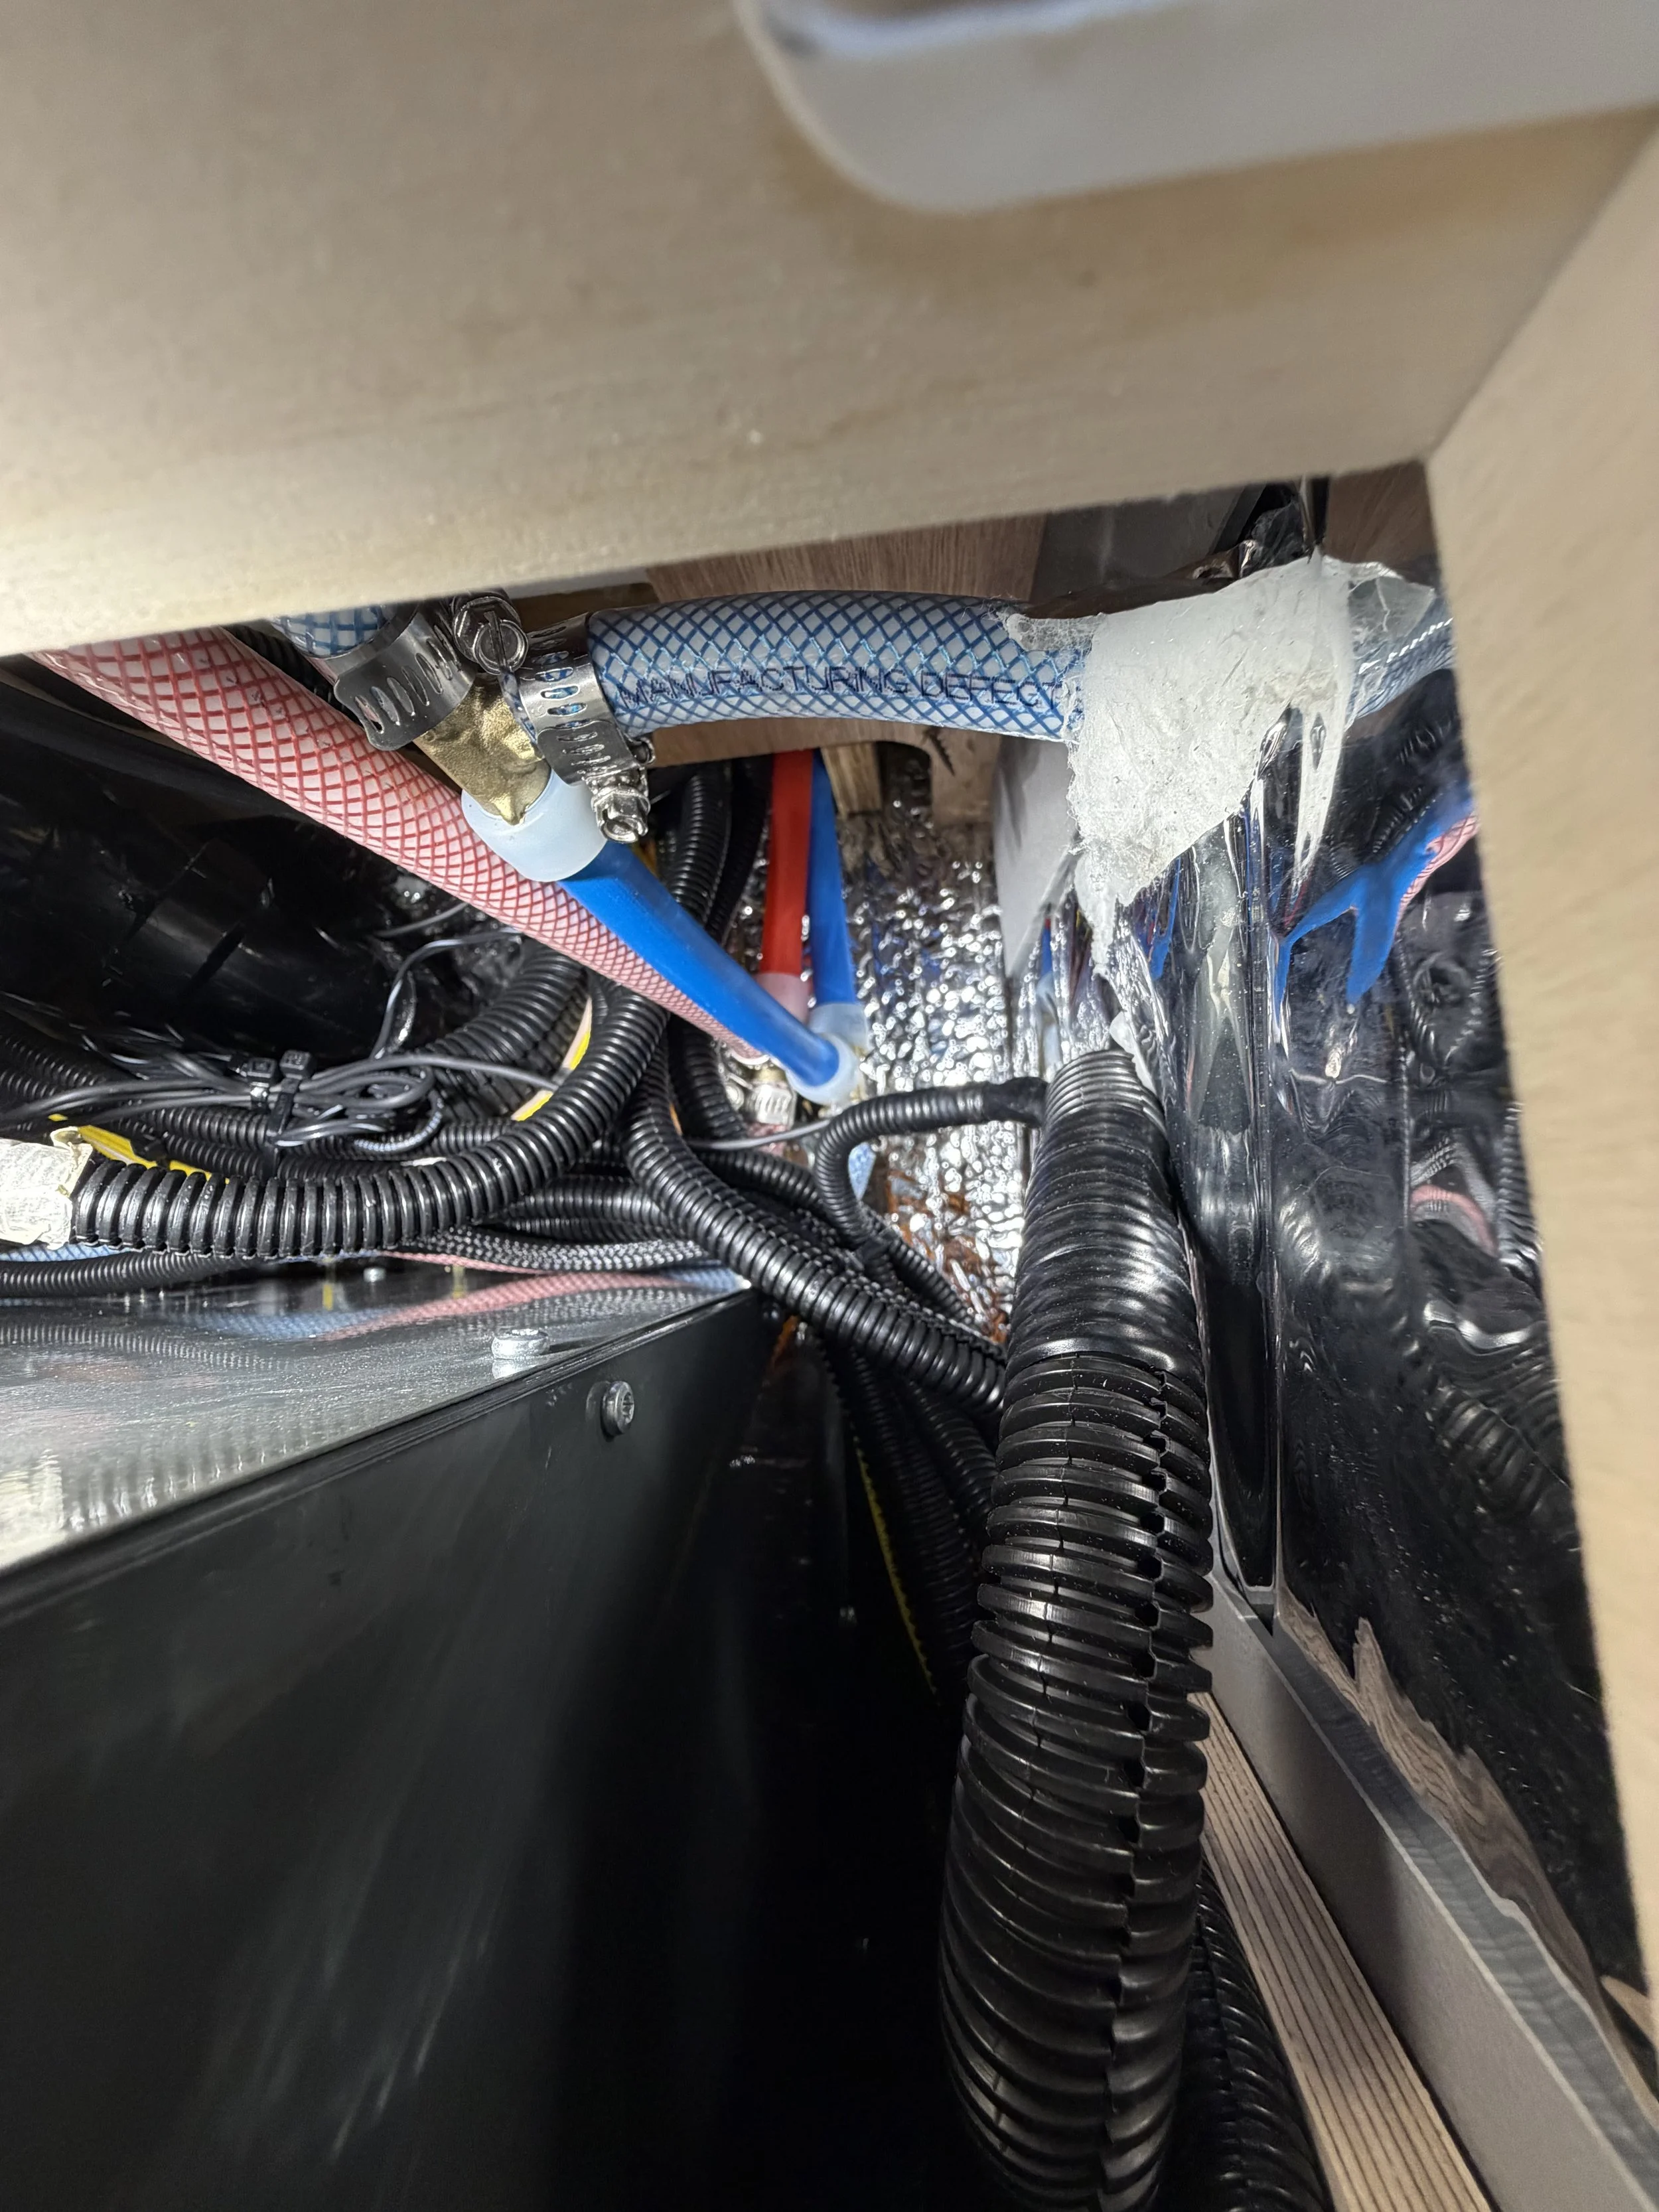
Brass fittings installed in place of the plastic plumbing fittings for more durability
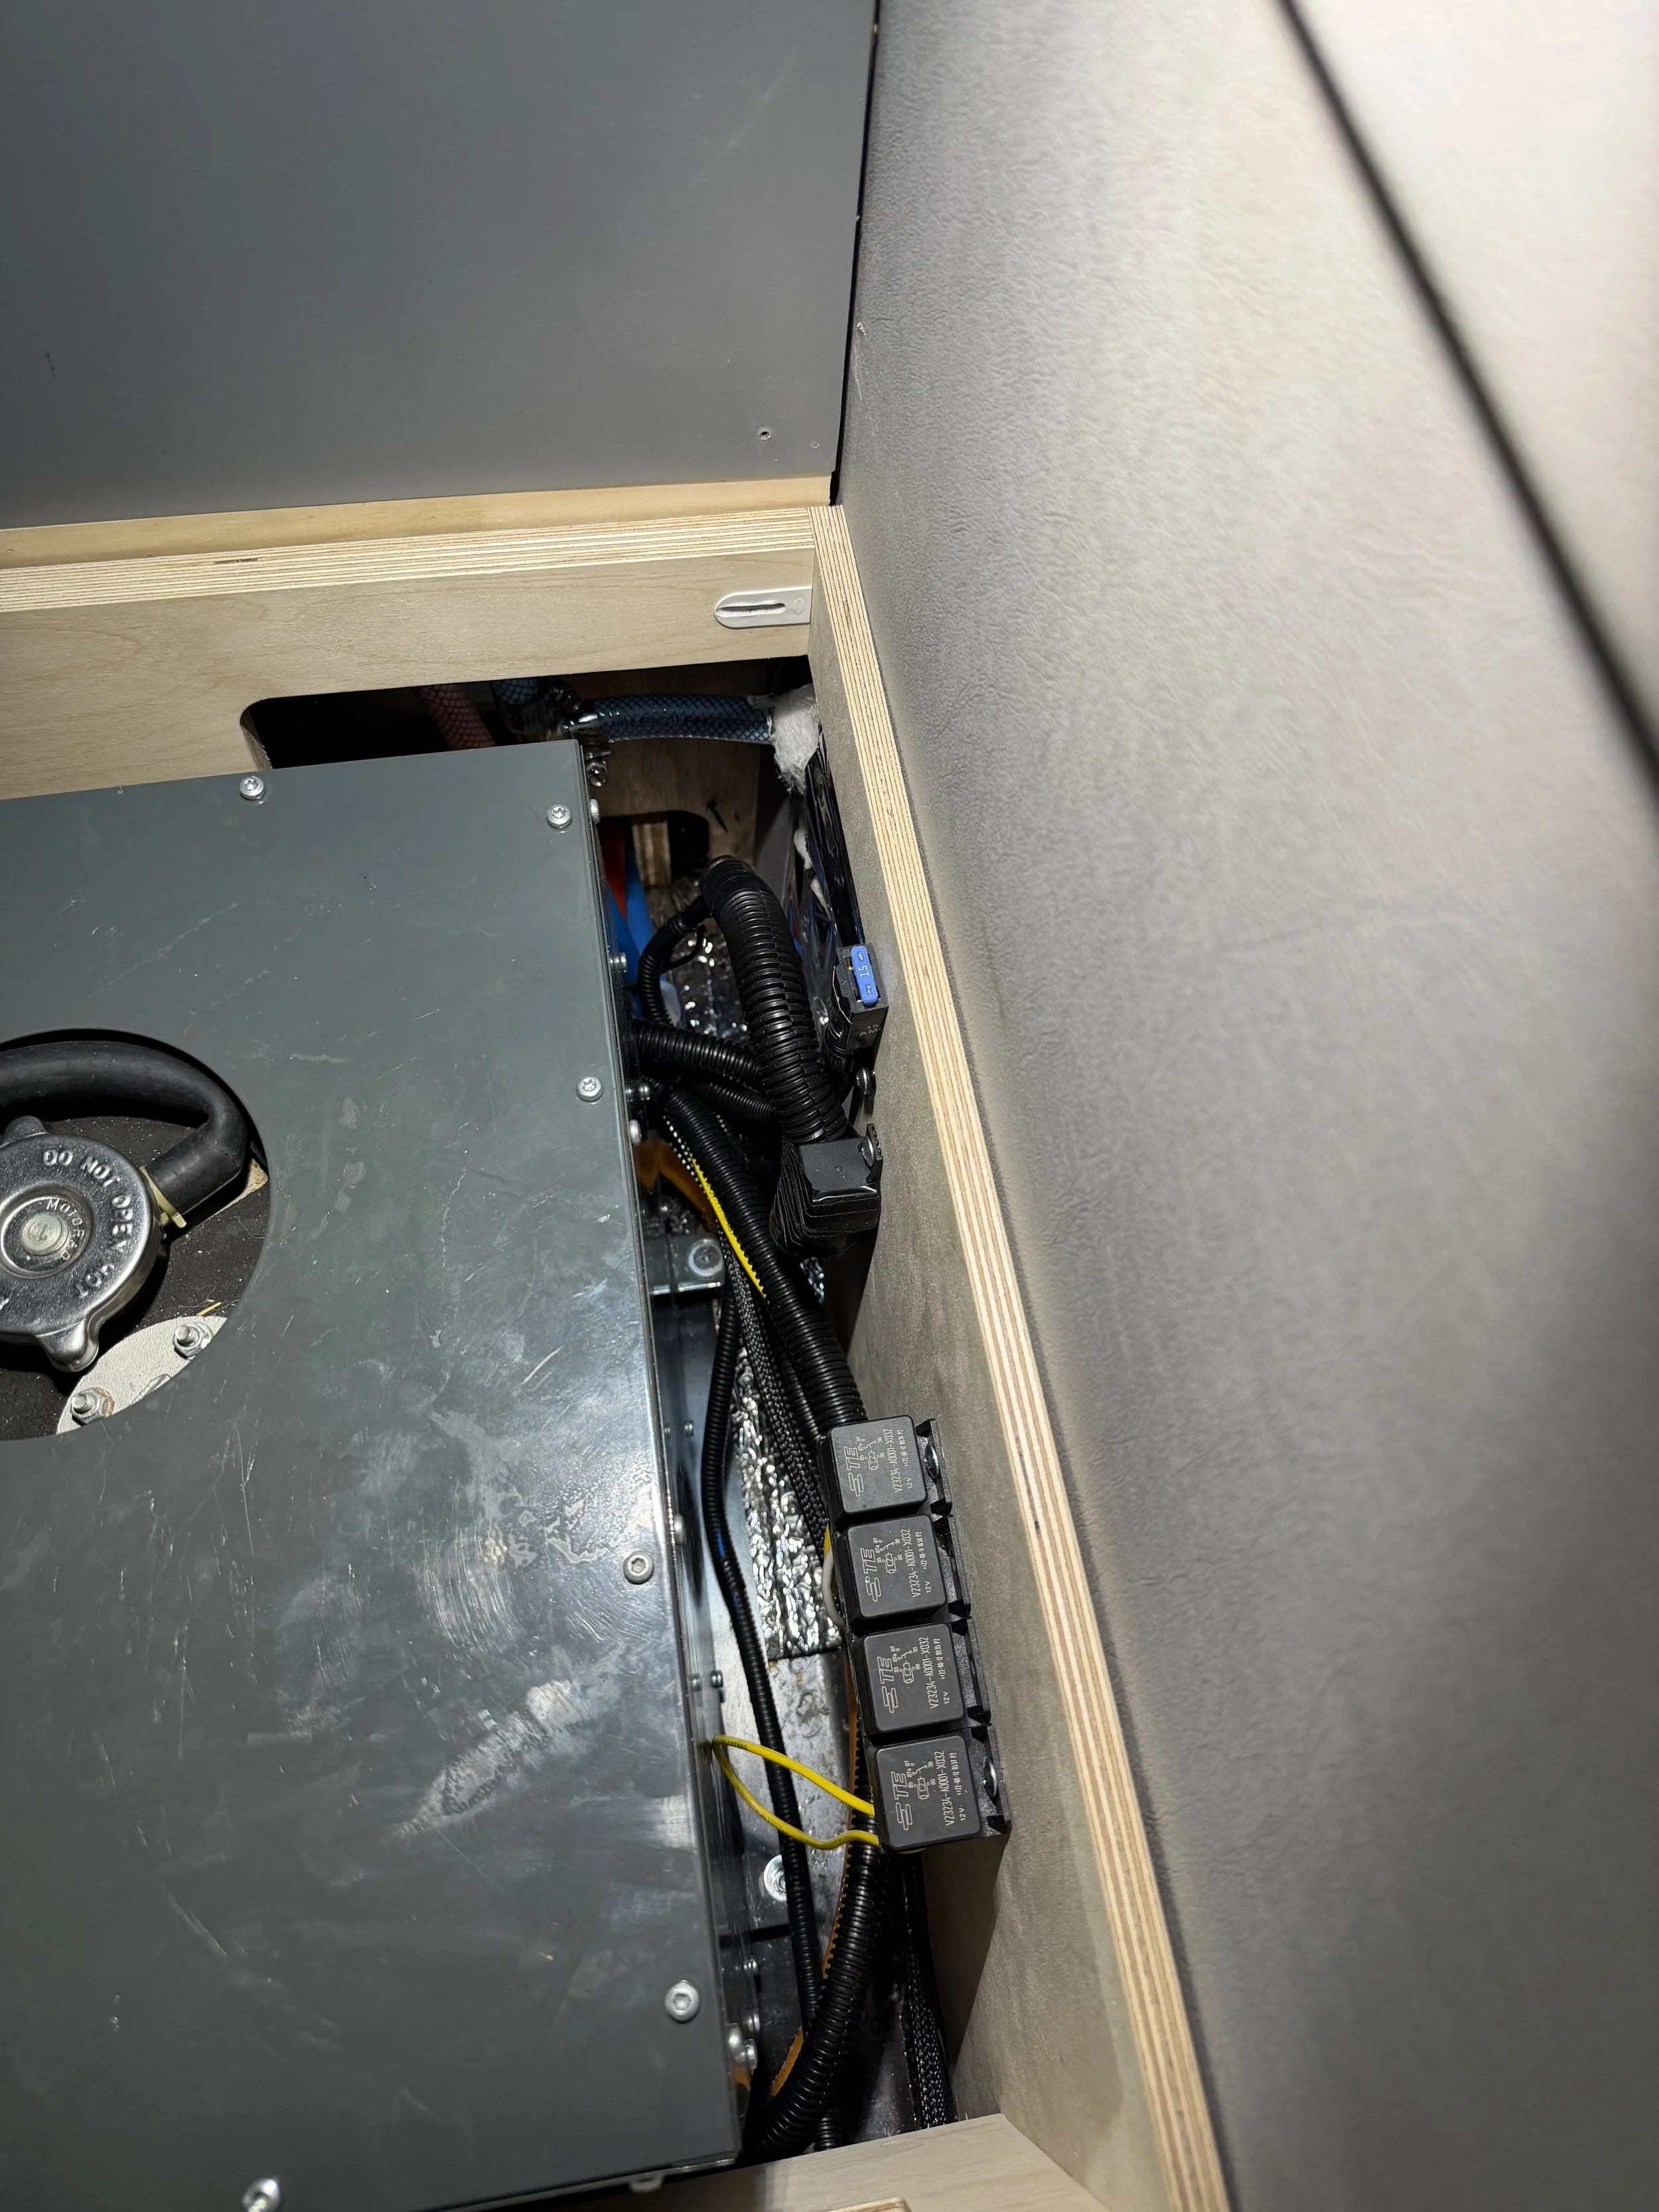
Fuses and Relays that were hidden under the jump seats are re-located to a spot that makes them accessible.
More brass fittings and relays
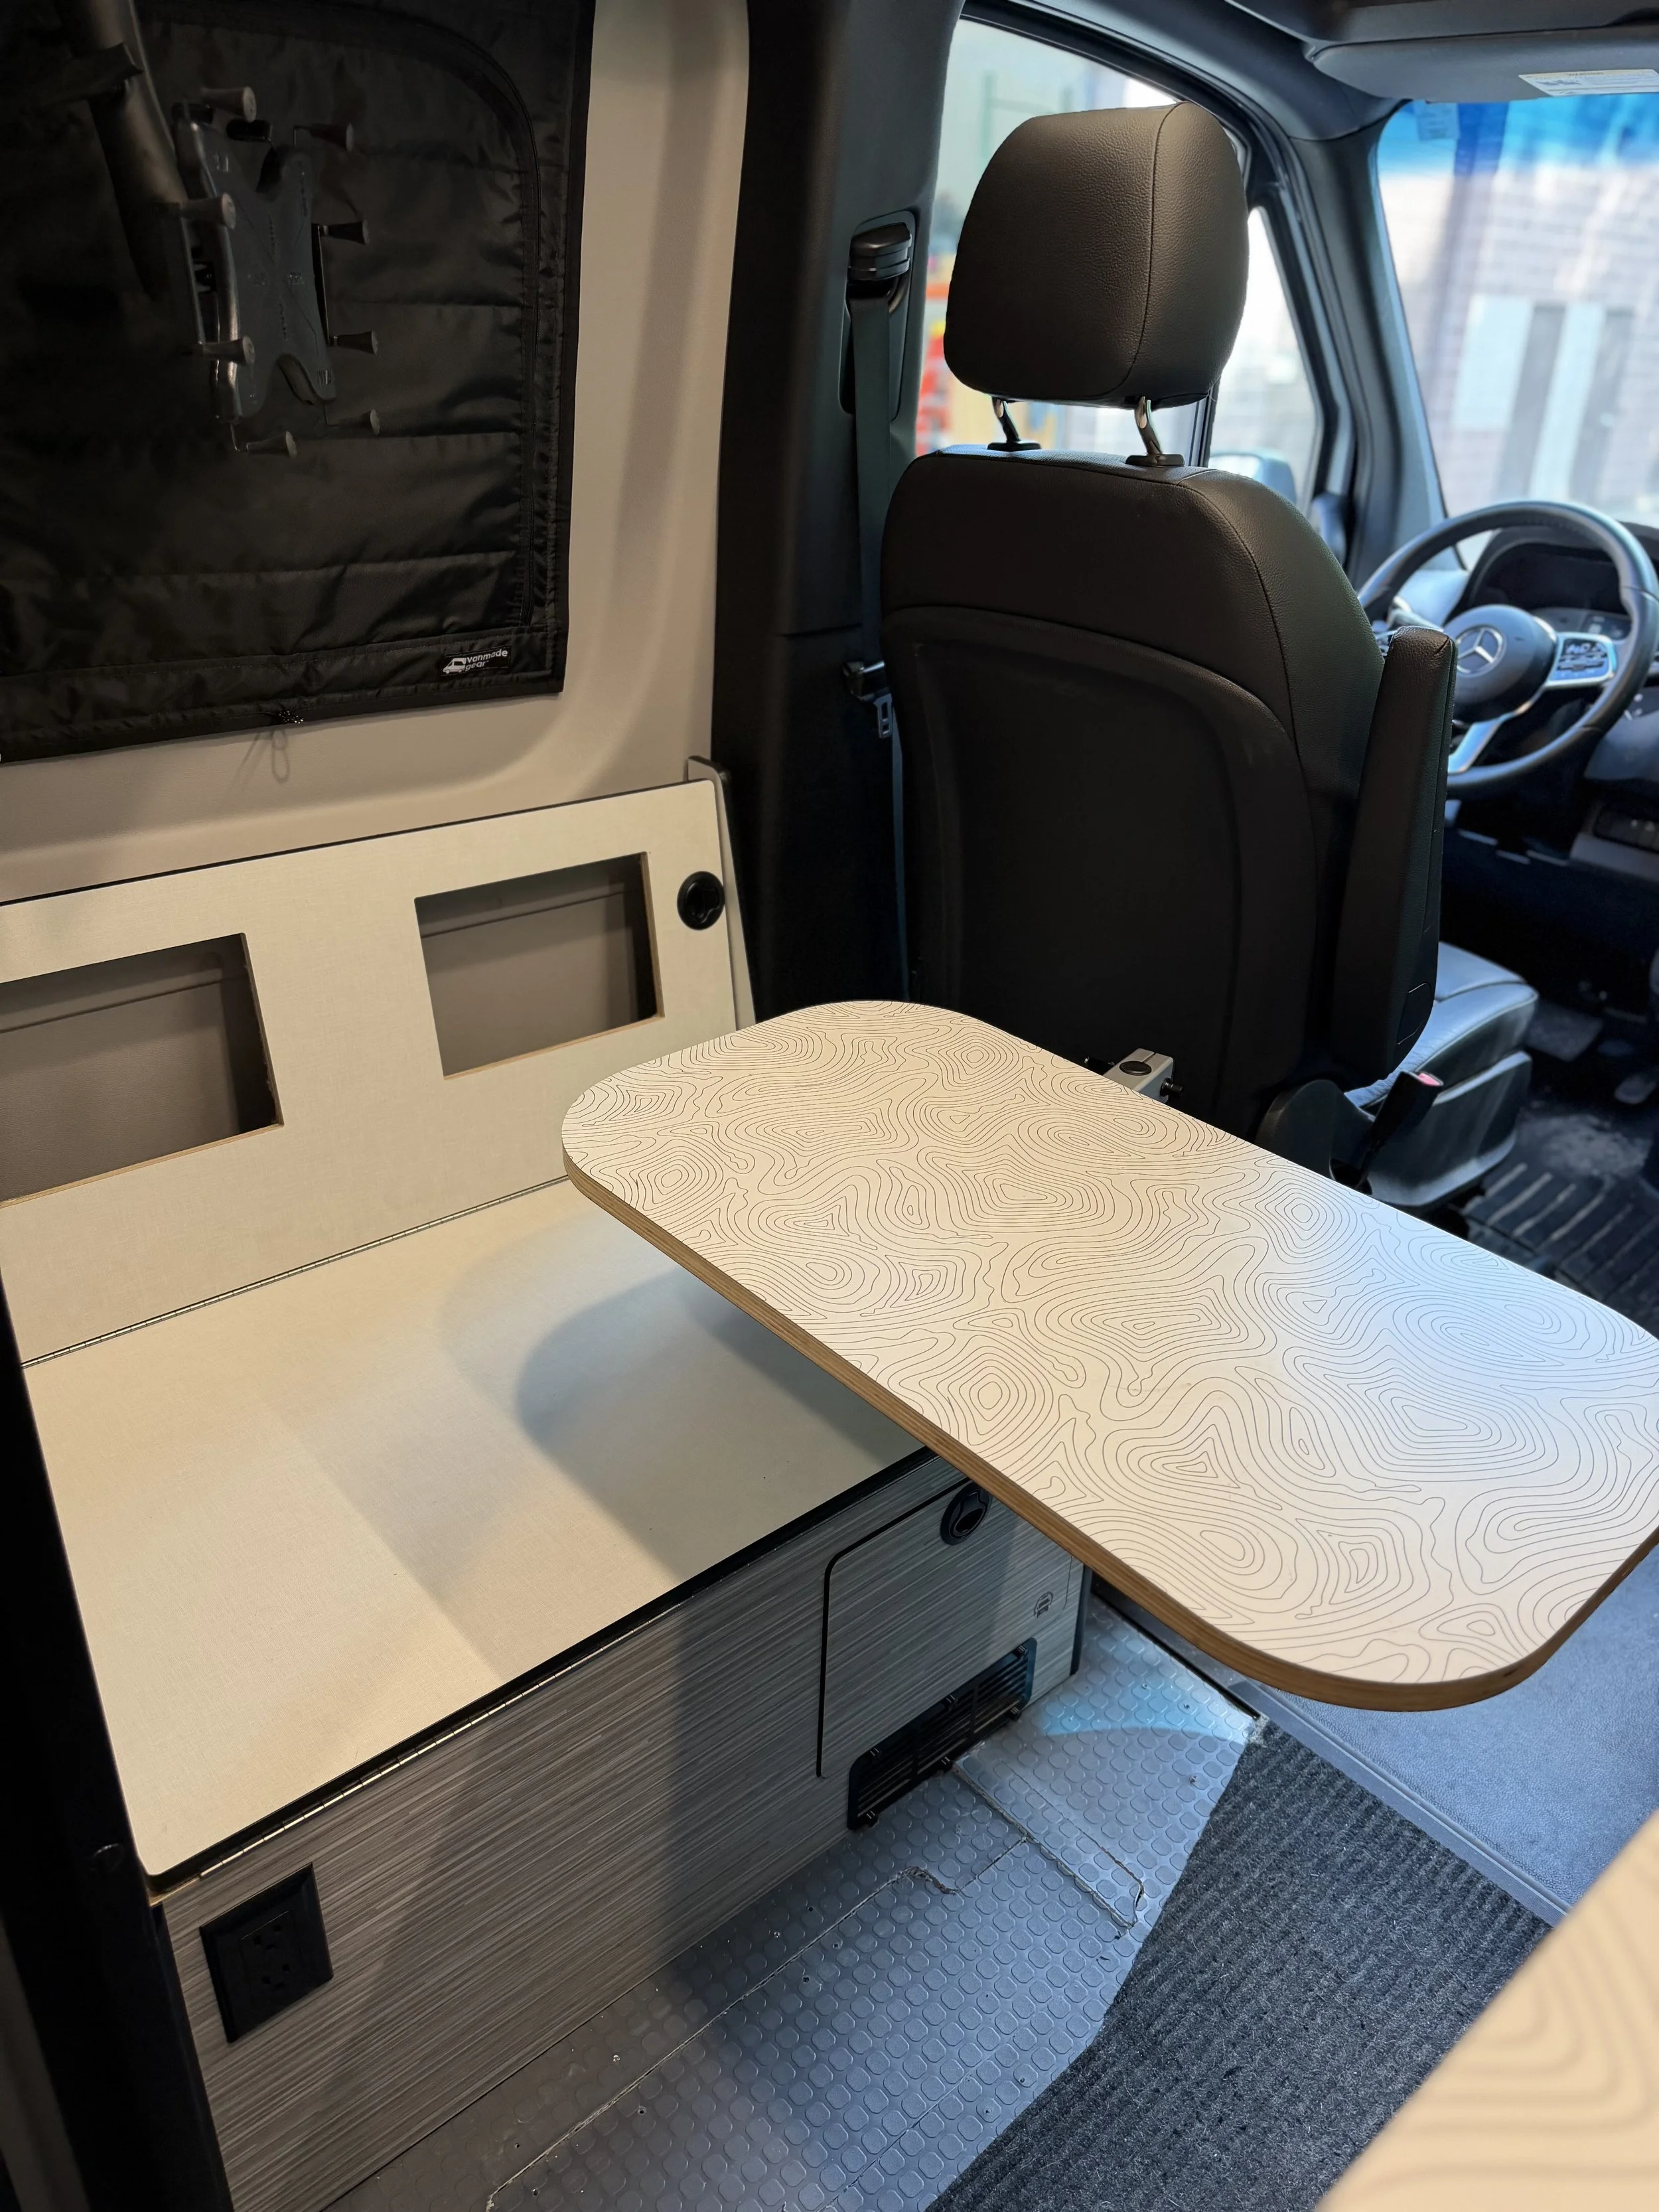
Lagun table mounts nicely to the side in a location that makes it usable from the new bench, along with the driver and passenger seat when they are swiveled
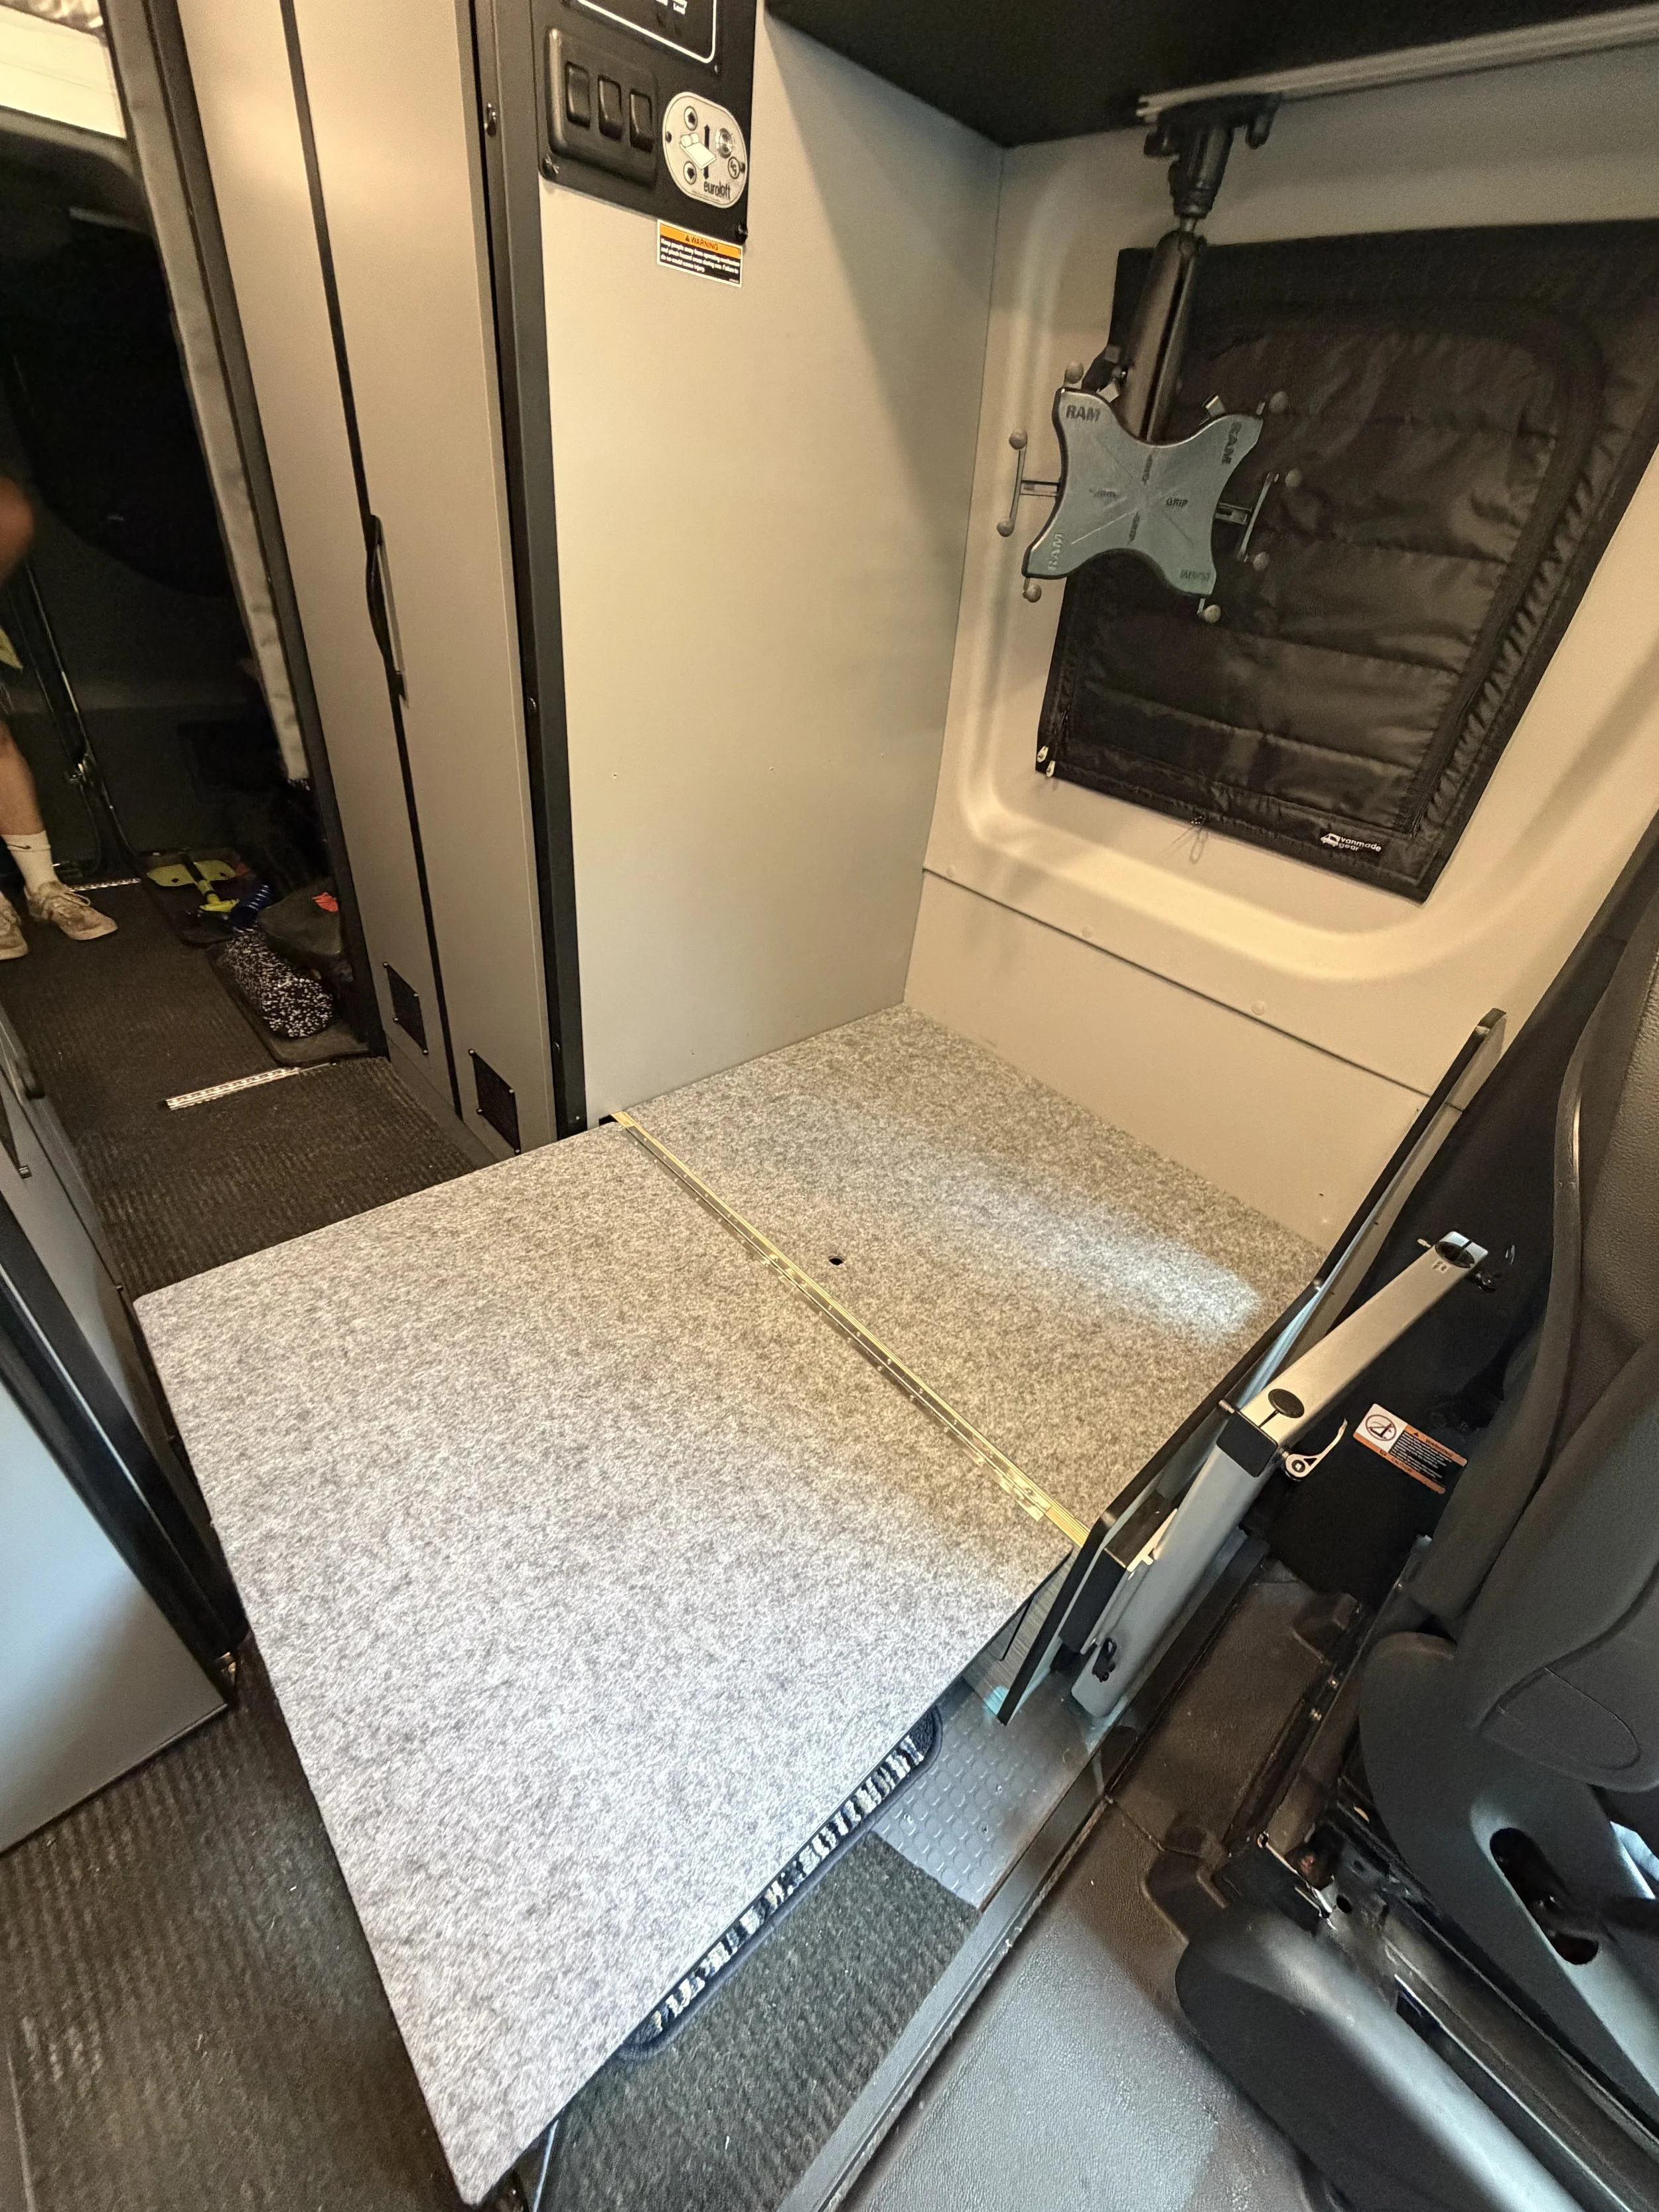
The back of the bench folds down into a lounge area
22/23 Winnebago Revel 44N. In for the Sunchaser Vans Bench Rotation Kit
Stock layout of Revel 44N
Removal of the old bench
Installed Sunchaser Van Company Bench Rotation kit for the Revel 44N
2019 Ram Promaster 1500. All of our work on this van took one month to complete

This was a facebook marketplace find that needed lots of attention to make it safe to travel in.
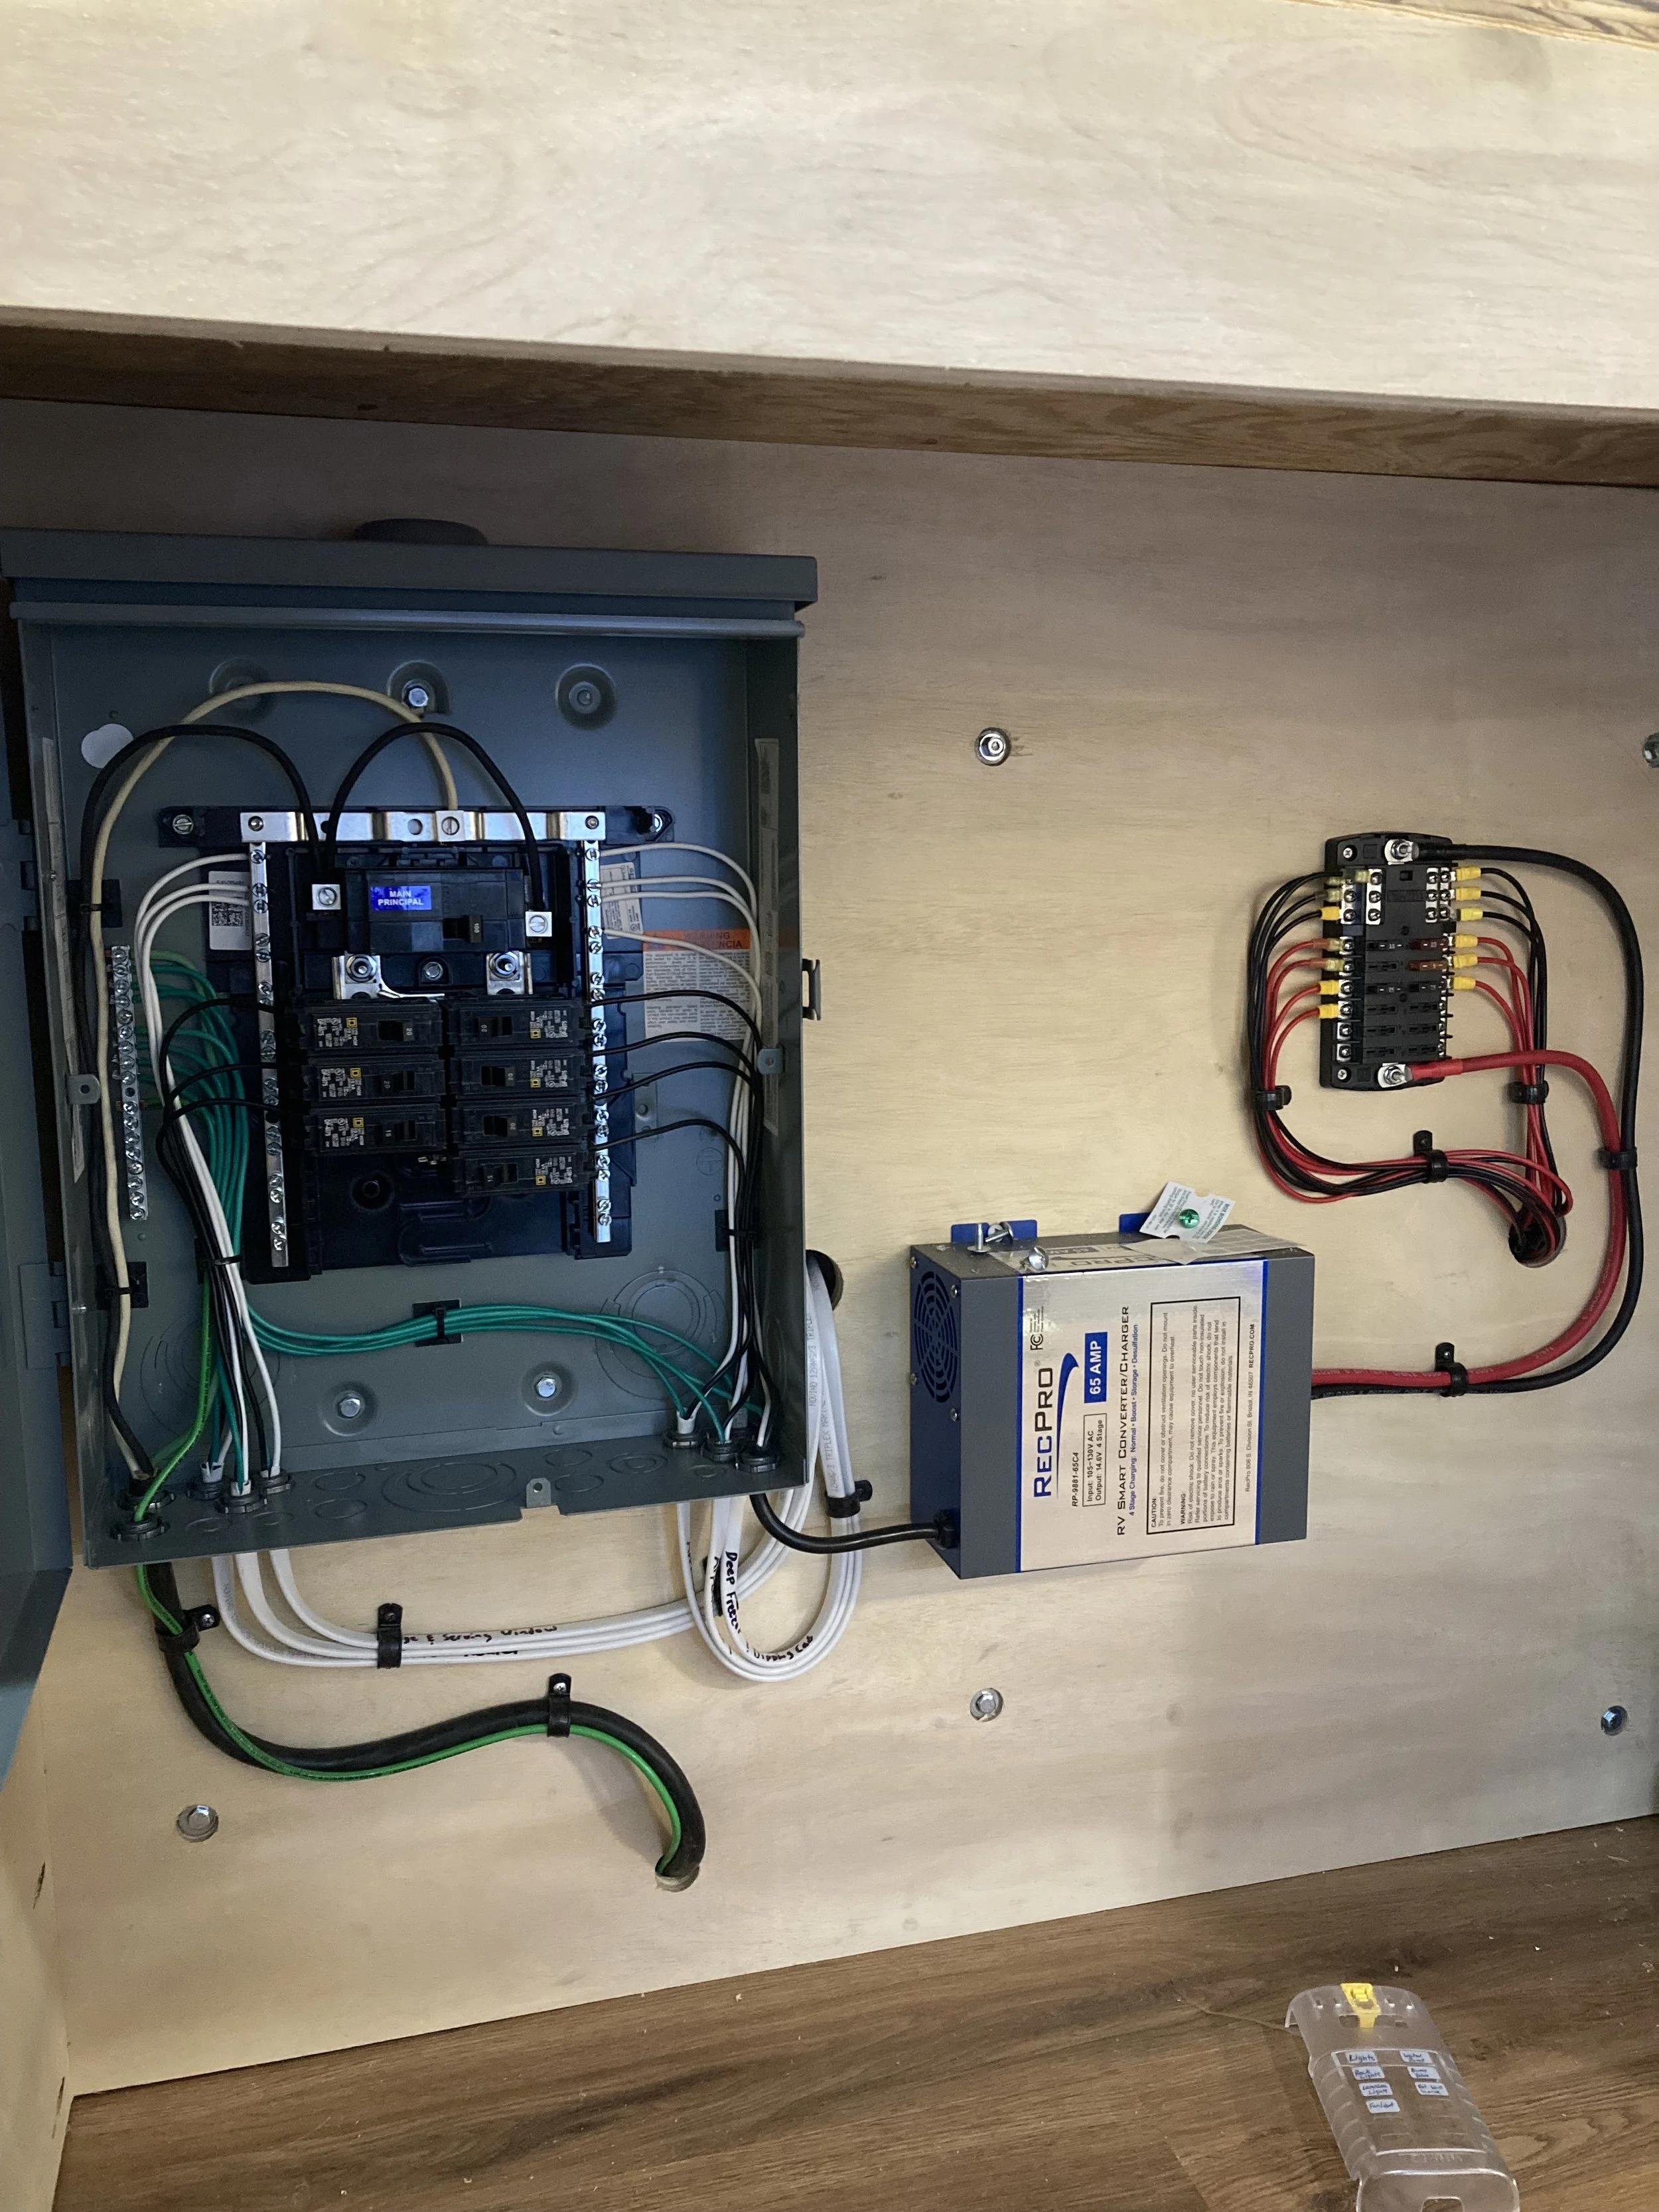
There were no disconnecting means to turn off the system or fuses to protect the wiring
There were even different gauge wires going to the inverter
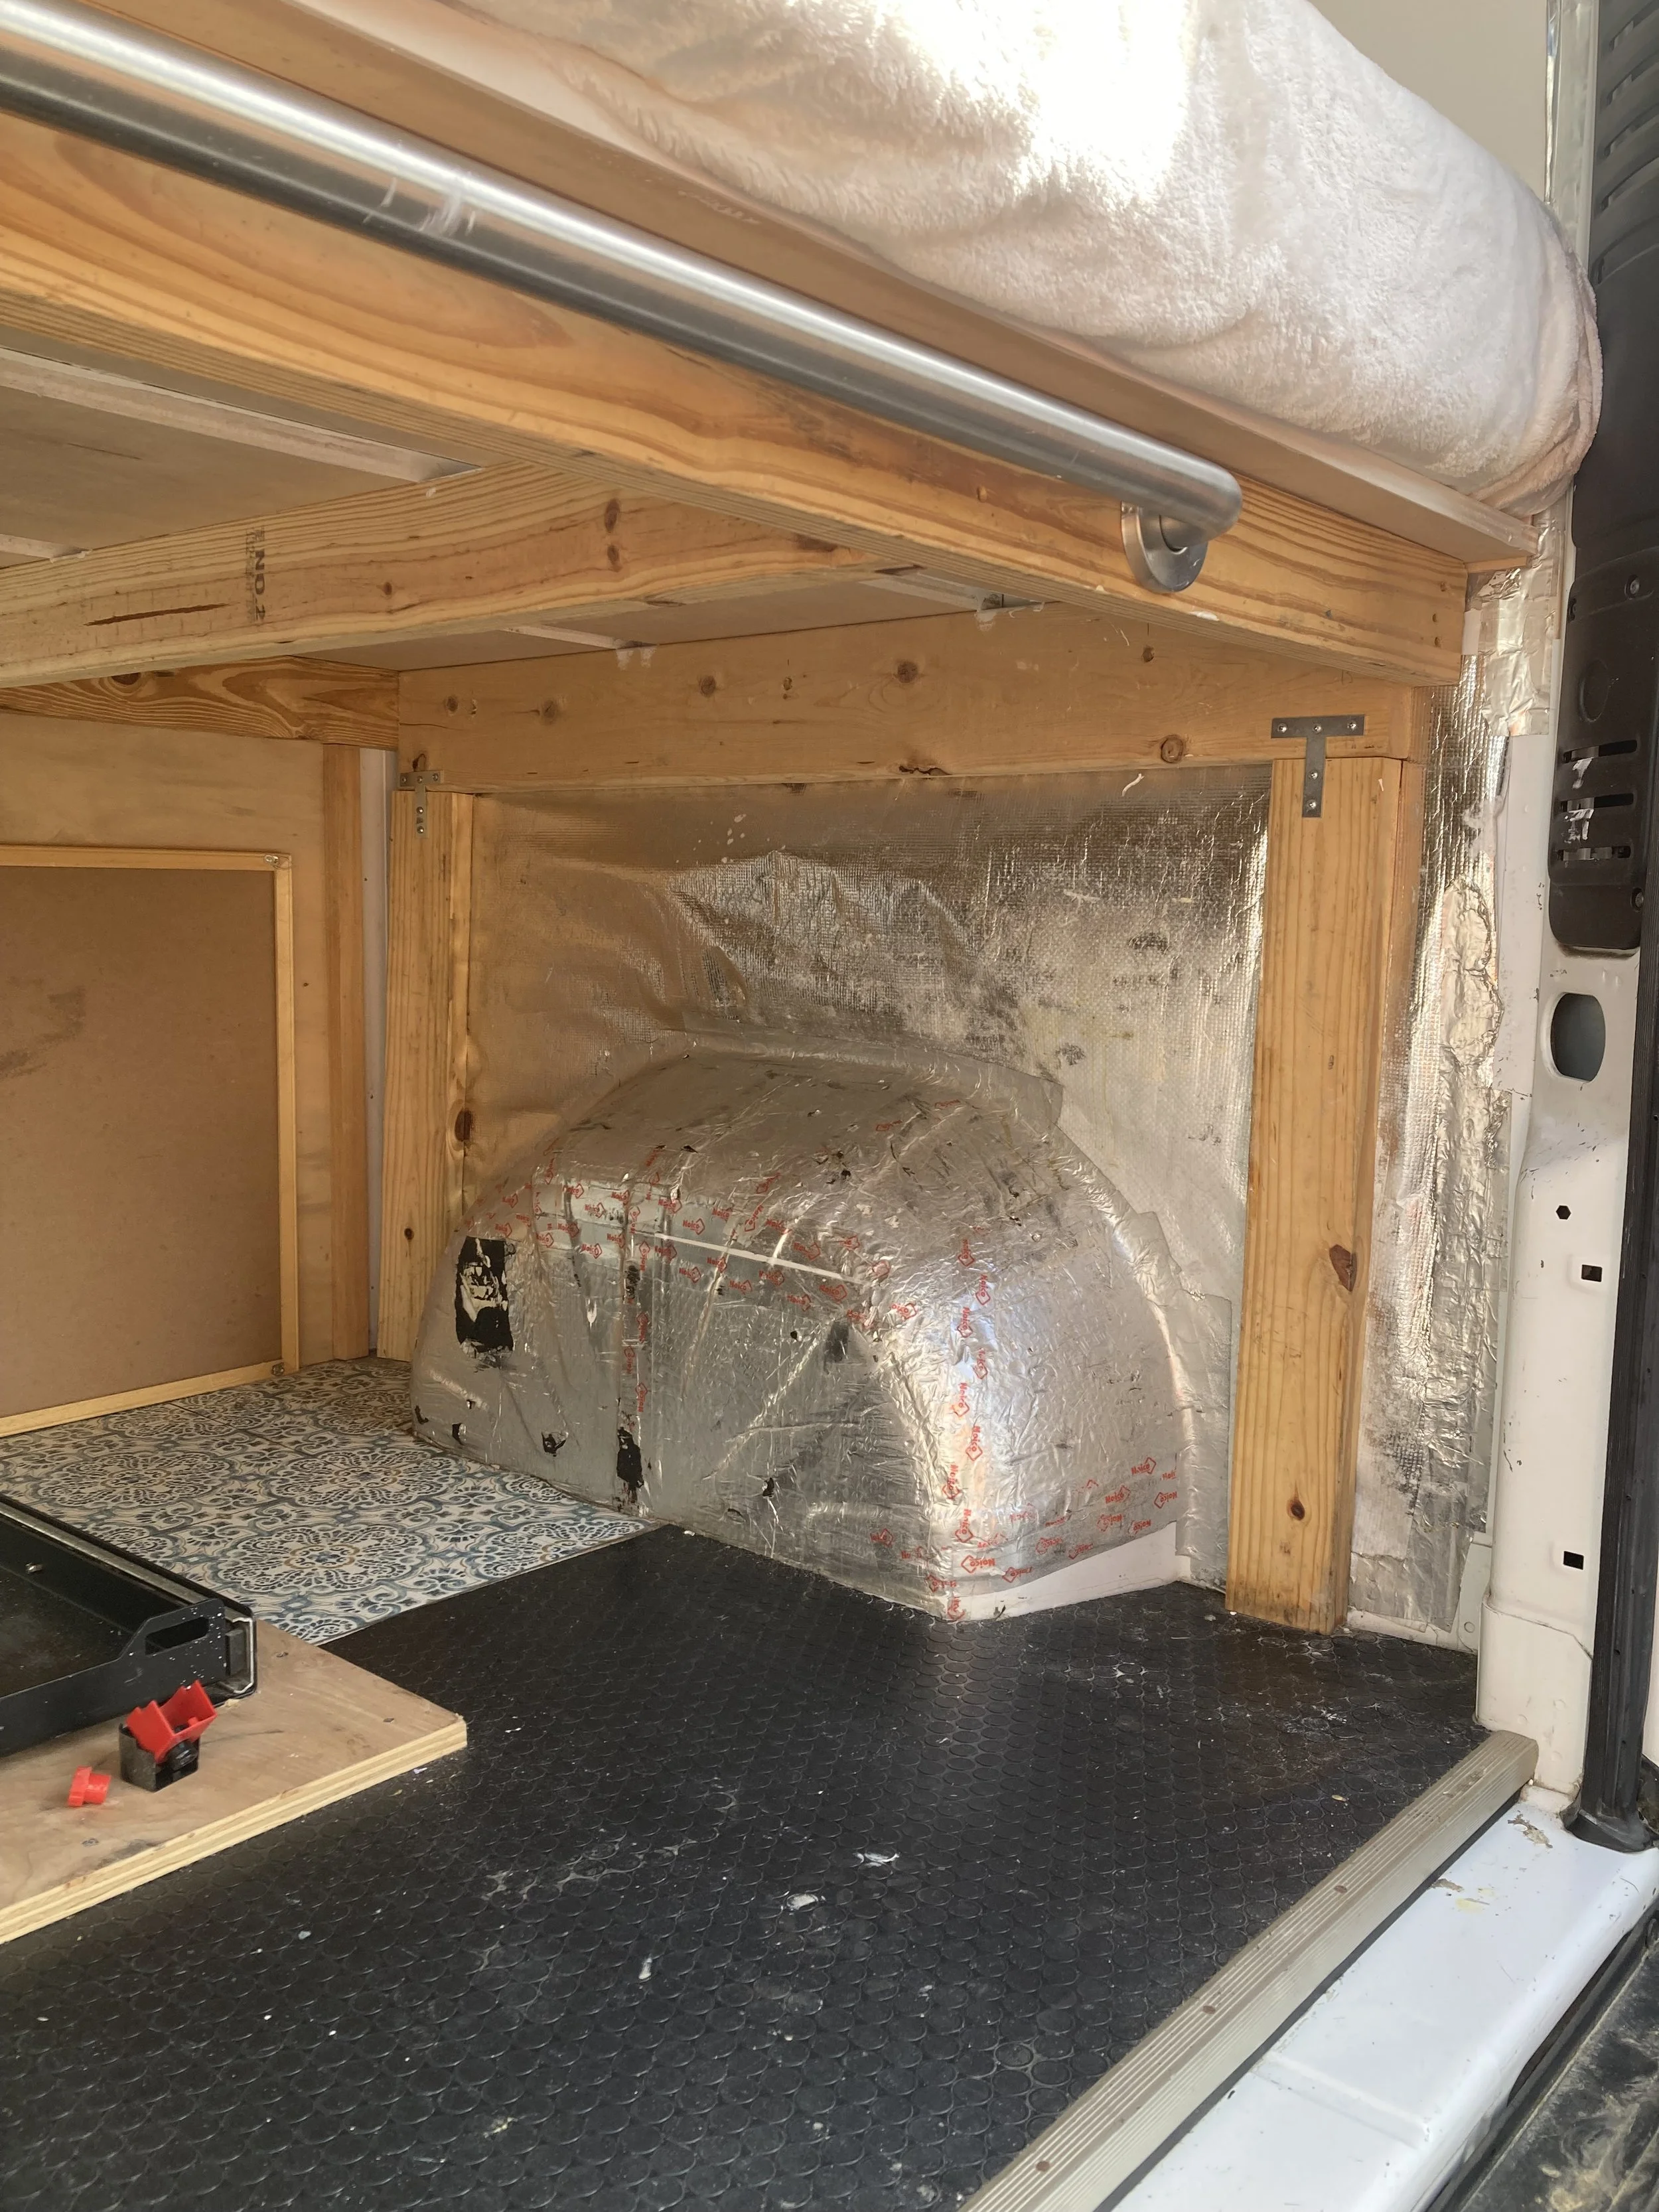
The upper part of the bed frame was bolted to the wall of the van but the support legs were not fastened to anything so they were not doing their job very well. So we fixed that,
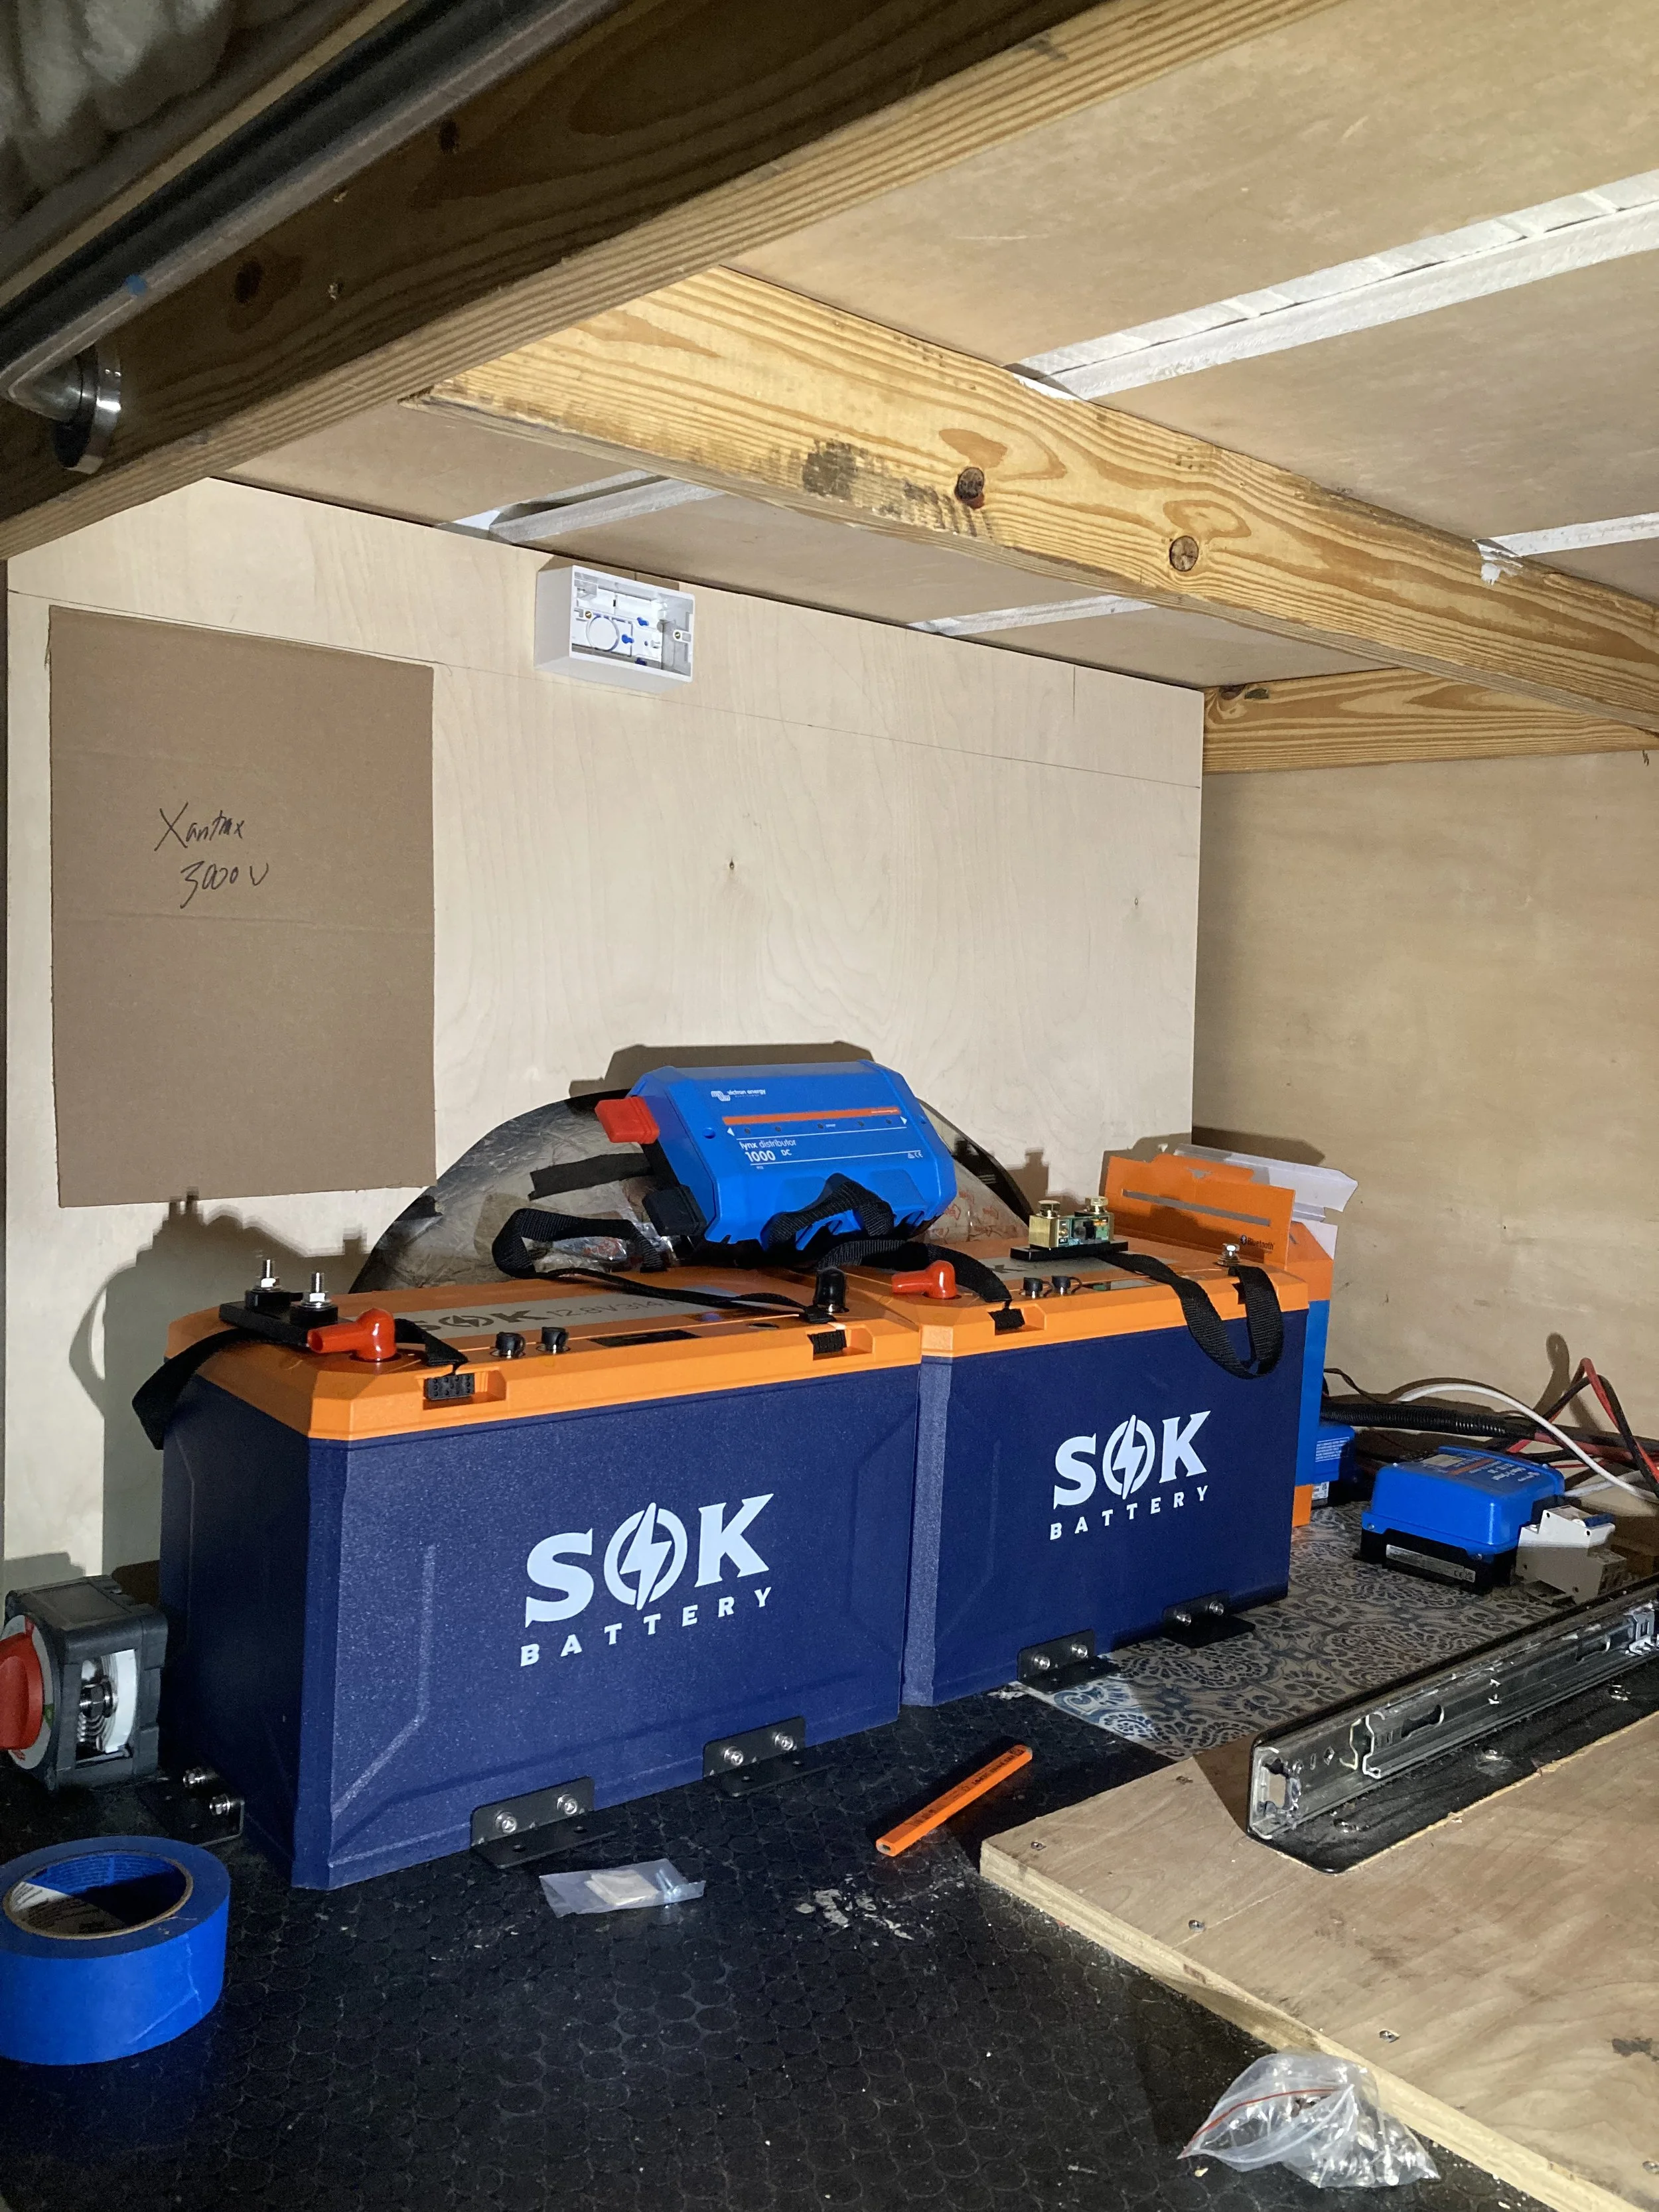
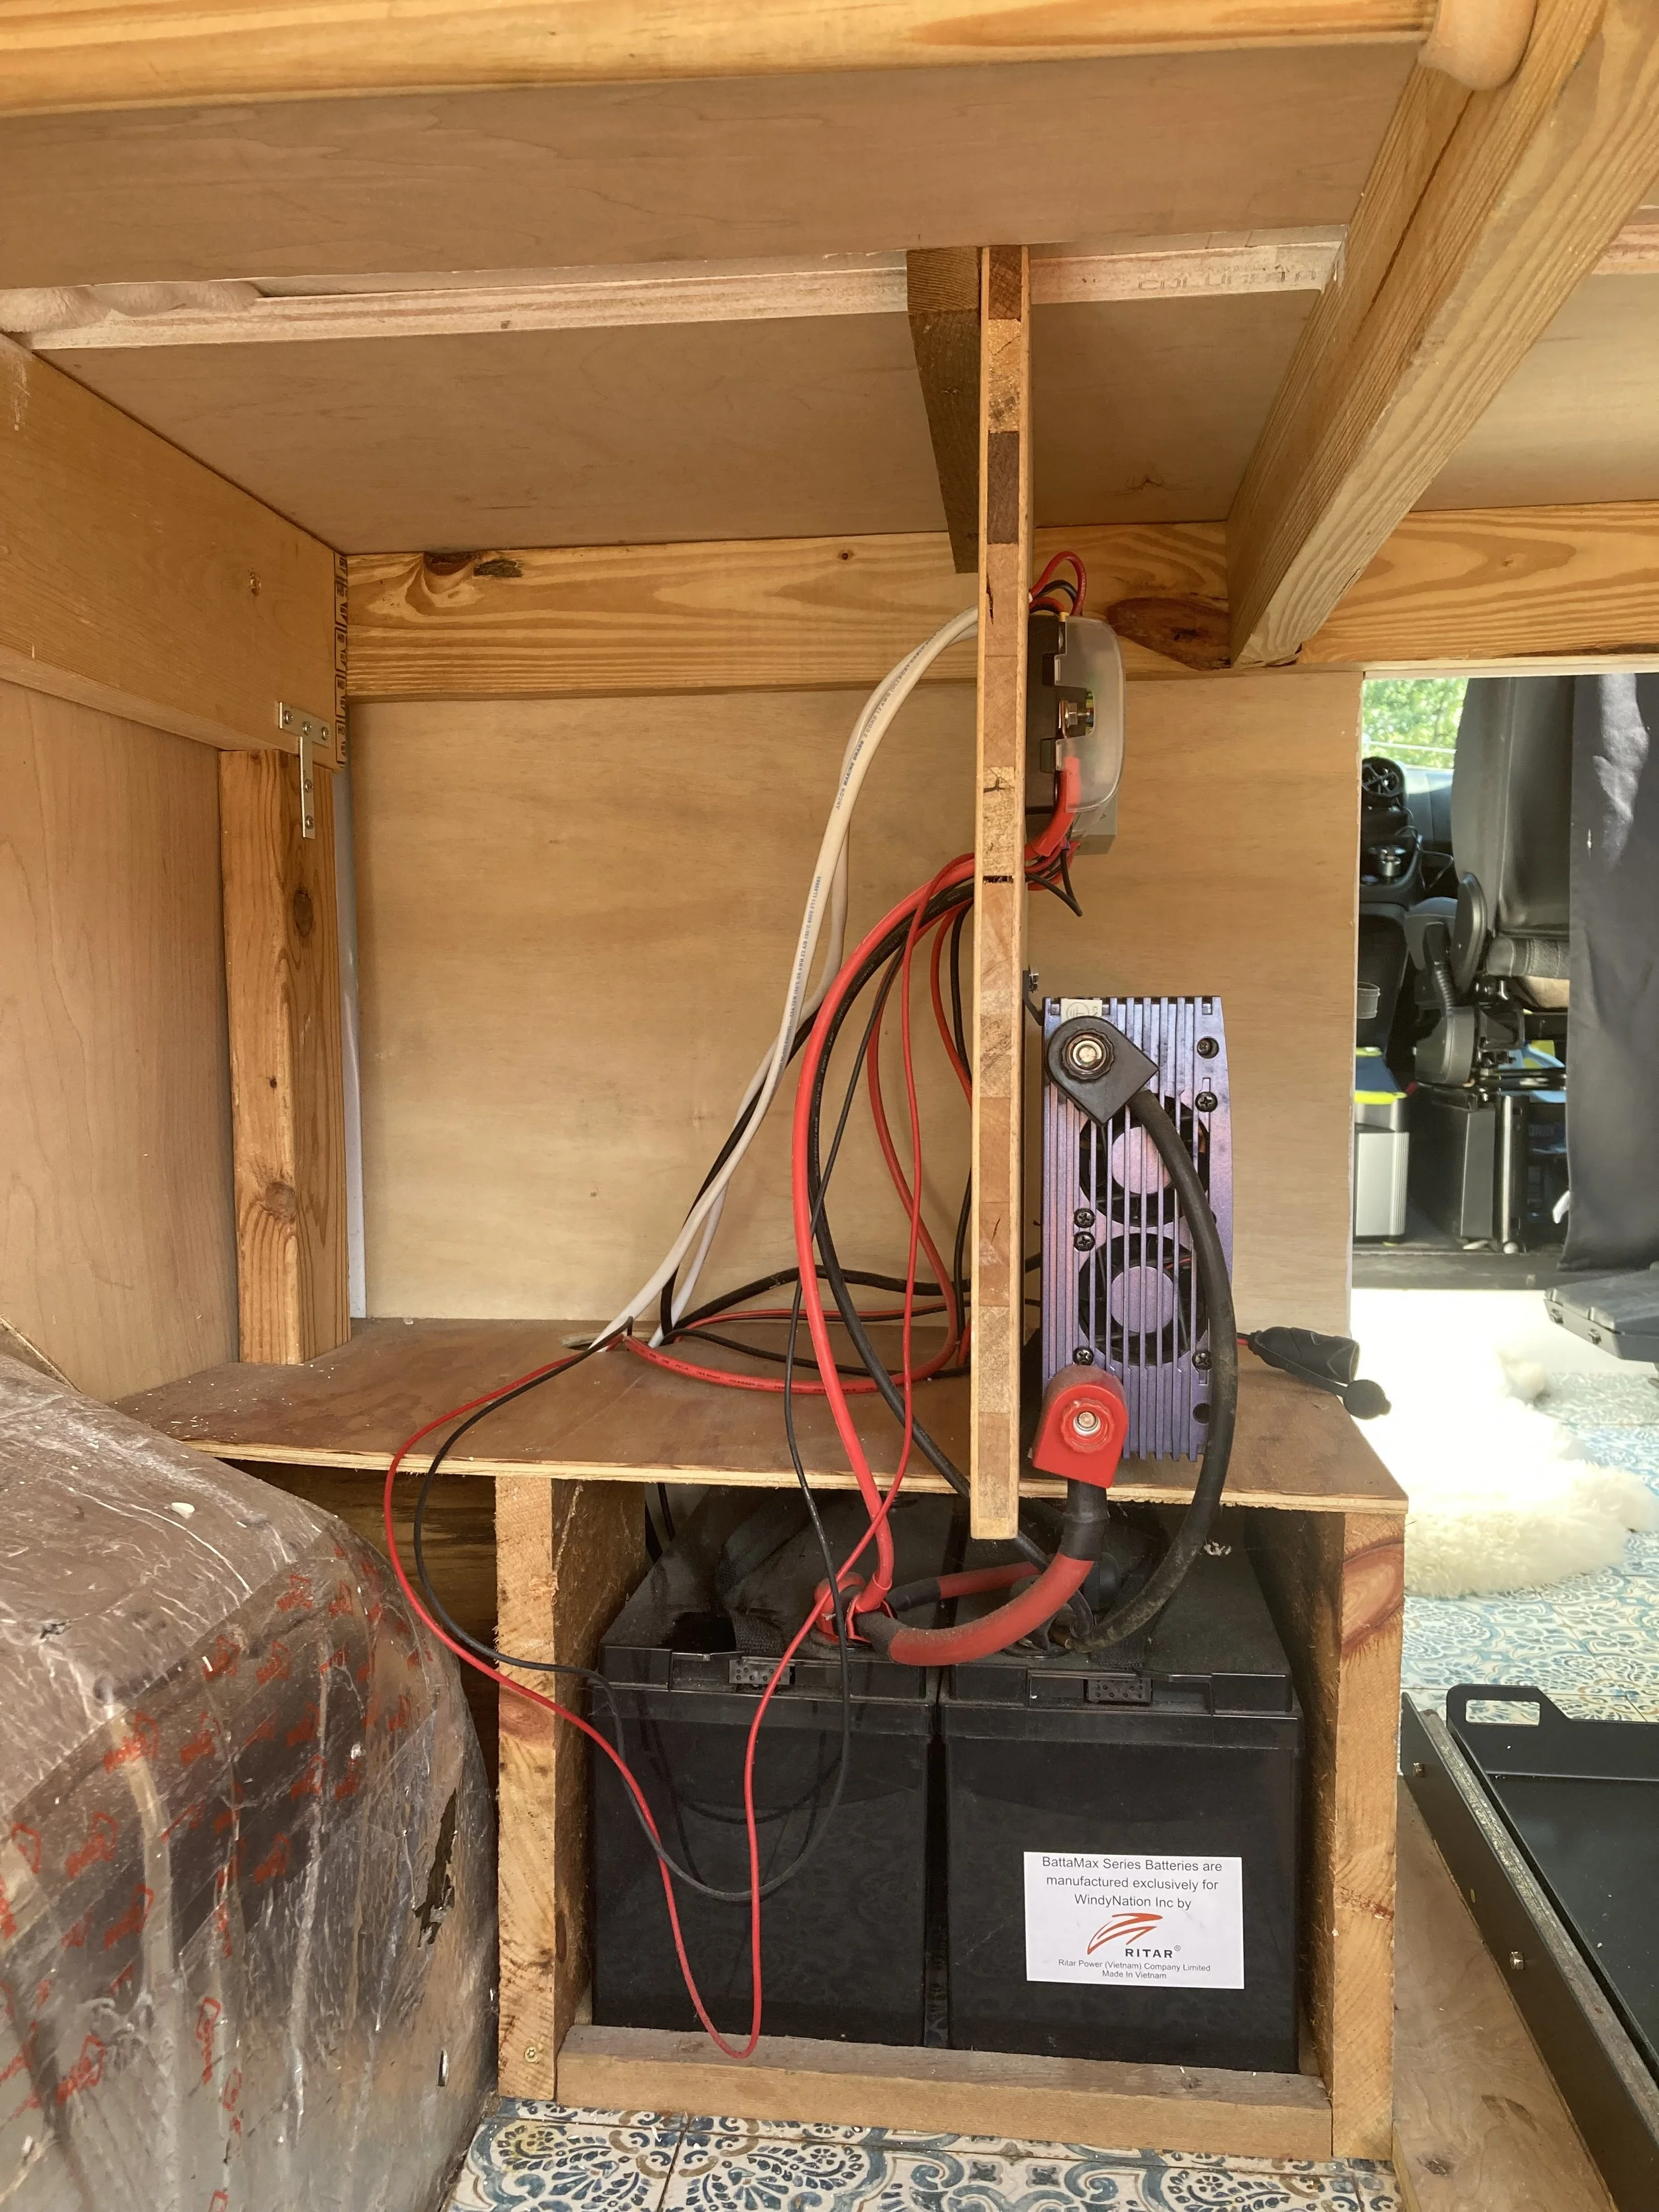
We wanted to be cost effective but still have a large battery bank so we installed two of the SOK 314ah lithium batteries to power the van.
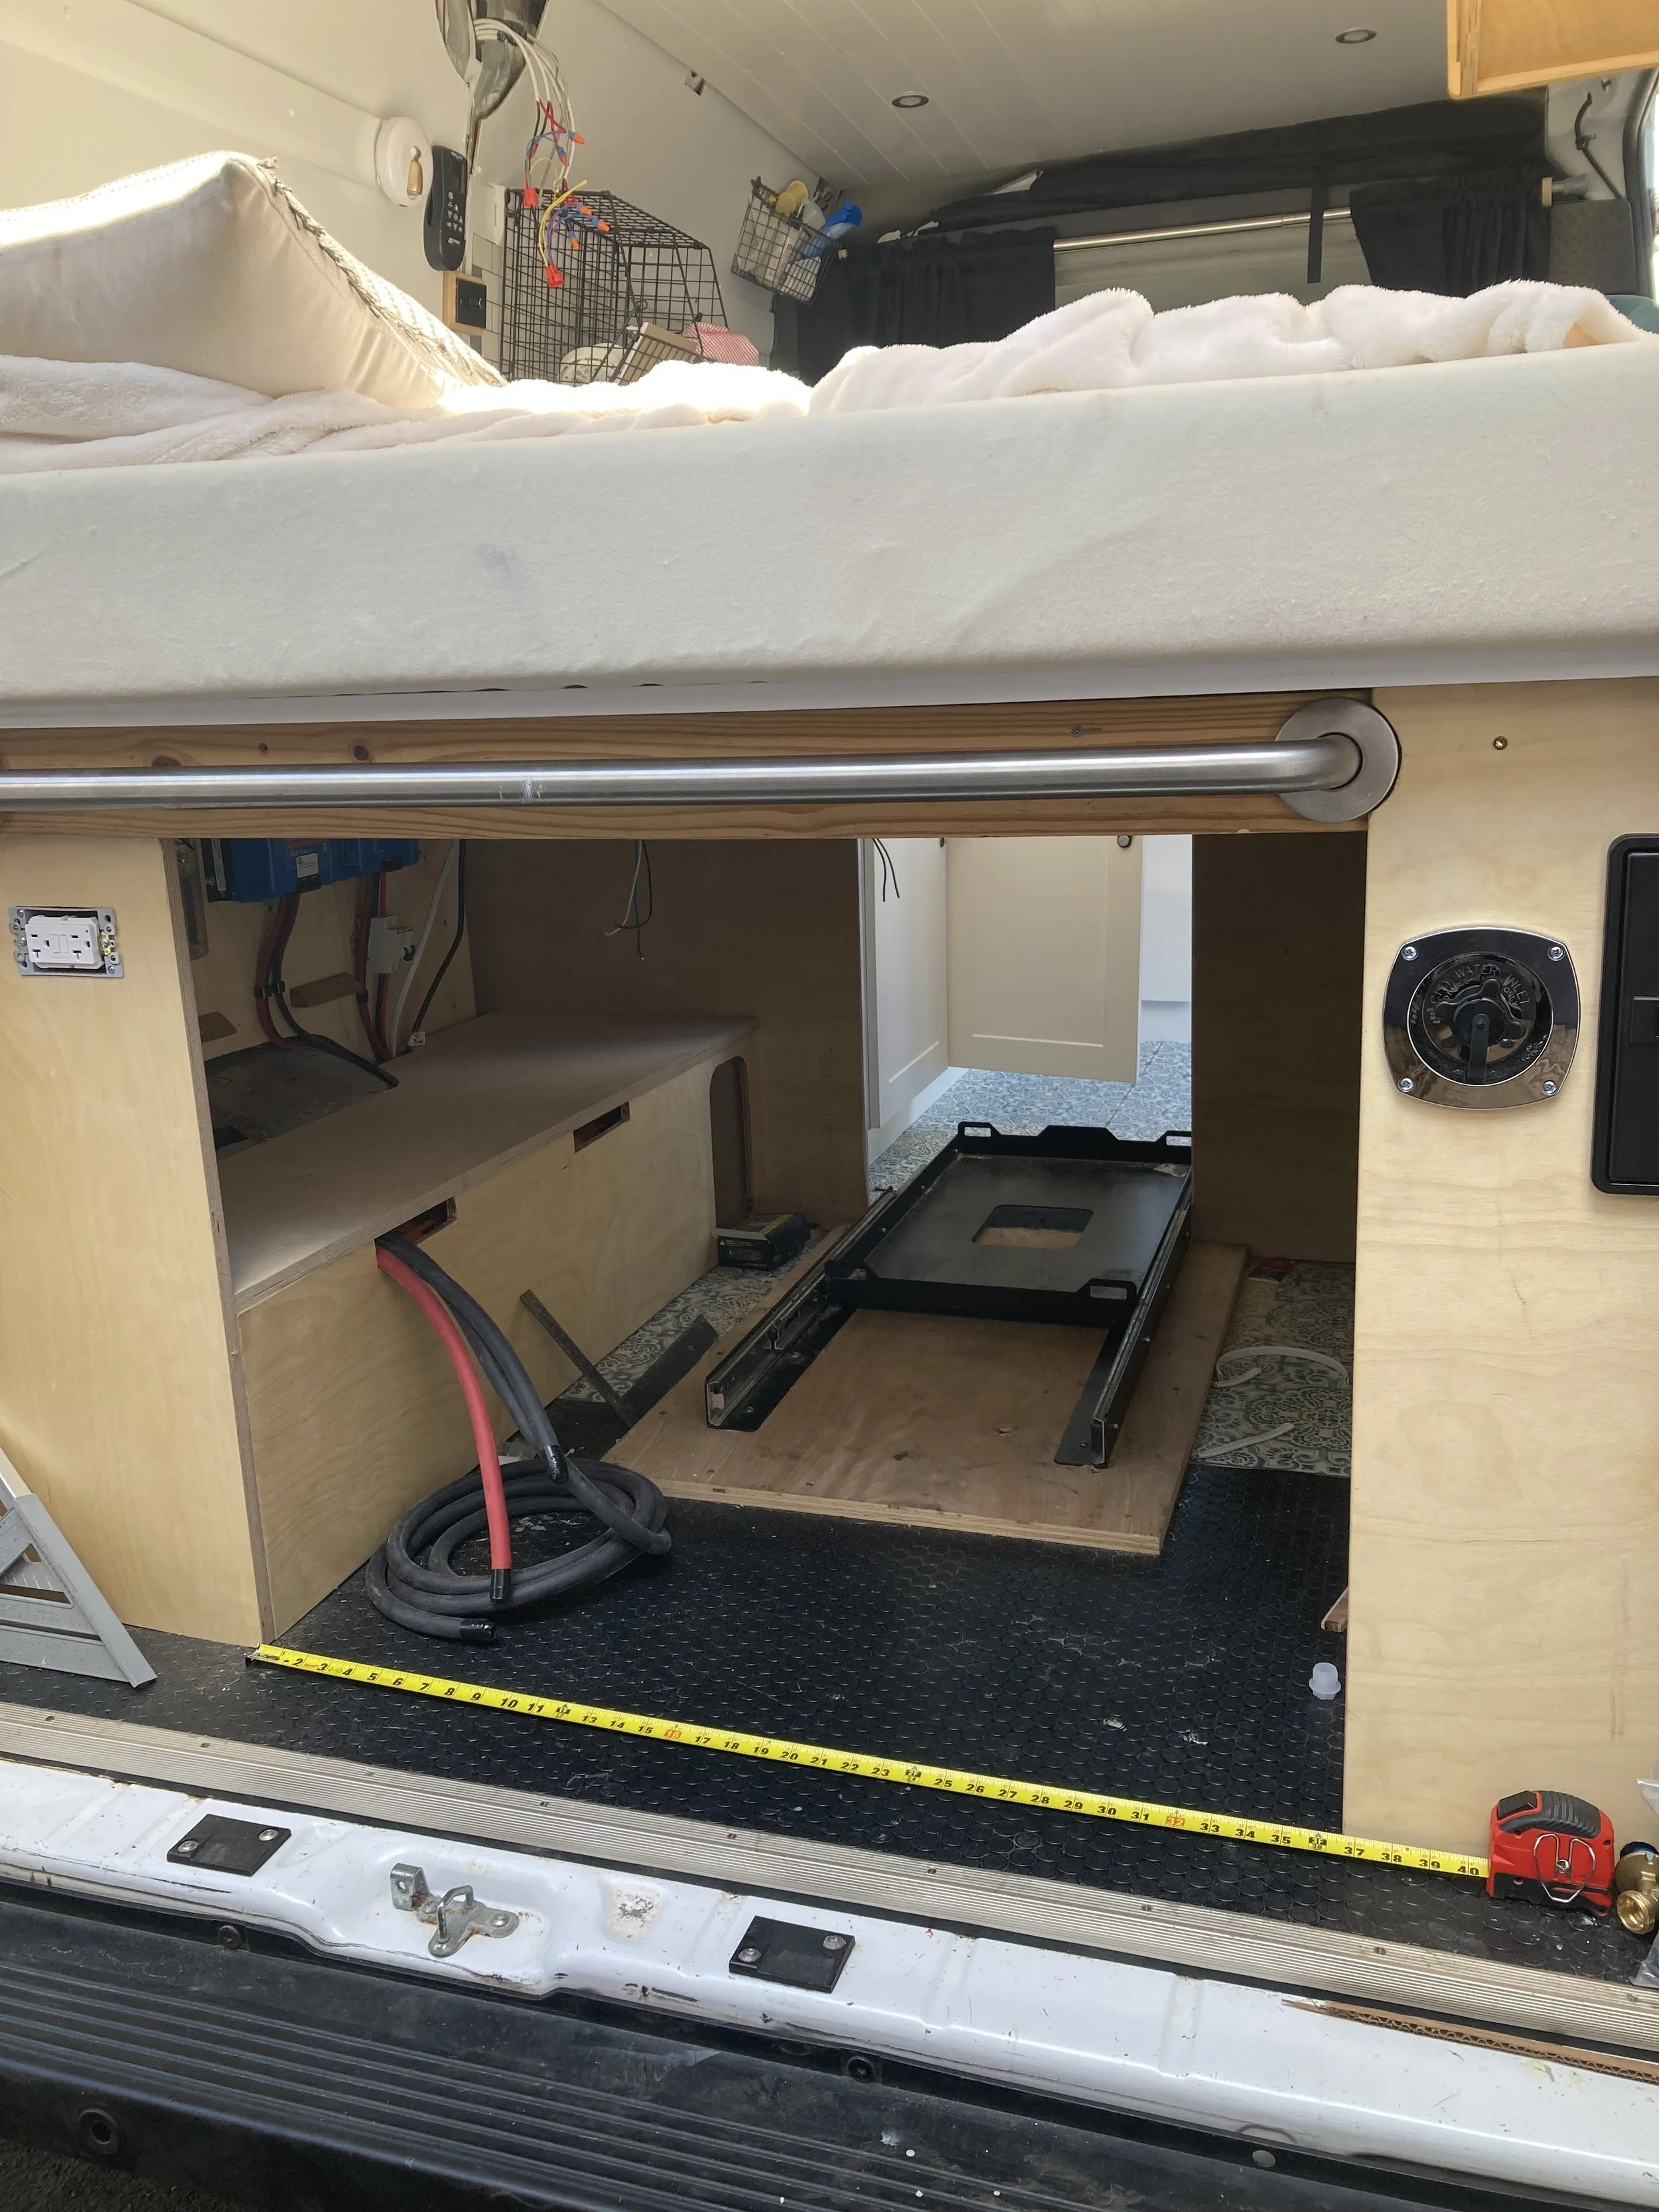
We built usable storage space on top of the SOK batteries and infront of the other electrical equipment we installed.
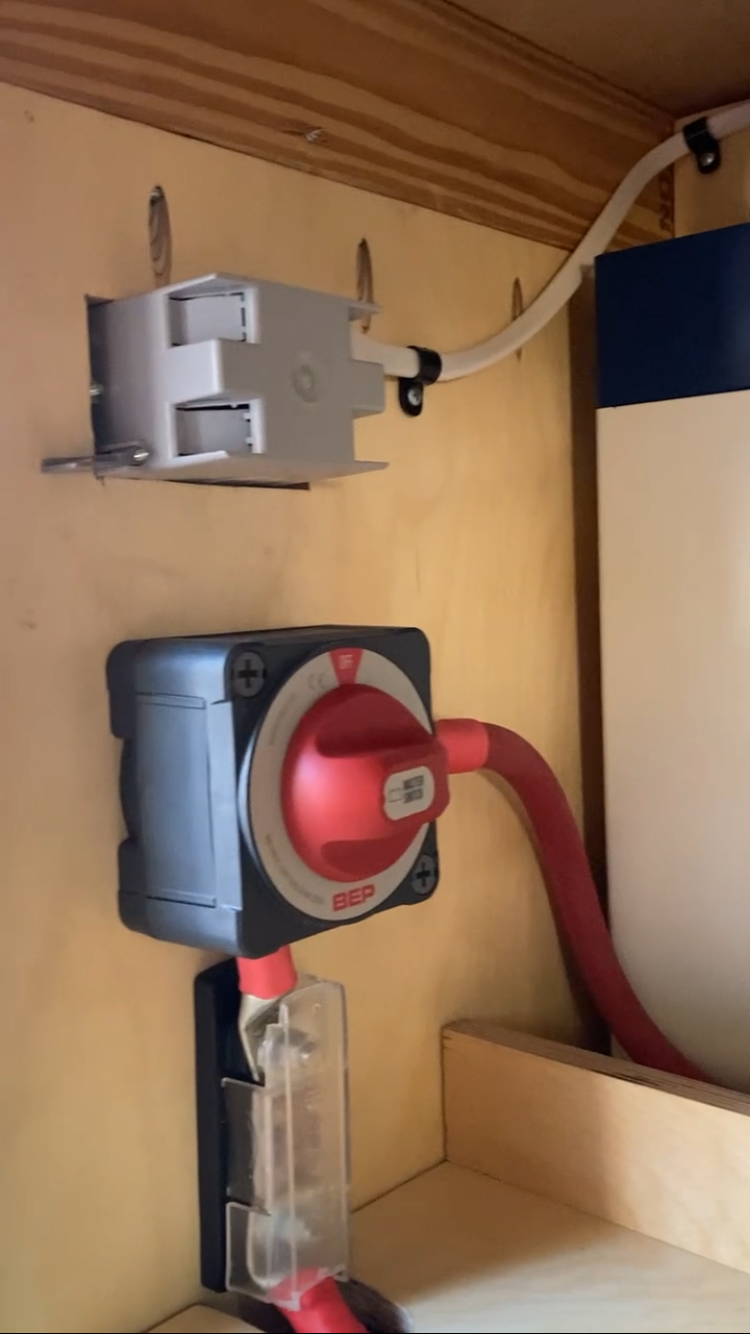
Main fuse and On/off switch located in an easy to get to location for safety and maintenance reasons
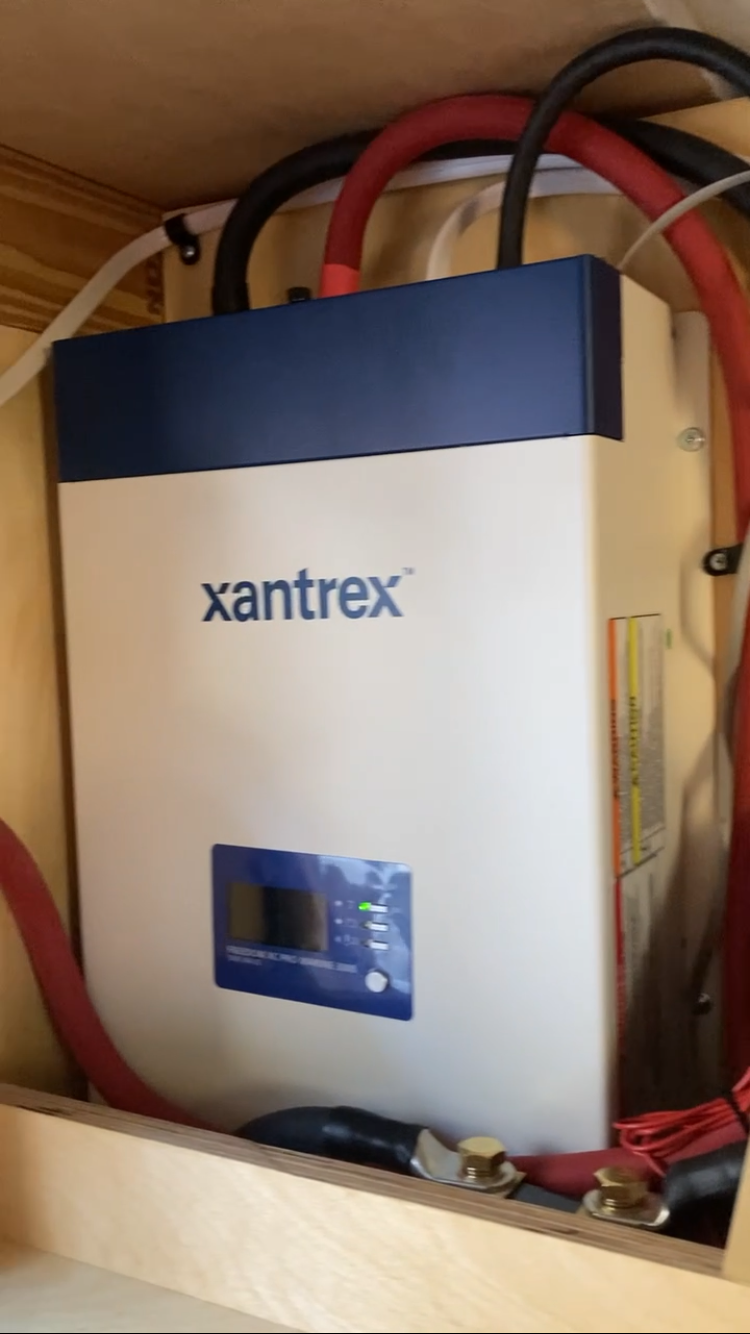
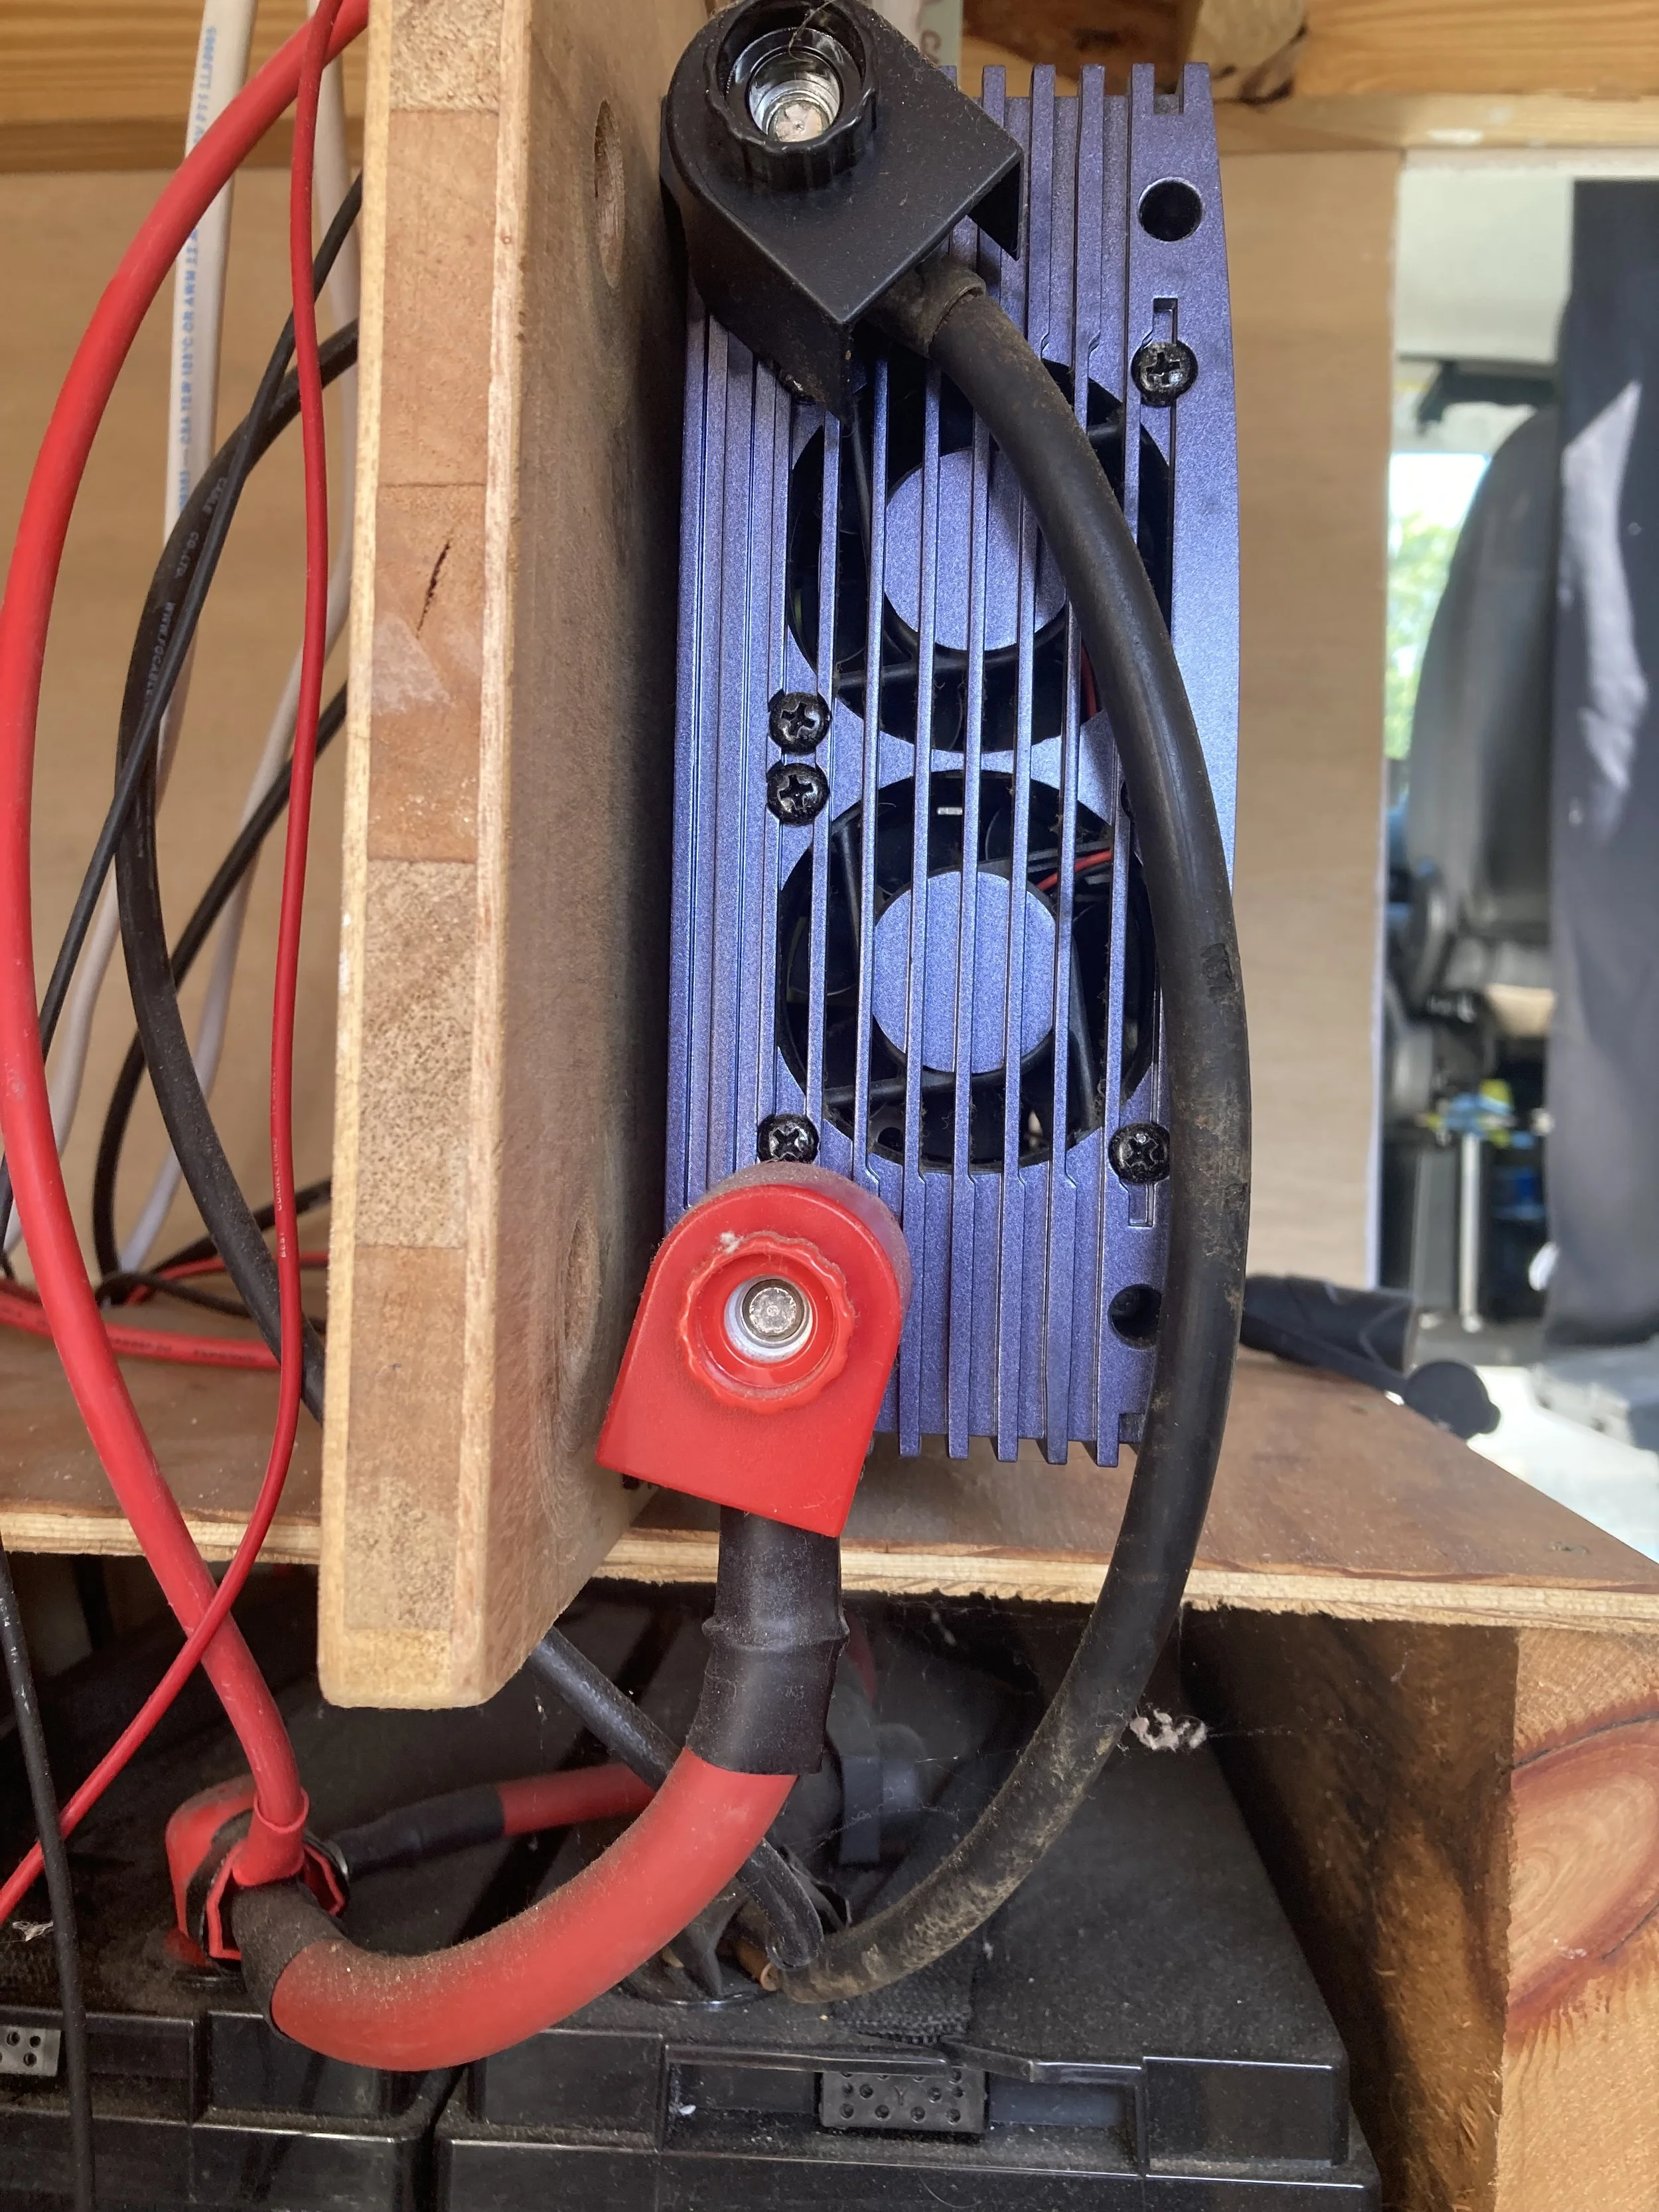
Installed the Xantrex Freedom XC Marine 3000w Inverter/Charger. With this you are able to charge your house batteries from shore power as well as convert your 12v DC power to 120v AC power.
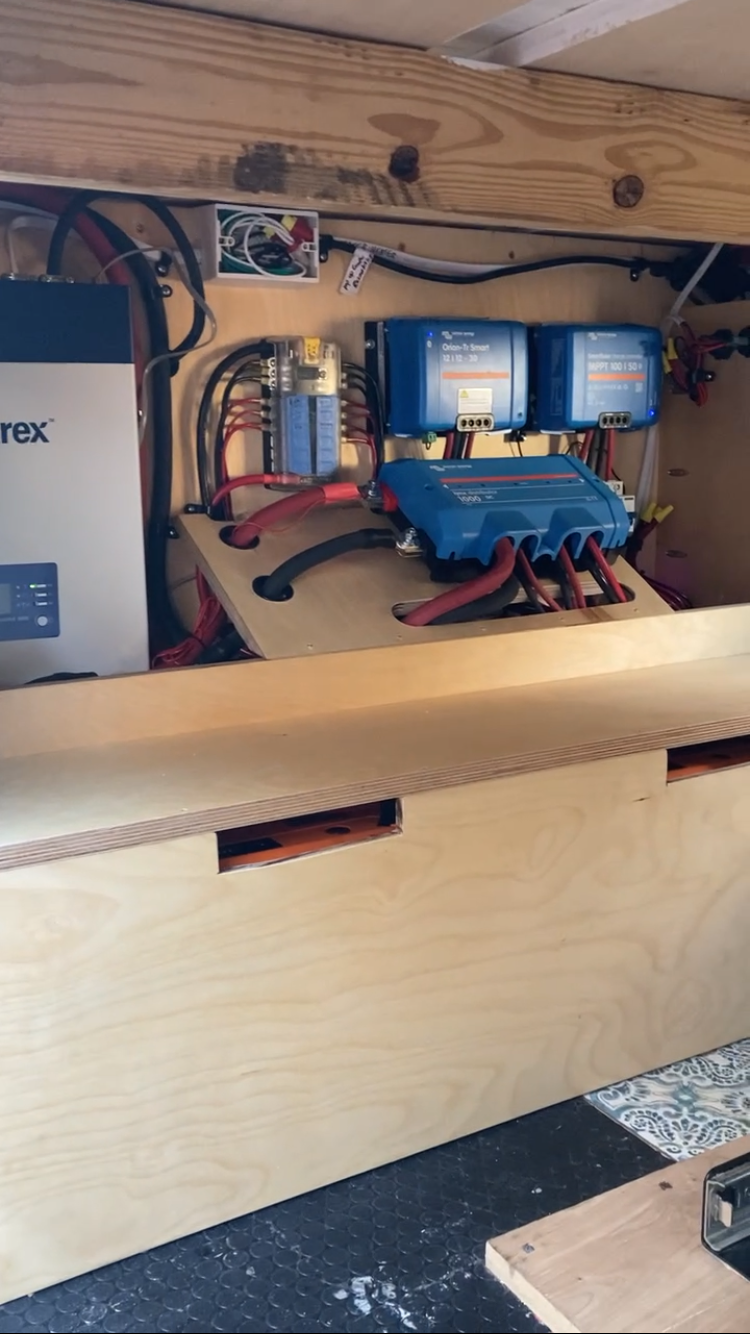
Built the angled shelf over the wheel well for the Victron Lynx Distributer in order to create more room on the shelf over the batteries
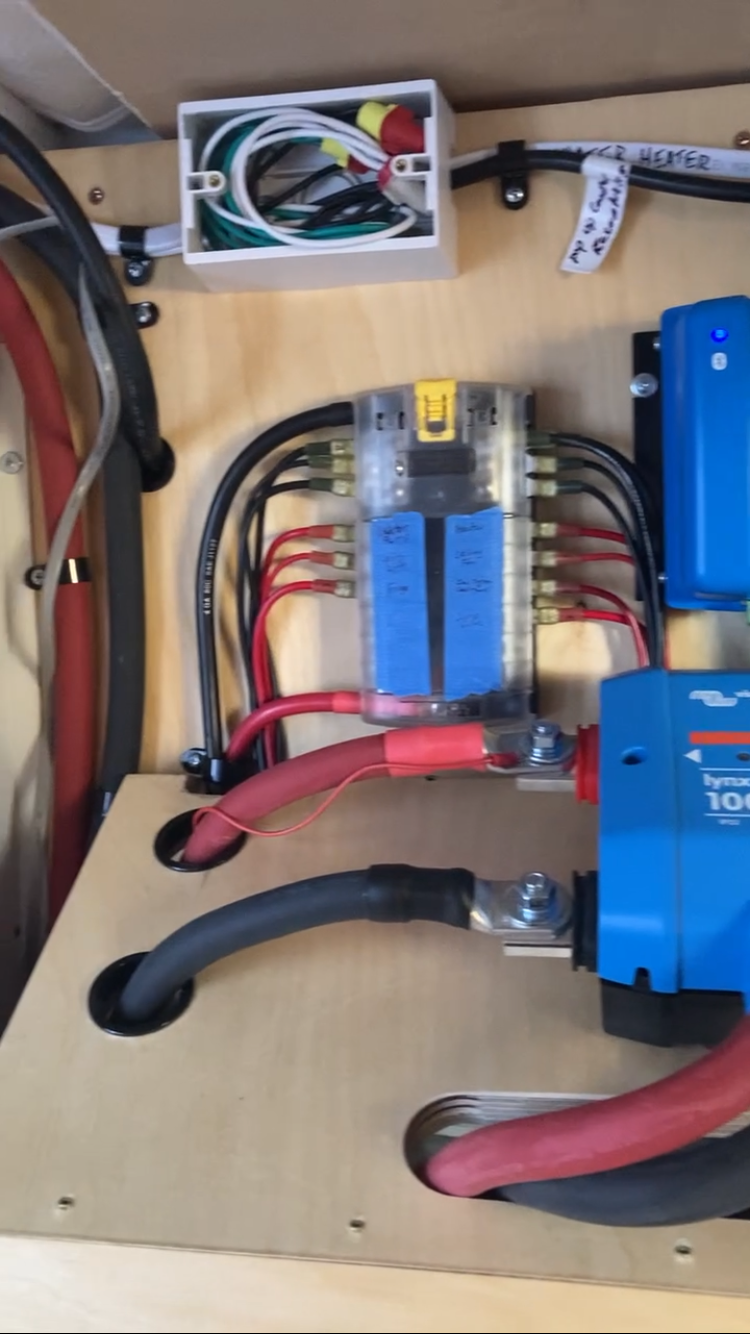
Re-used the Blue seas 12 spot, 12v branch circuit panel that was installed with the old electrical system in the van.
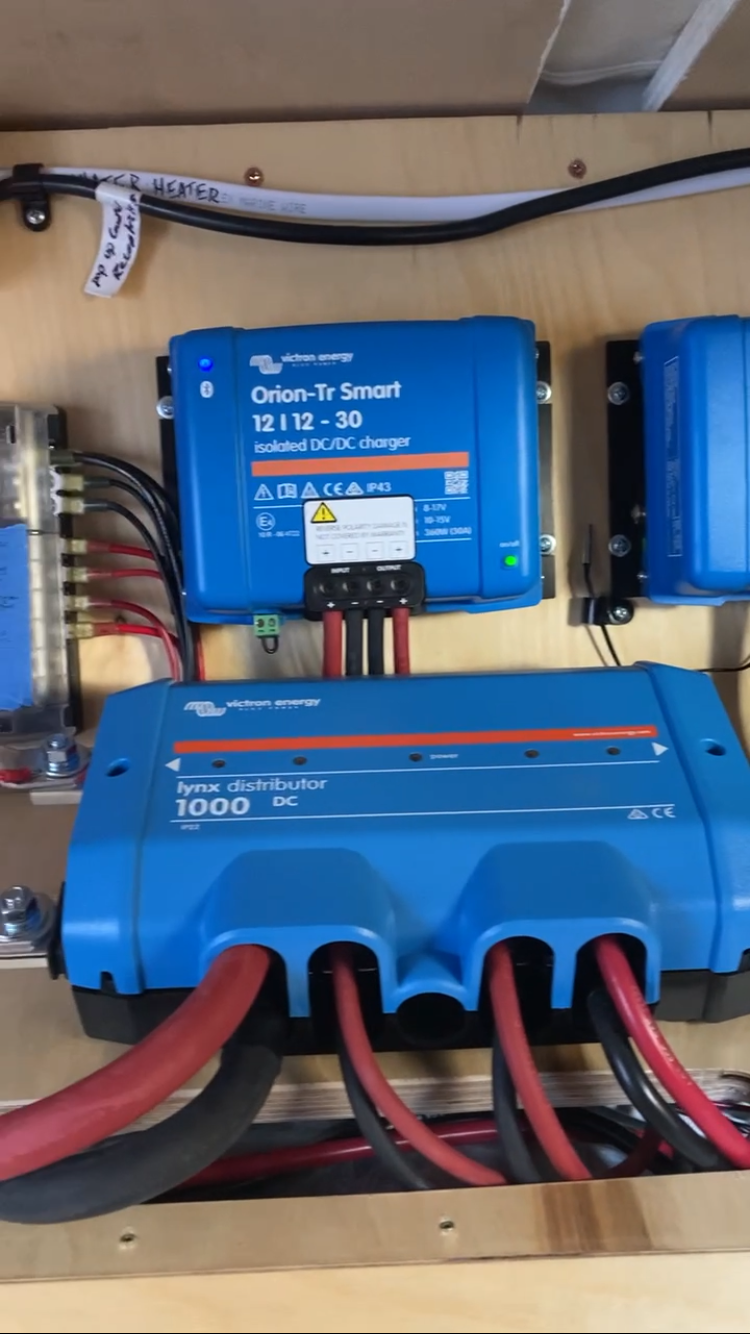
Installed the Victron Orion 12/12-30 DC-DC charger to use the vehicles alternator and charge the house batteries while the van is running.
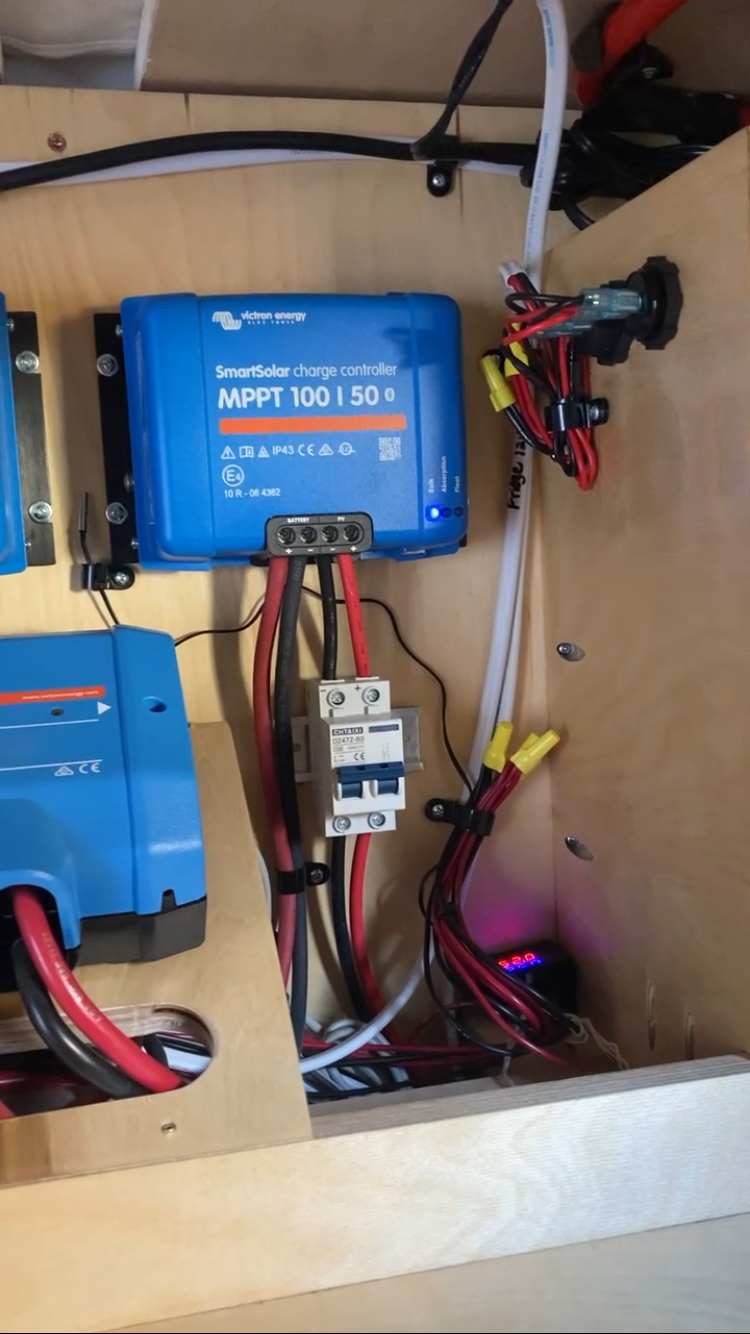
Victron MPPT 100/50 Solar charger and disconnect. Also to the left of the solar disconnect there is a temperature sensor that controls two ventilation fans at each end of the electrical layout to keep the sytem cool
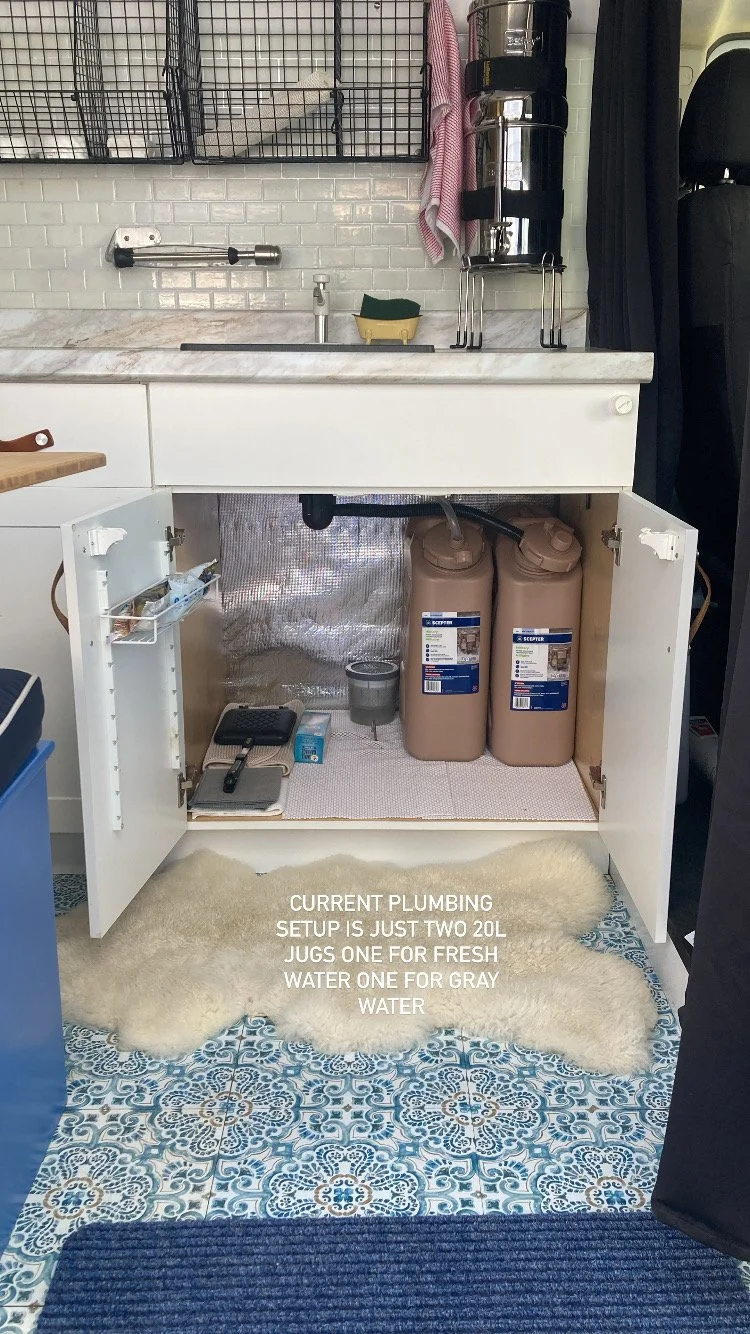
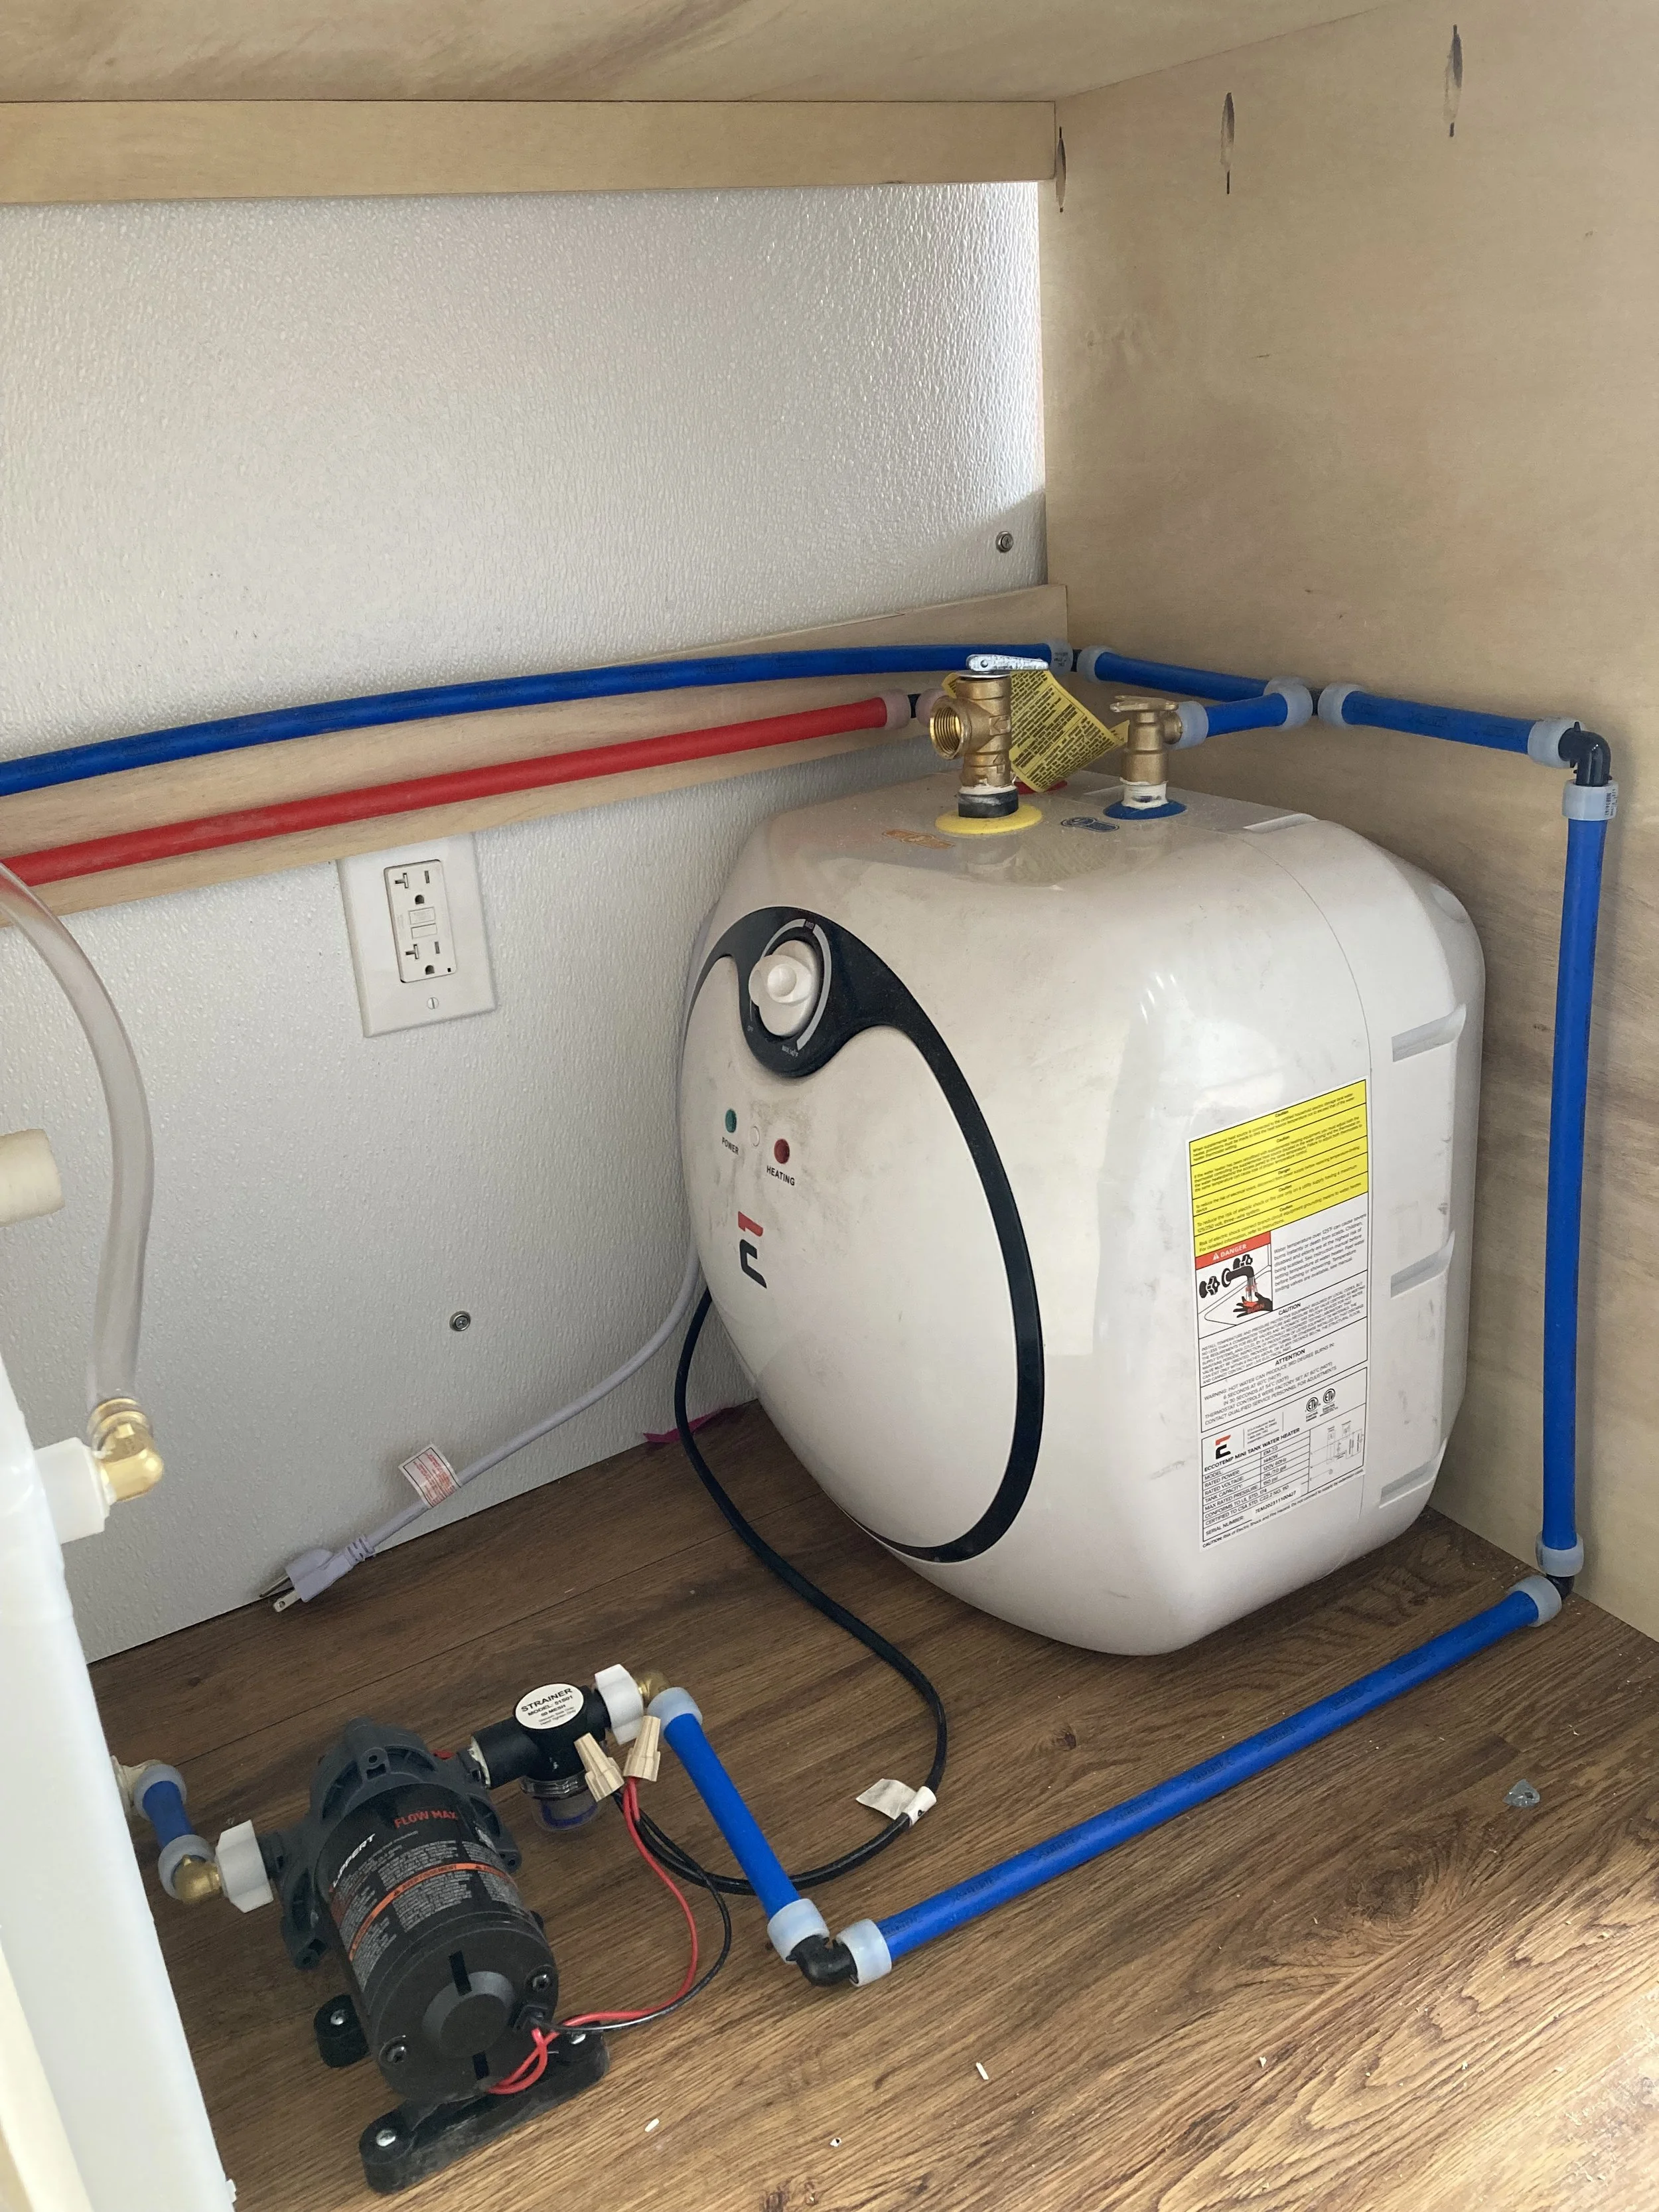
The old plumbing system worked but was not up to par for our clients standards
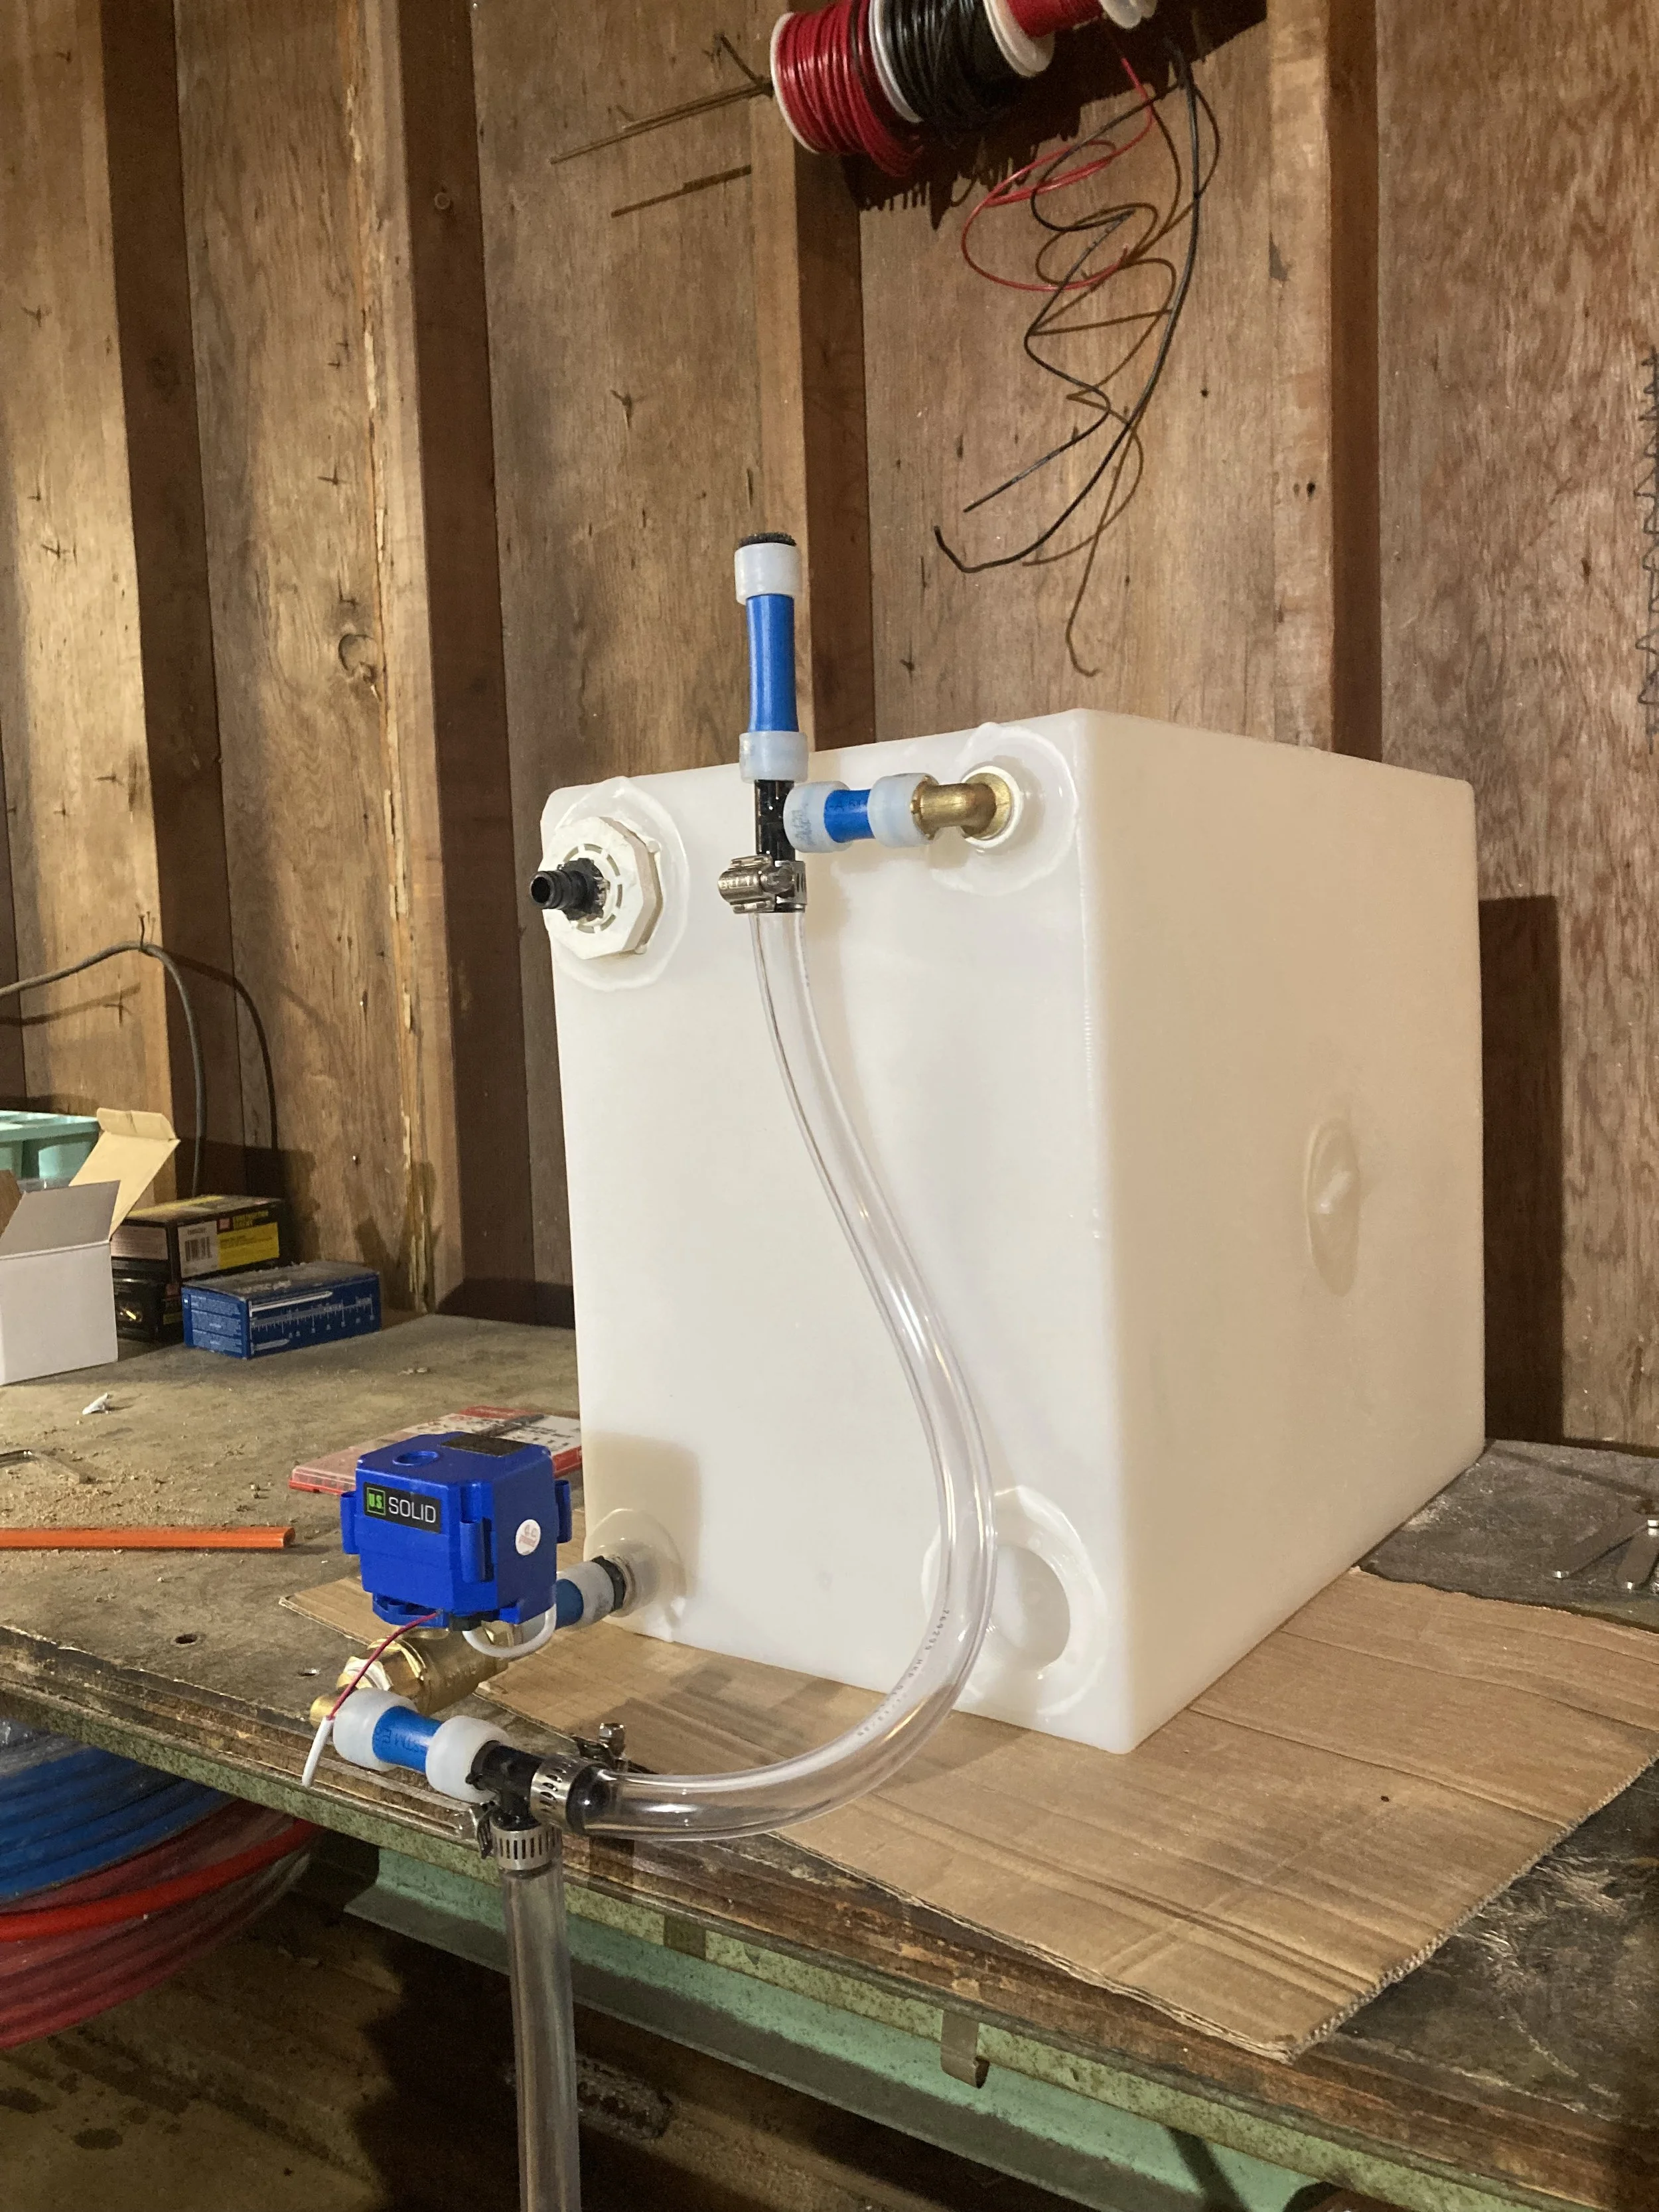
The new gray water tank is equipped with an automatic ball valve so you can empty the tank with the push of a button
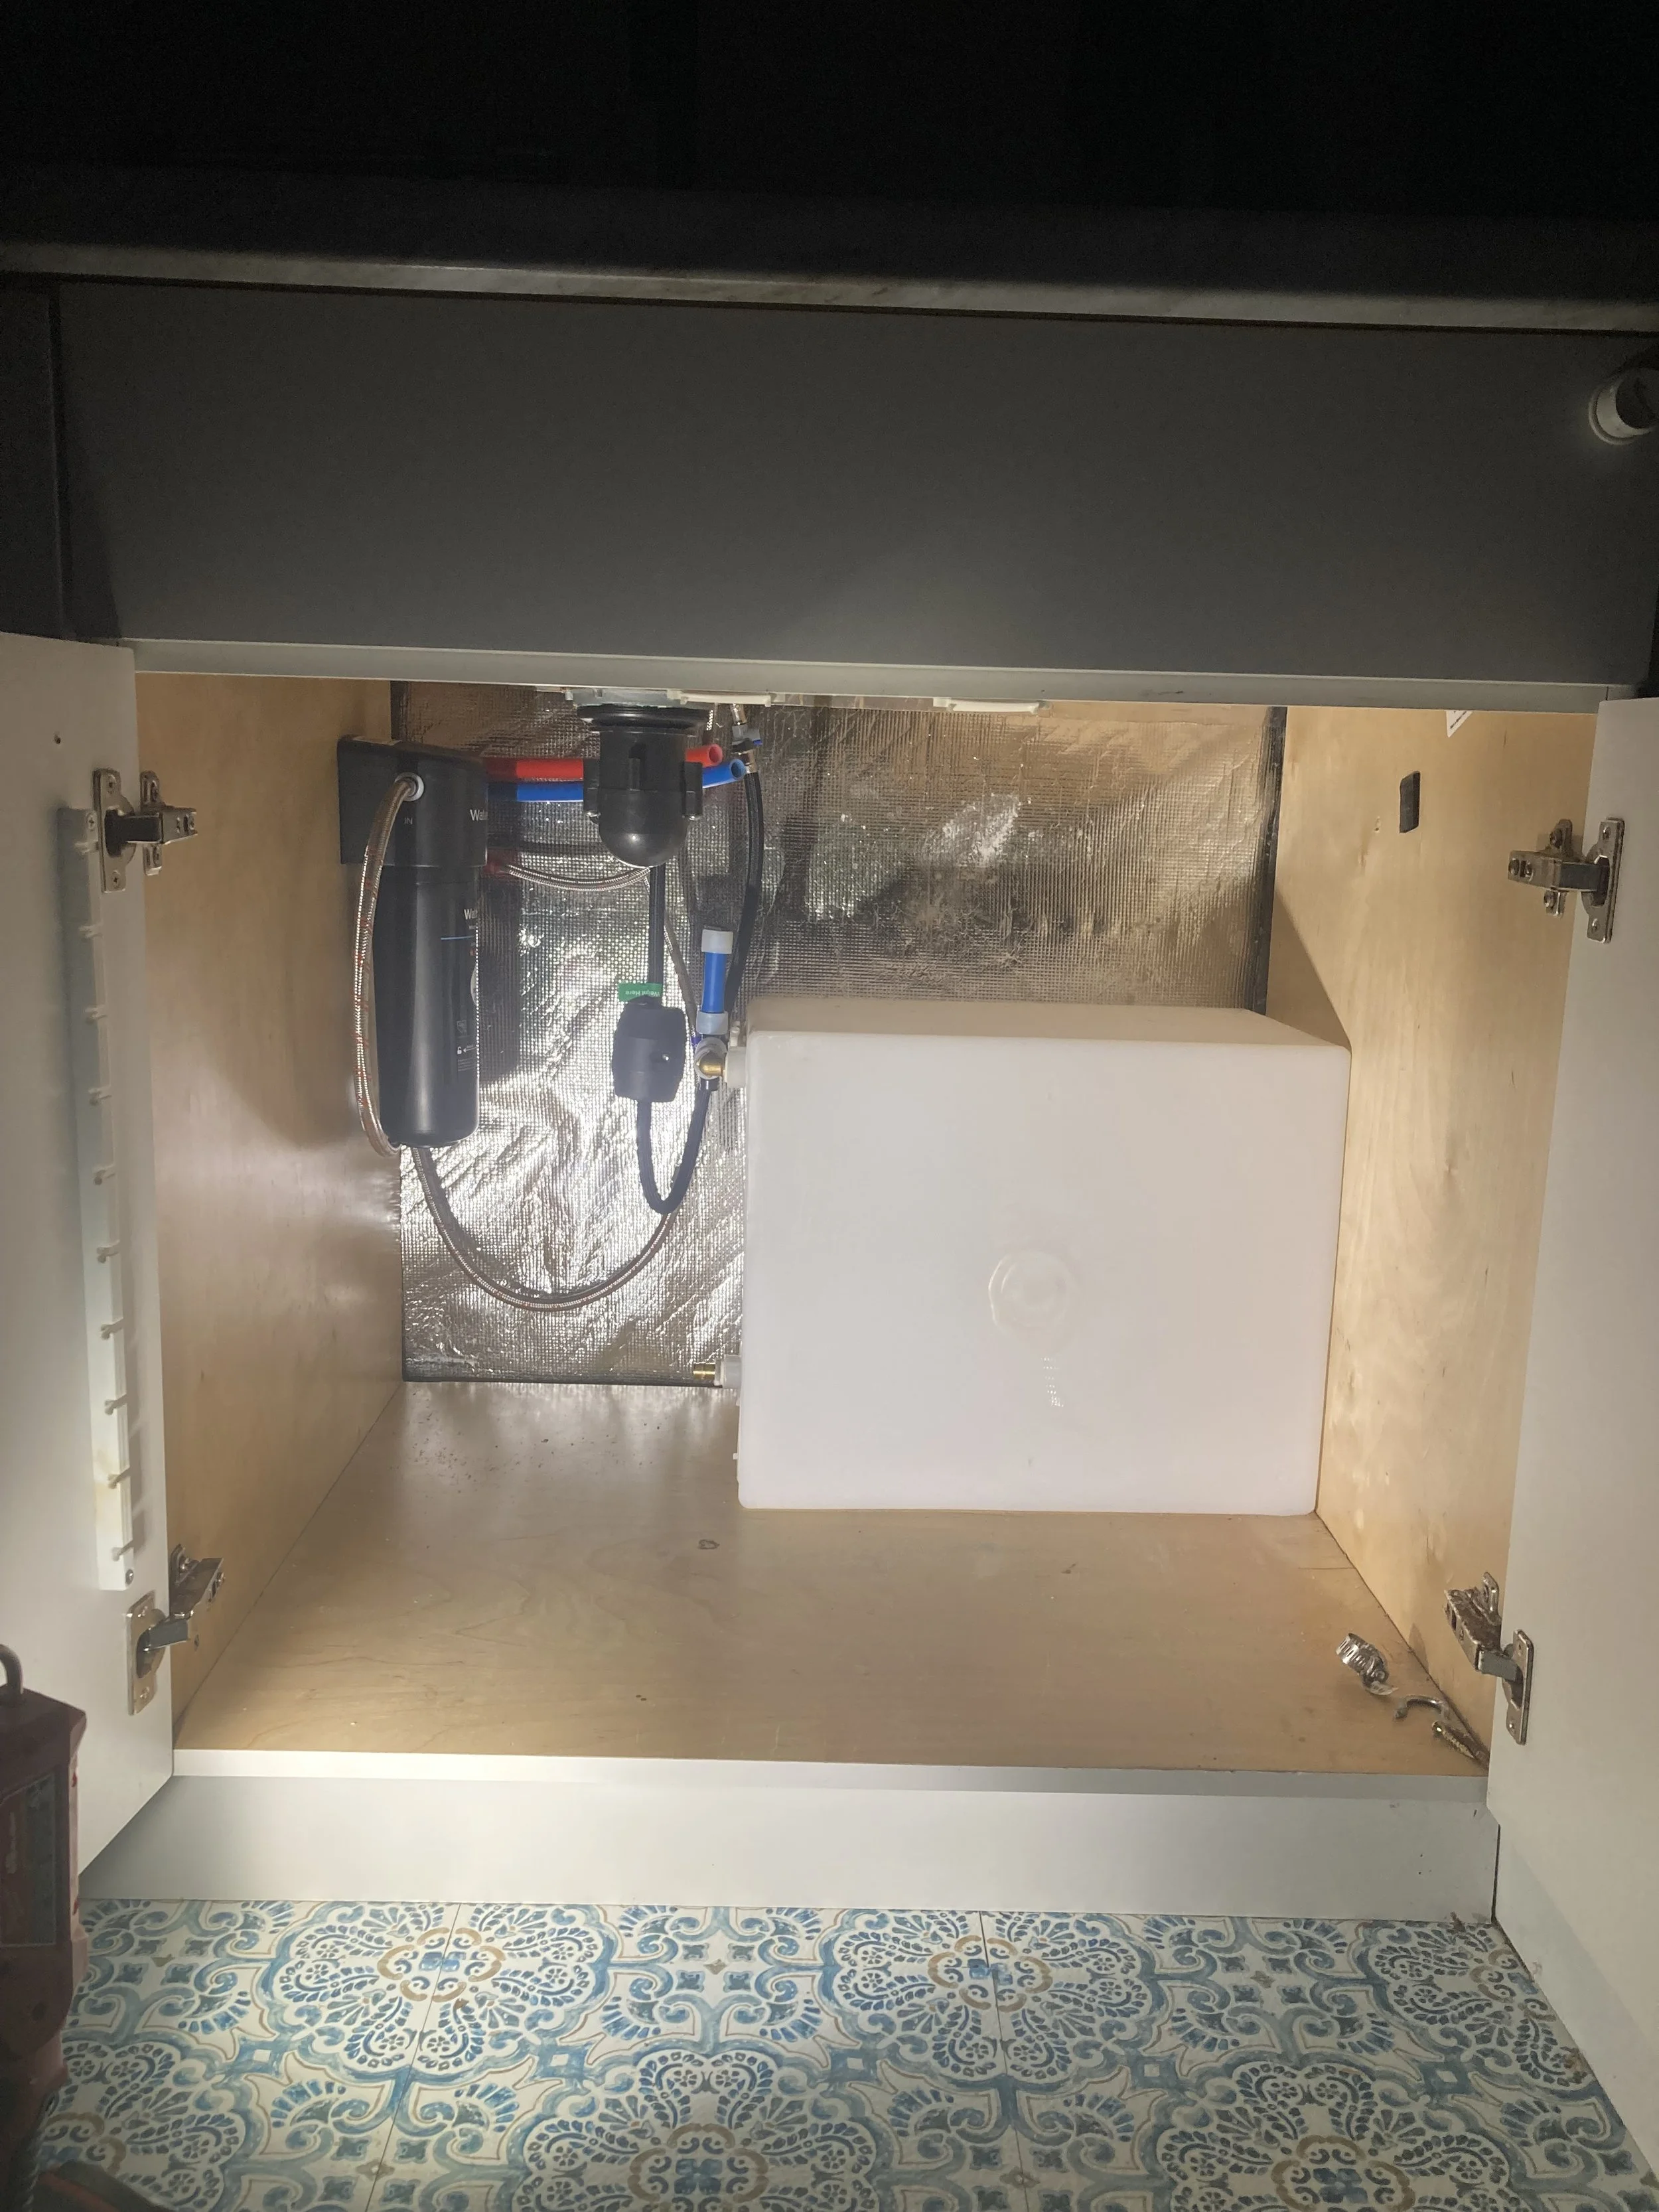
Due to low ground clearance we decided to install the gray tank where the old water jugs were located.
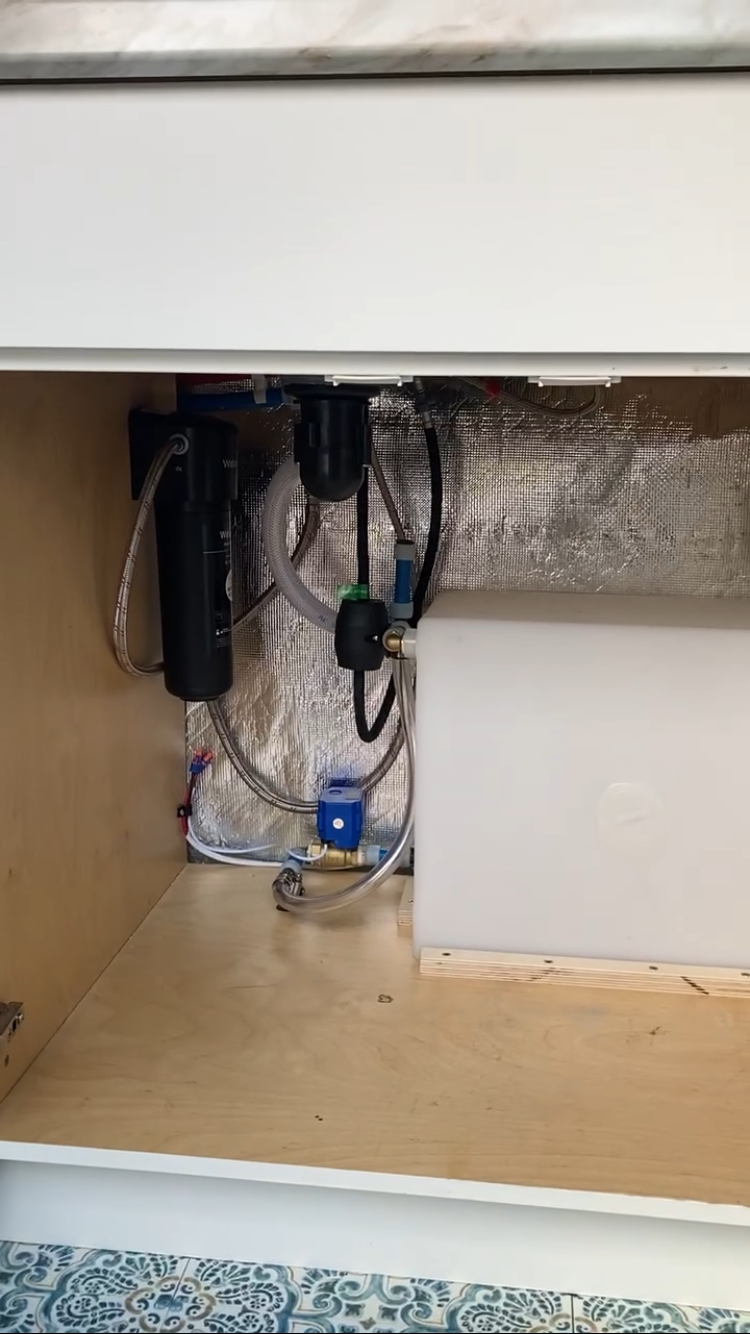
Single stage water filter installed under the sink as well
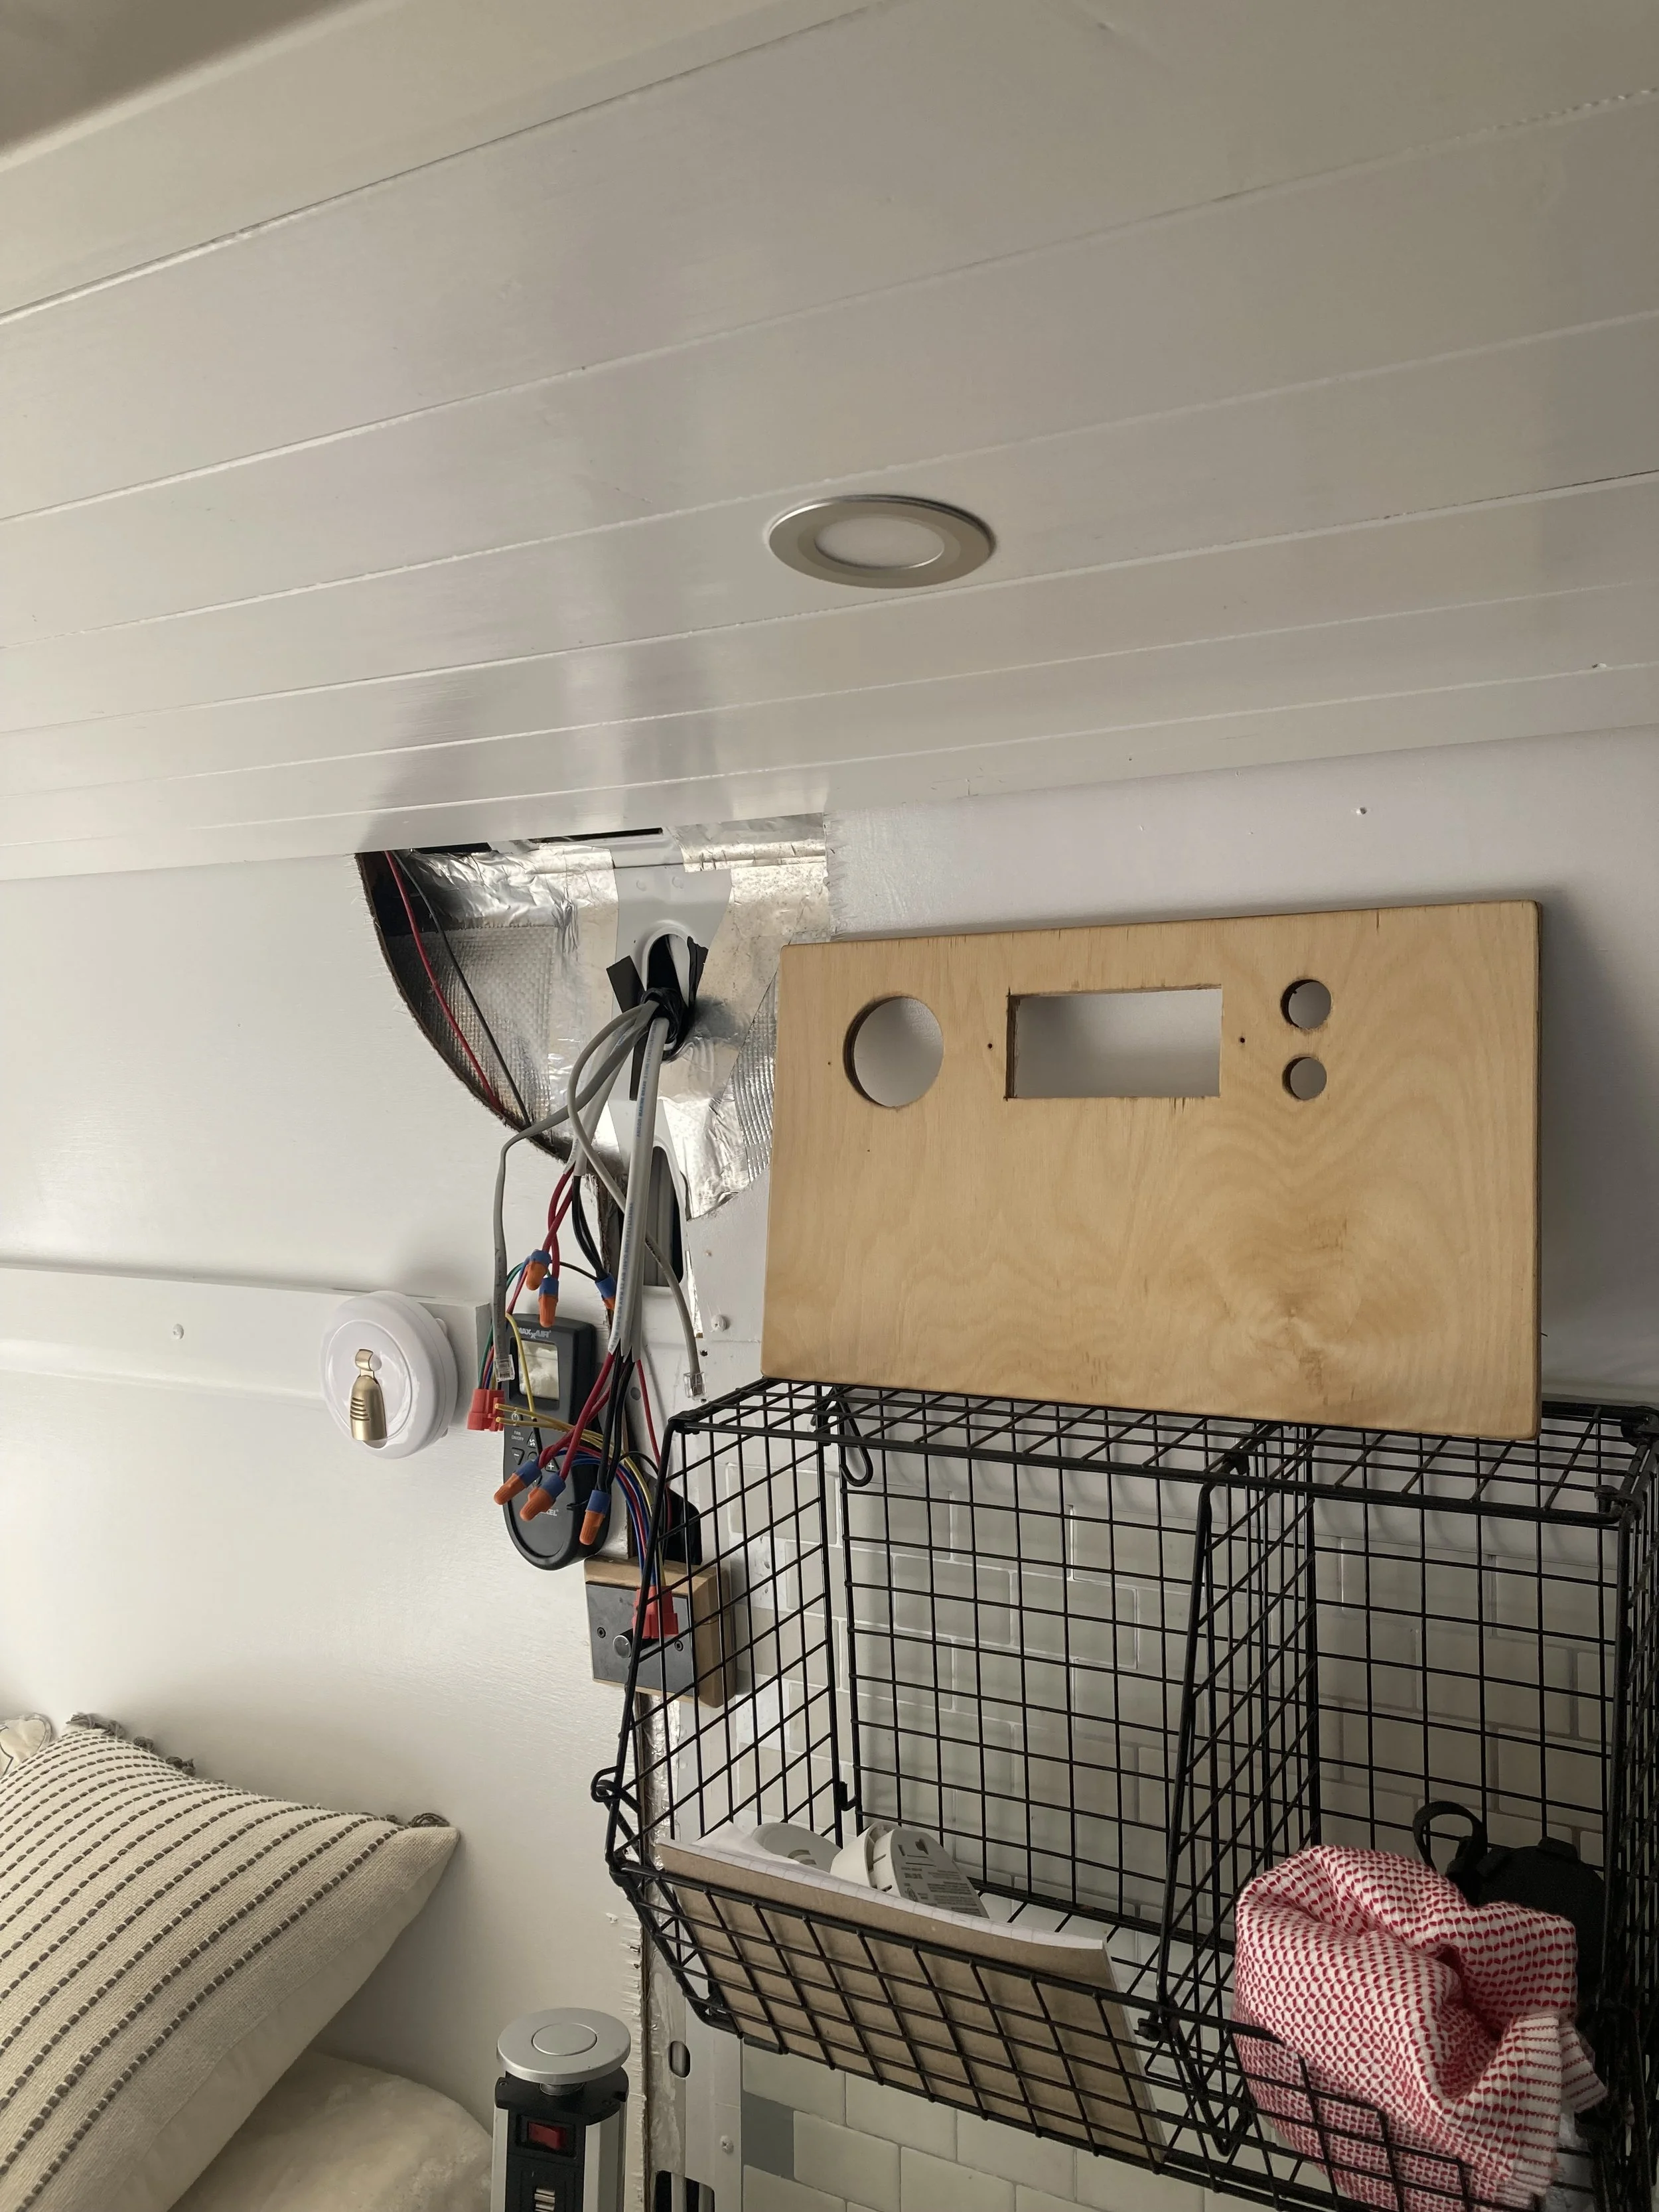
There was a huge hole in the wall from whoever built the van originally so we made the control panel fit over the hole to make it look more finished. This Control panel houses the battery monitor, inverter controller, water pump switch and the dump valve switch
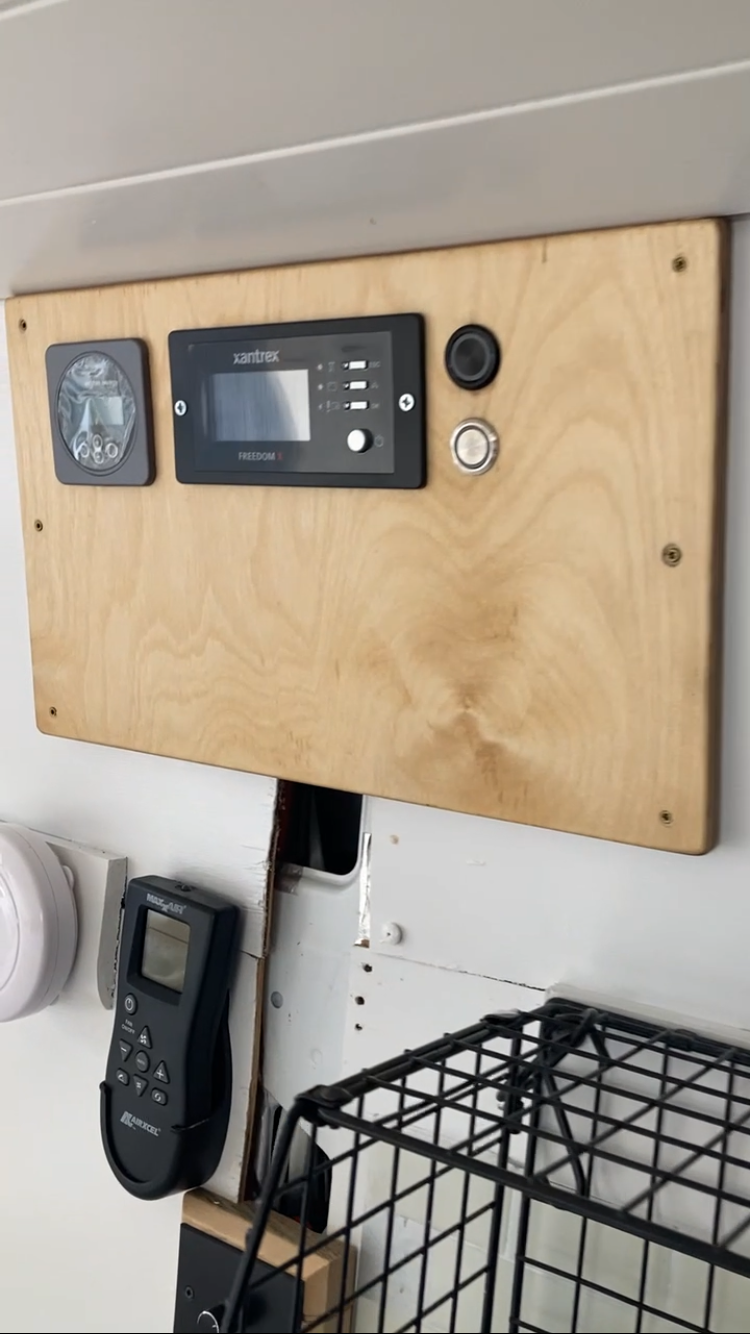
Control Panel installed
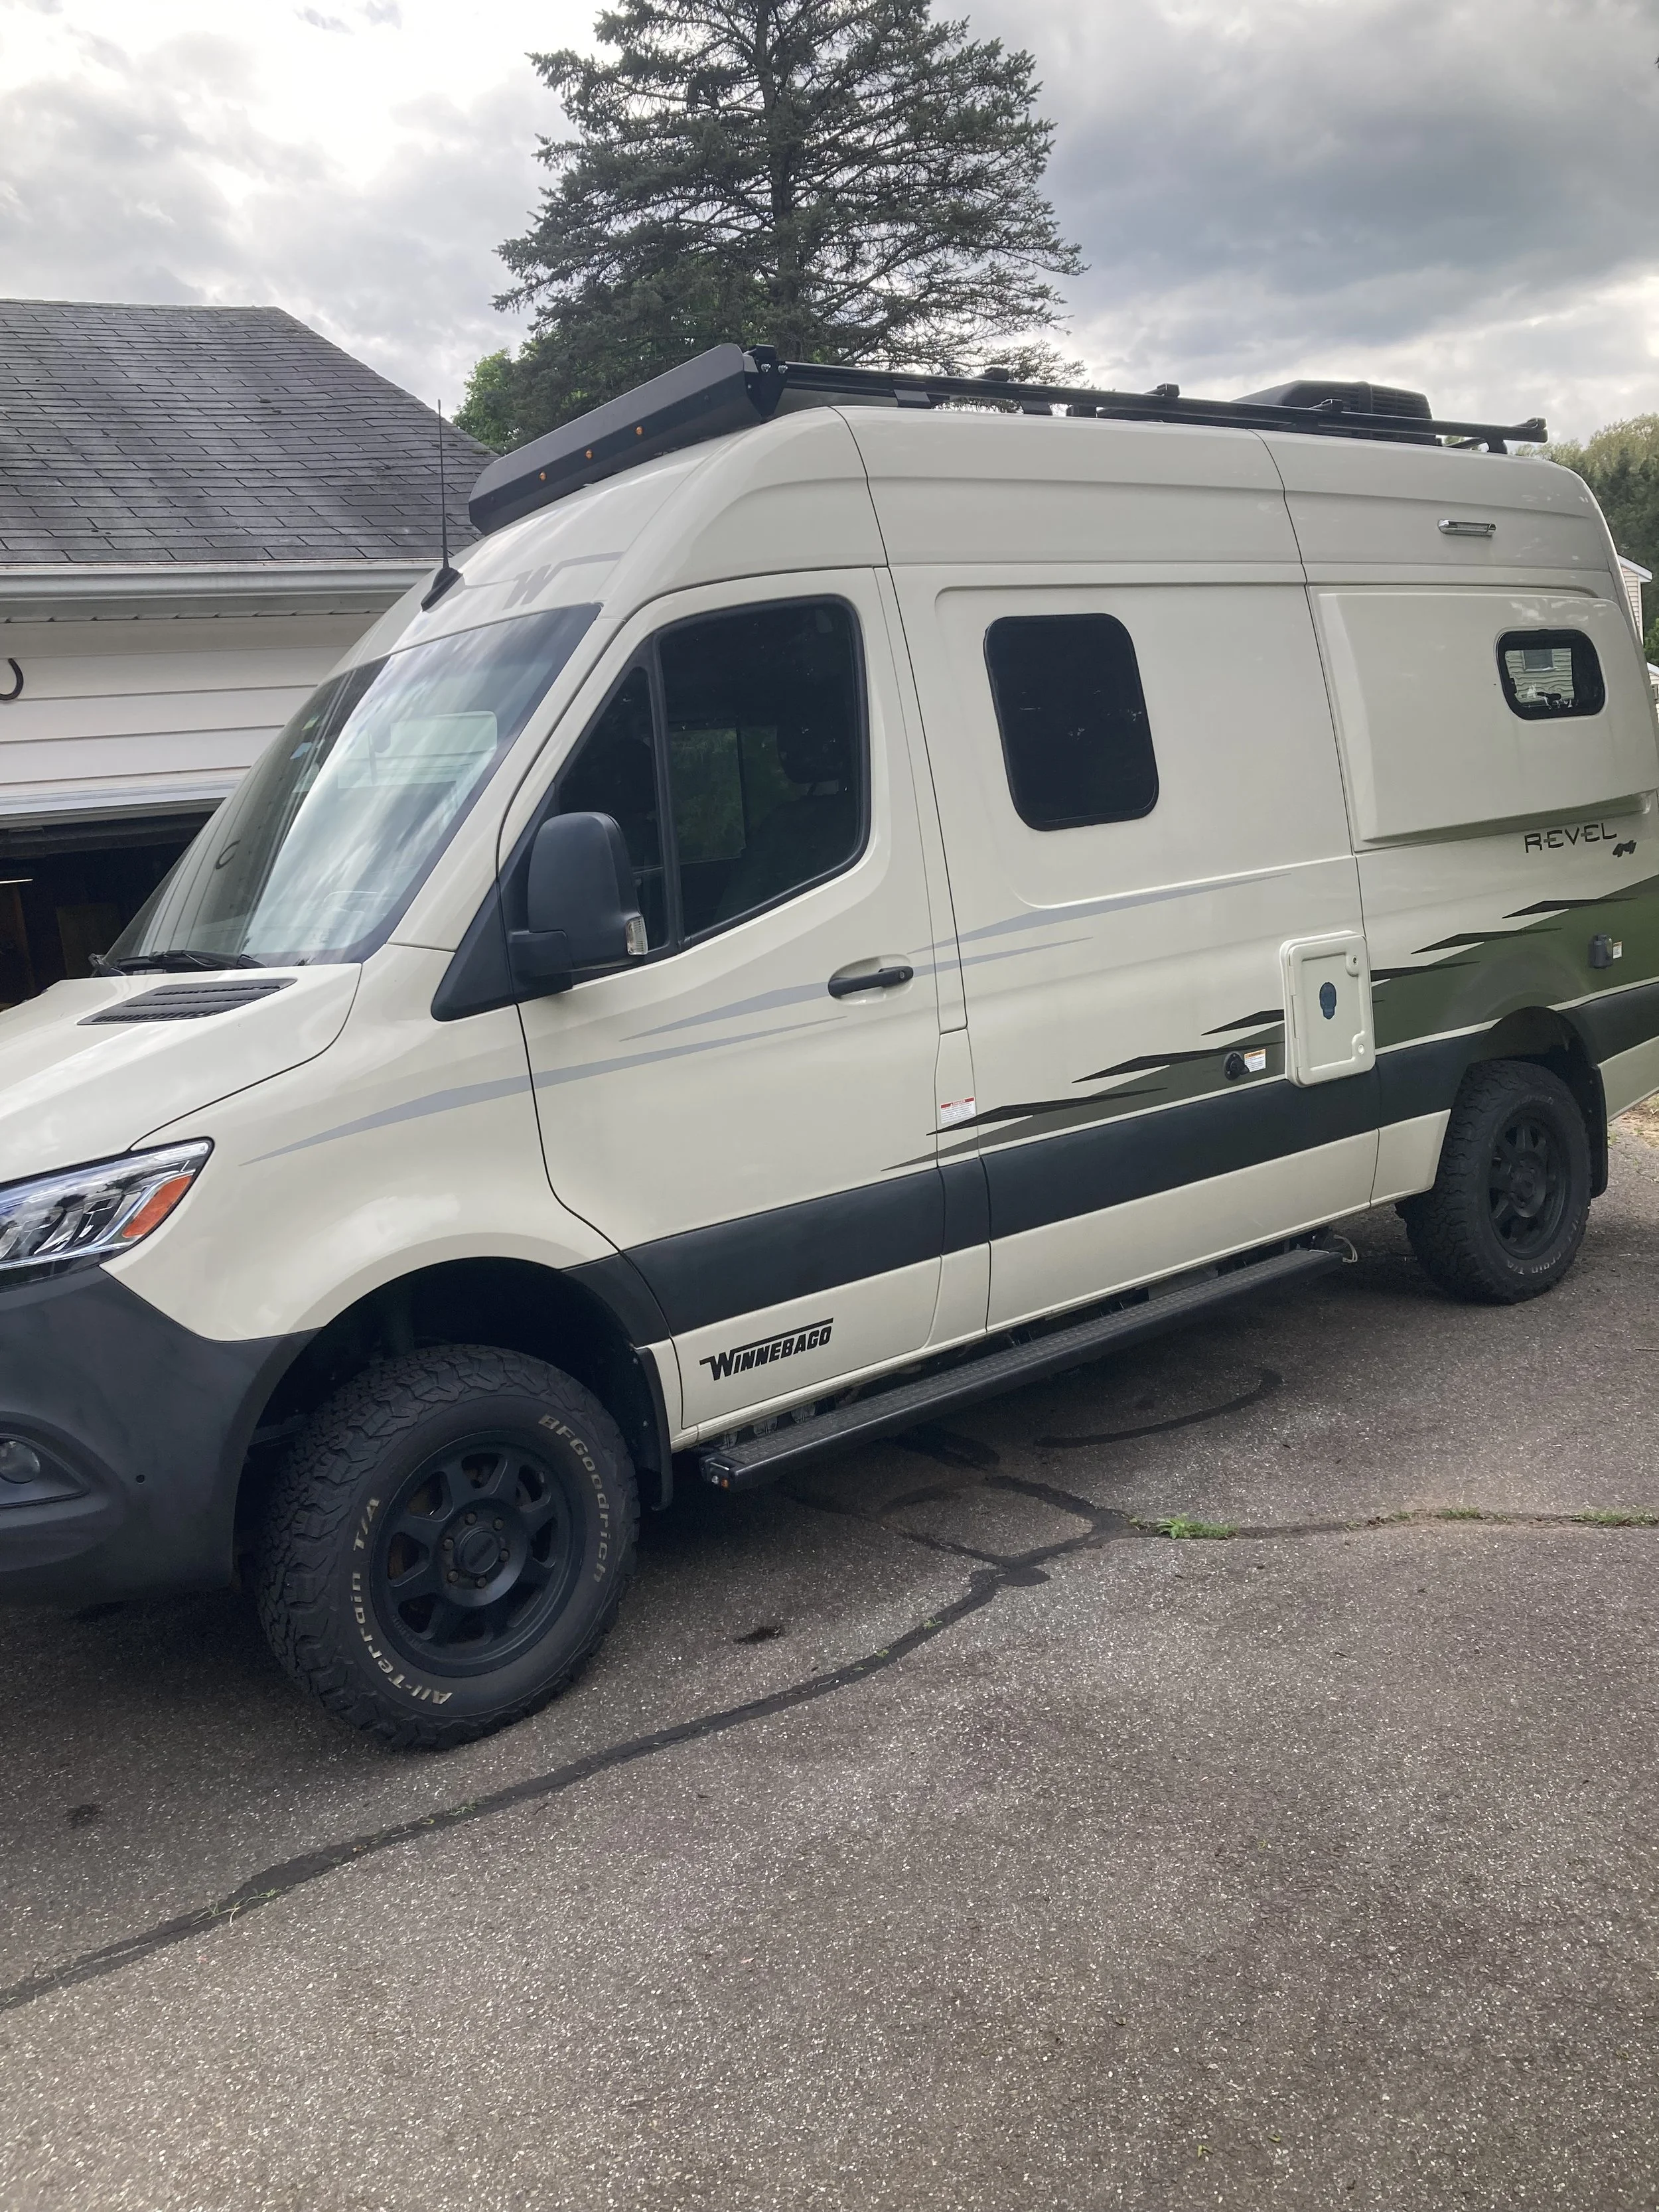
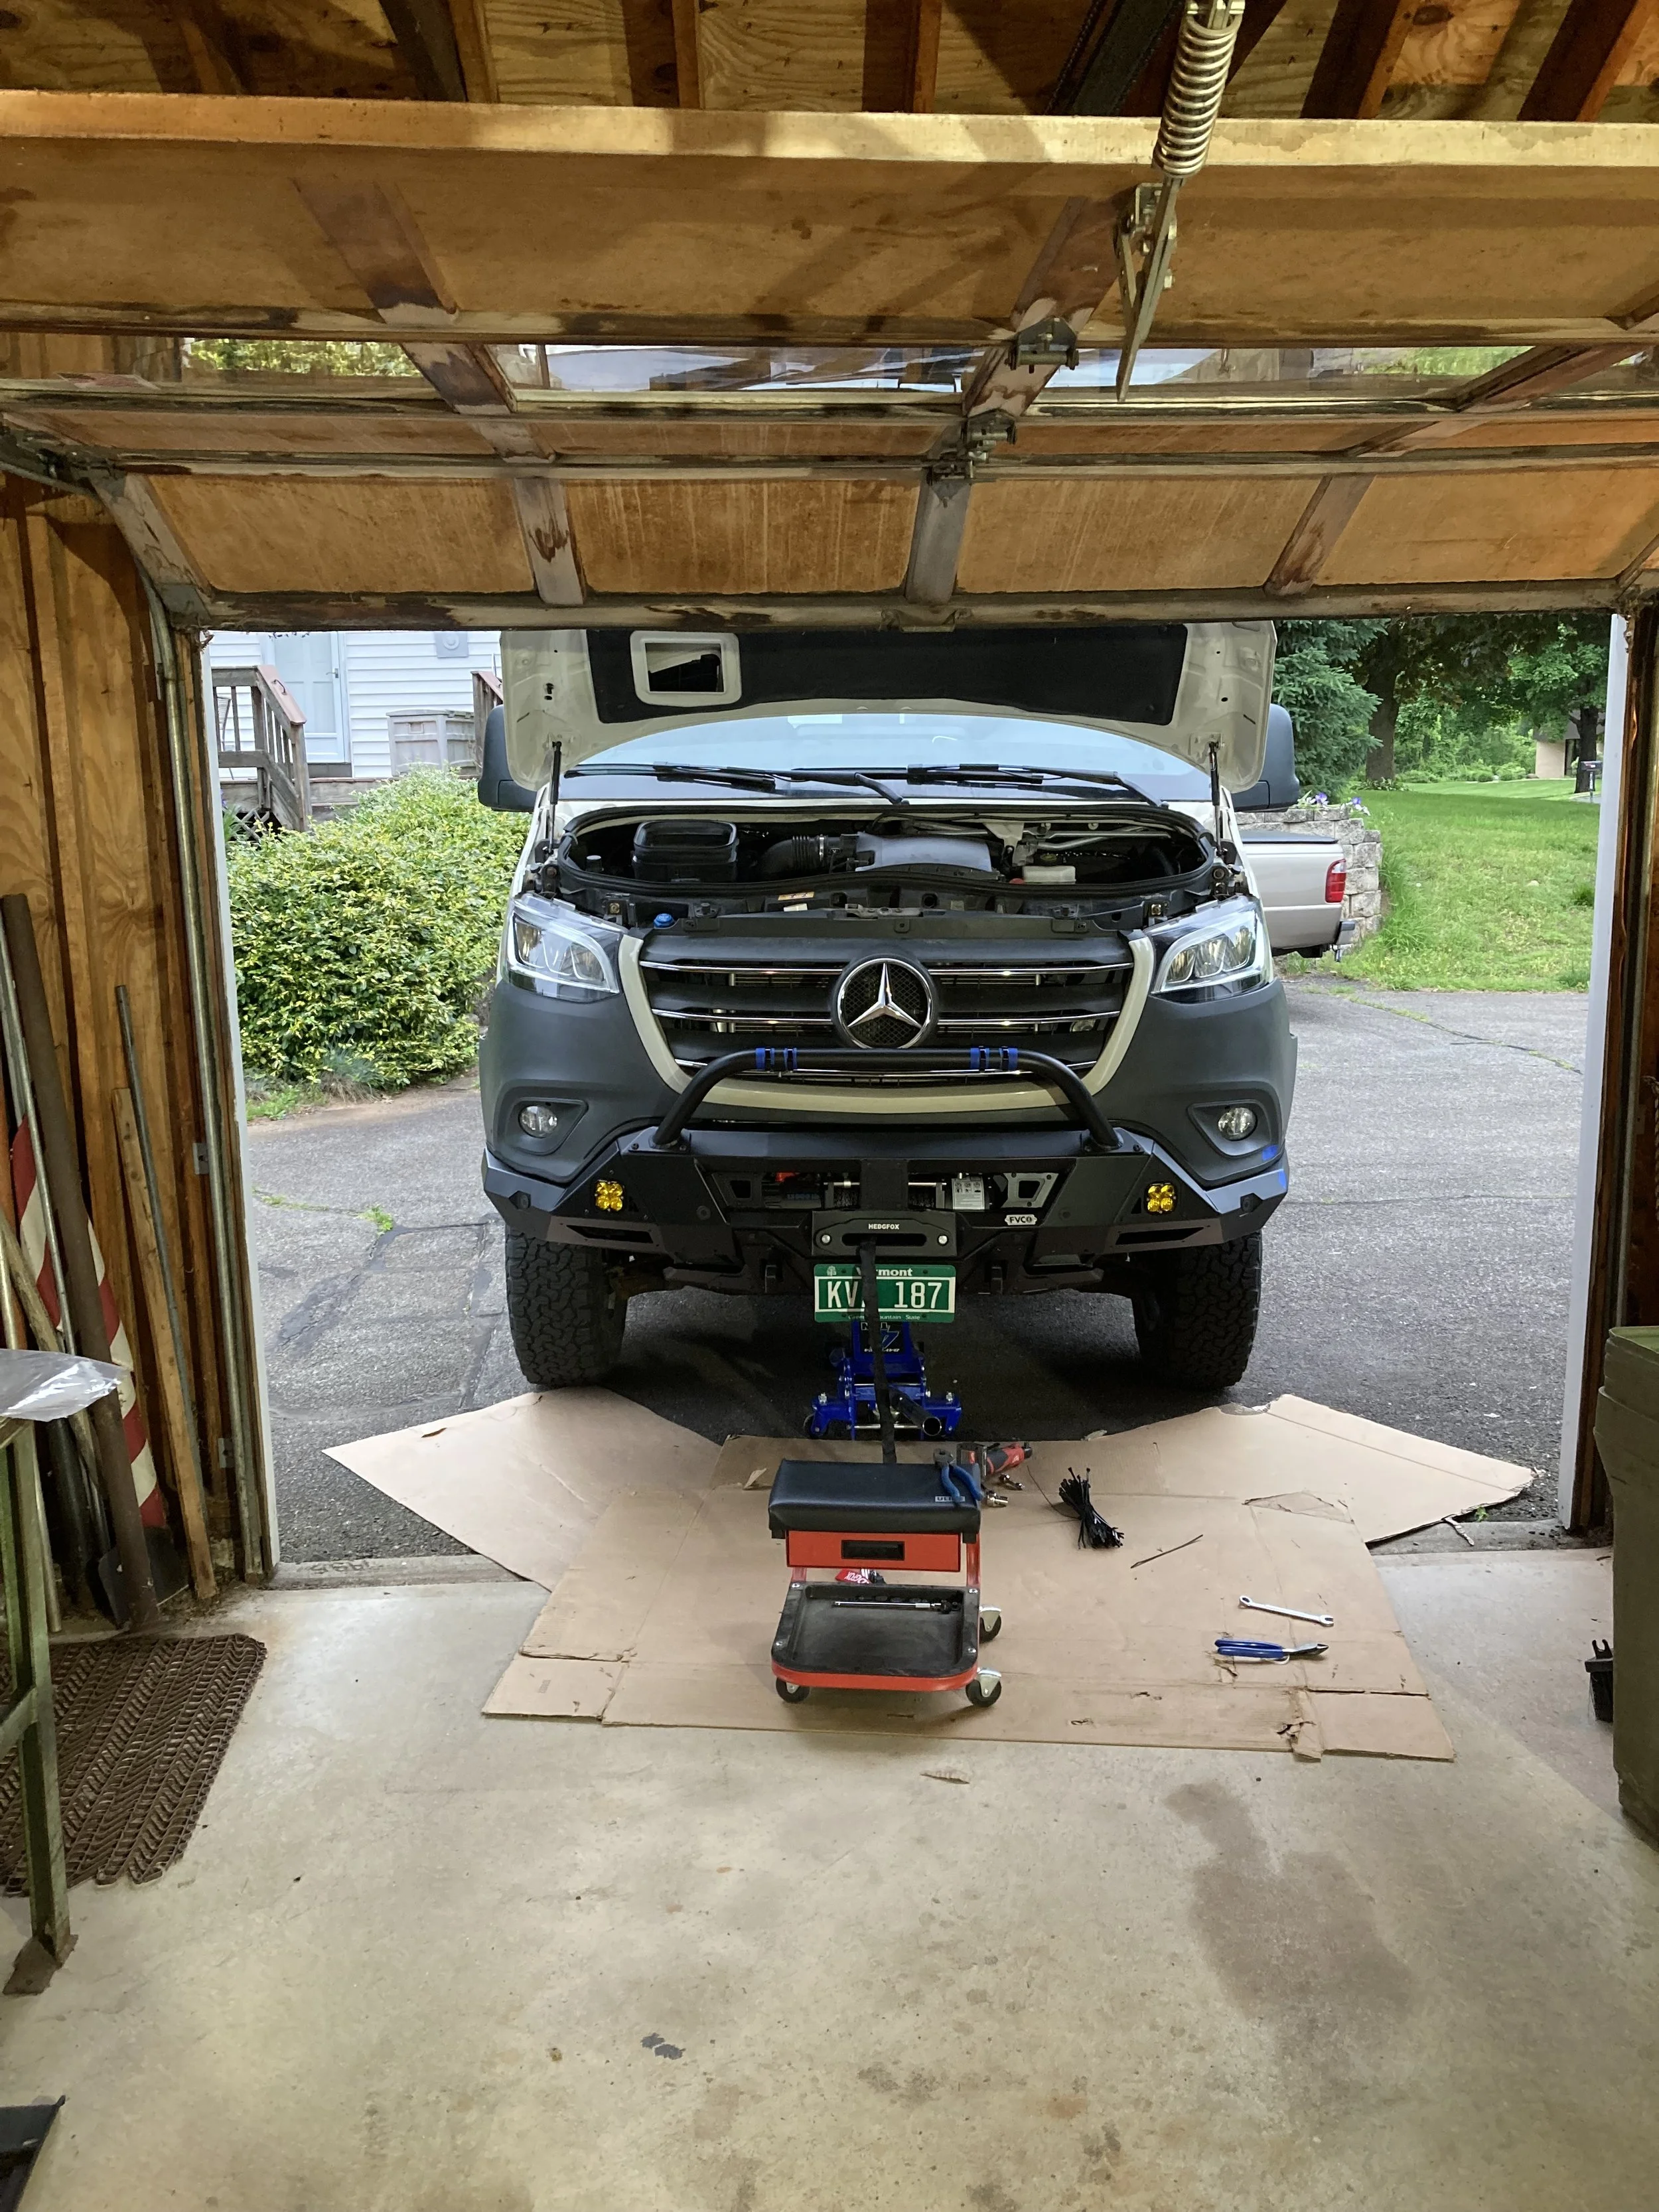
2019 Mercedes Sprinter 4x4 Winnebago Revel
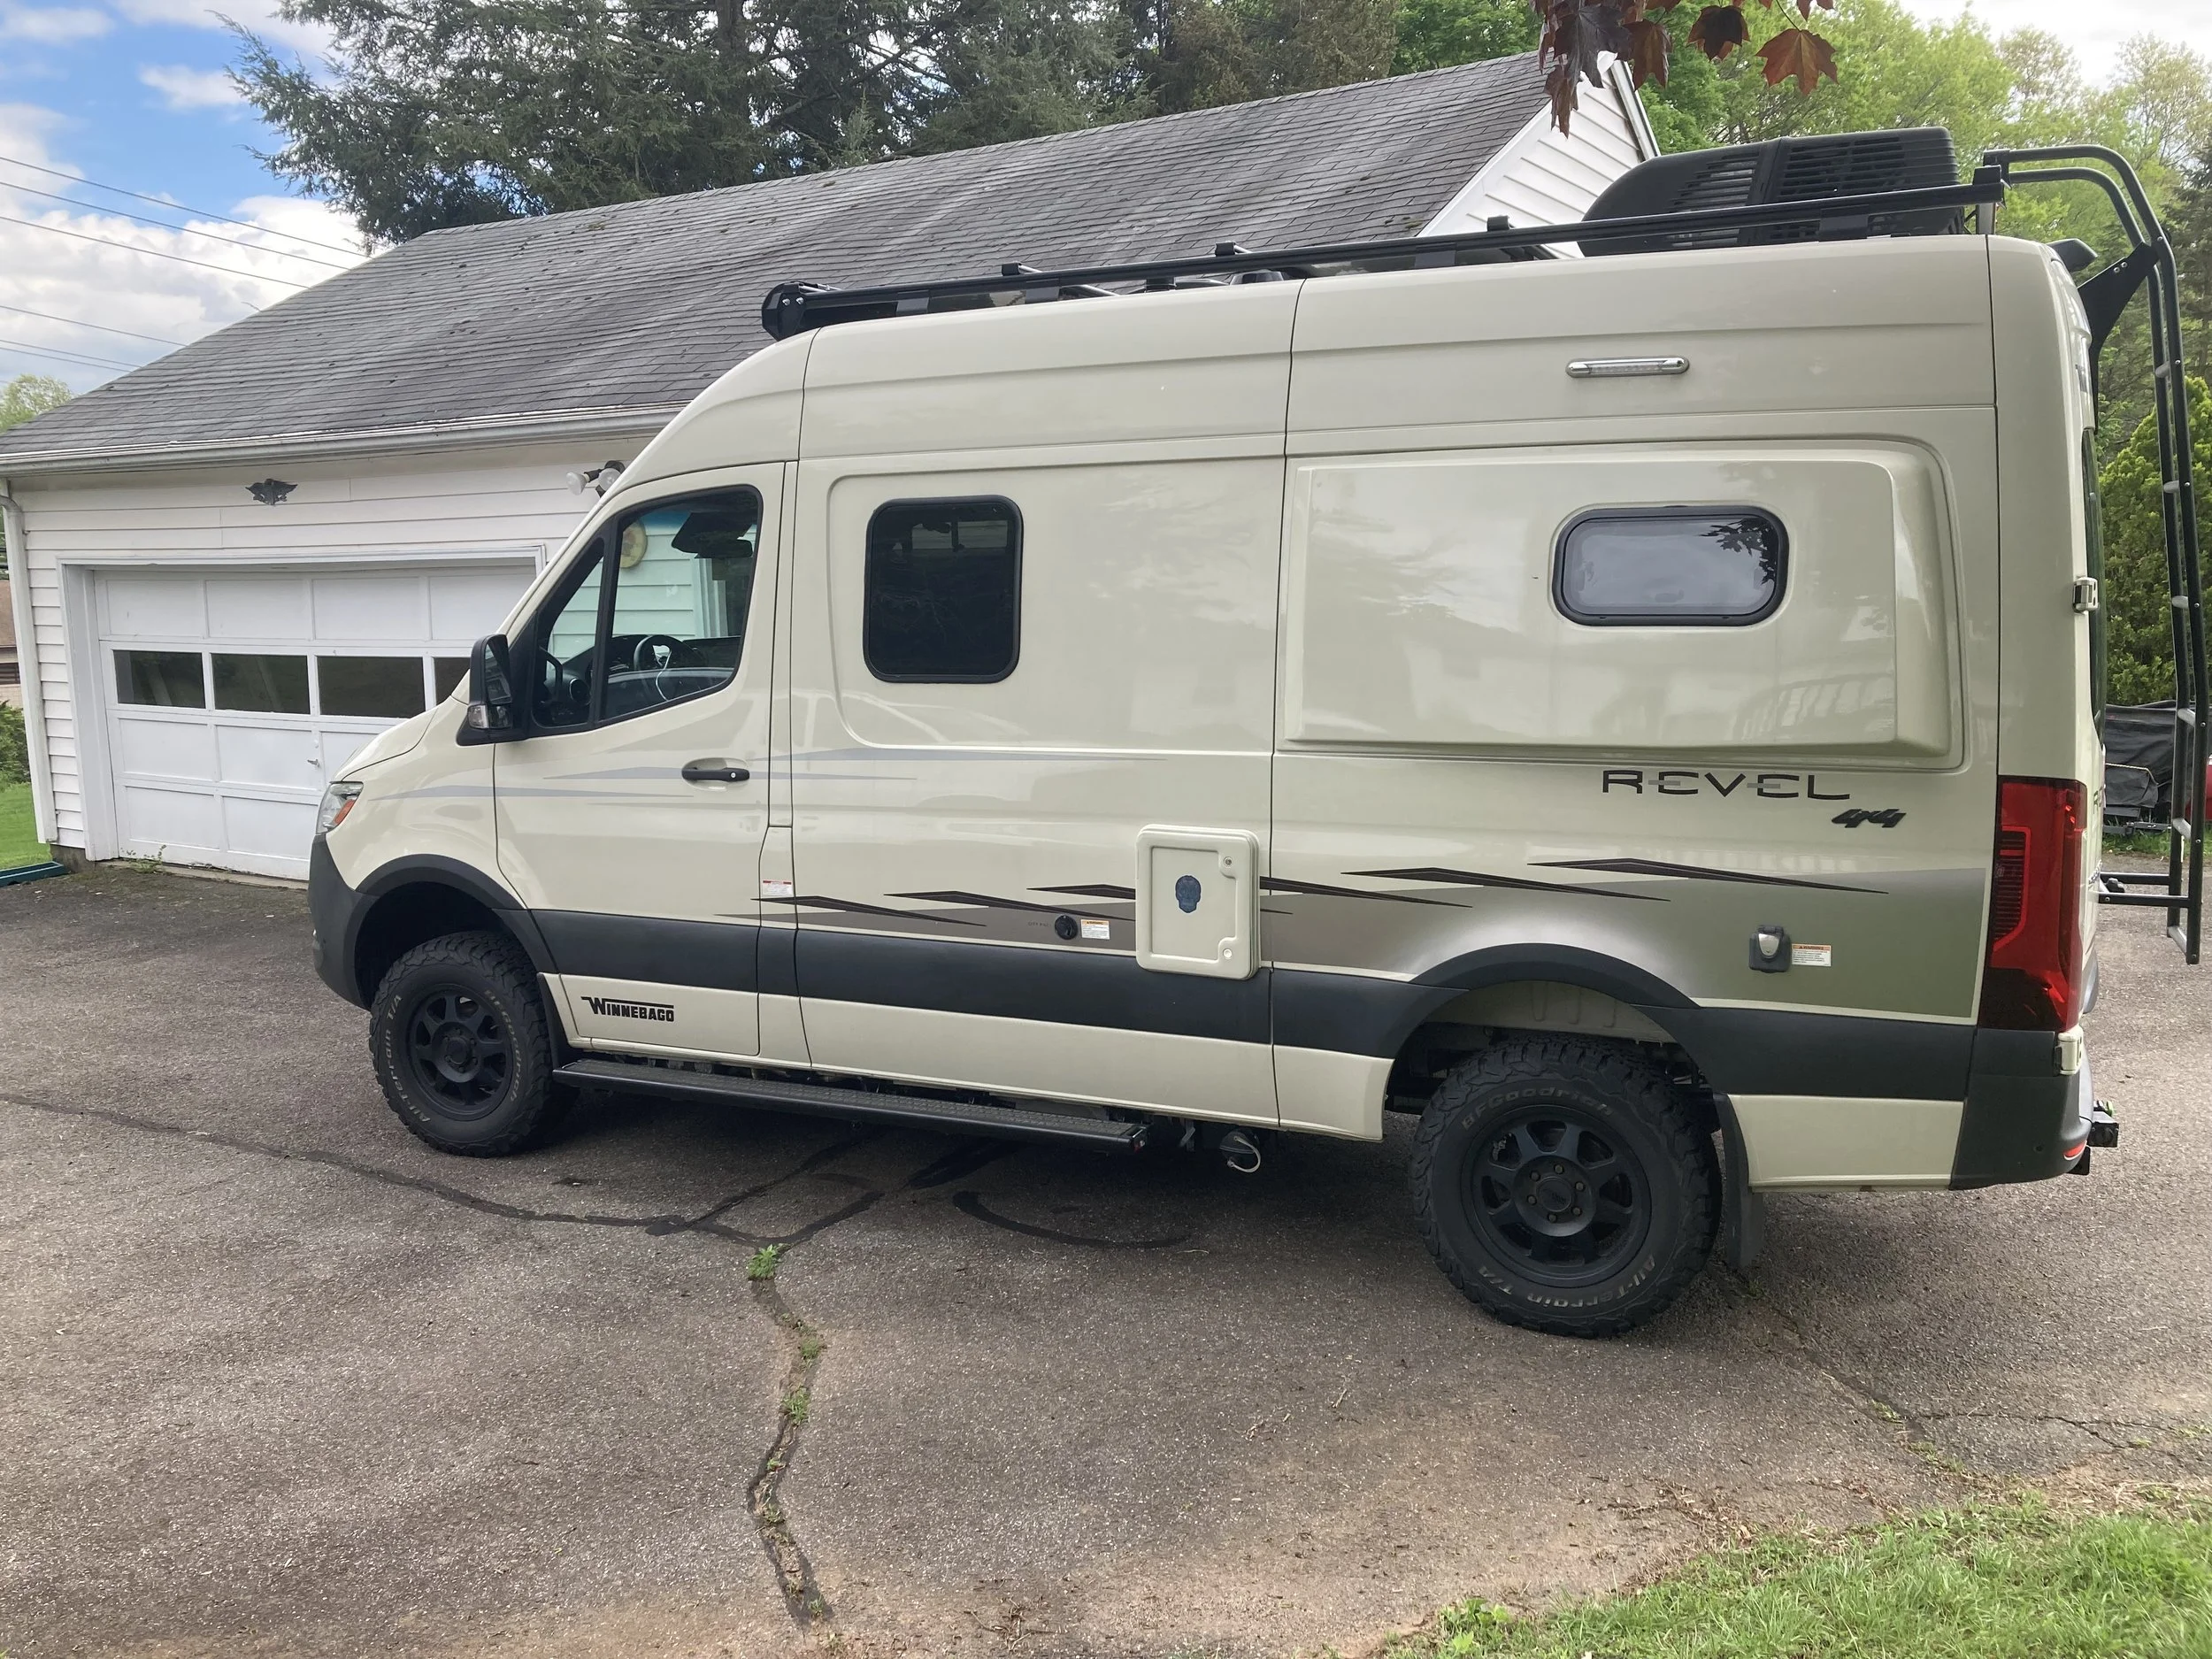
Added Terrawagon Fender Armor Kit
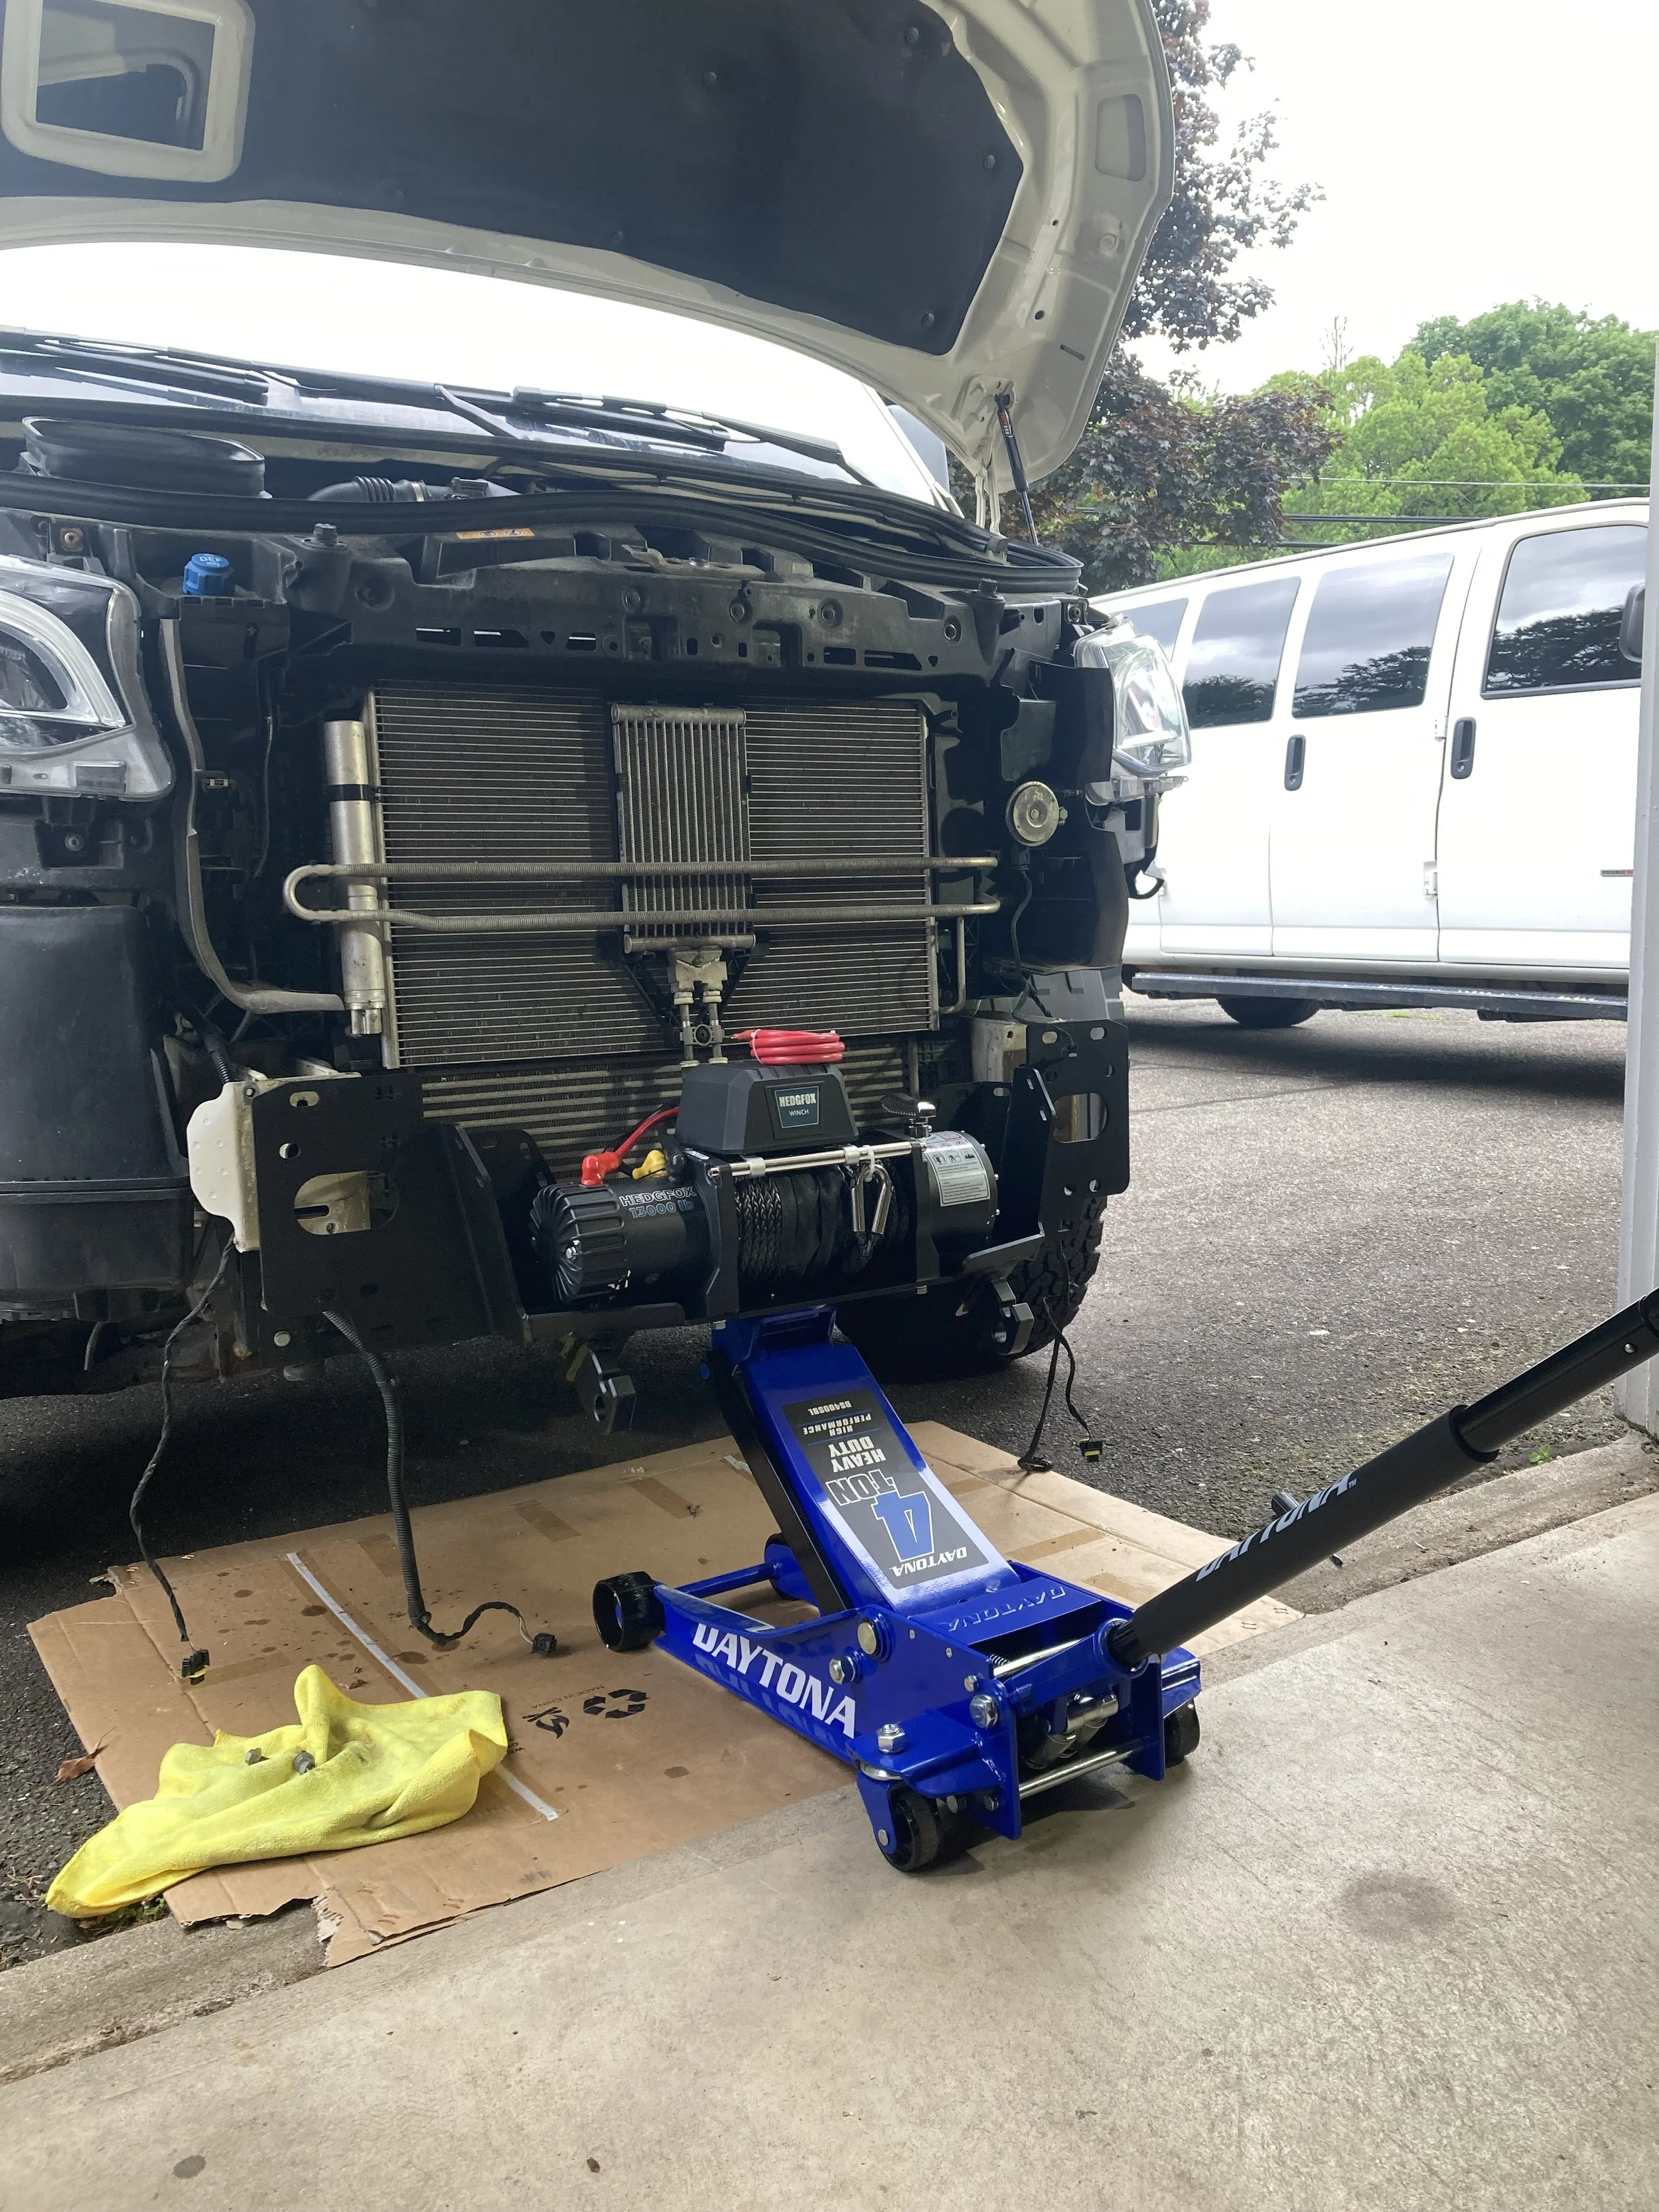
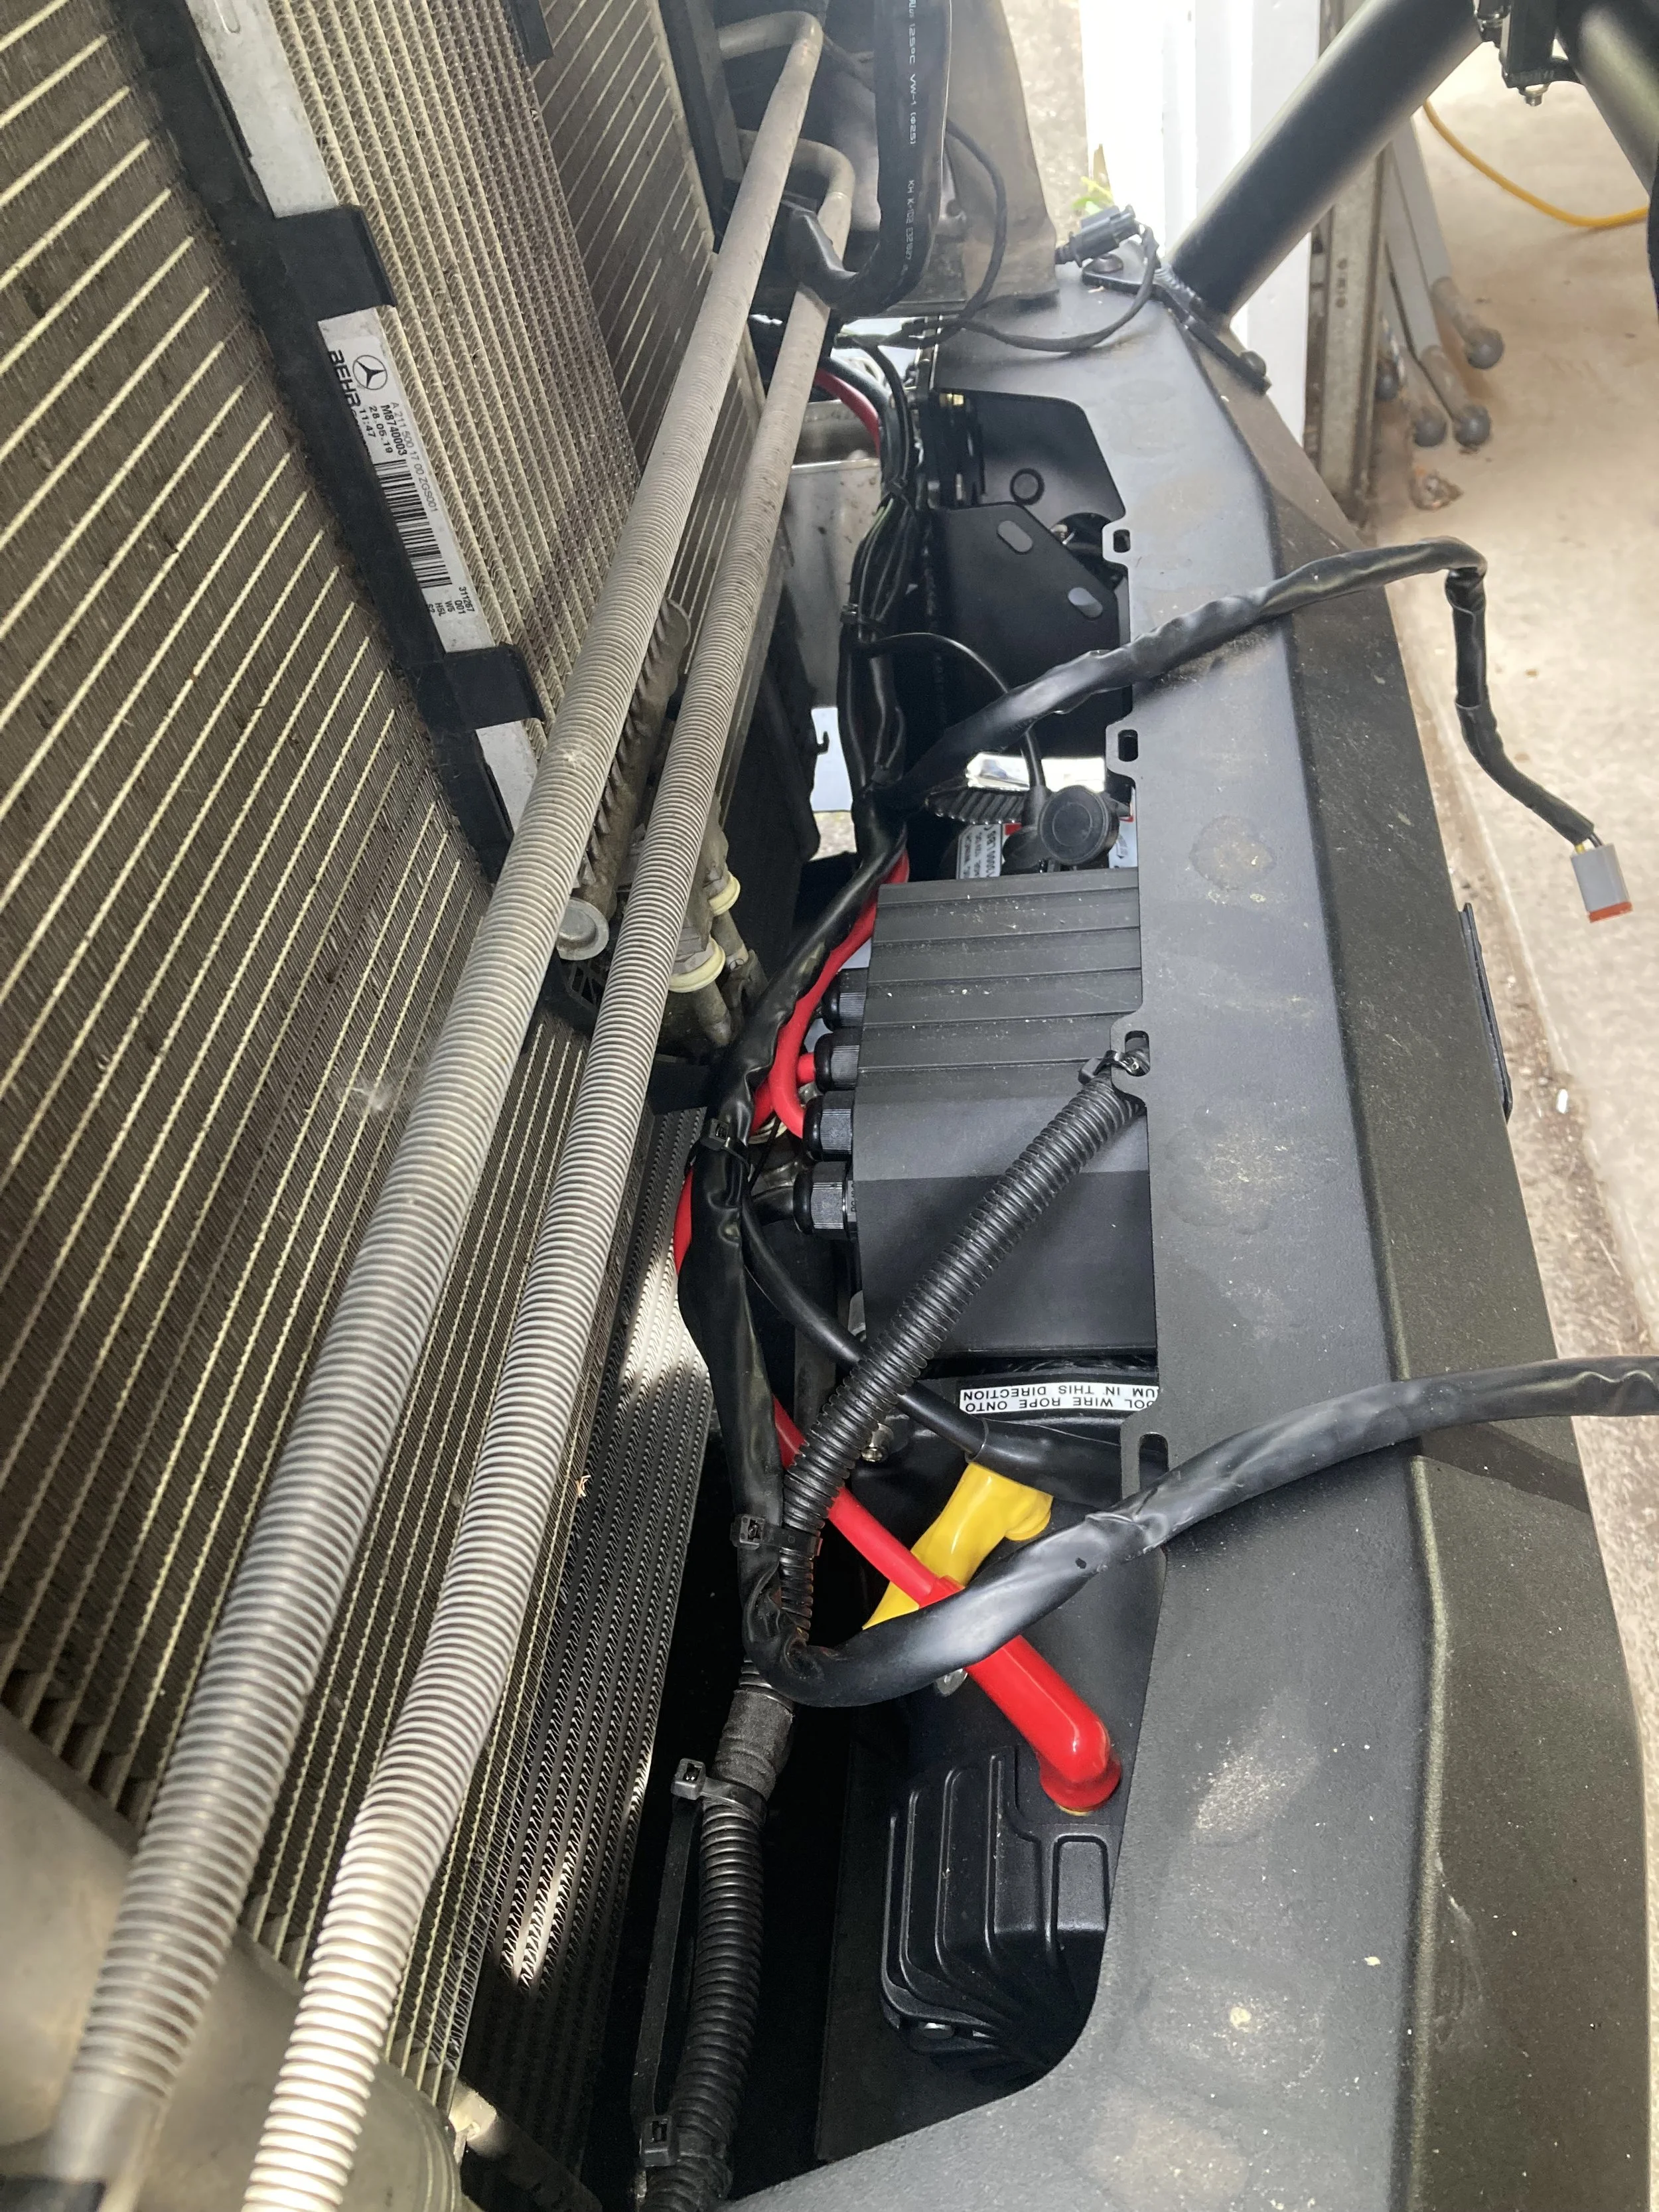
Installed 1300lb Hedgfox Recovery winch
Fits nicely inside Flatline Van Co front bumper
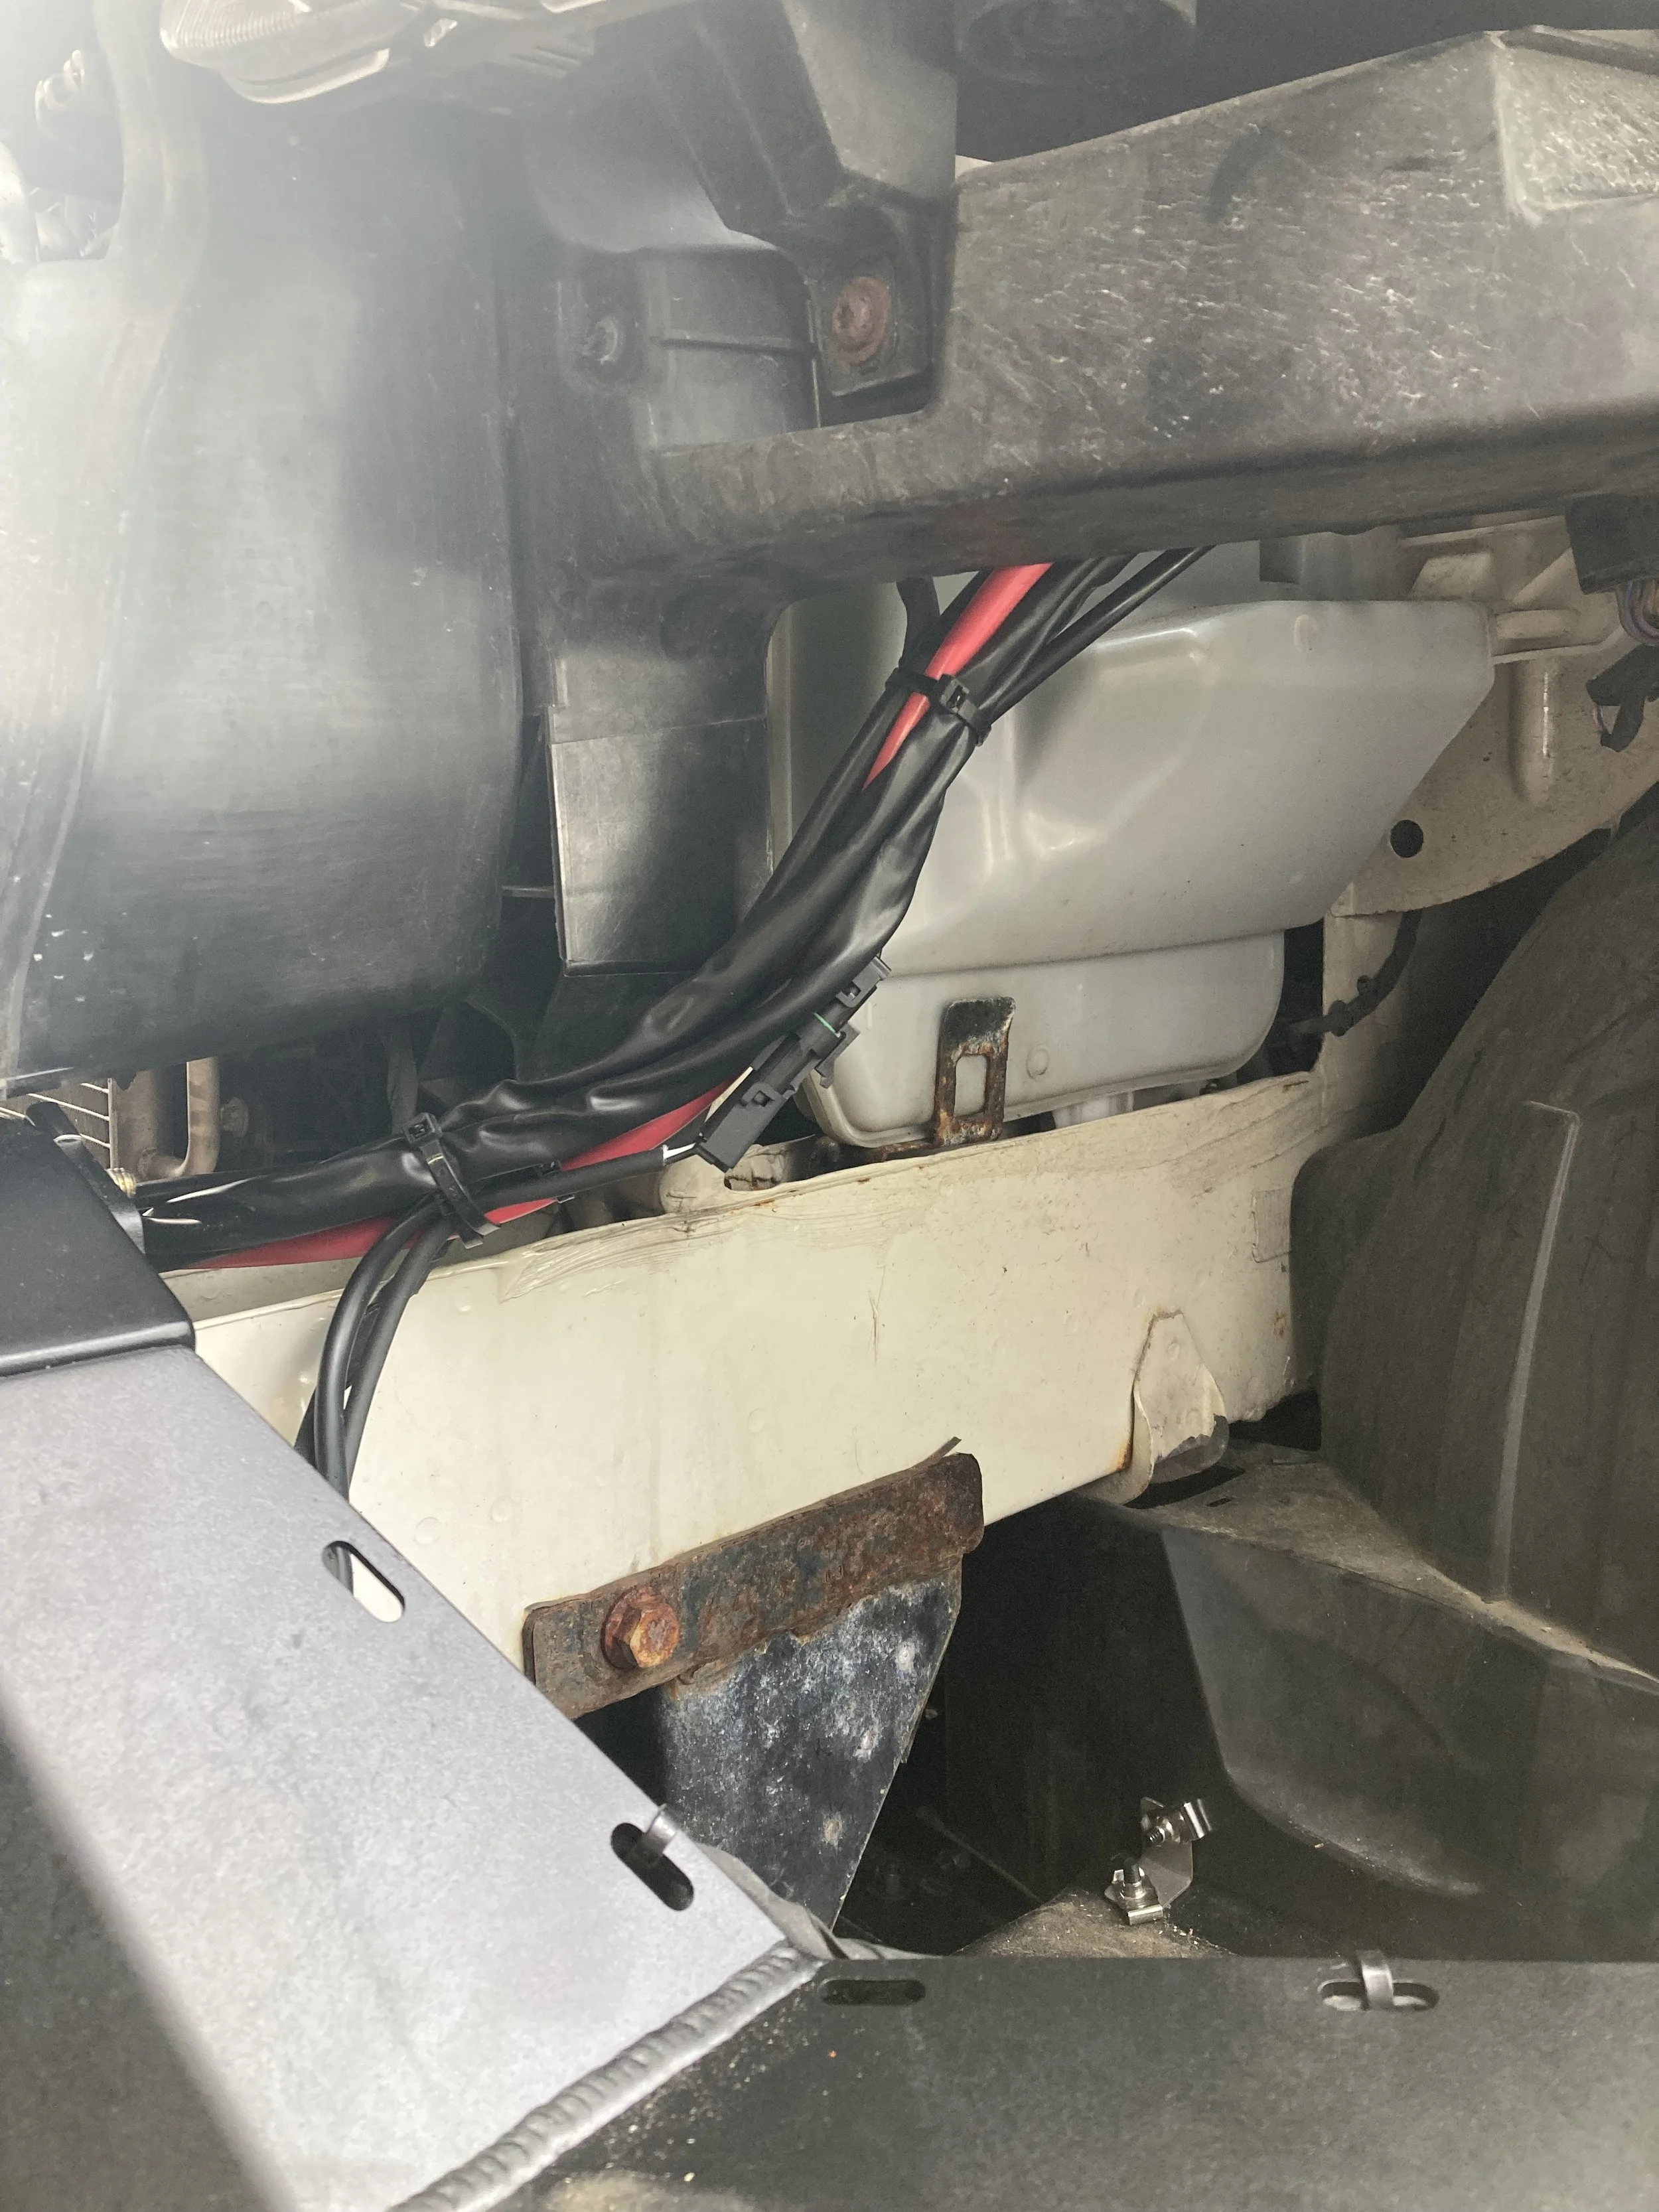
When wiring a vehicle we always try to follow stock wiring harnesses for cleanliness
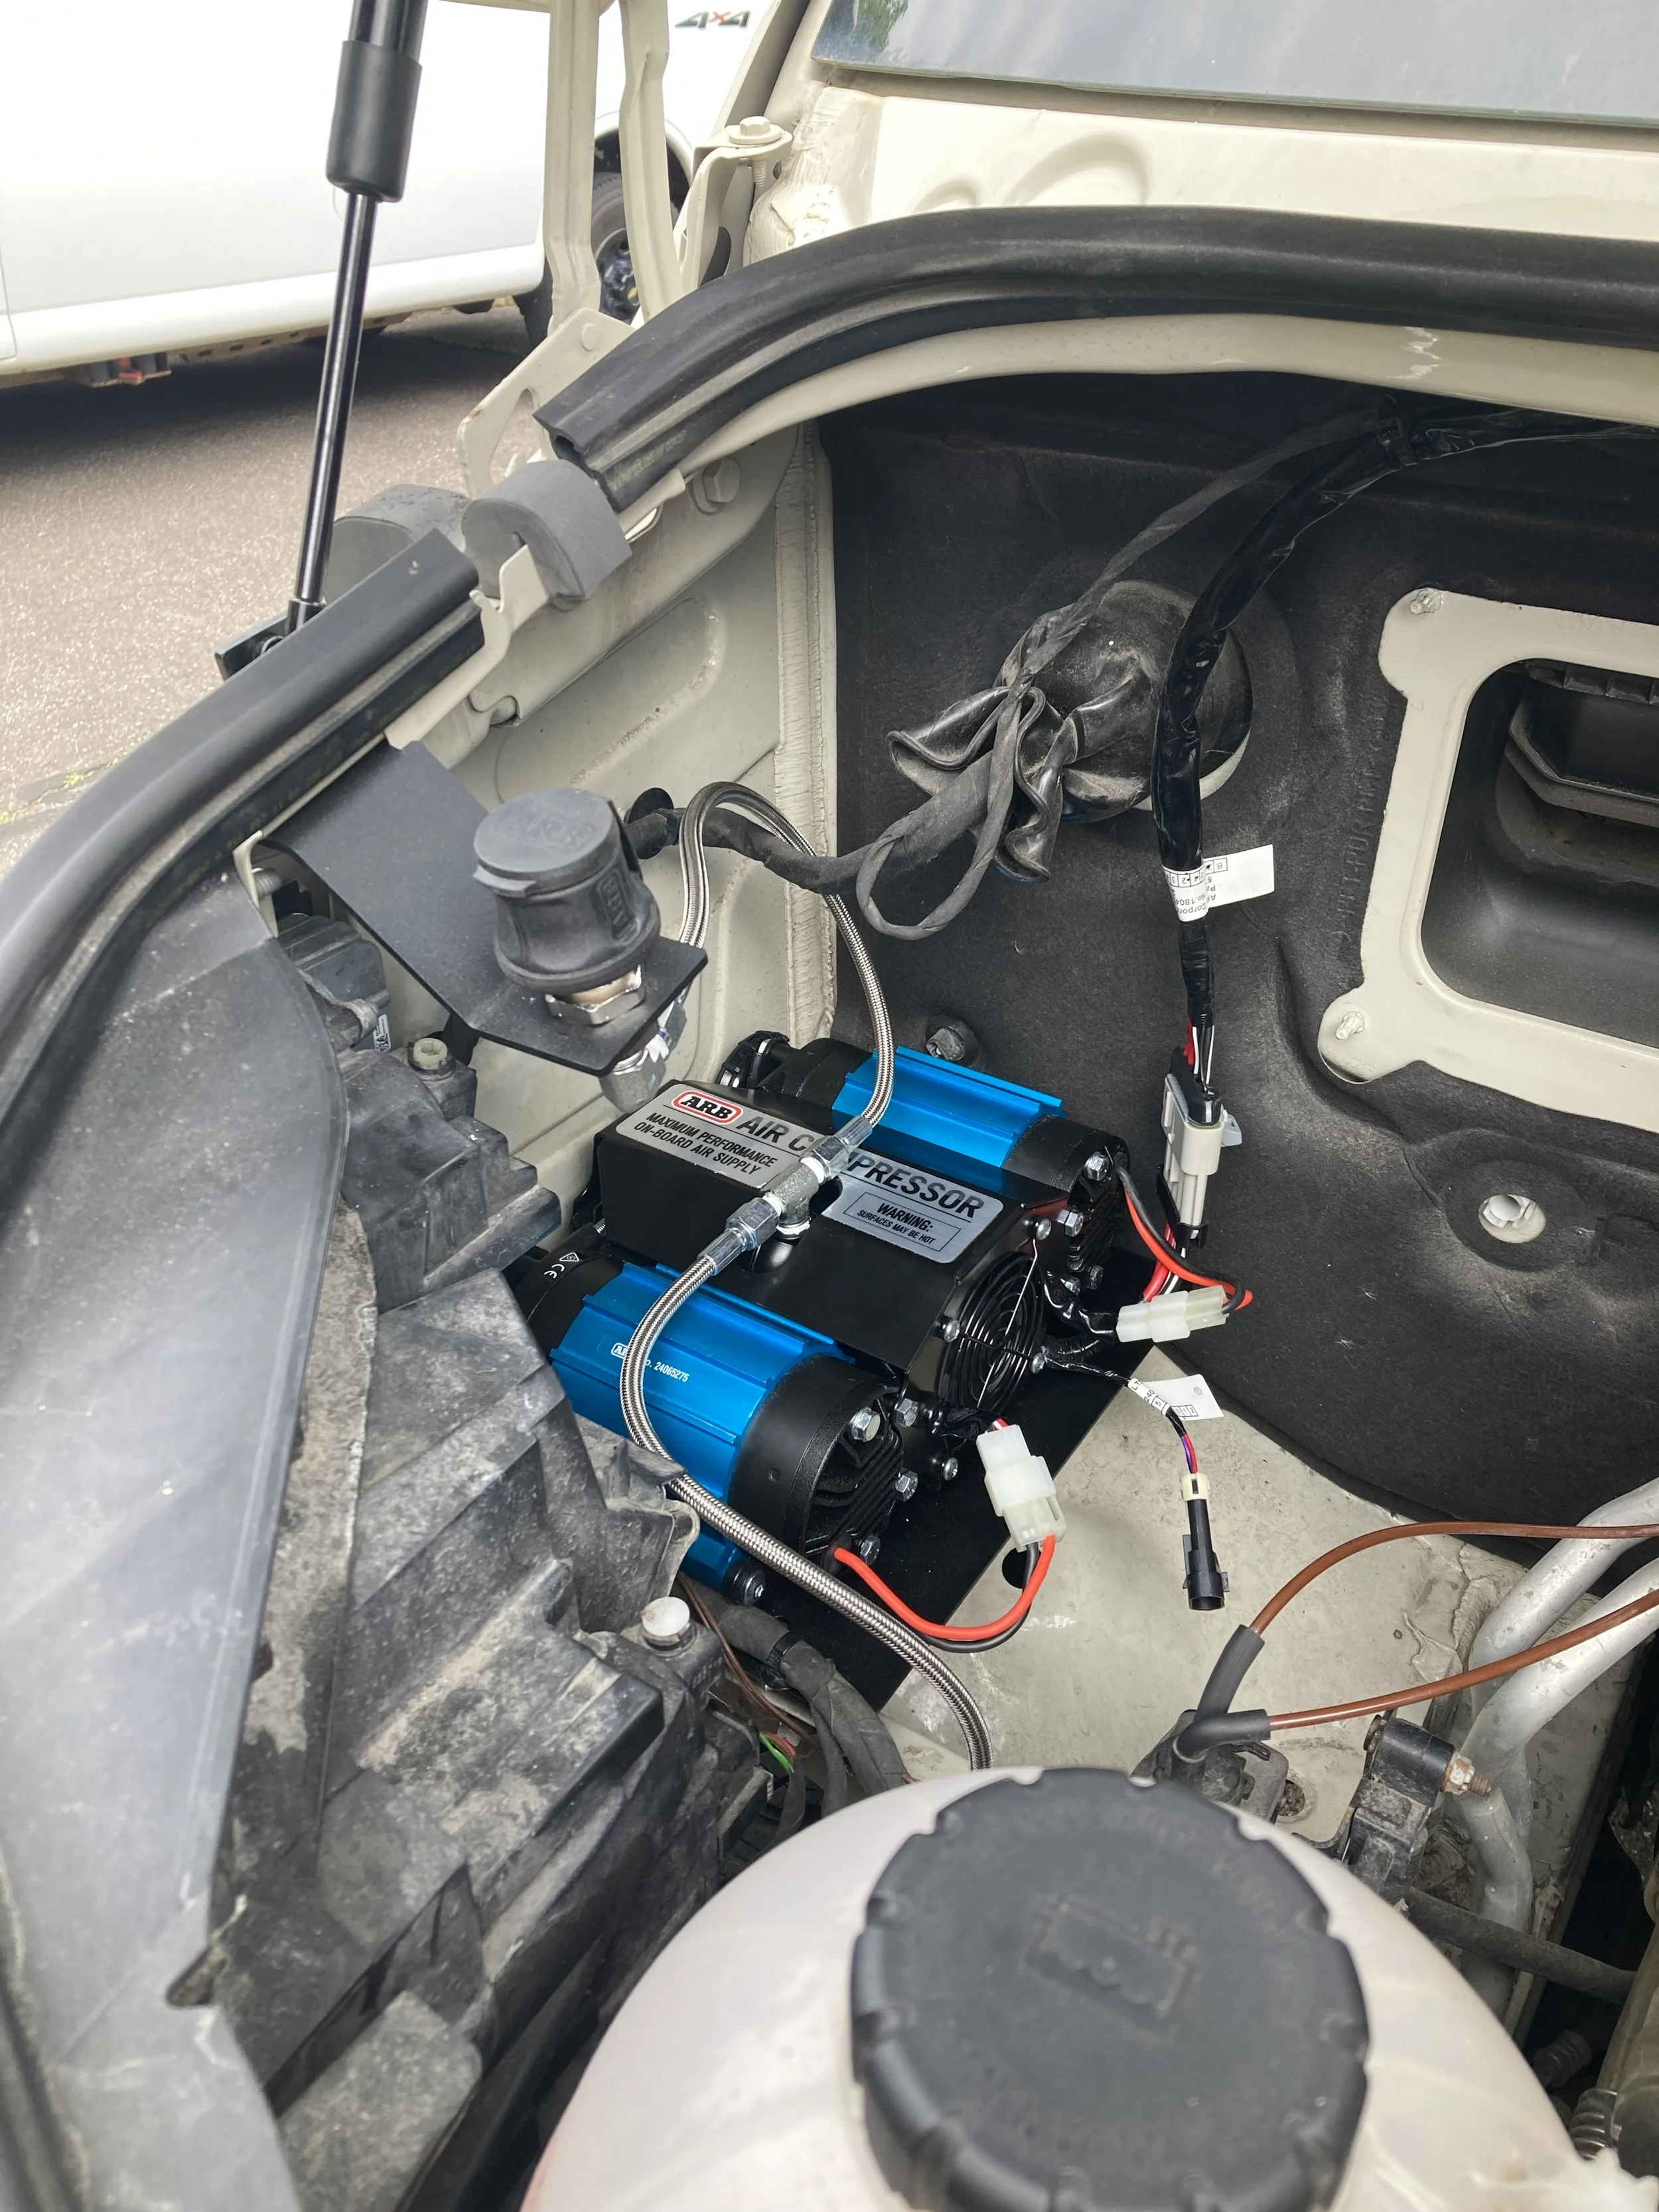
ARB air compressor
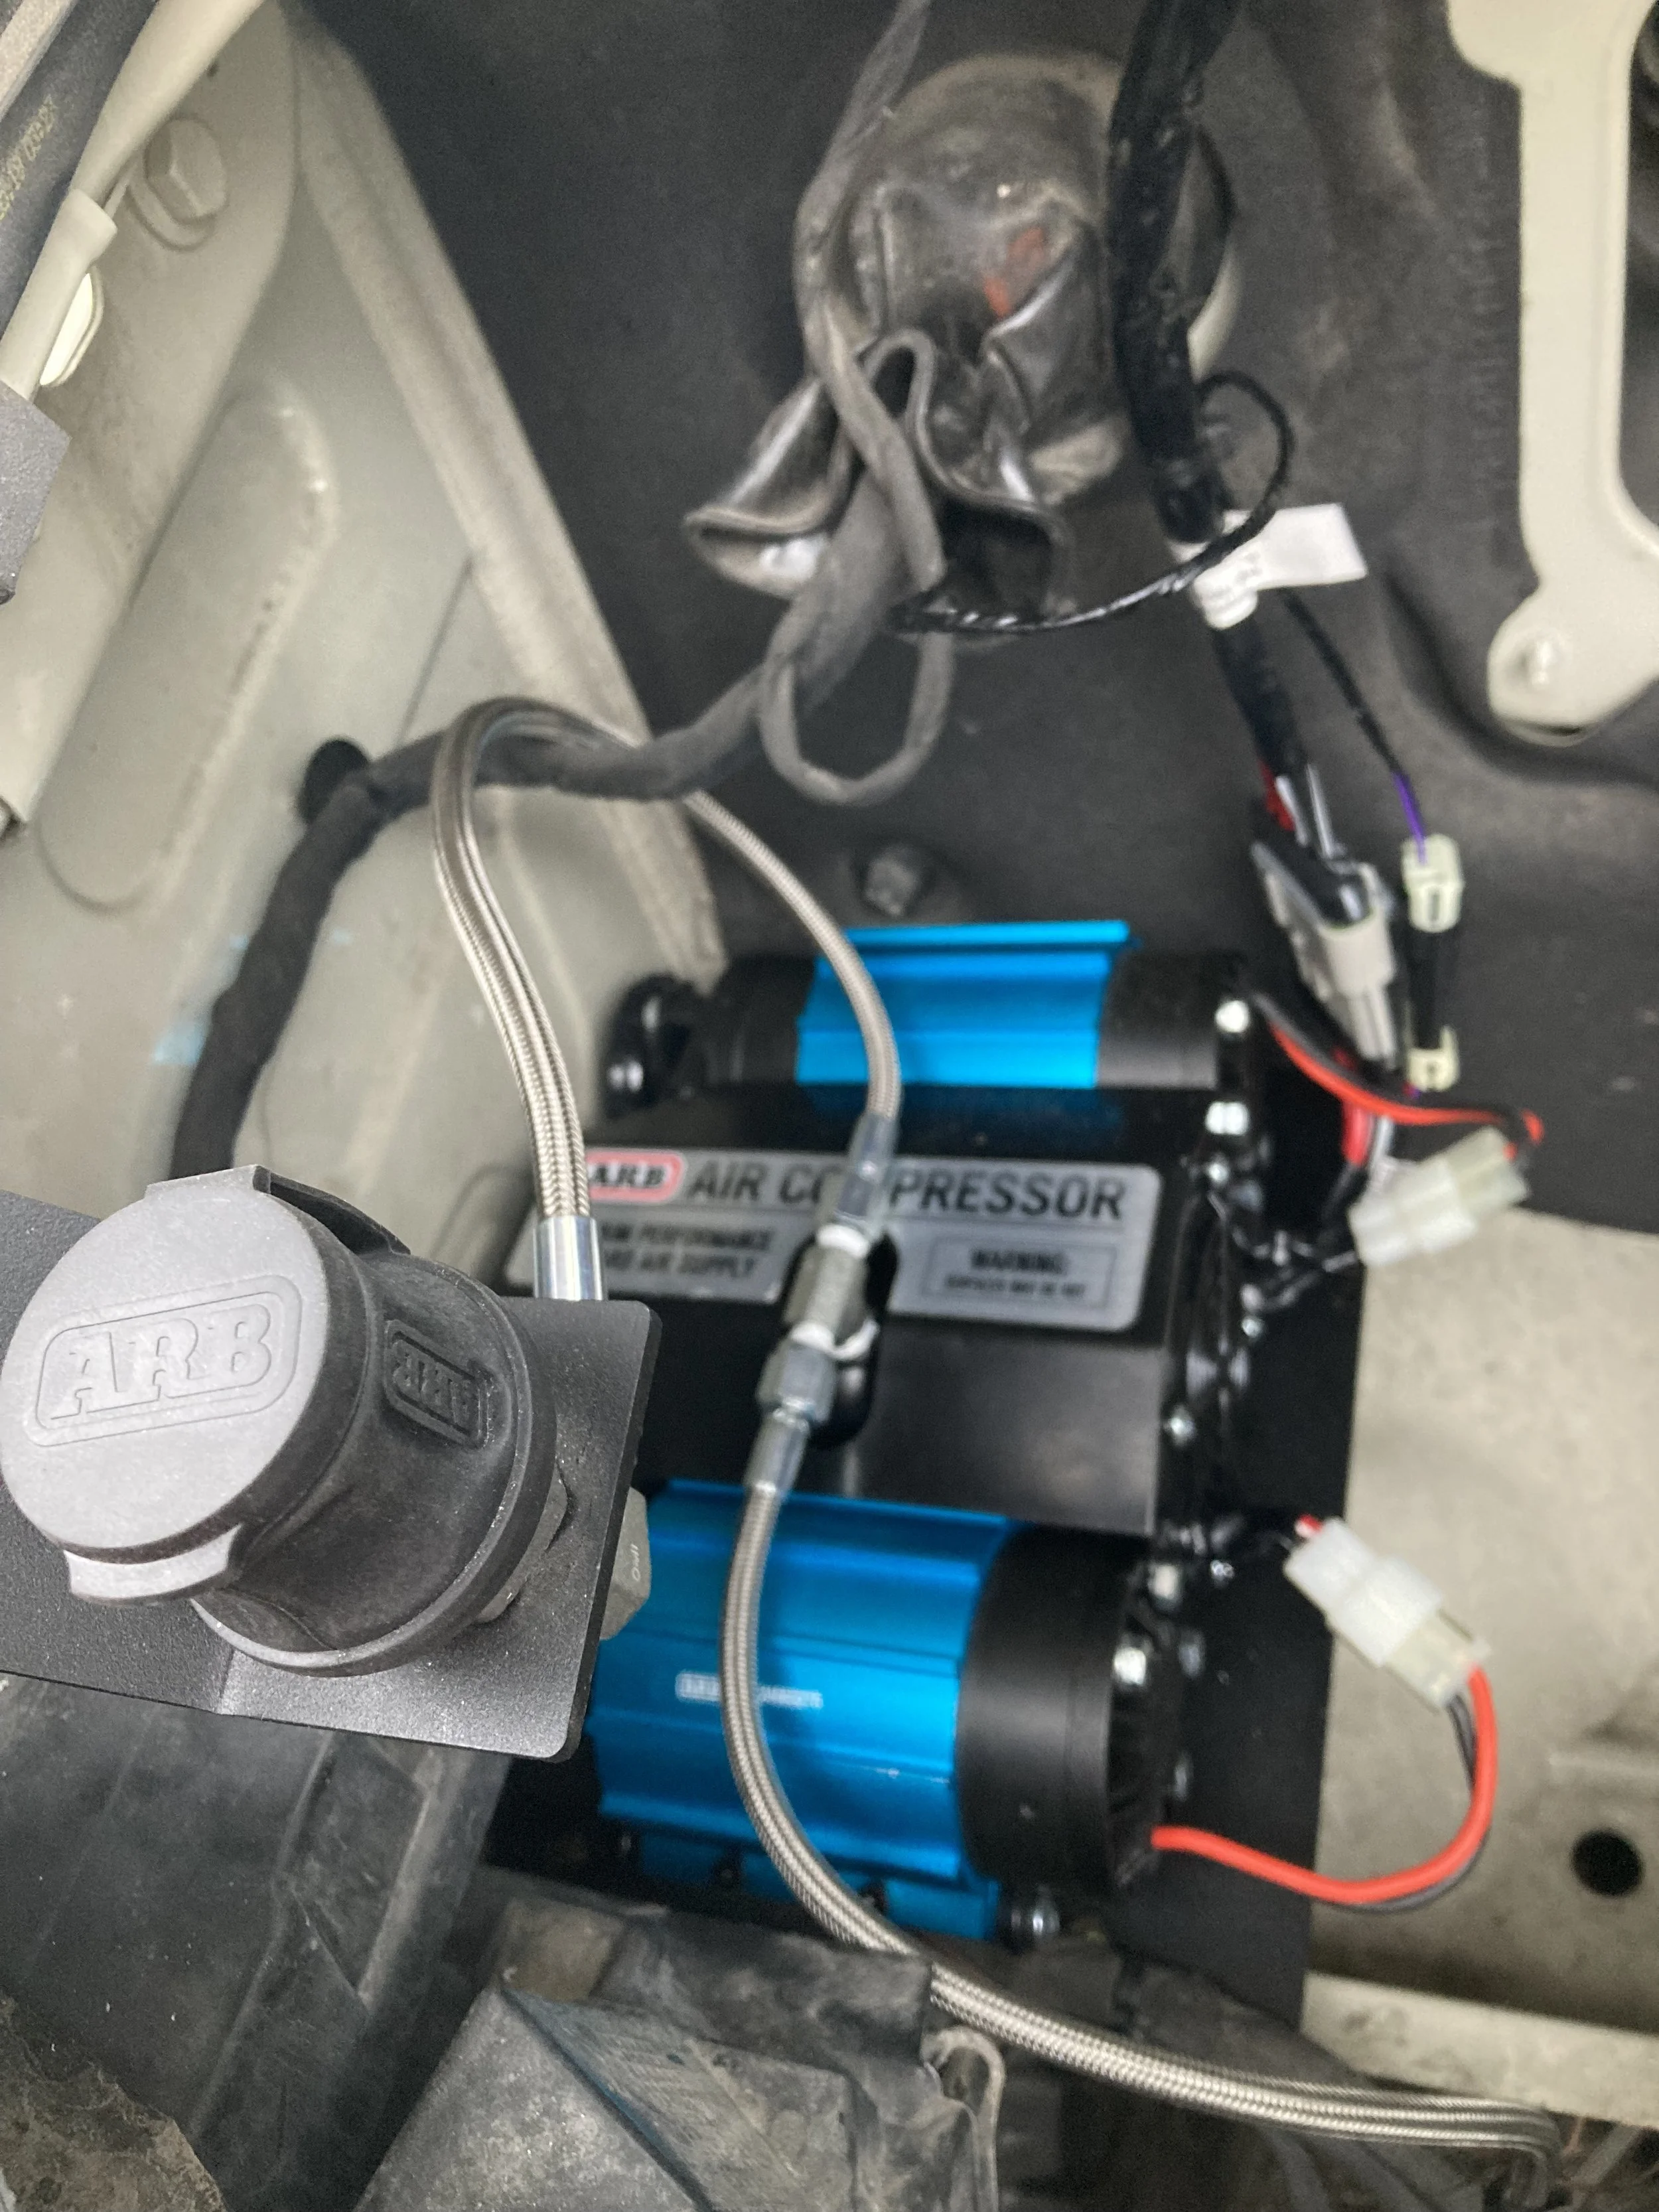
Air port under the hood for inflating front tires
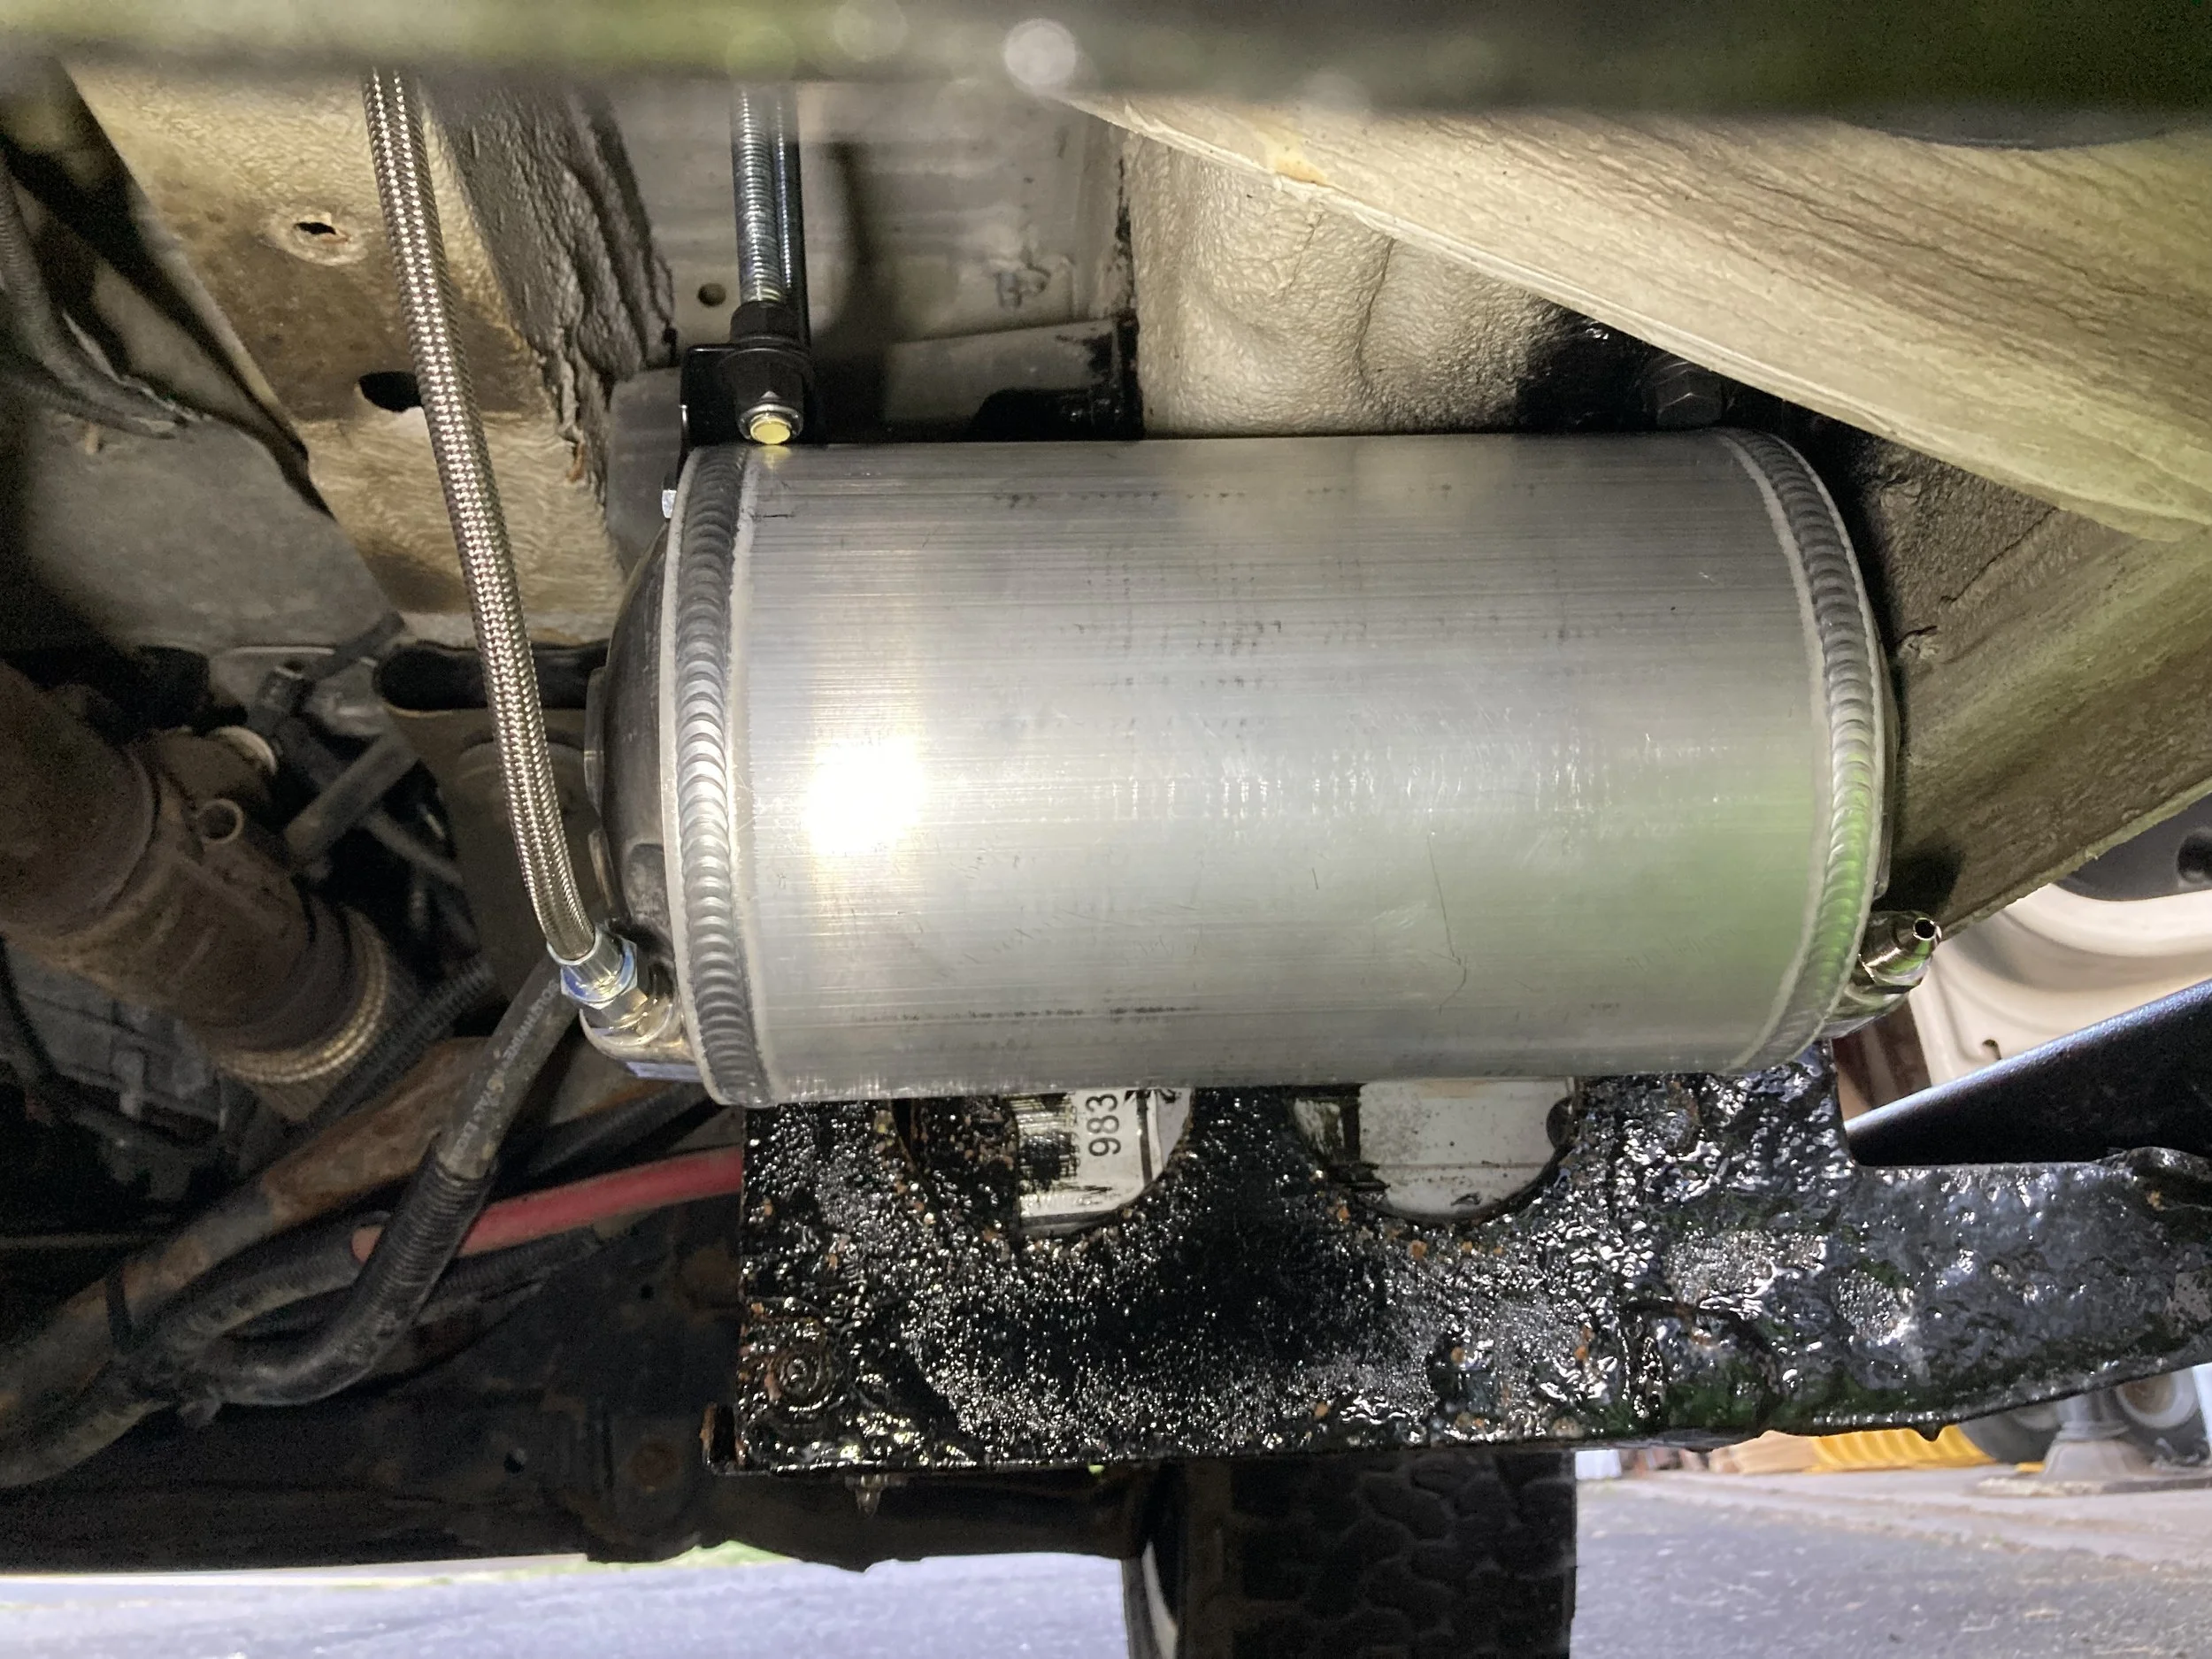
ARB 1lb air tank installed under the passenger seat behind one of the battery boxes for the house batteries
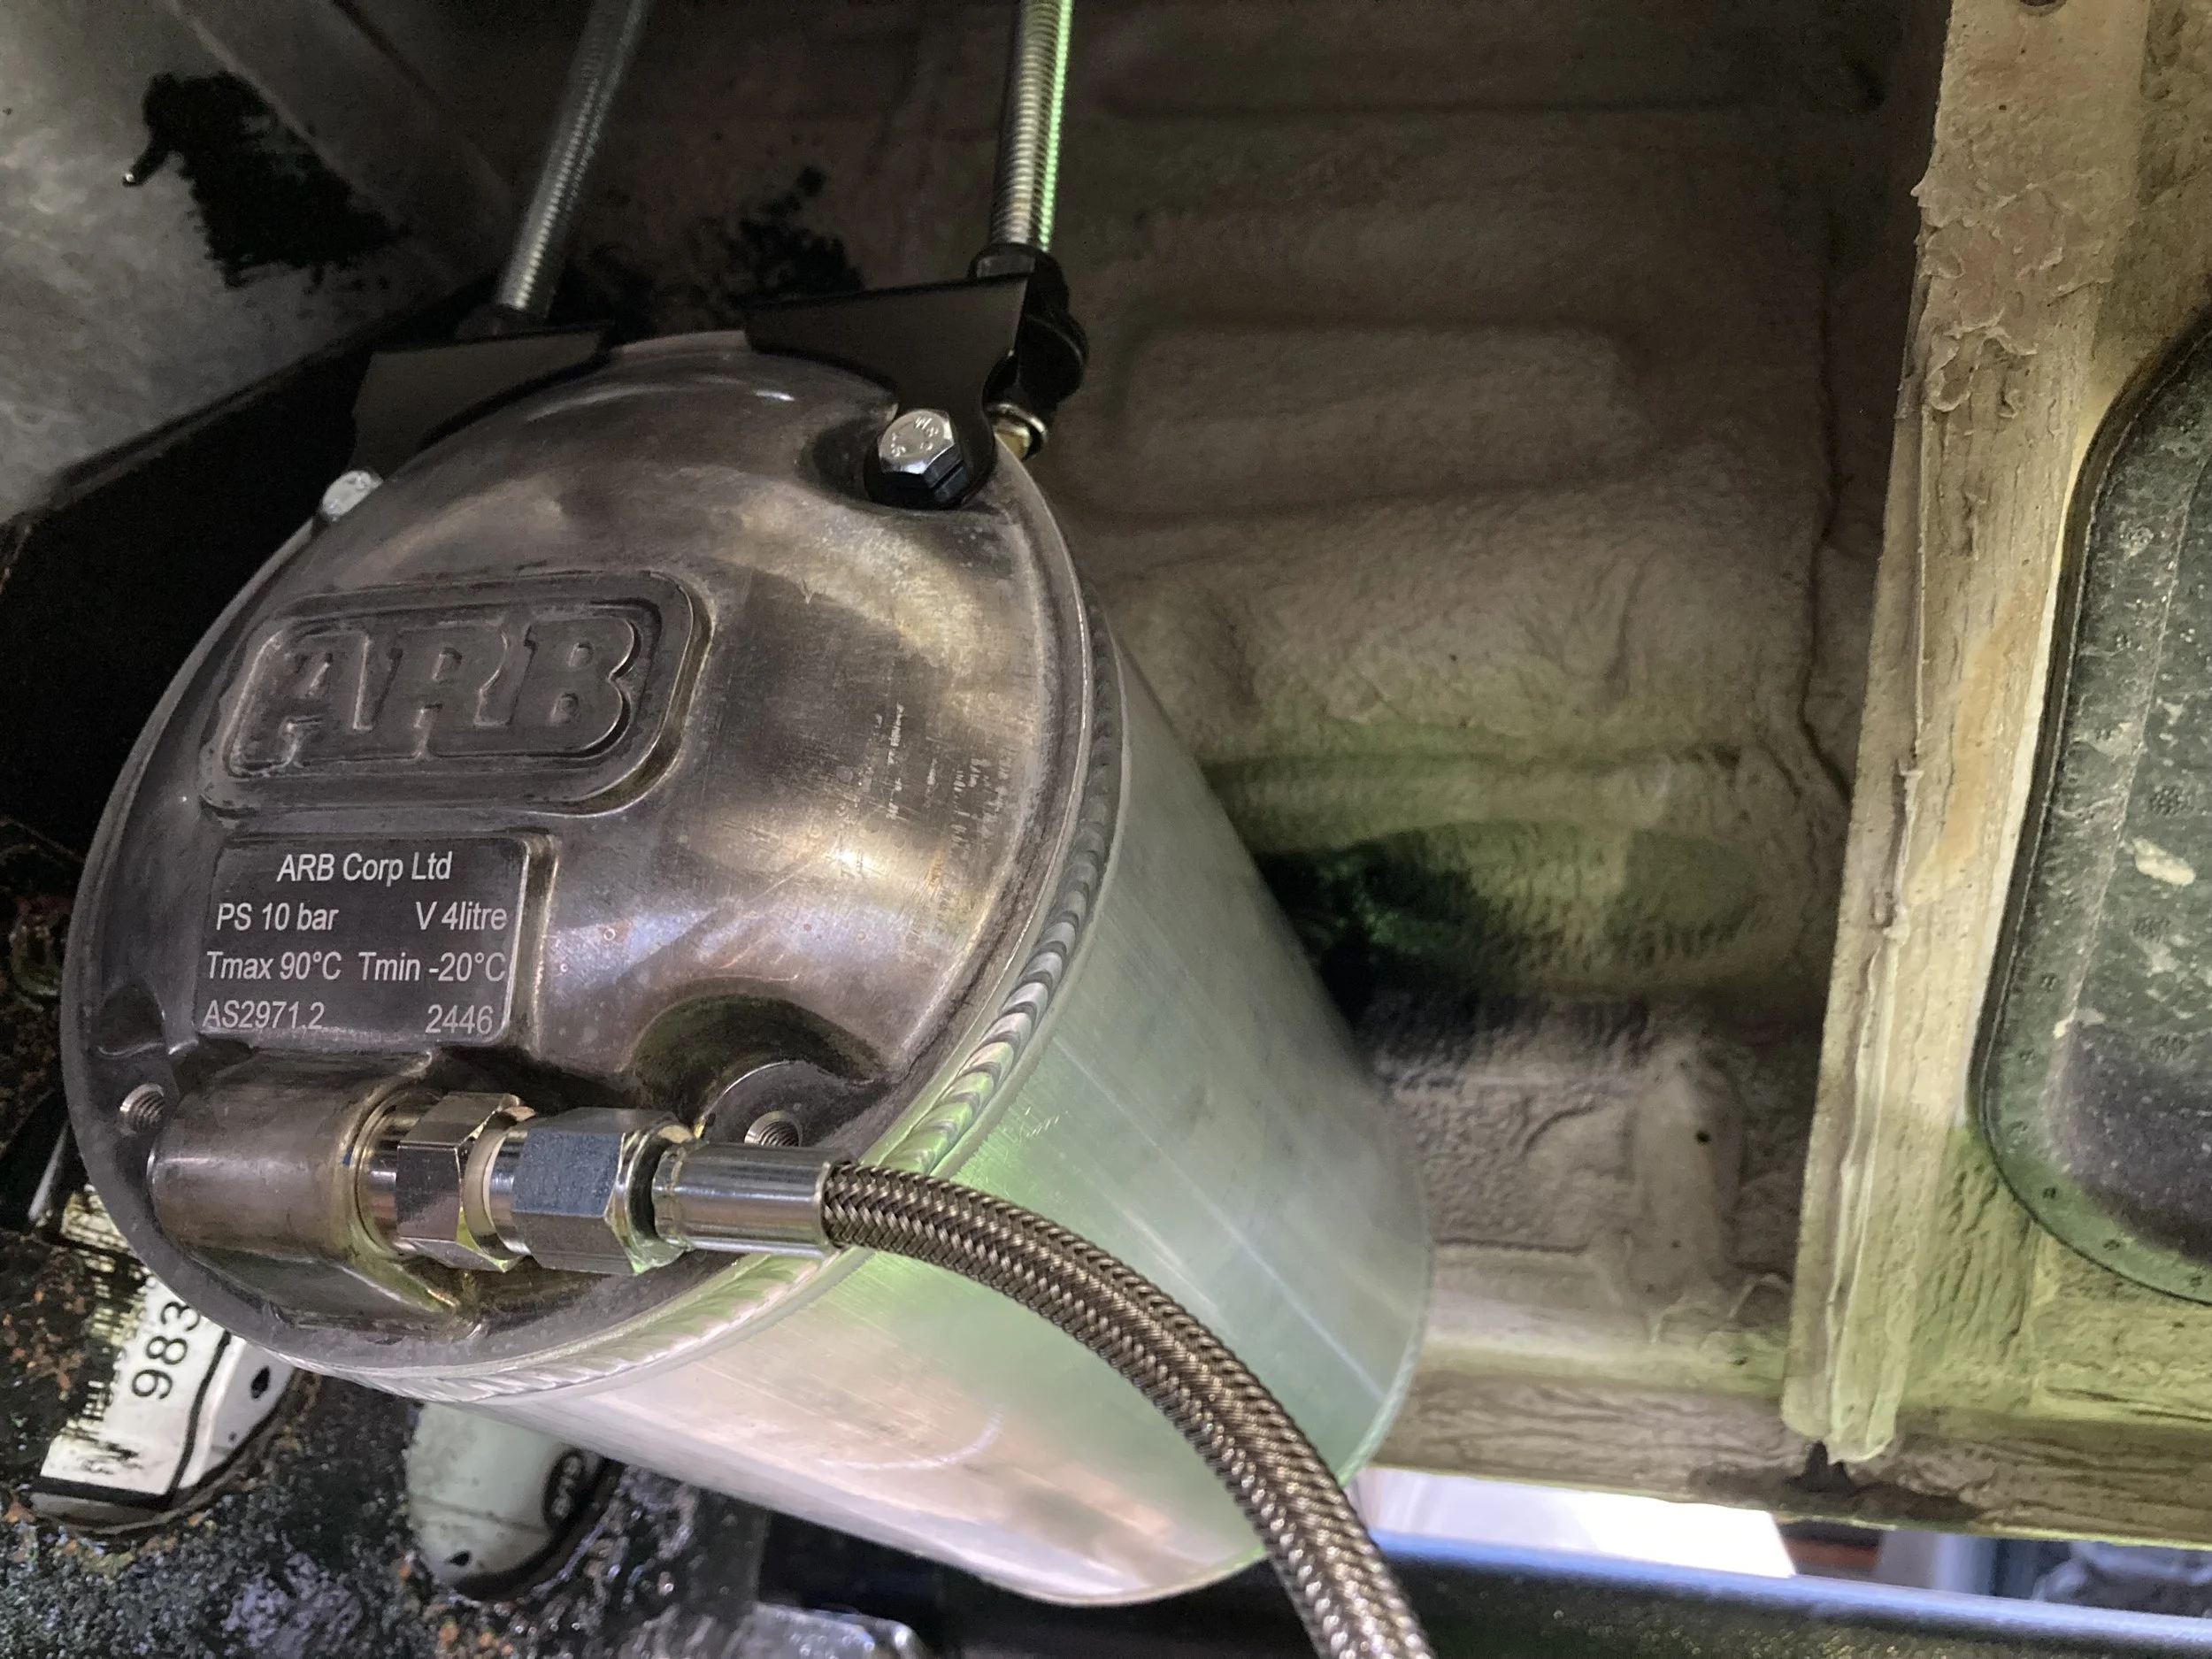
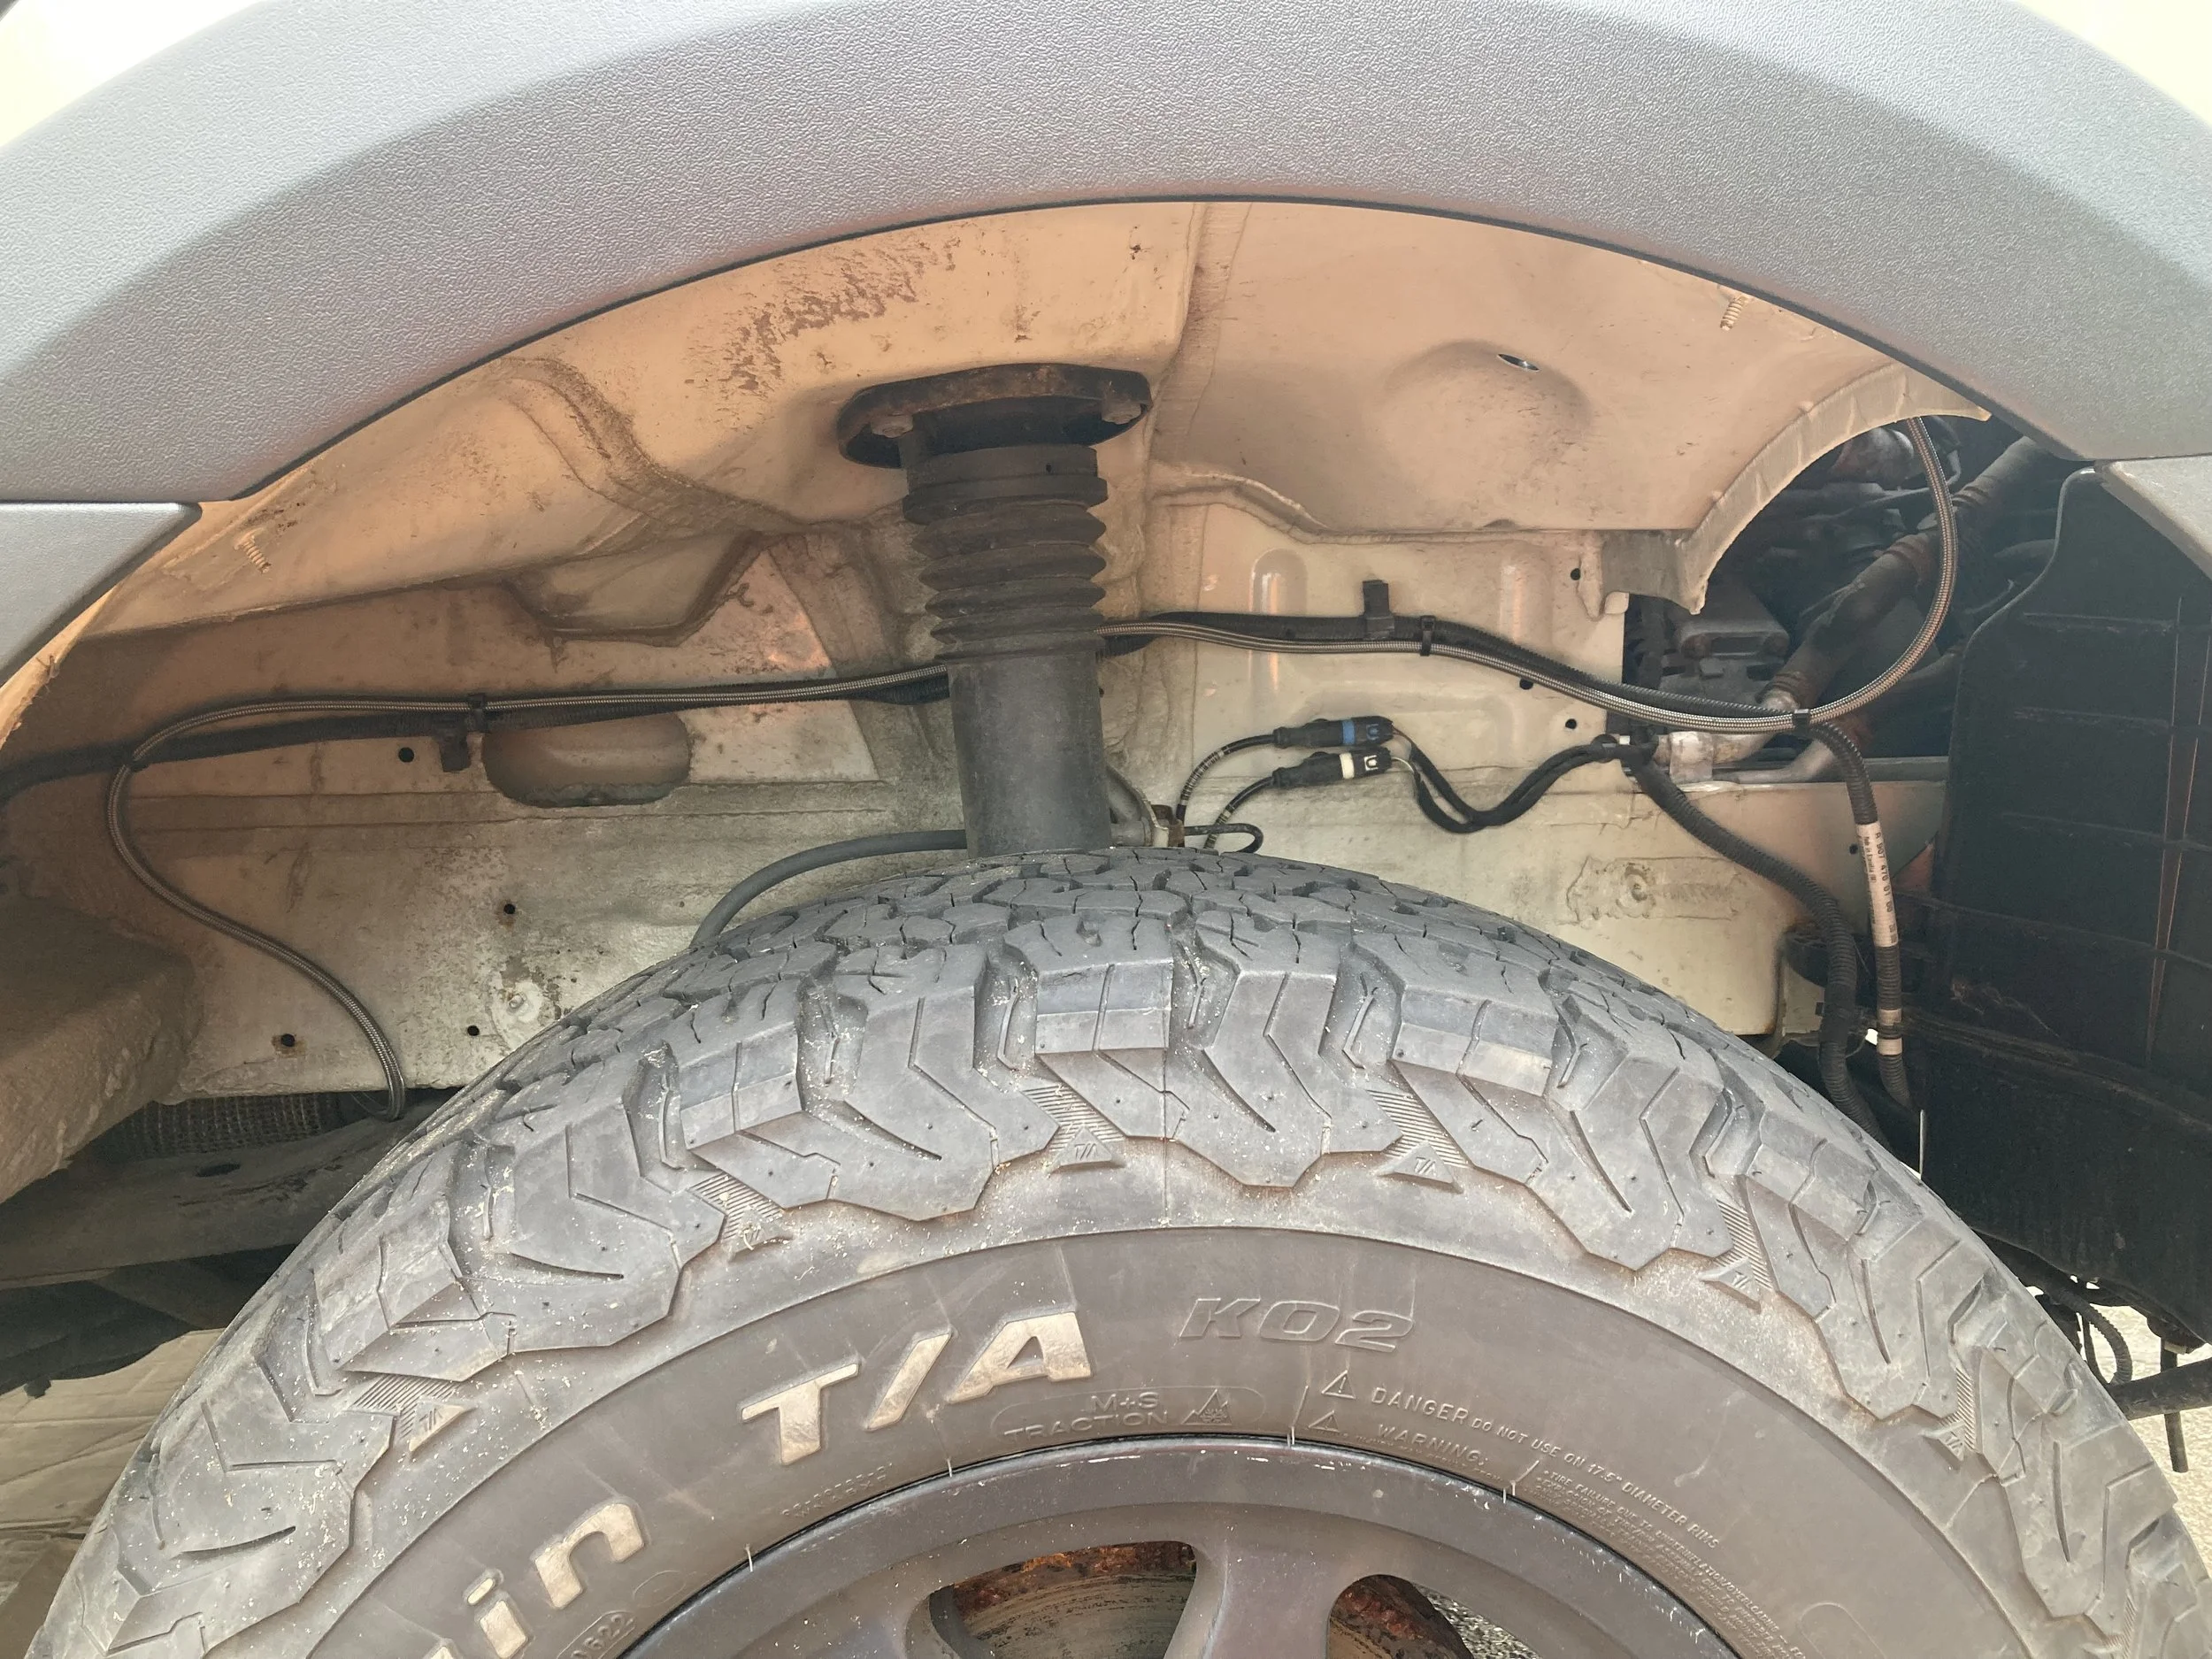
Stainless braided lines run throughout the entire sytem
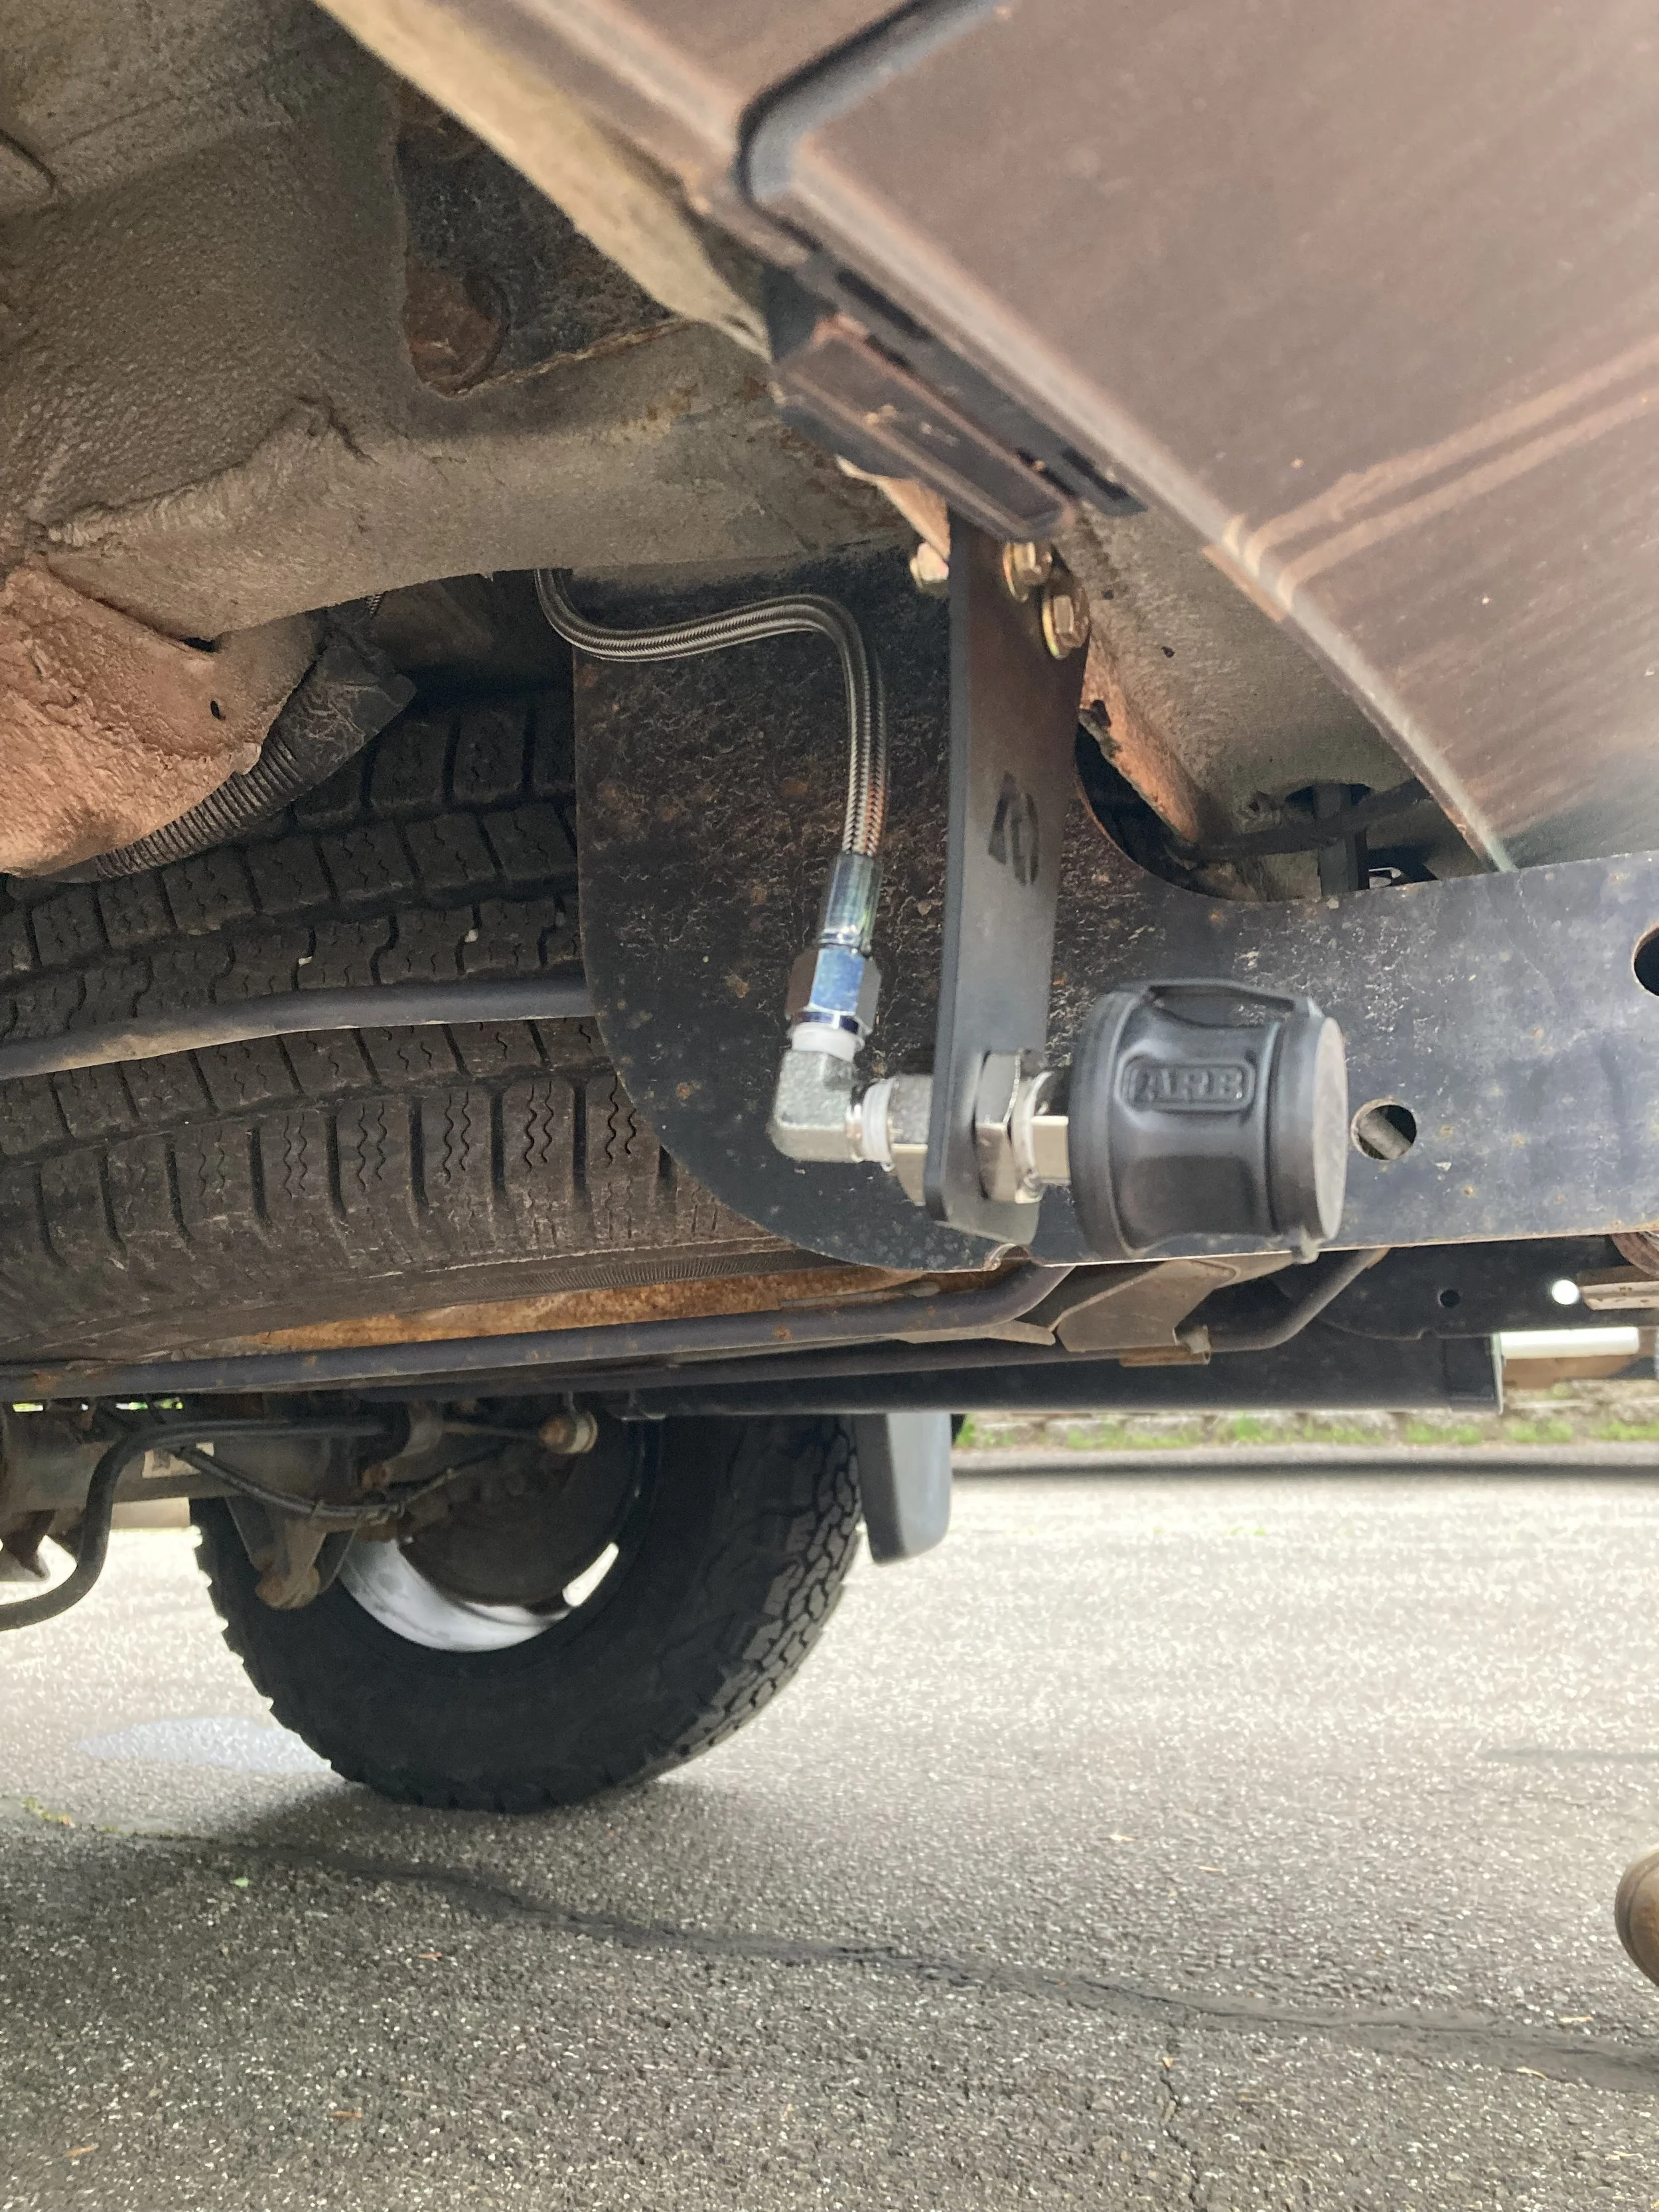
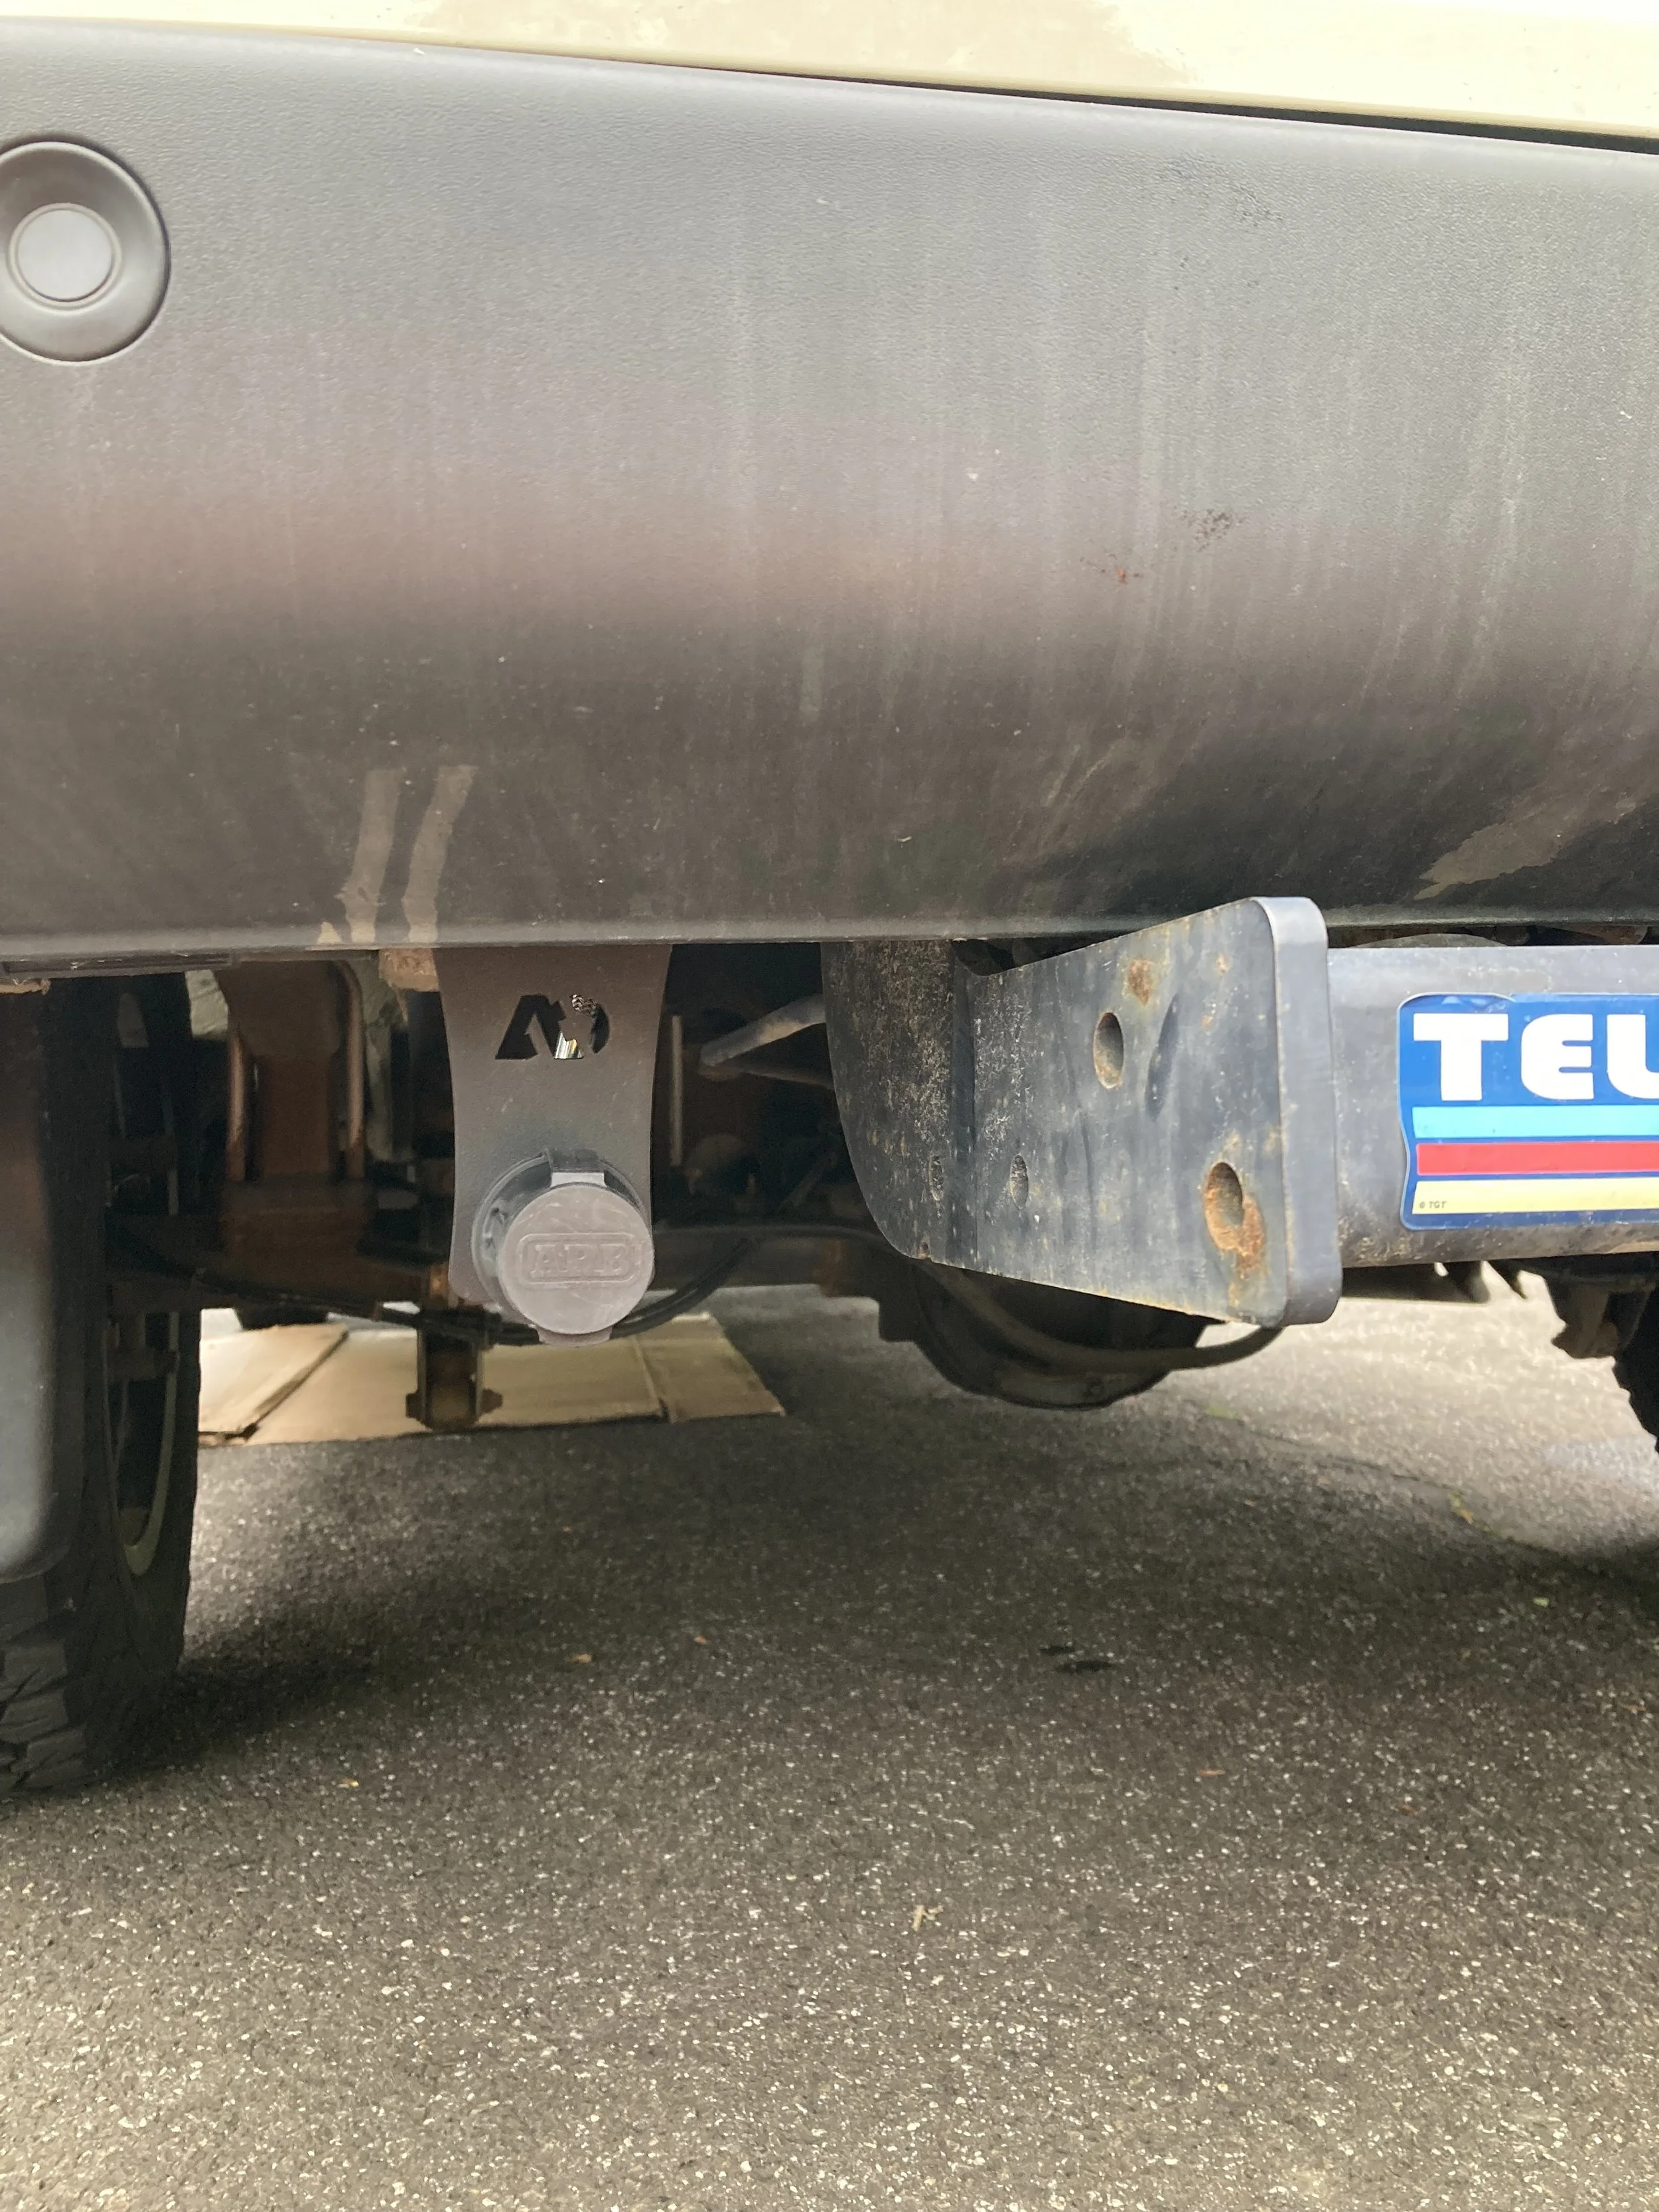
Air port mounted by trailer hitch for easy inflation for rear tires
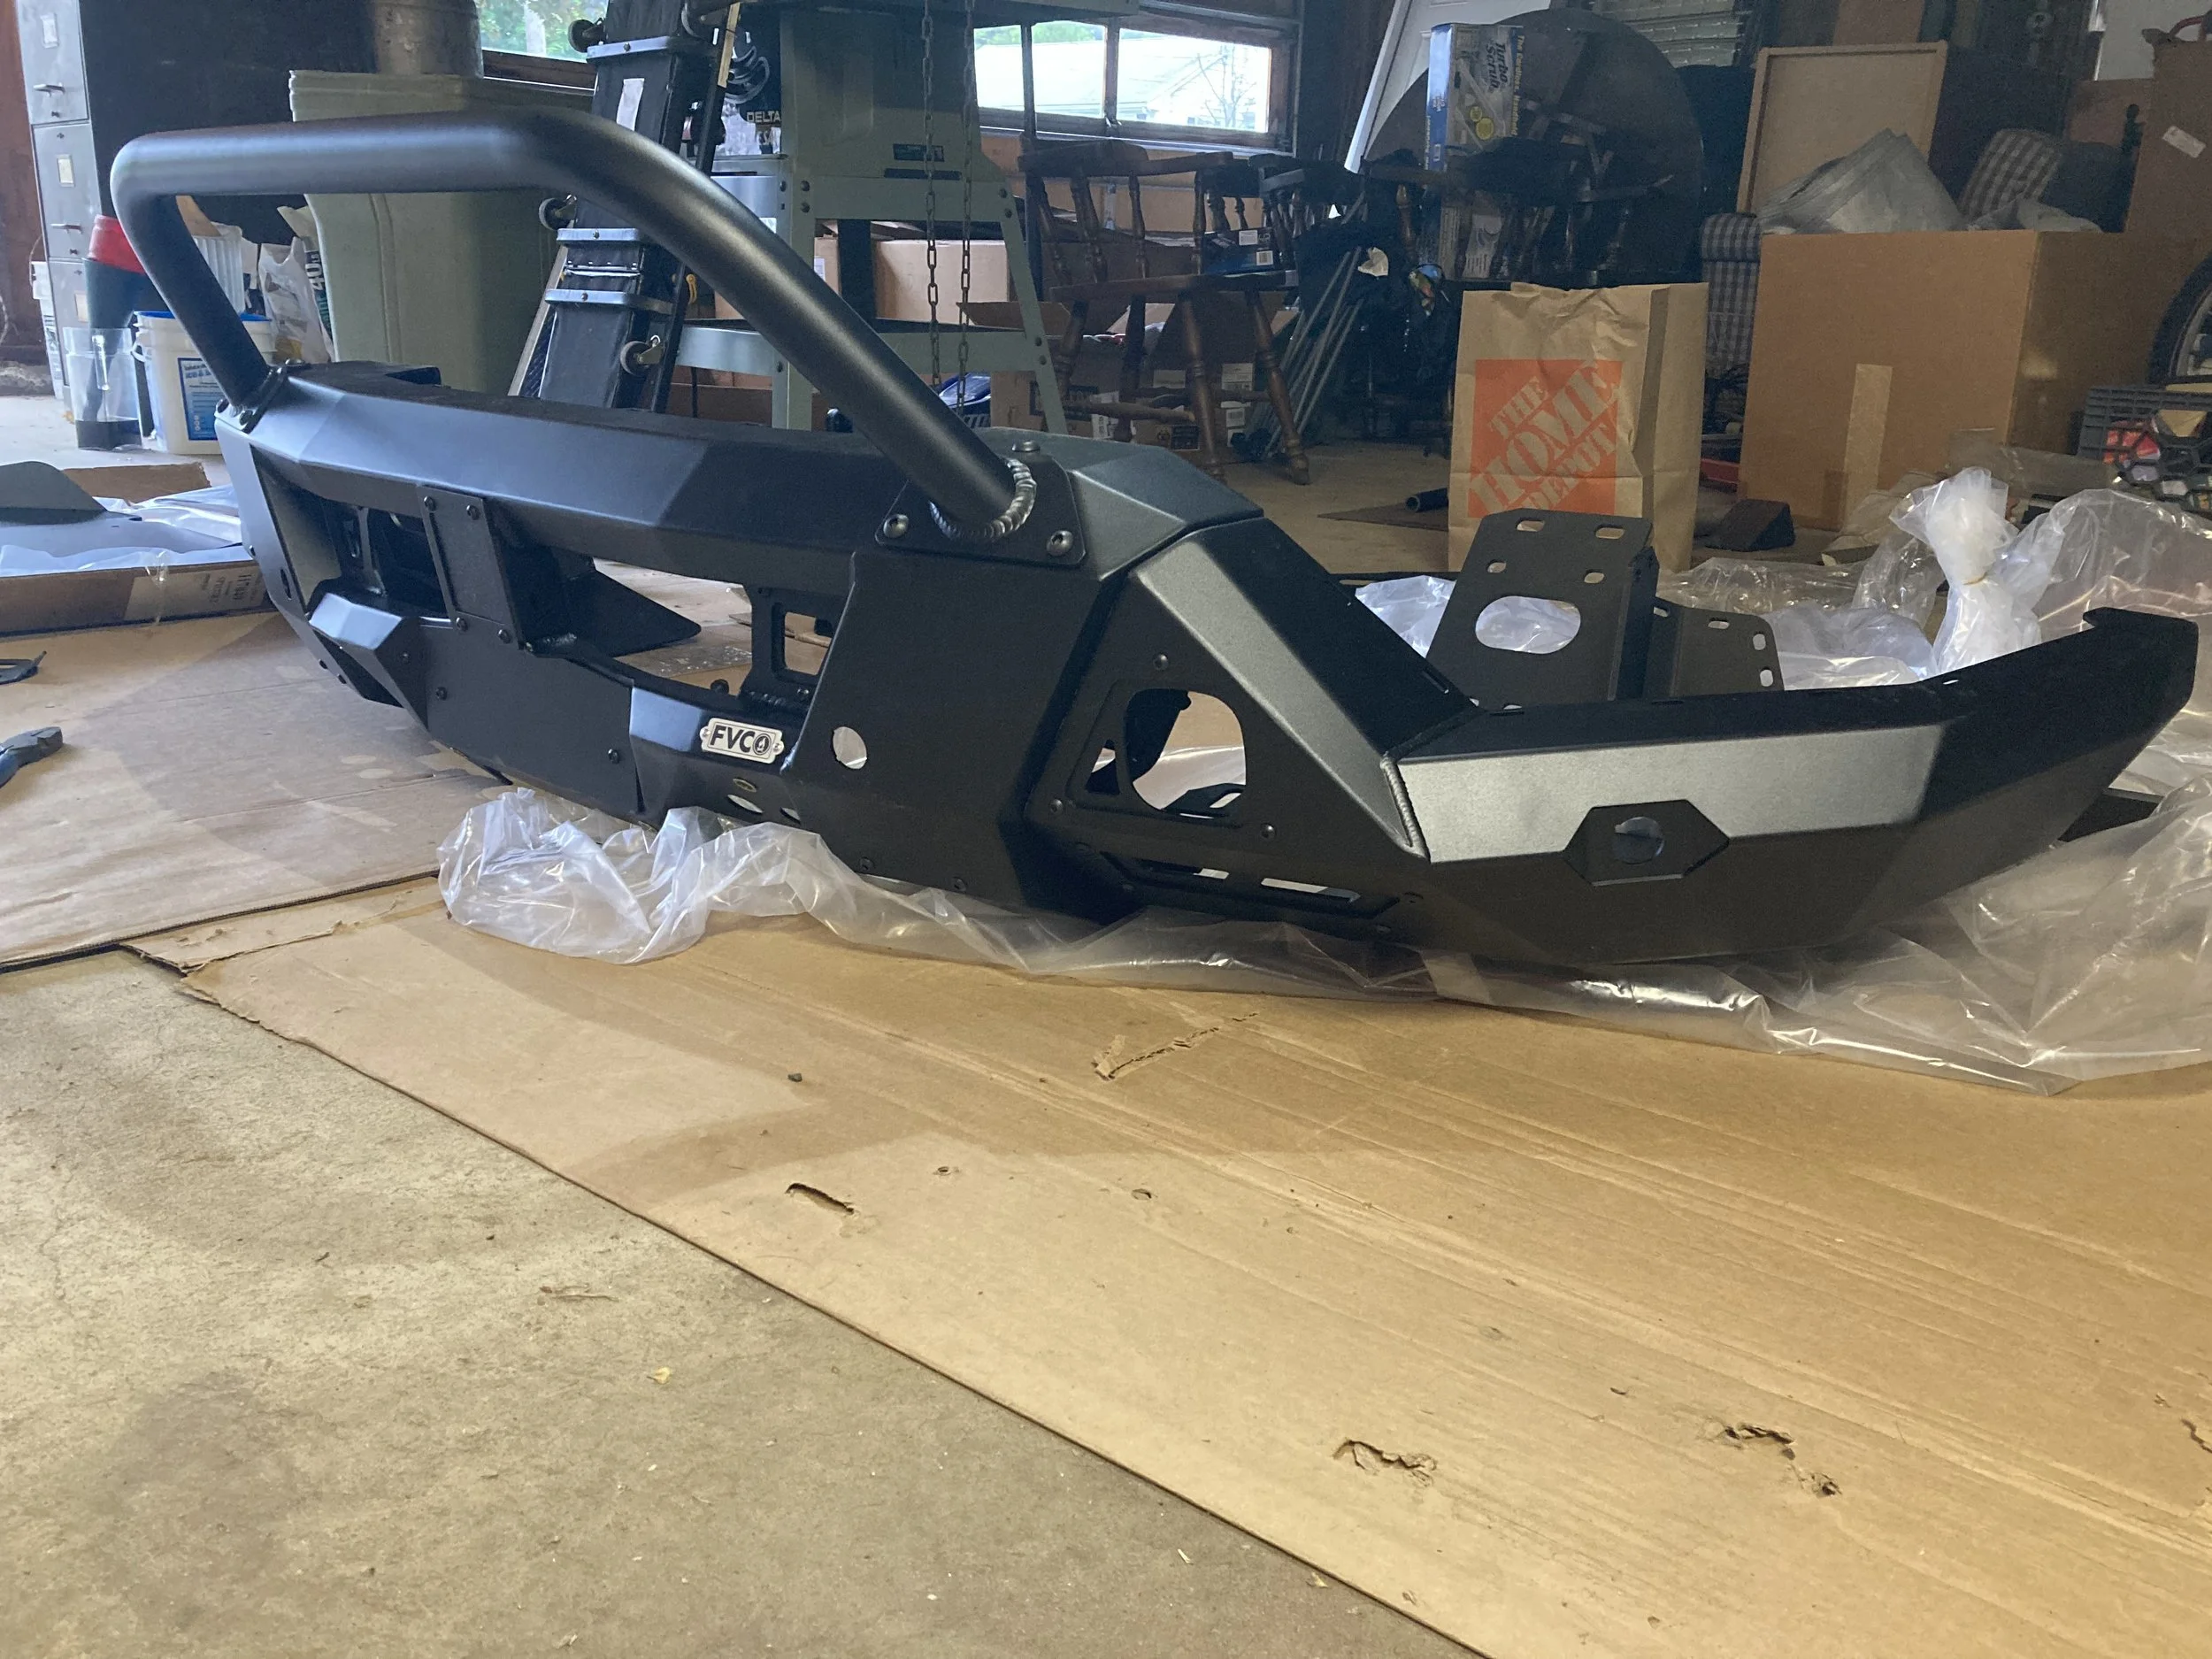
Flatline Van Co Front Bumper
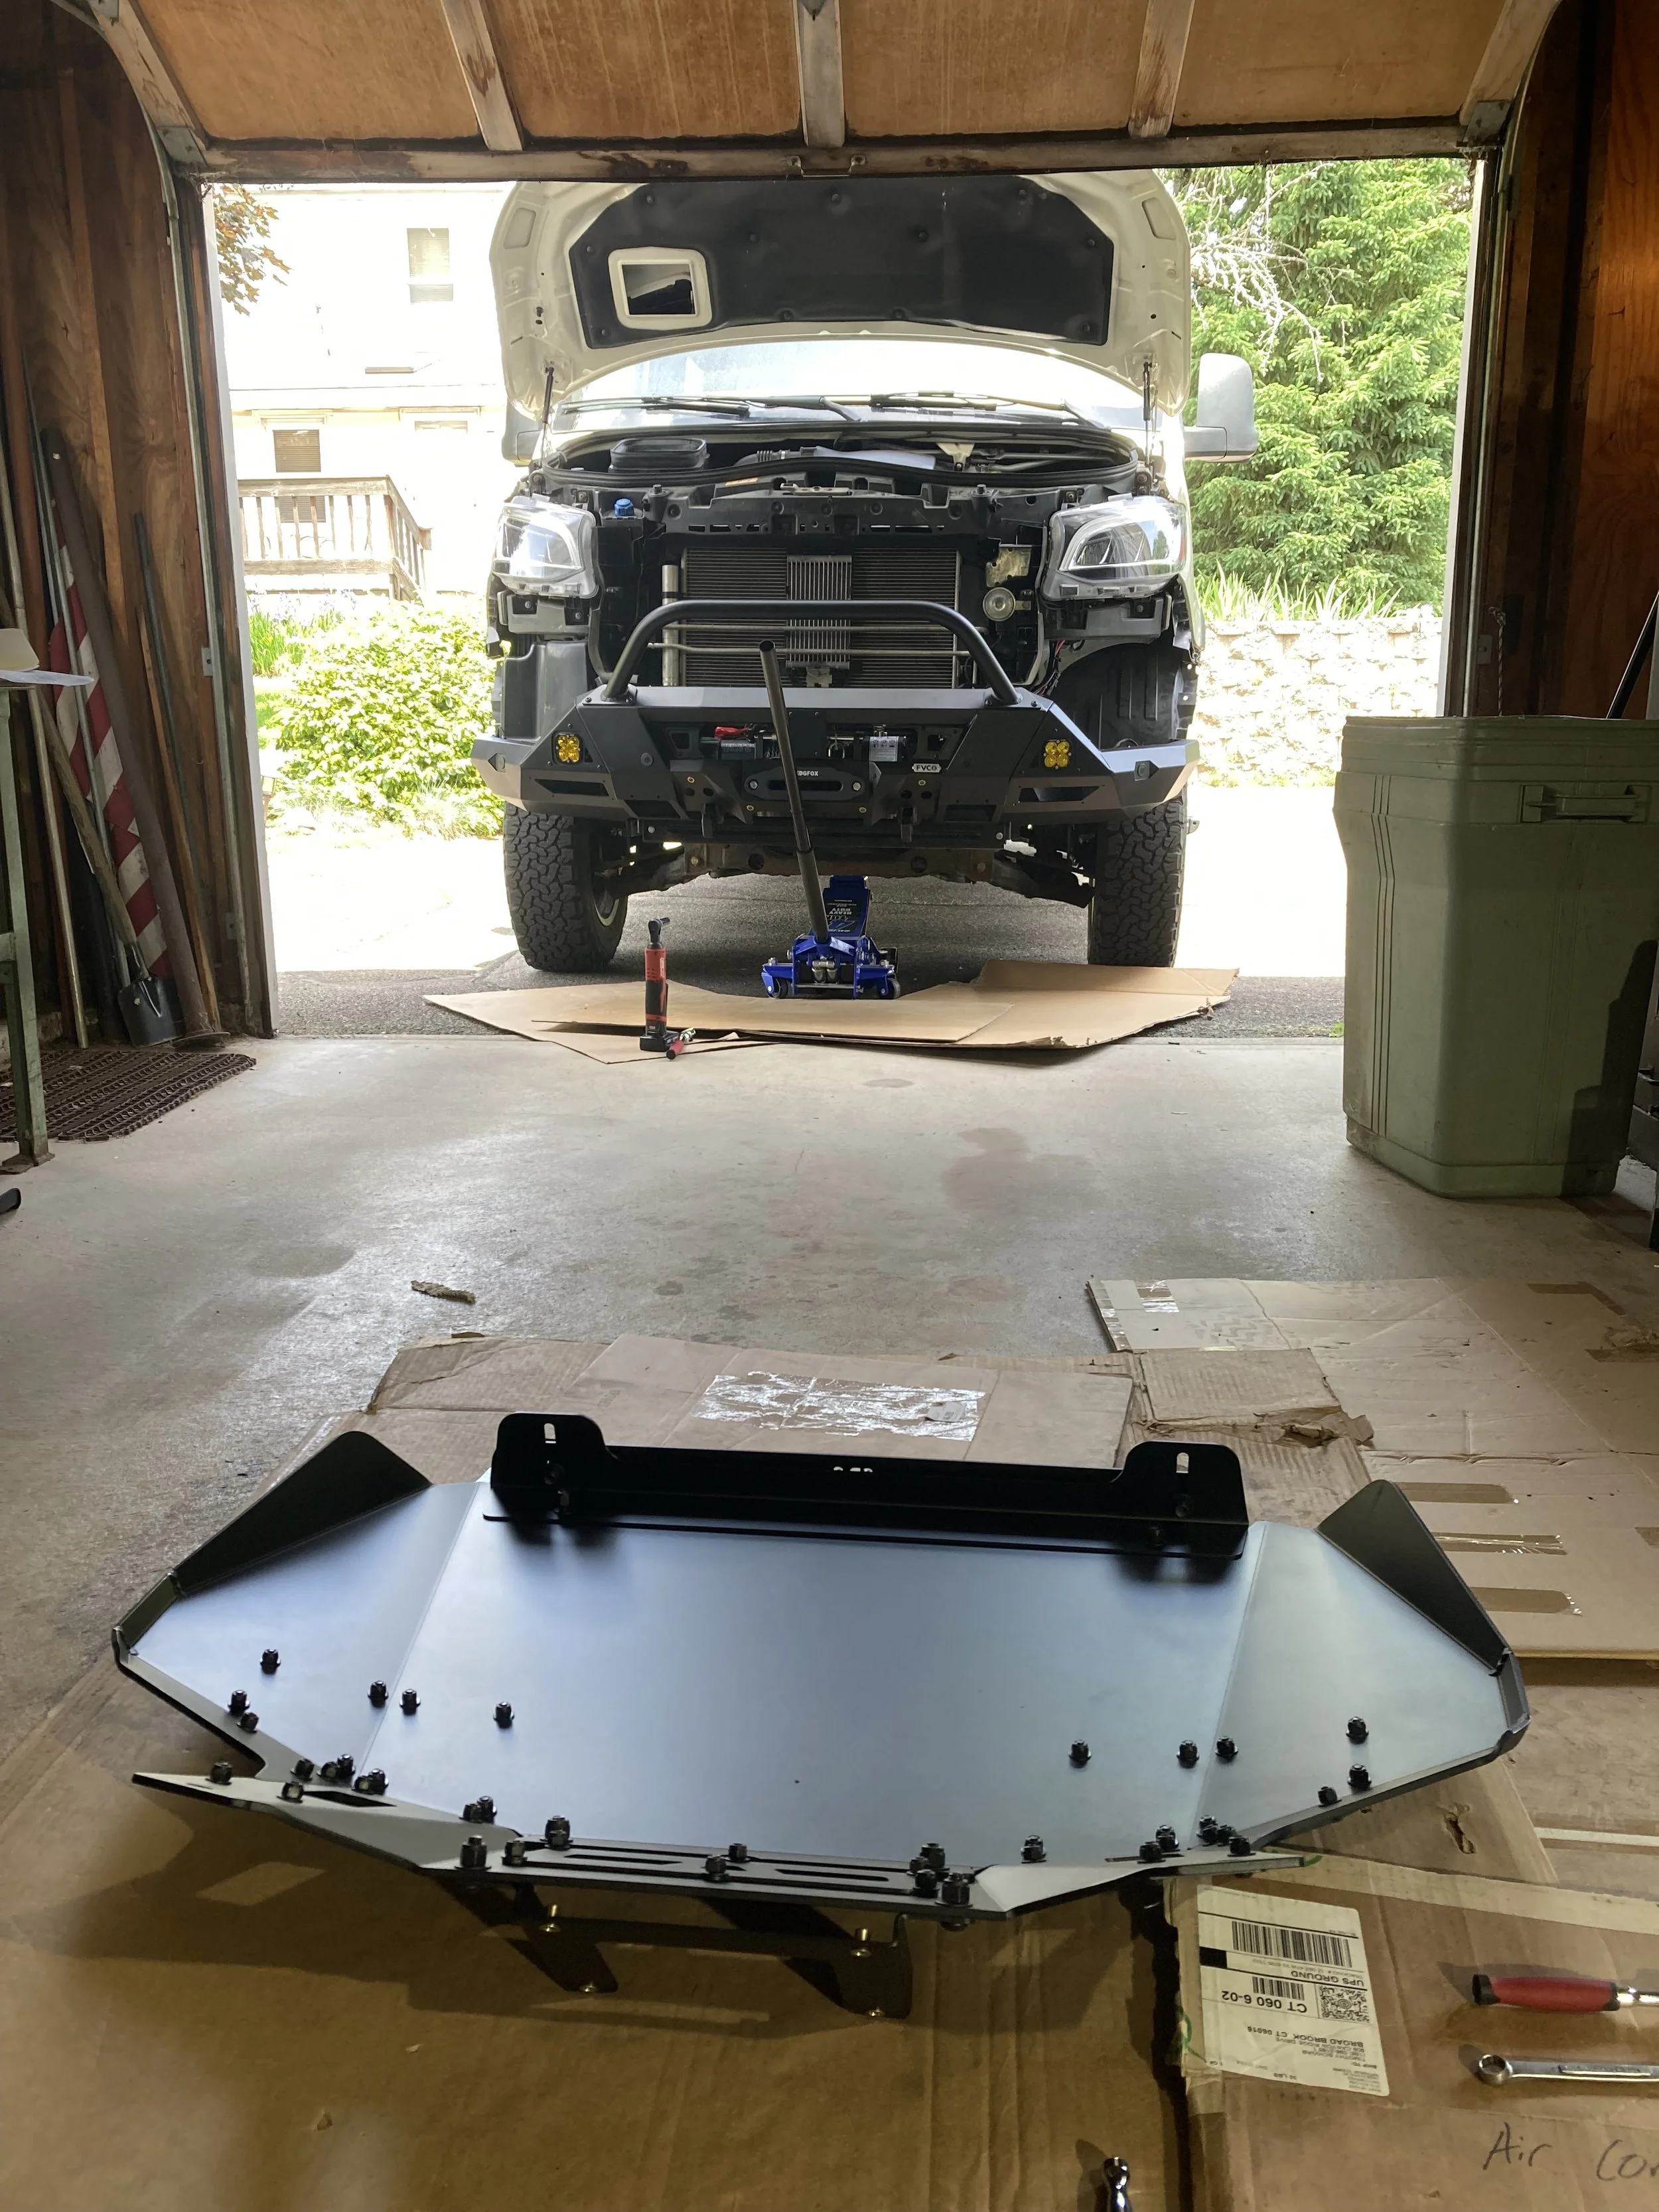
Flatline Van Co skid plate
Baja designs Squadron Pro Auxiliary

Baja Designs LP 9's (letting customer choose how they want them orientated)
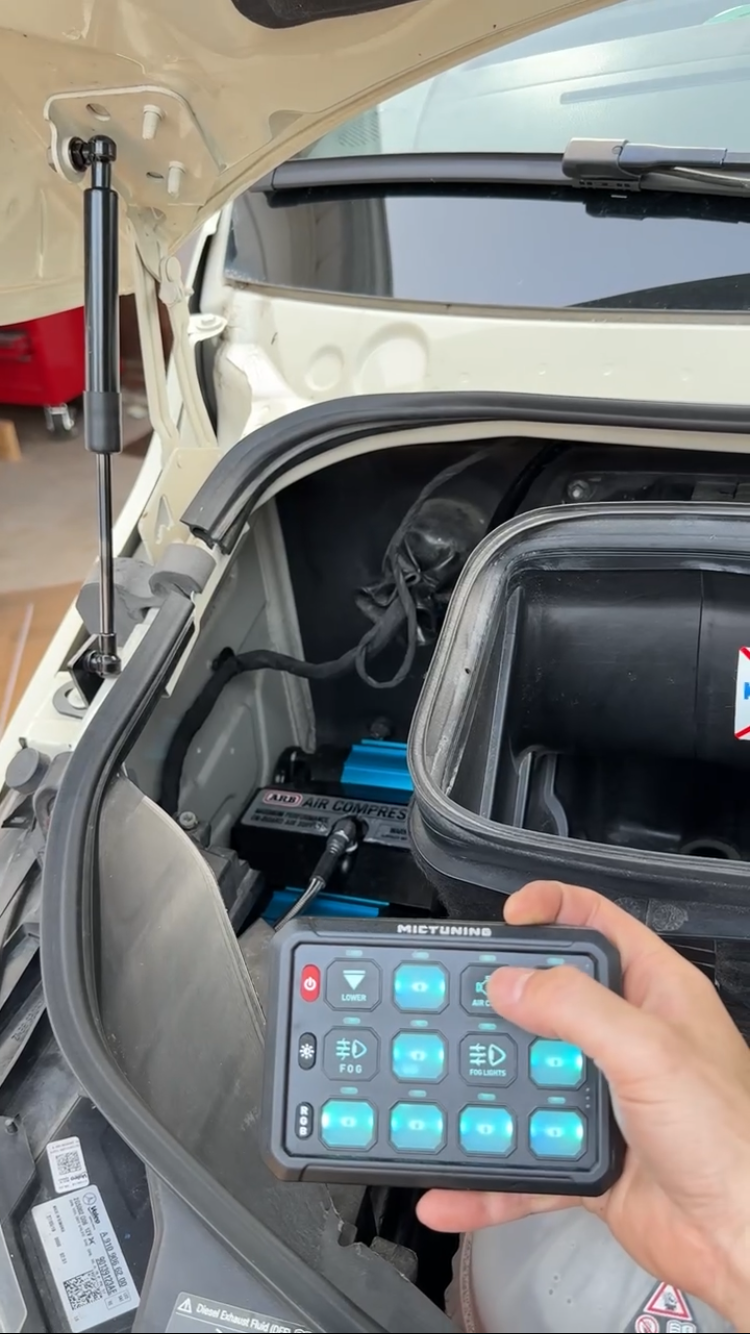
MIC Tuning 12 gang switch controls the air compressor and the lights in the front bumper. Used the 12 gang to leave room for more lights in the future
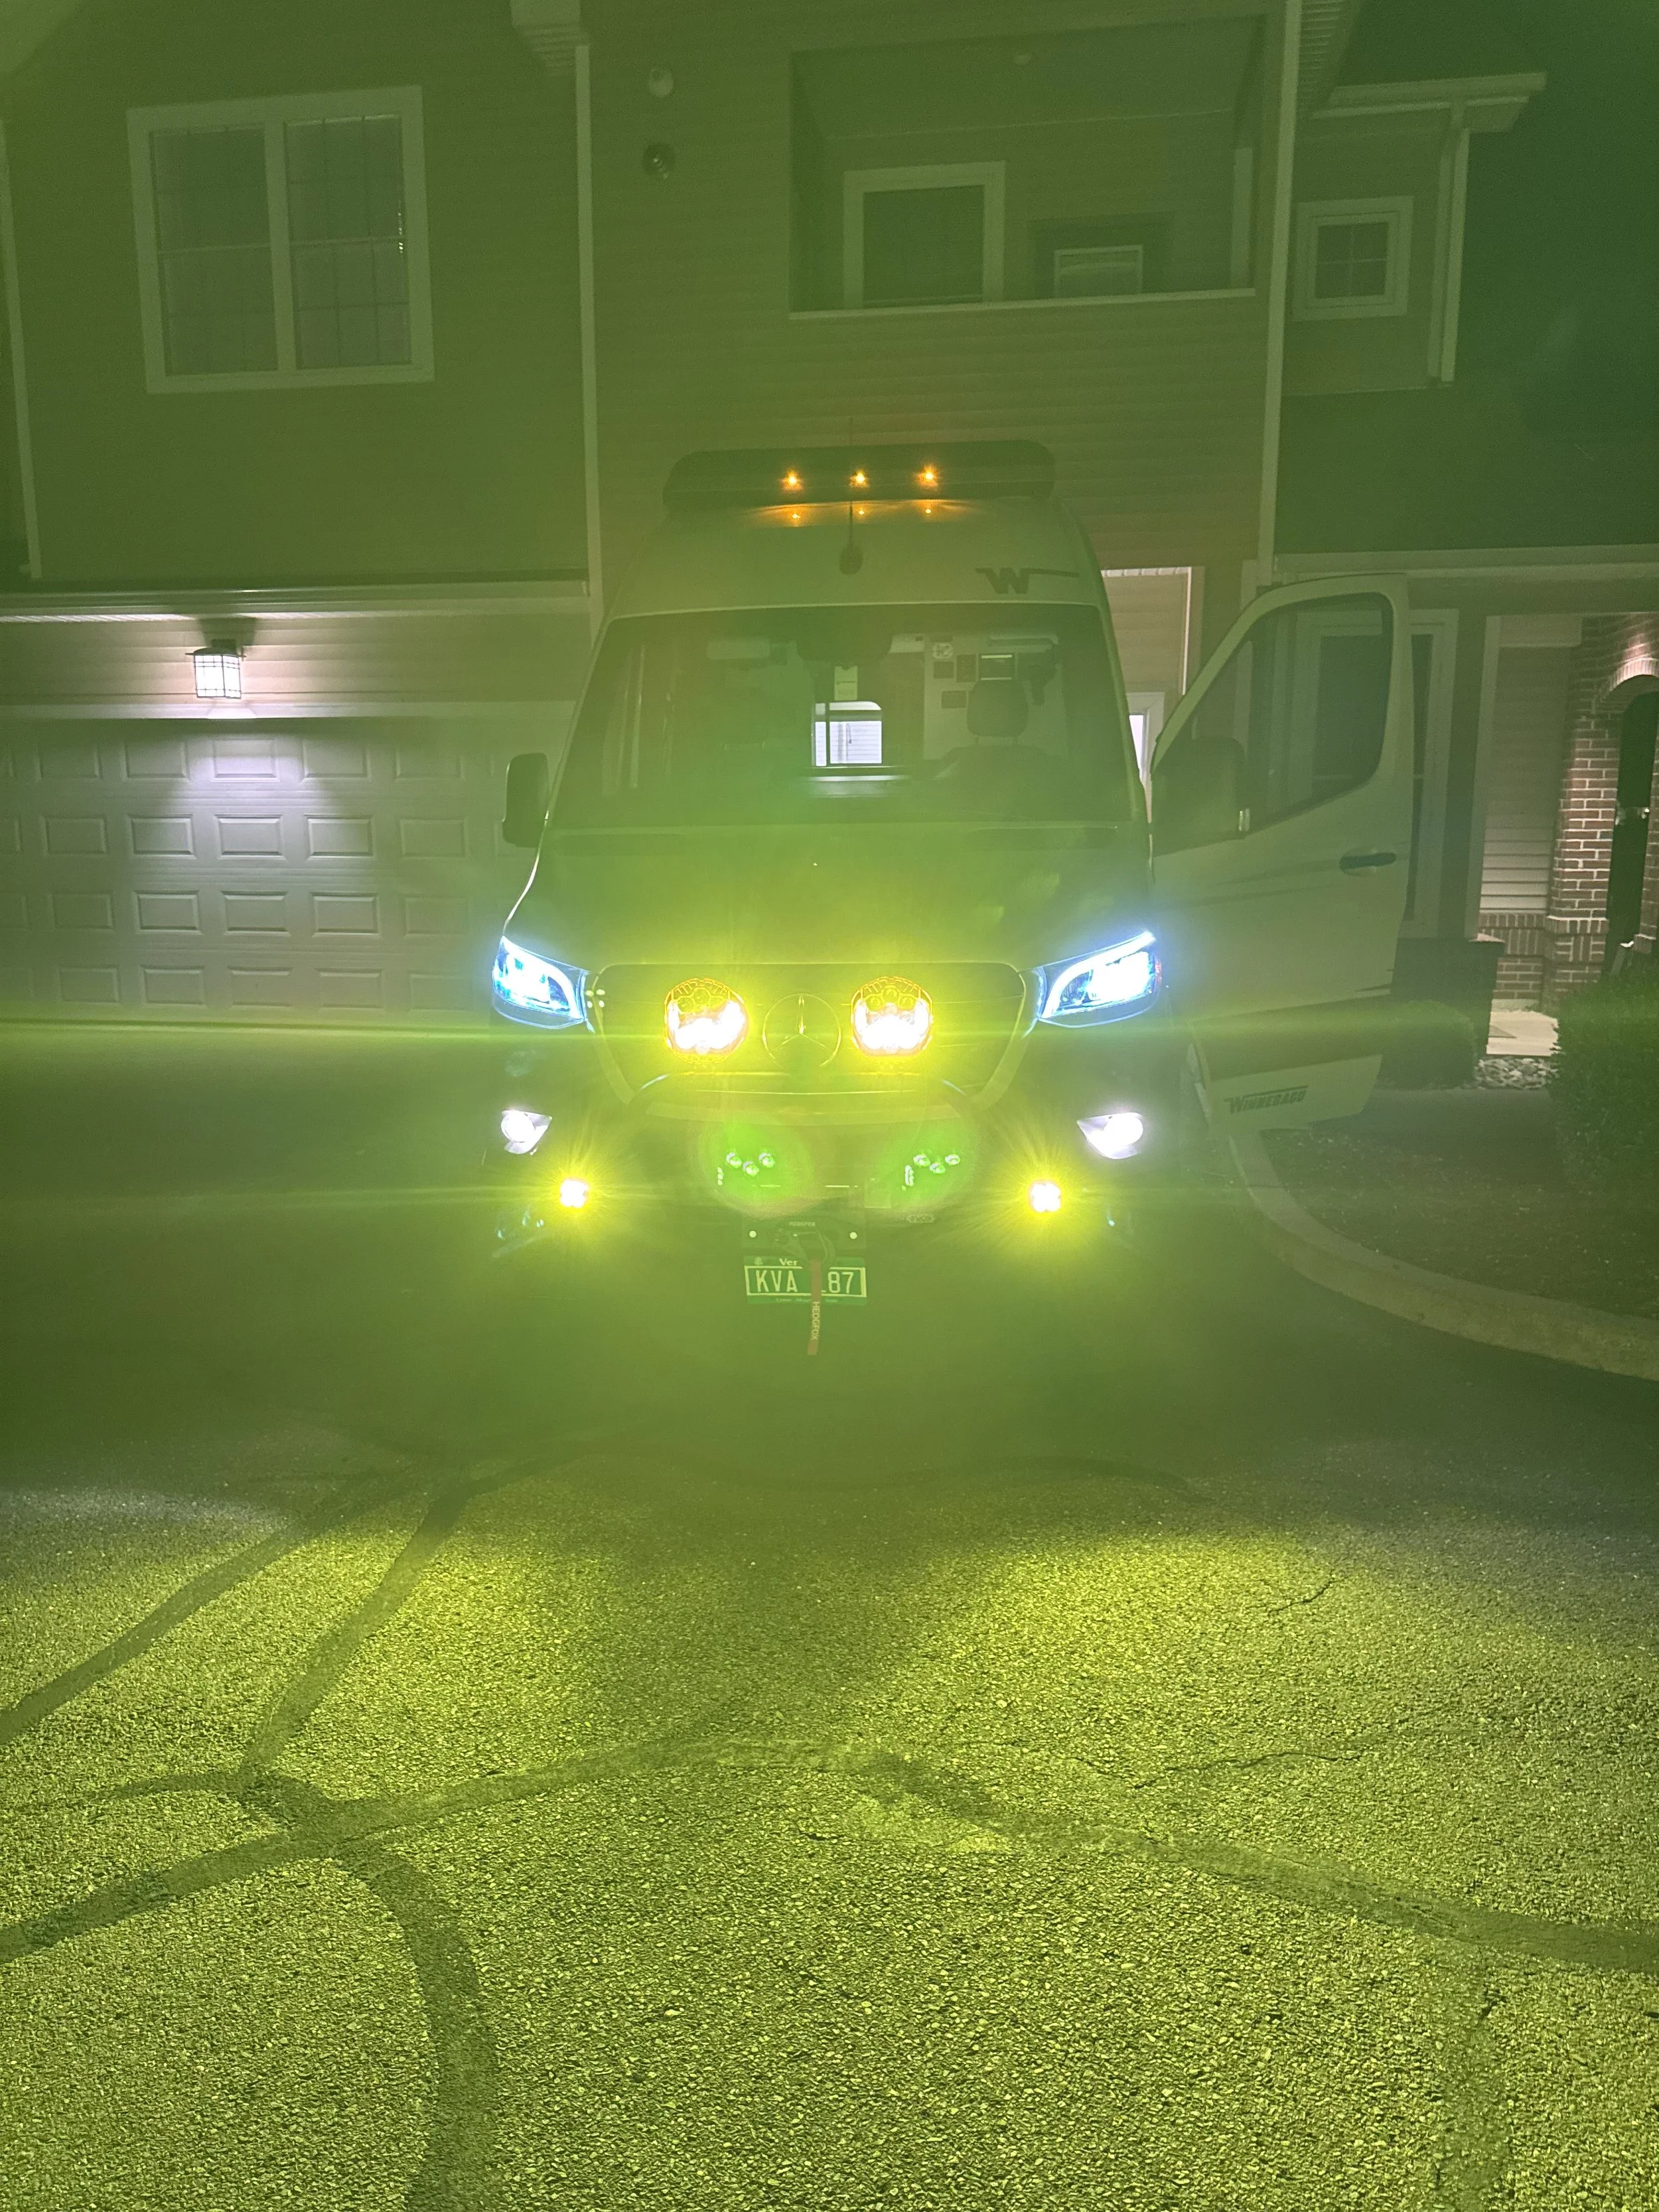
LP 9's also come with the amber lens covers
The customer wanted everything wired to the MIC Tuning 12 gang Blue tooth switch
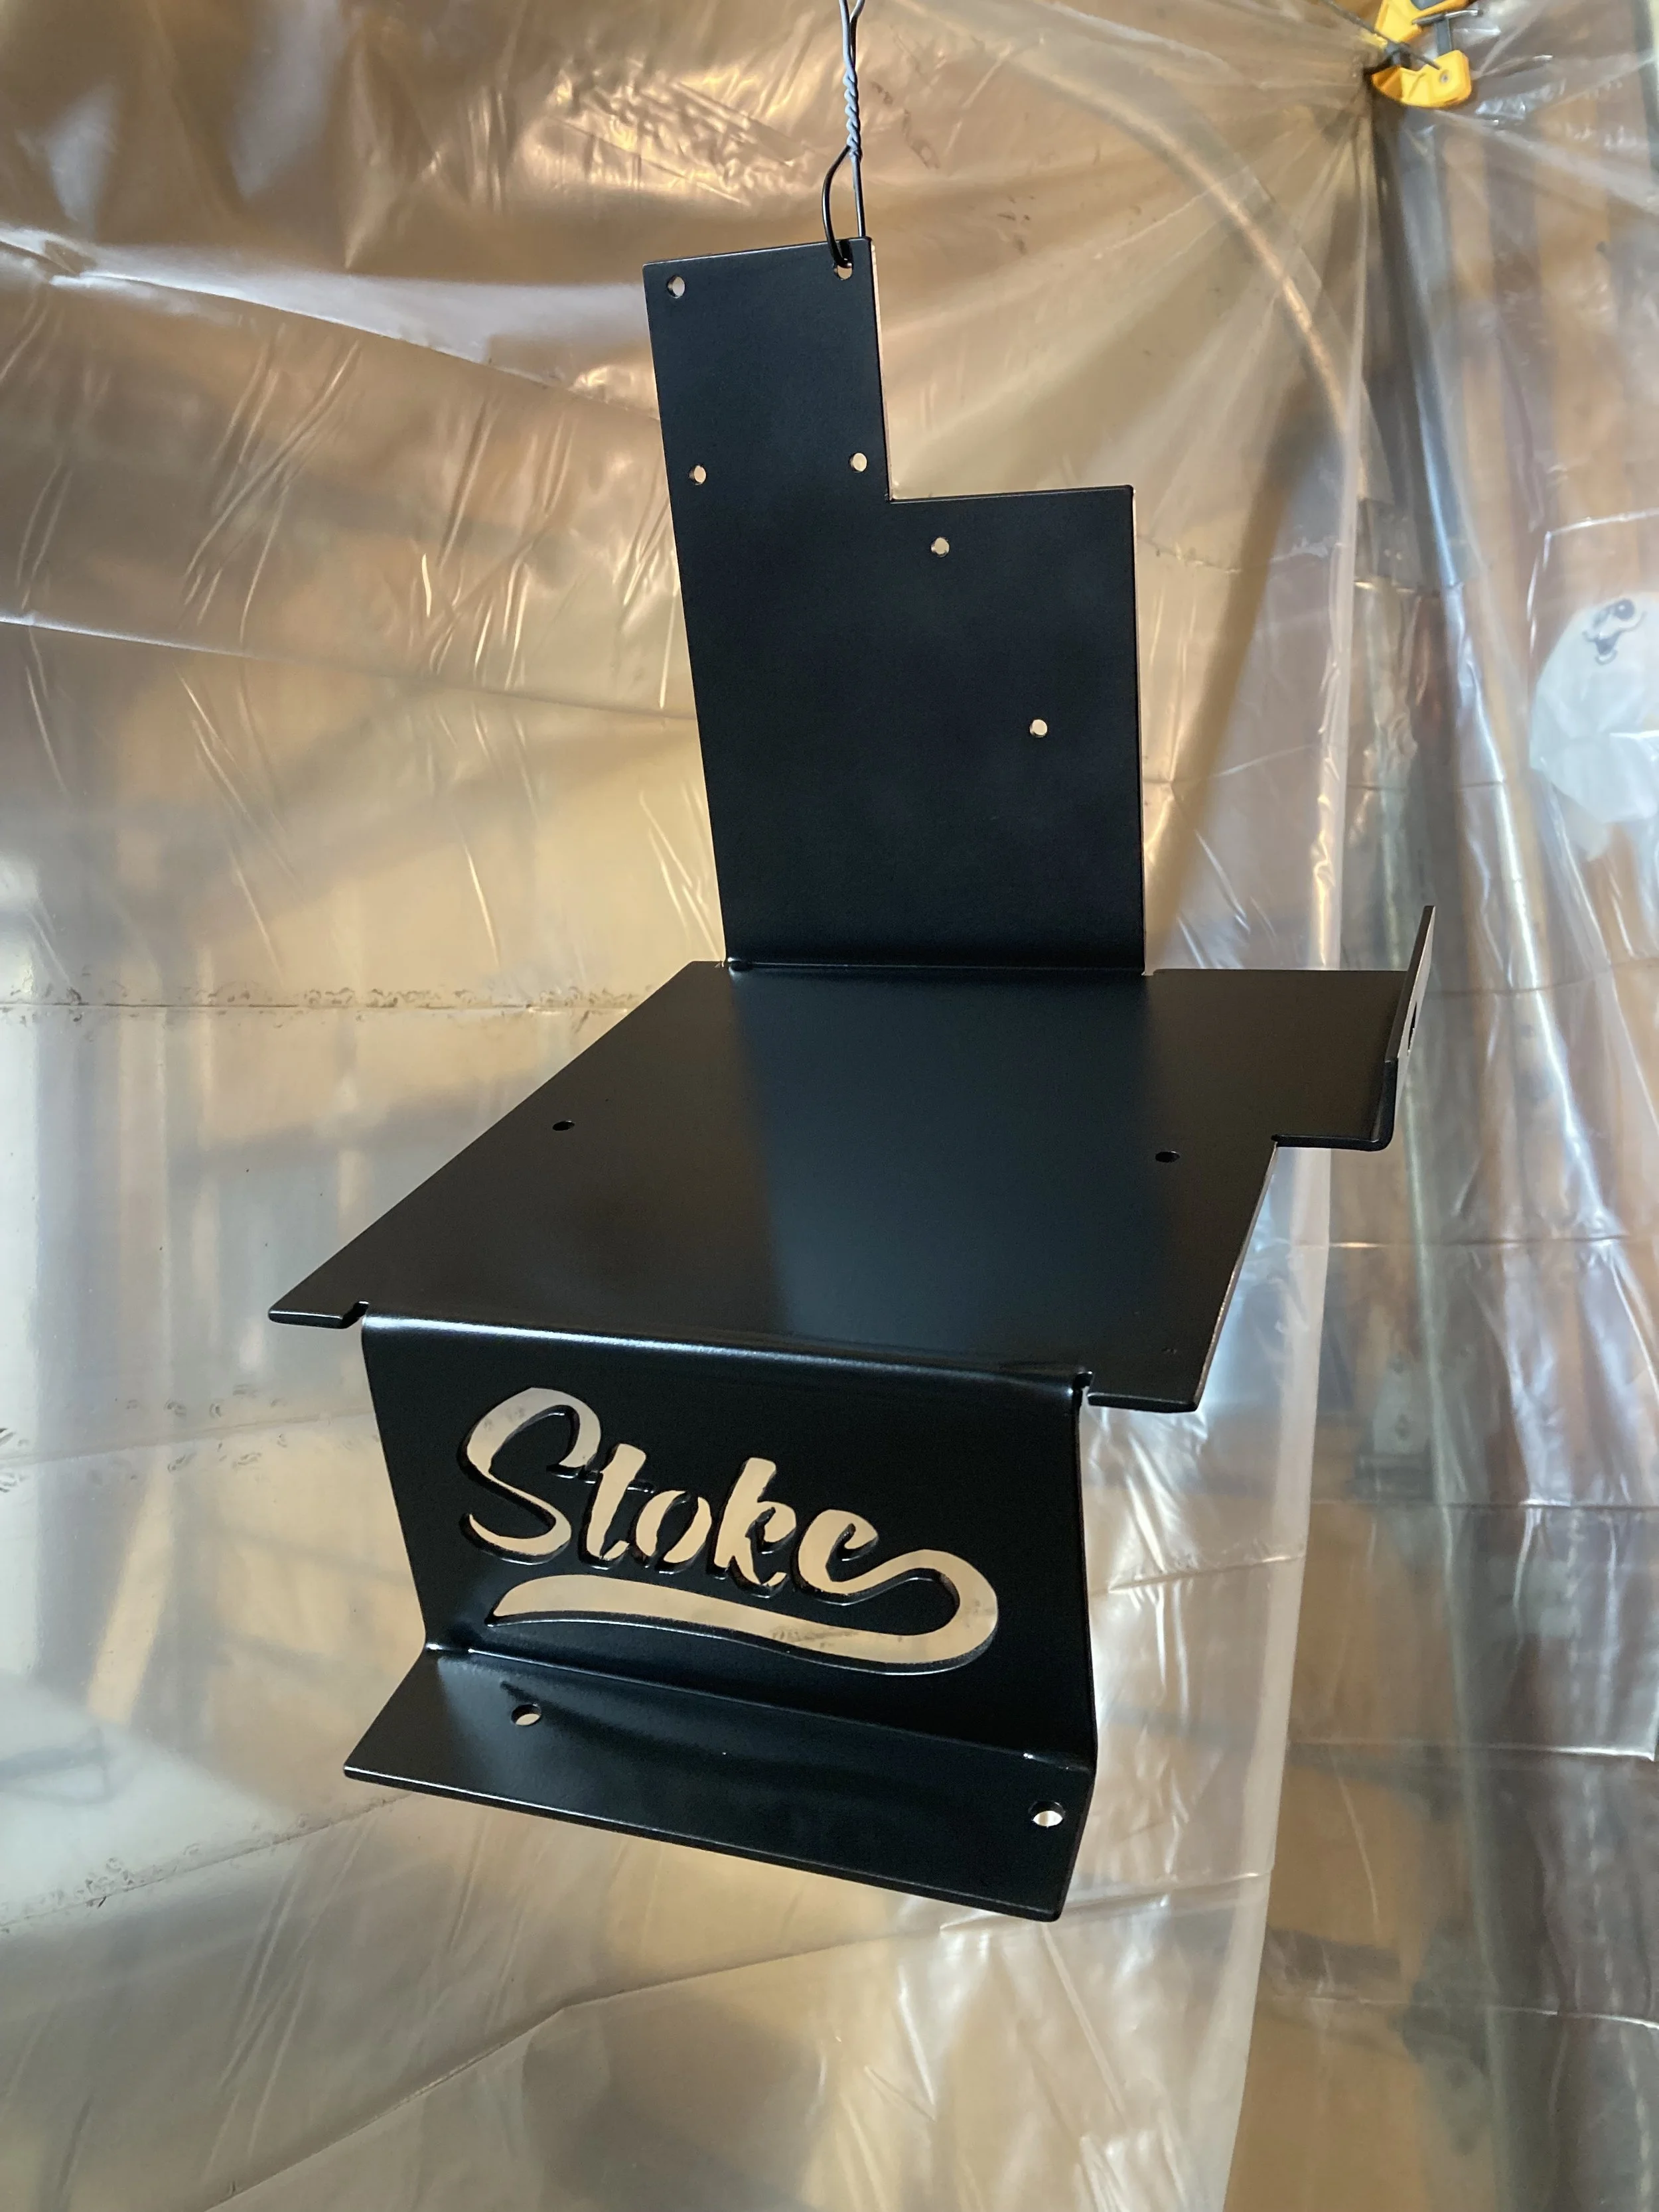
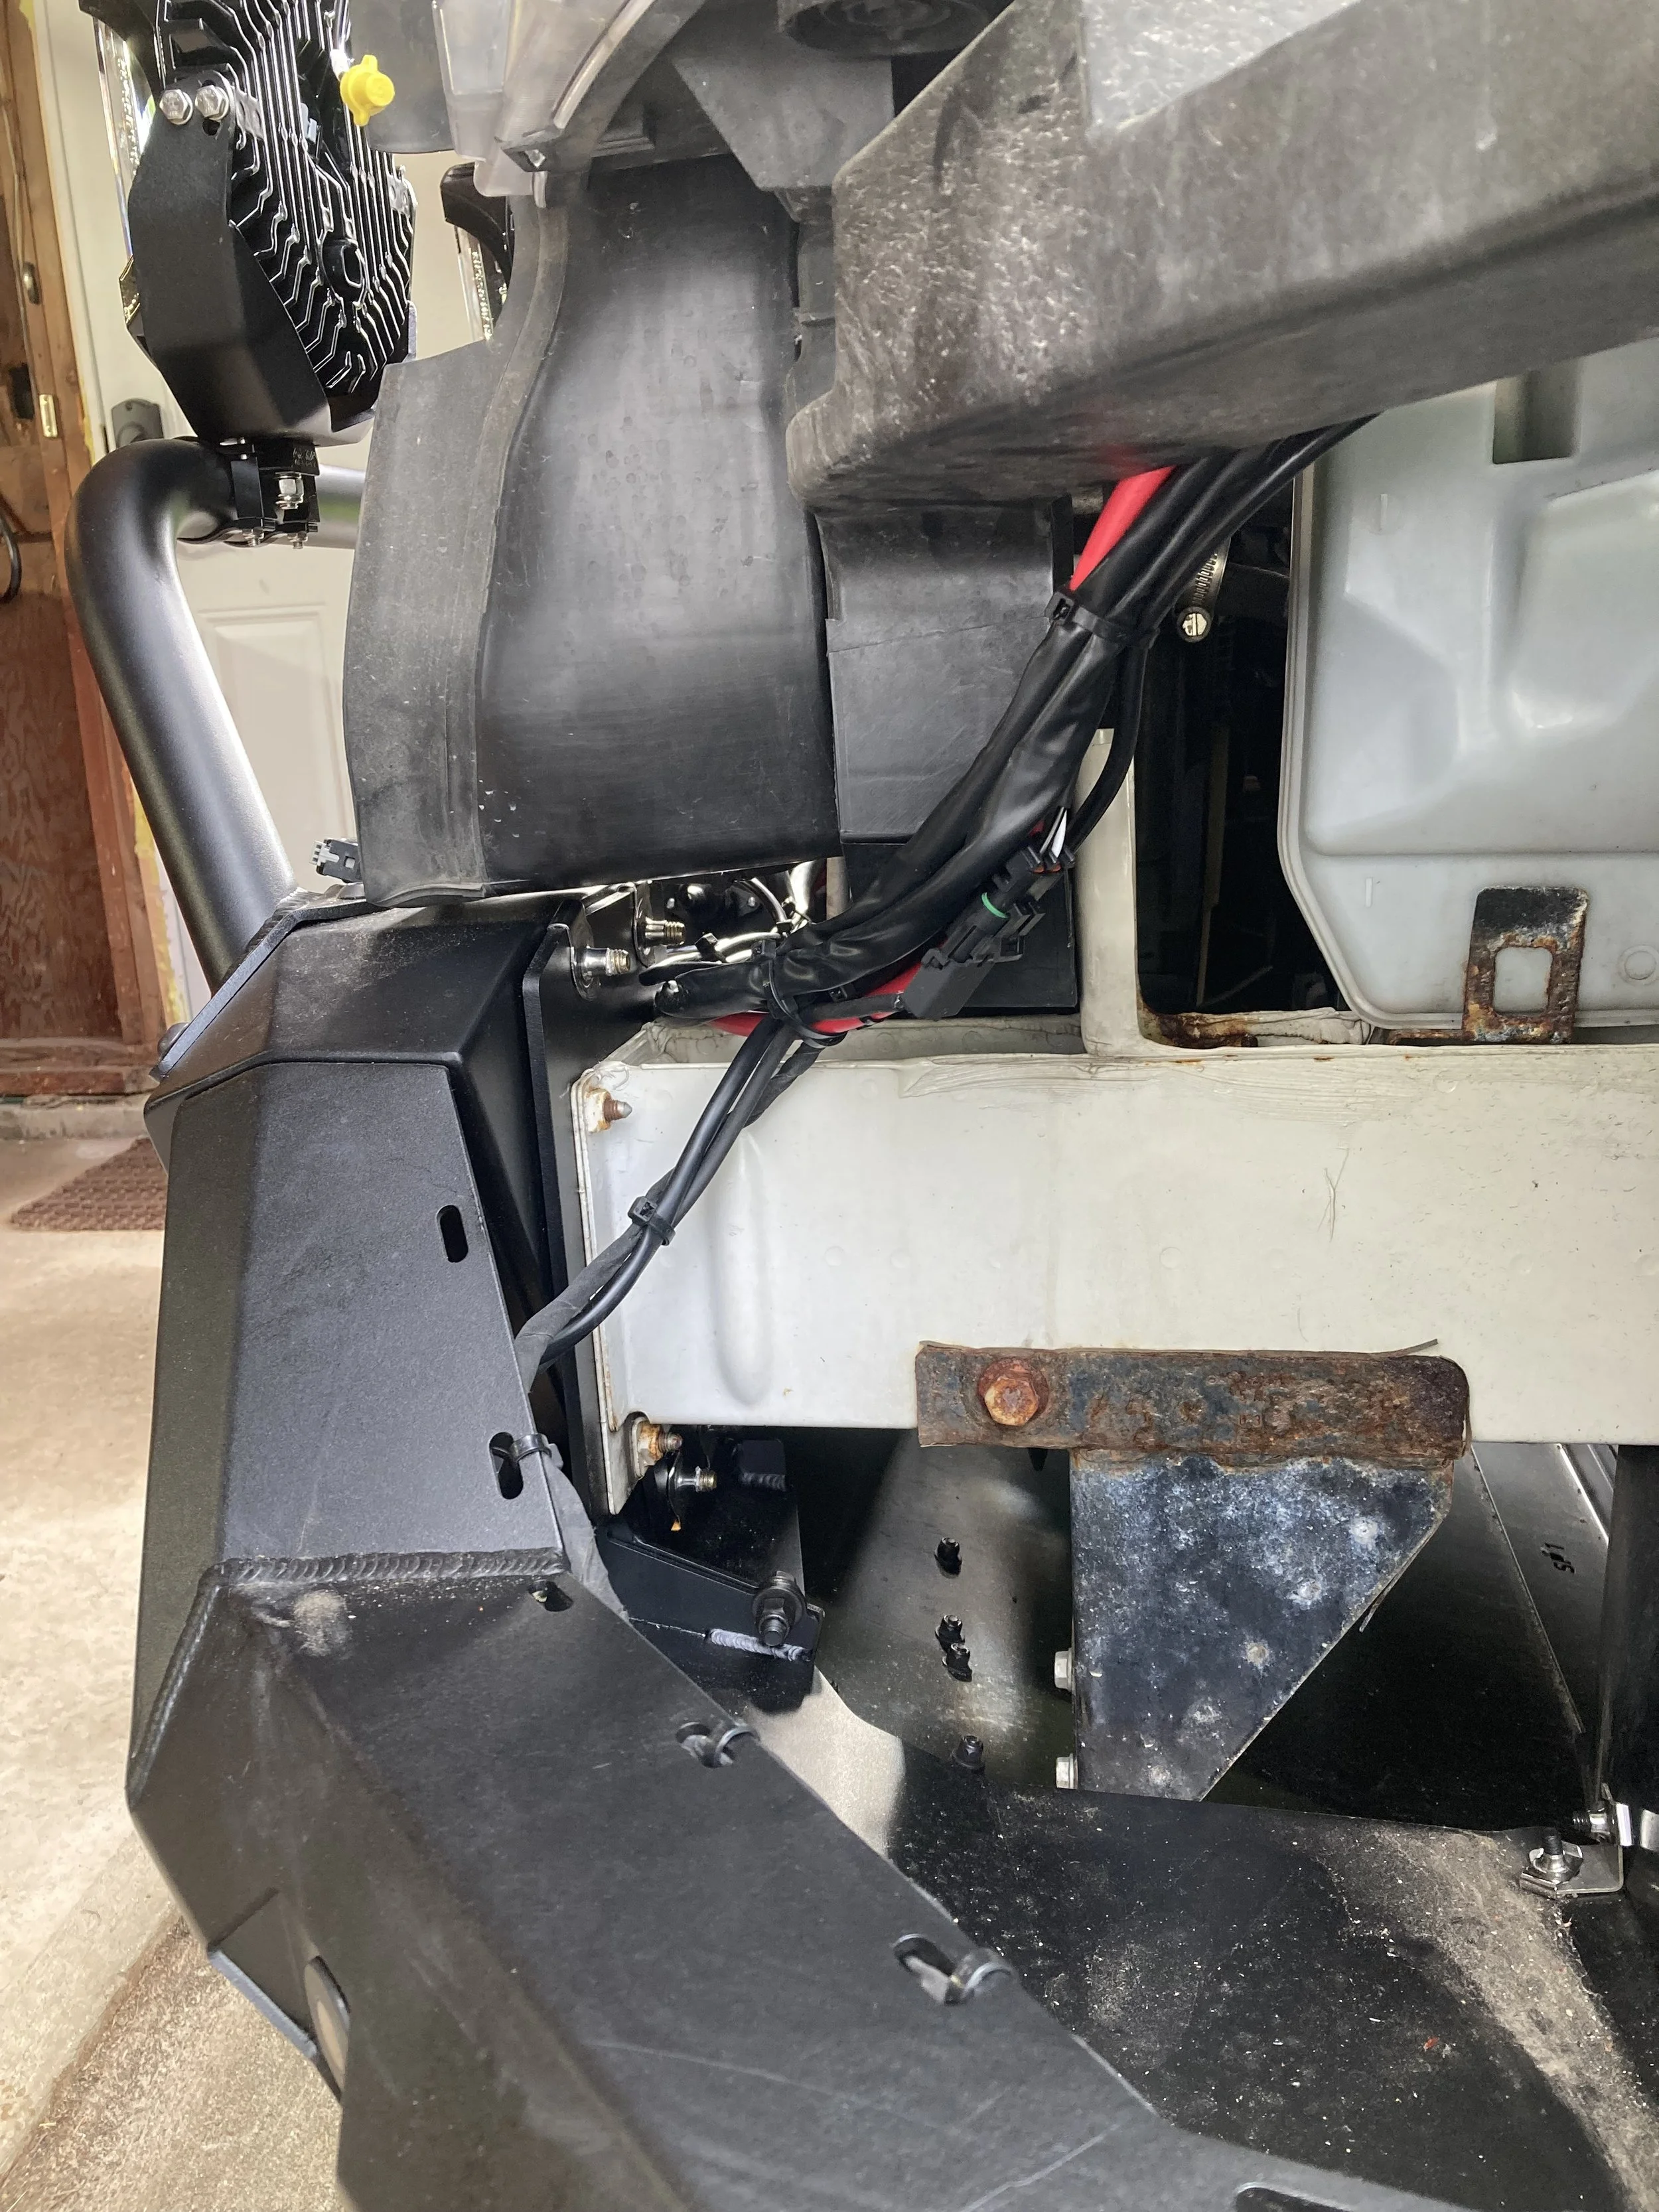
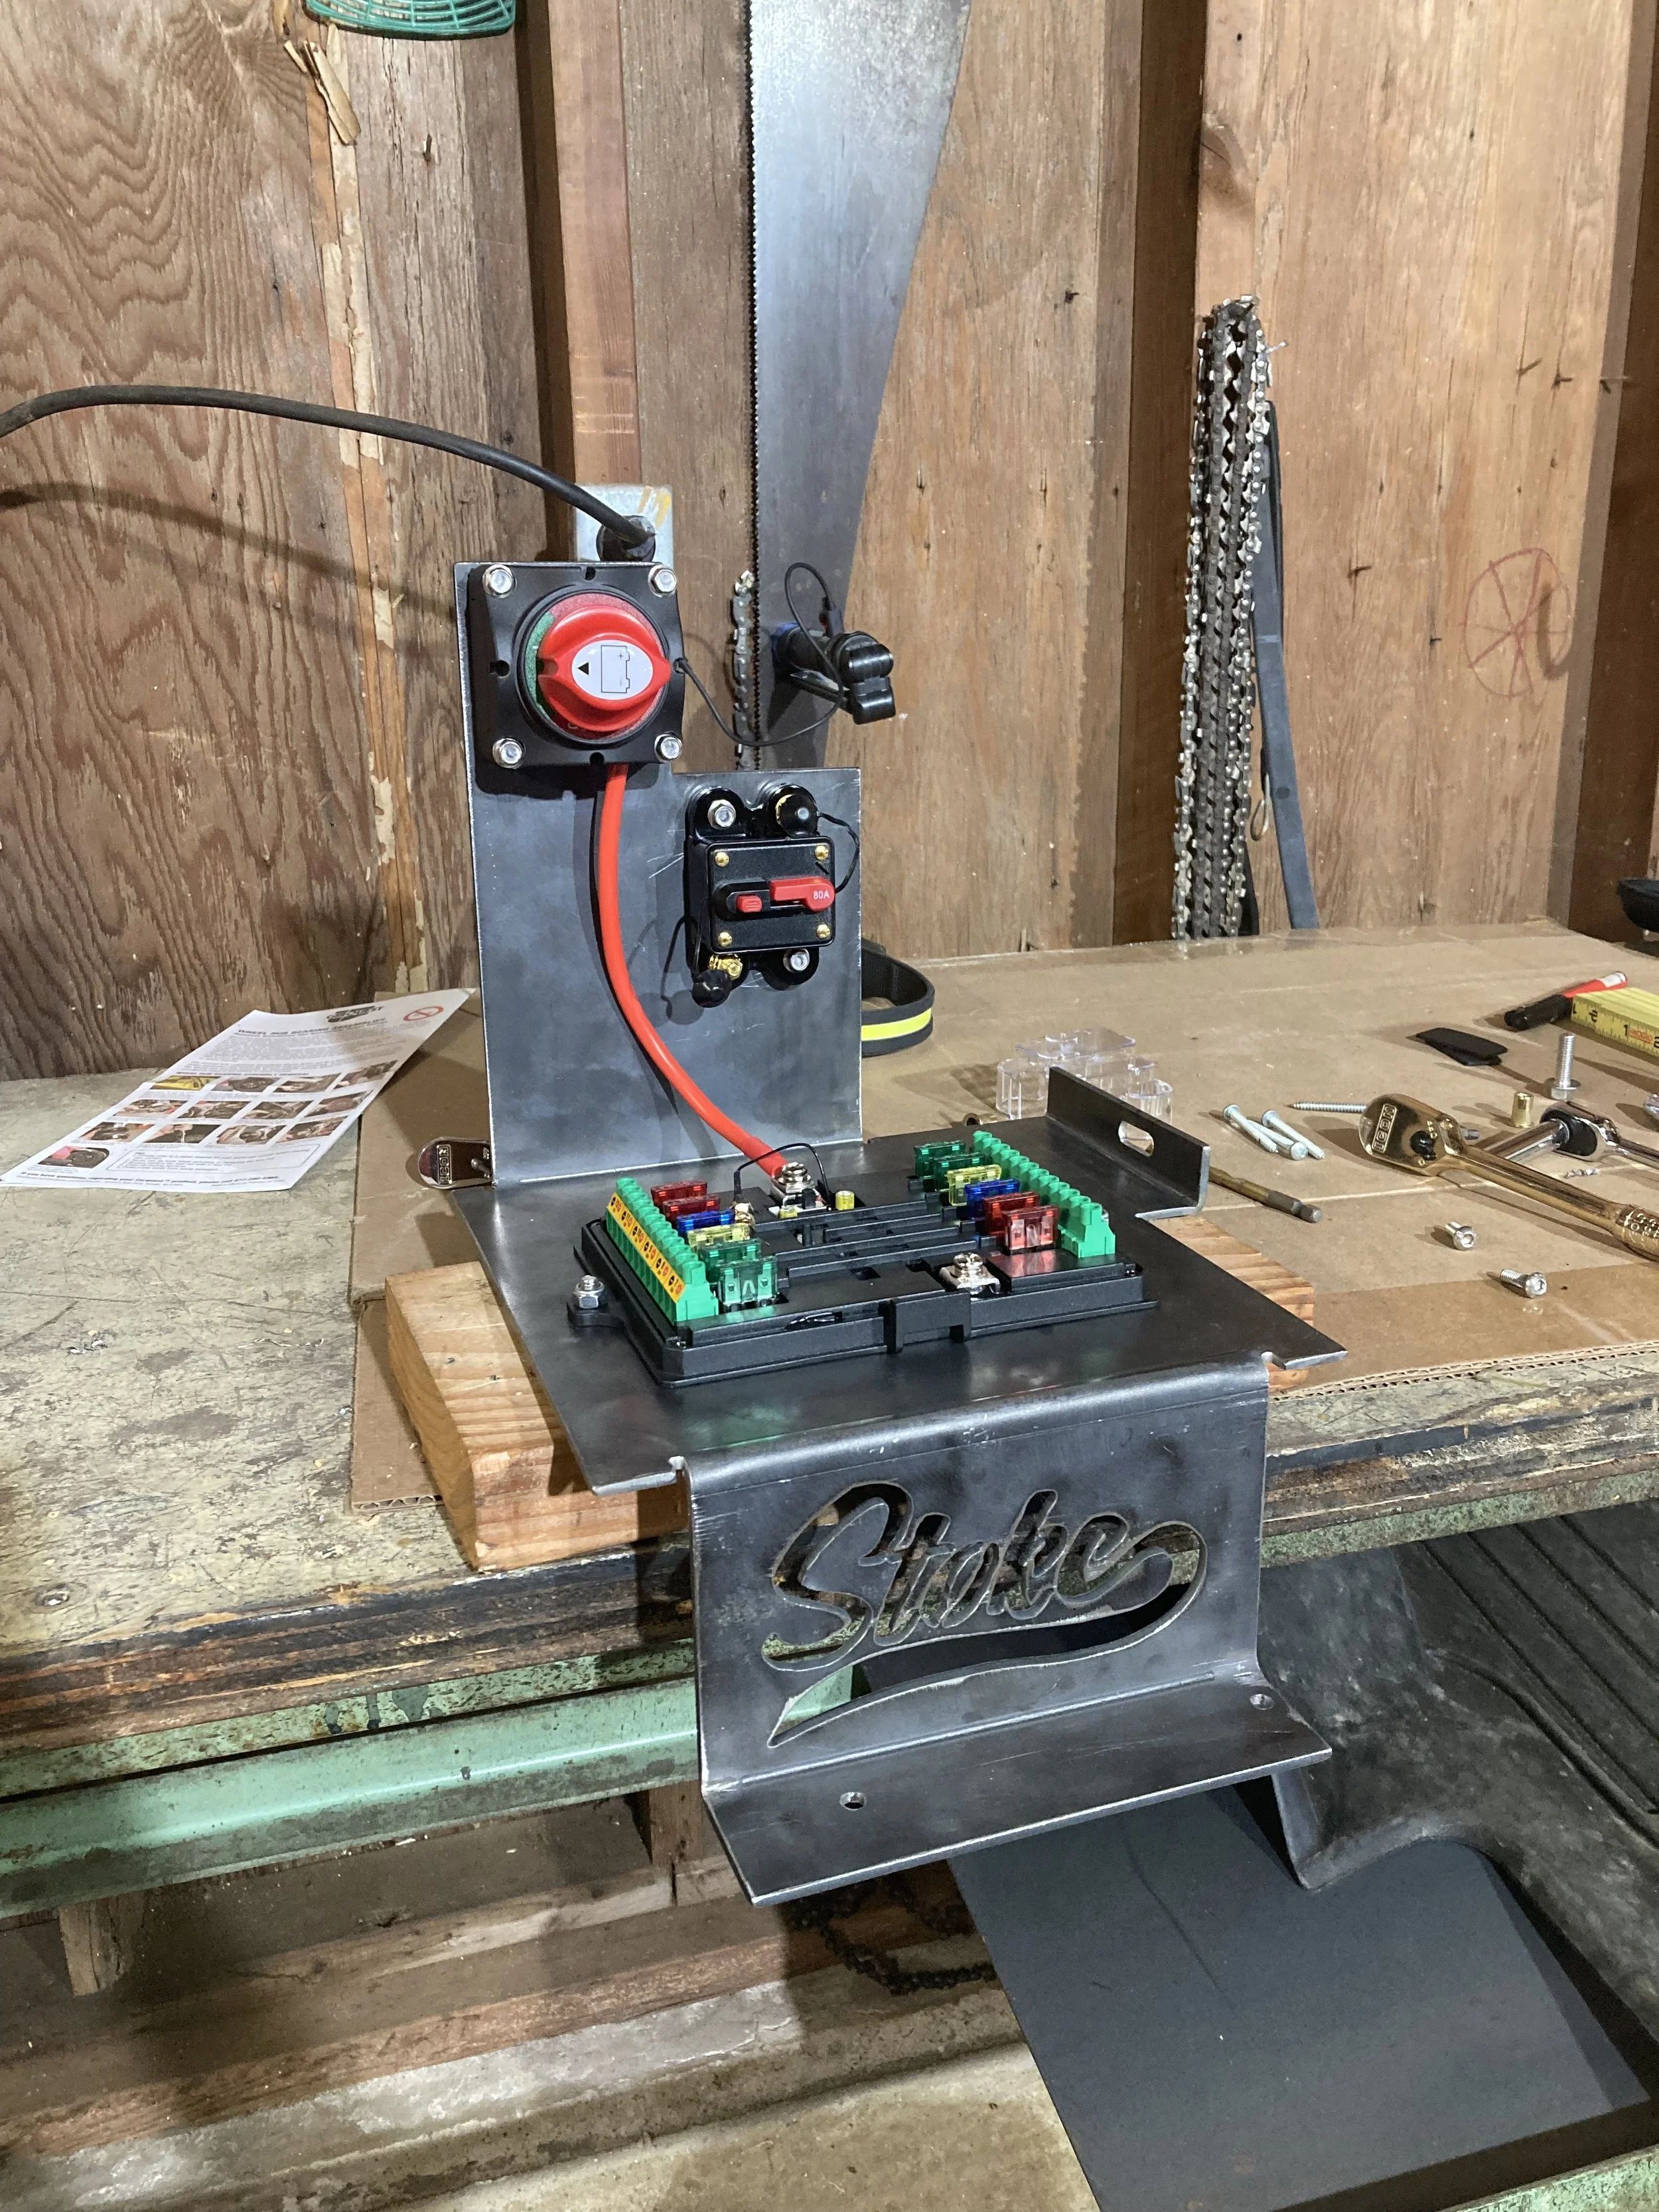
So we fabricated a mounting bracket (patent pending) that gives you a place to mount added electrical equipment in a neat way!
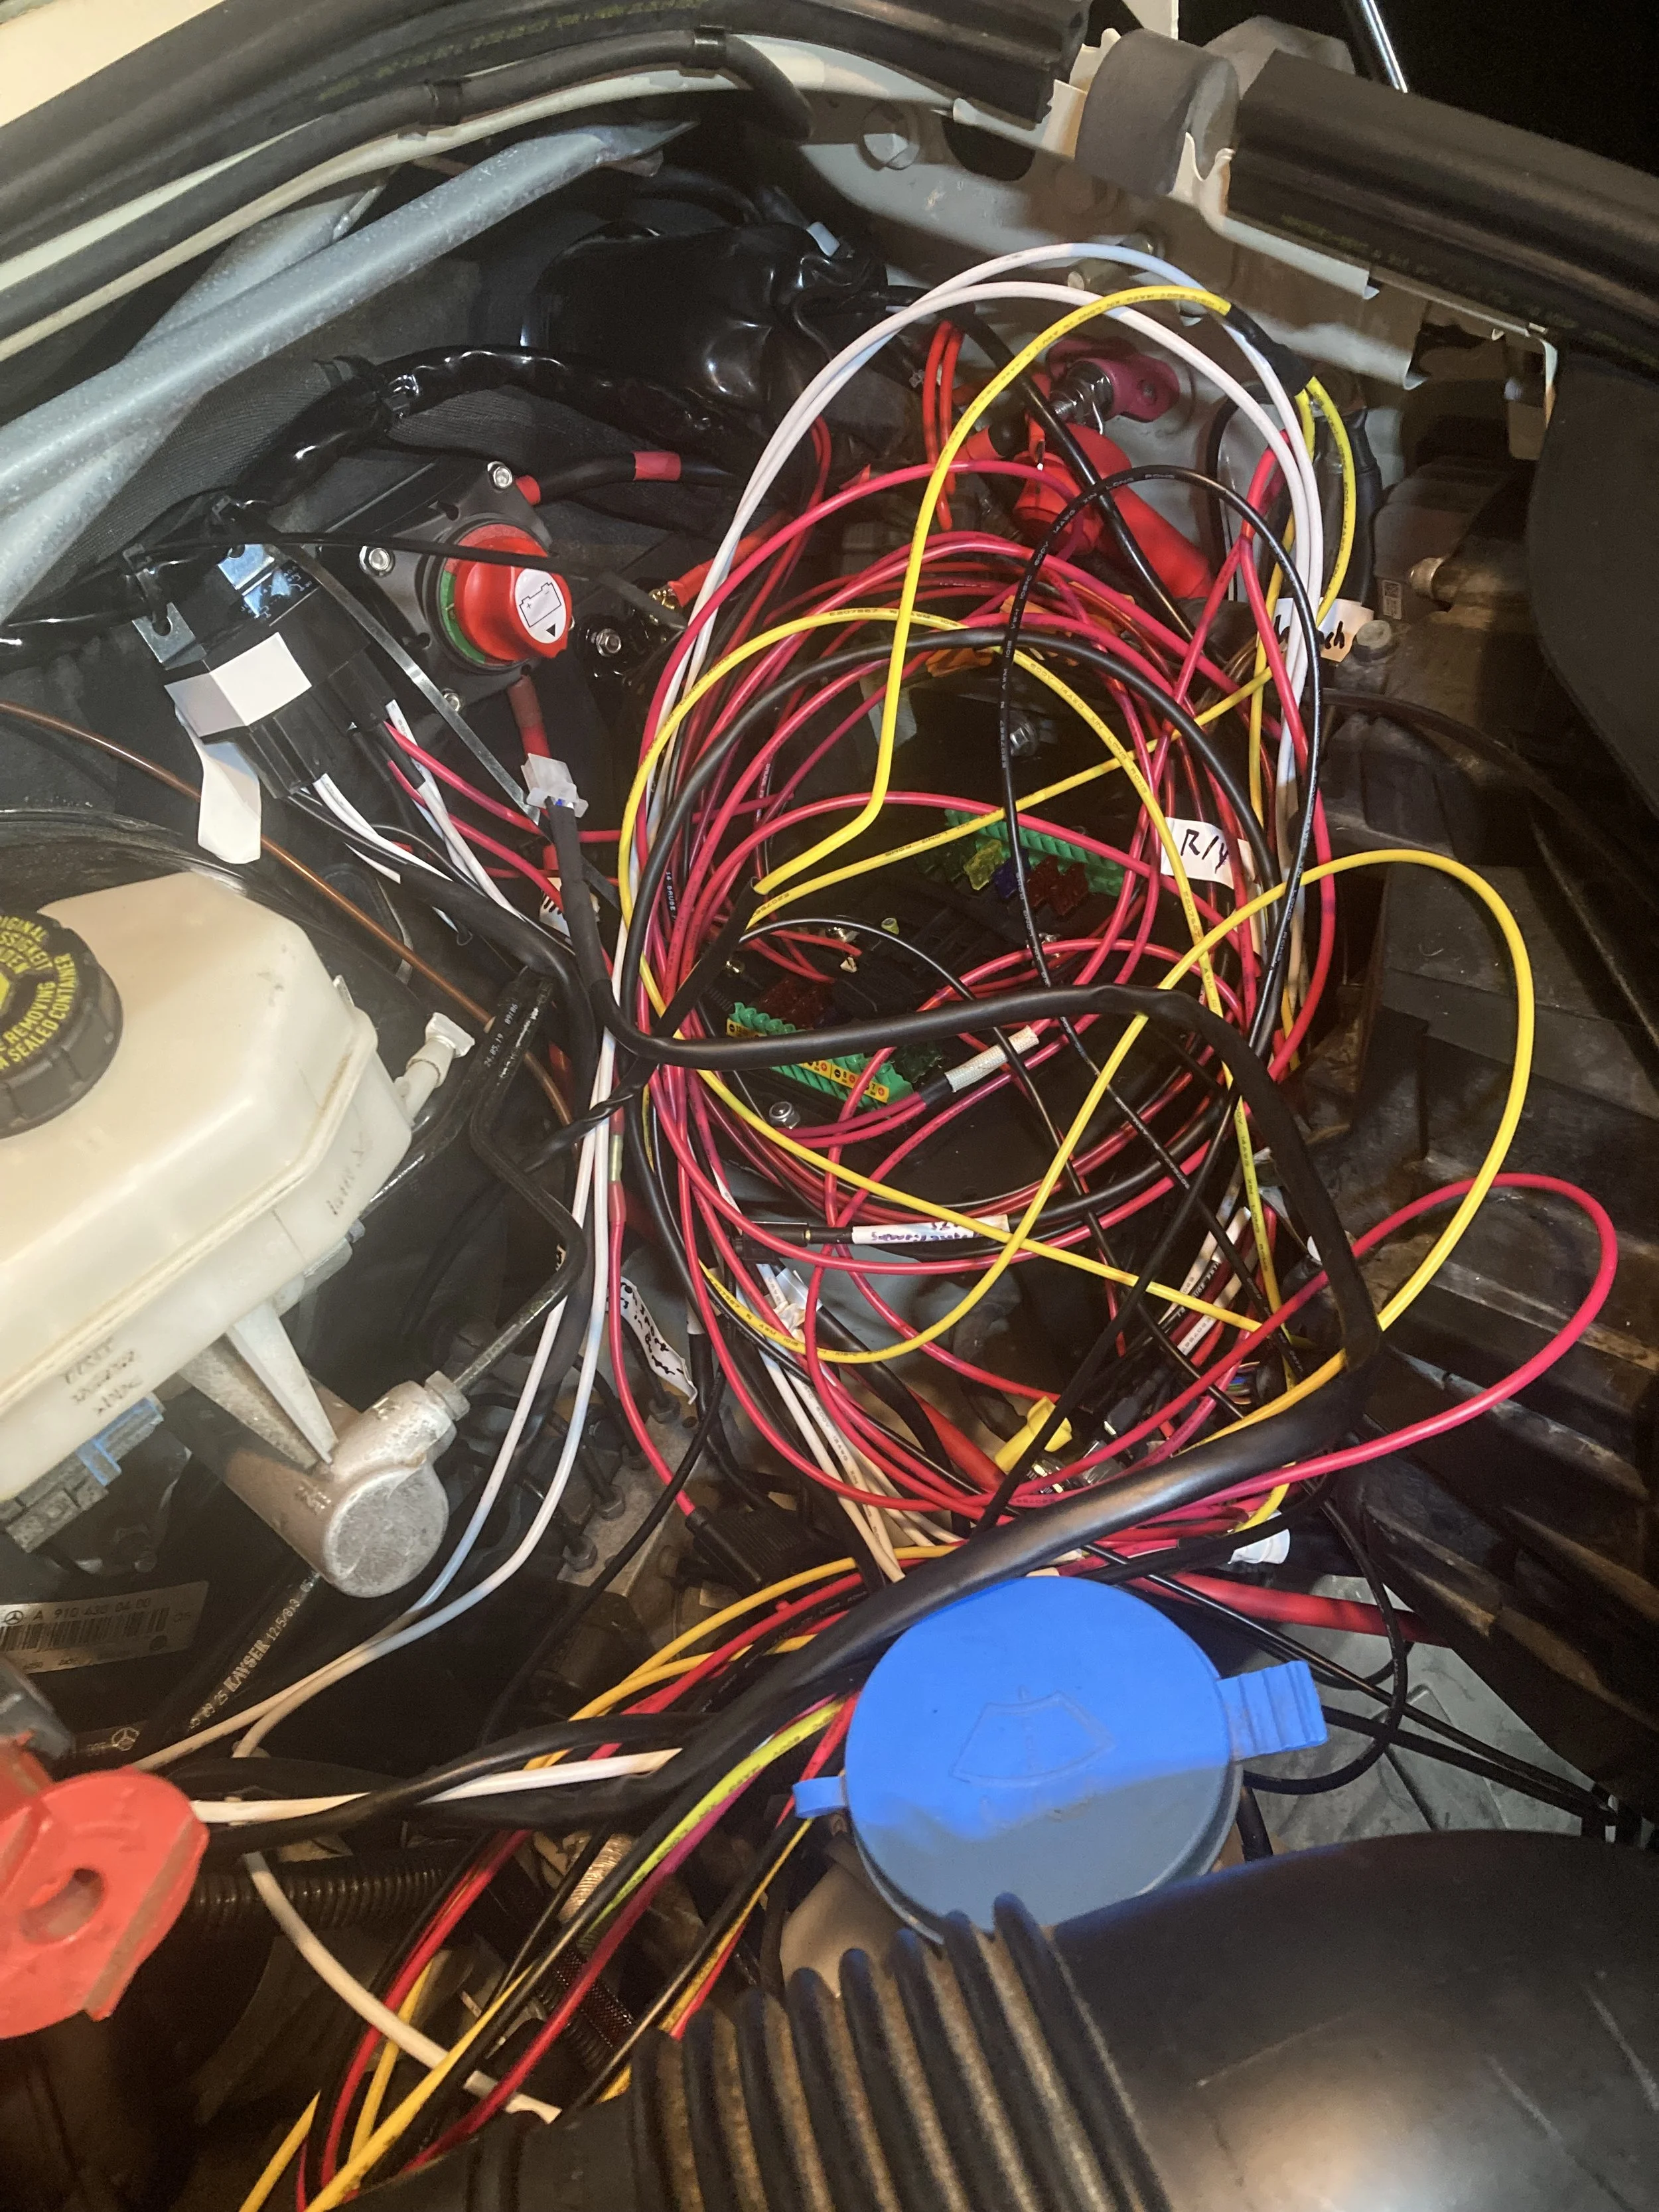
Between the winch, on board air compressor and new baja lights there was a lot of wiring to be done
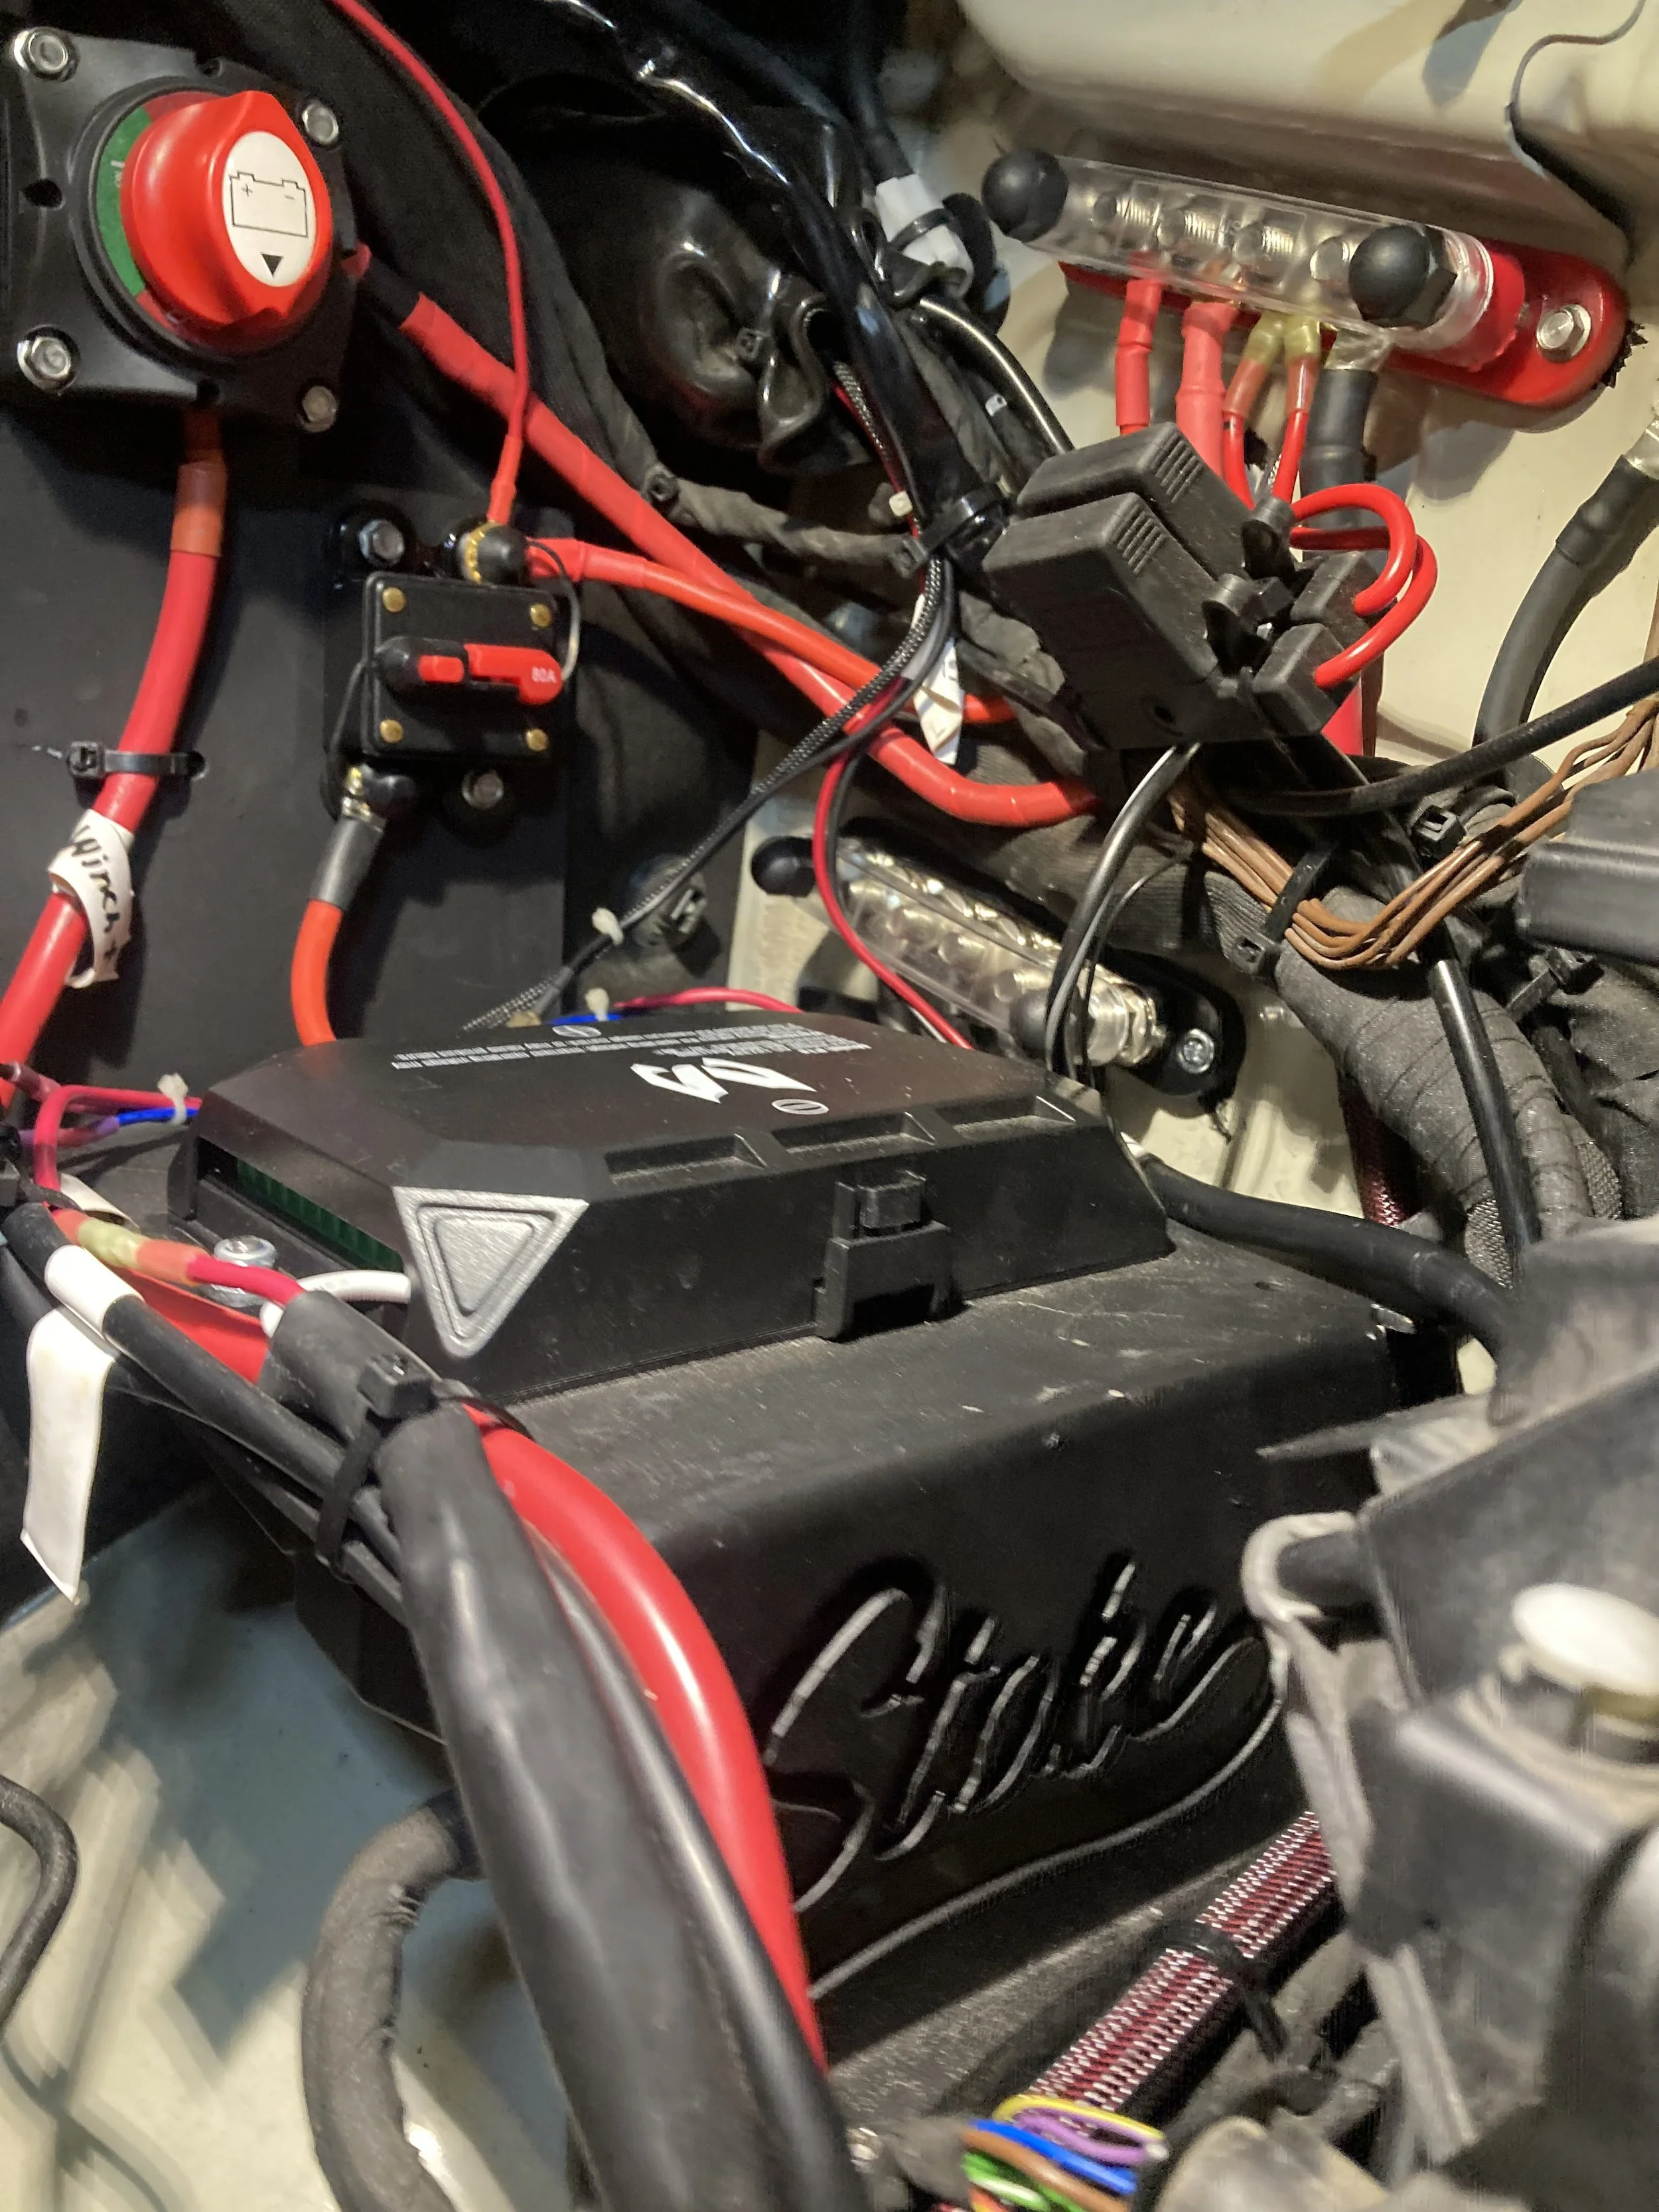
The Stoke mounting bracket installed under the hood of the 2019 Mercedes Sprinter.
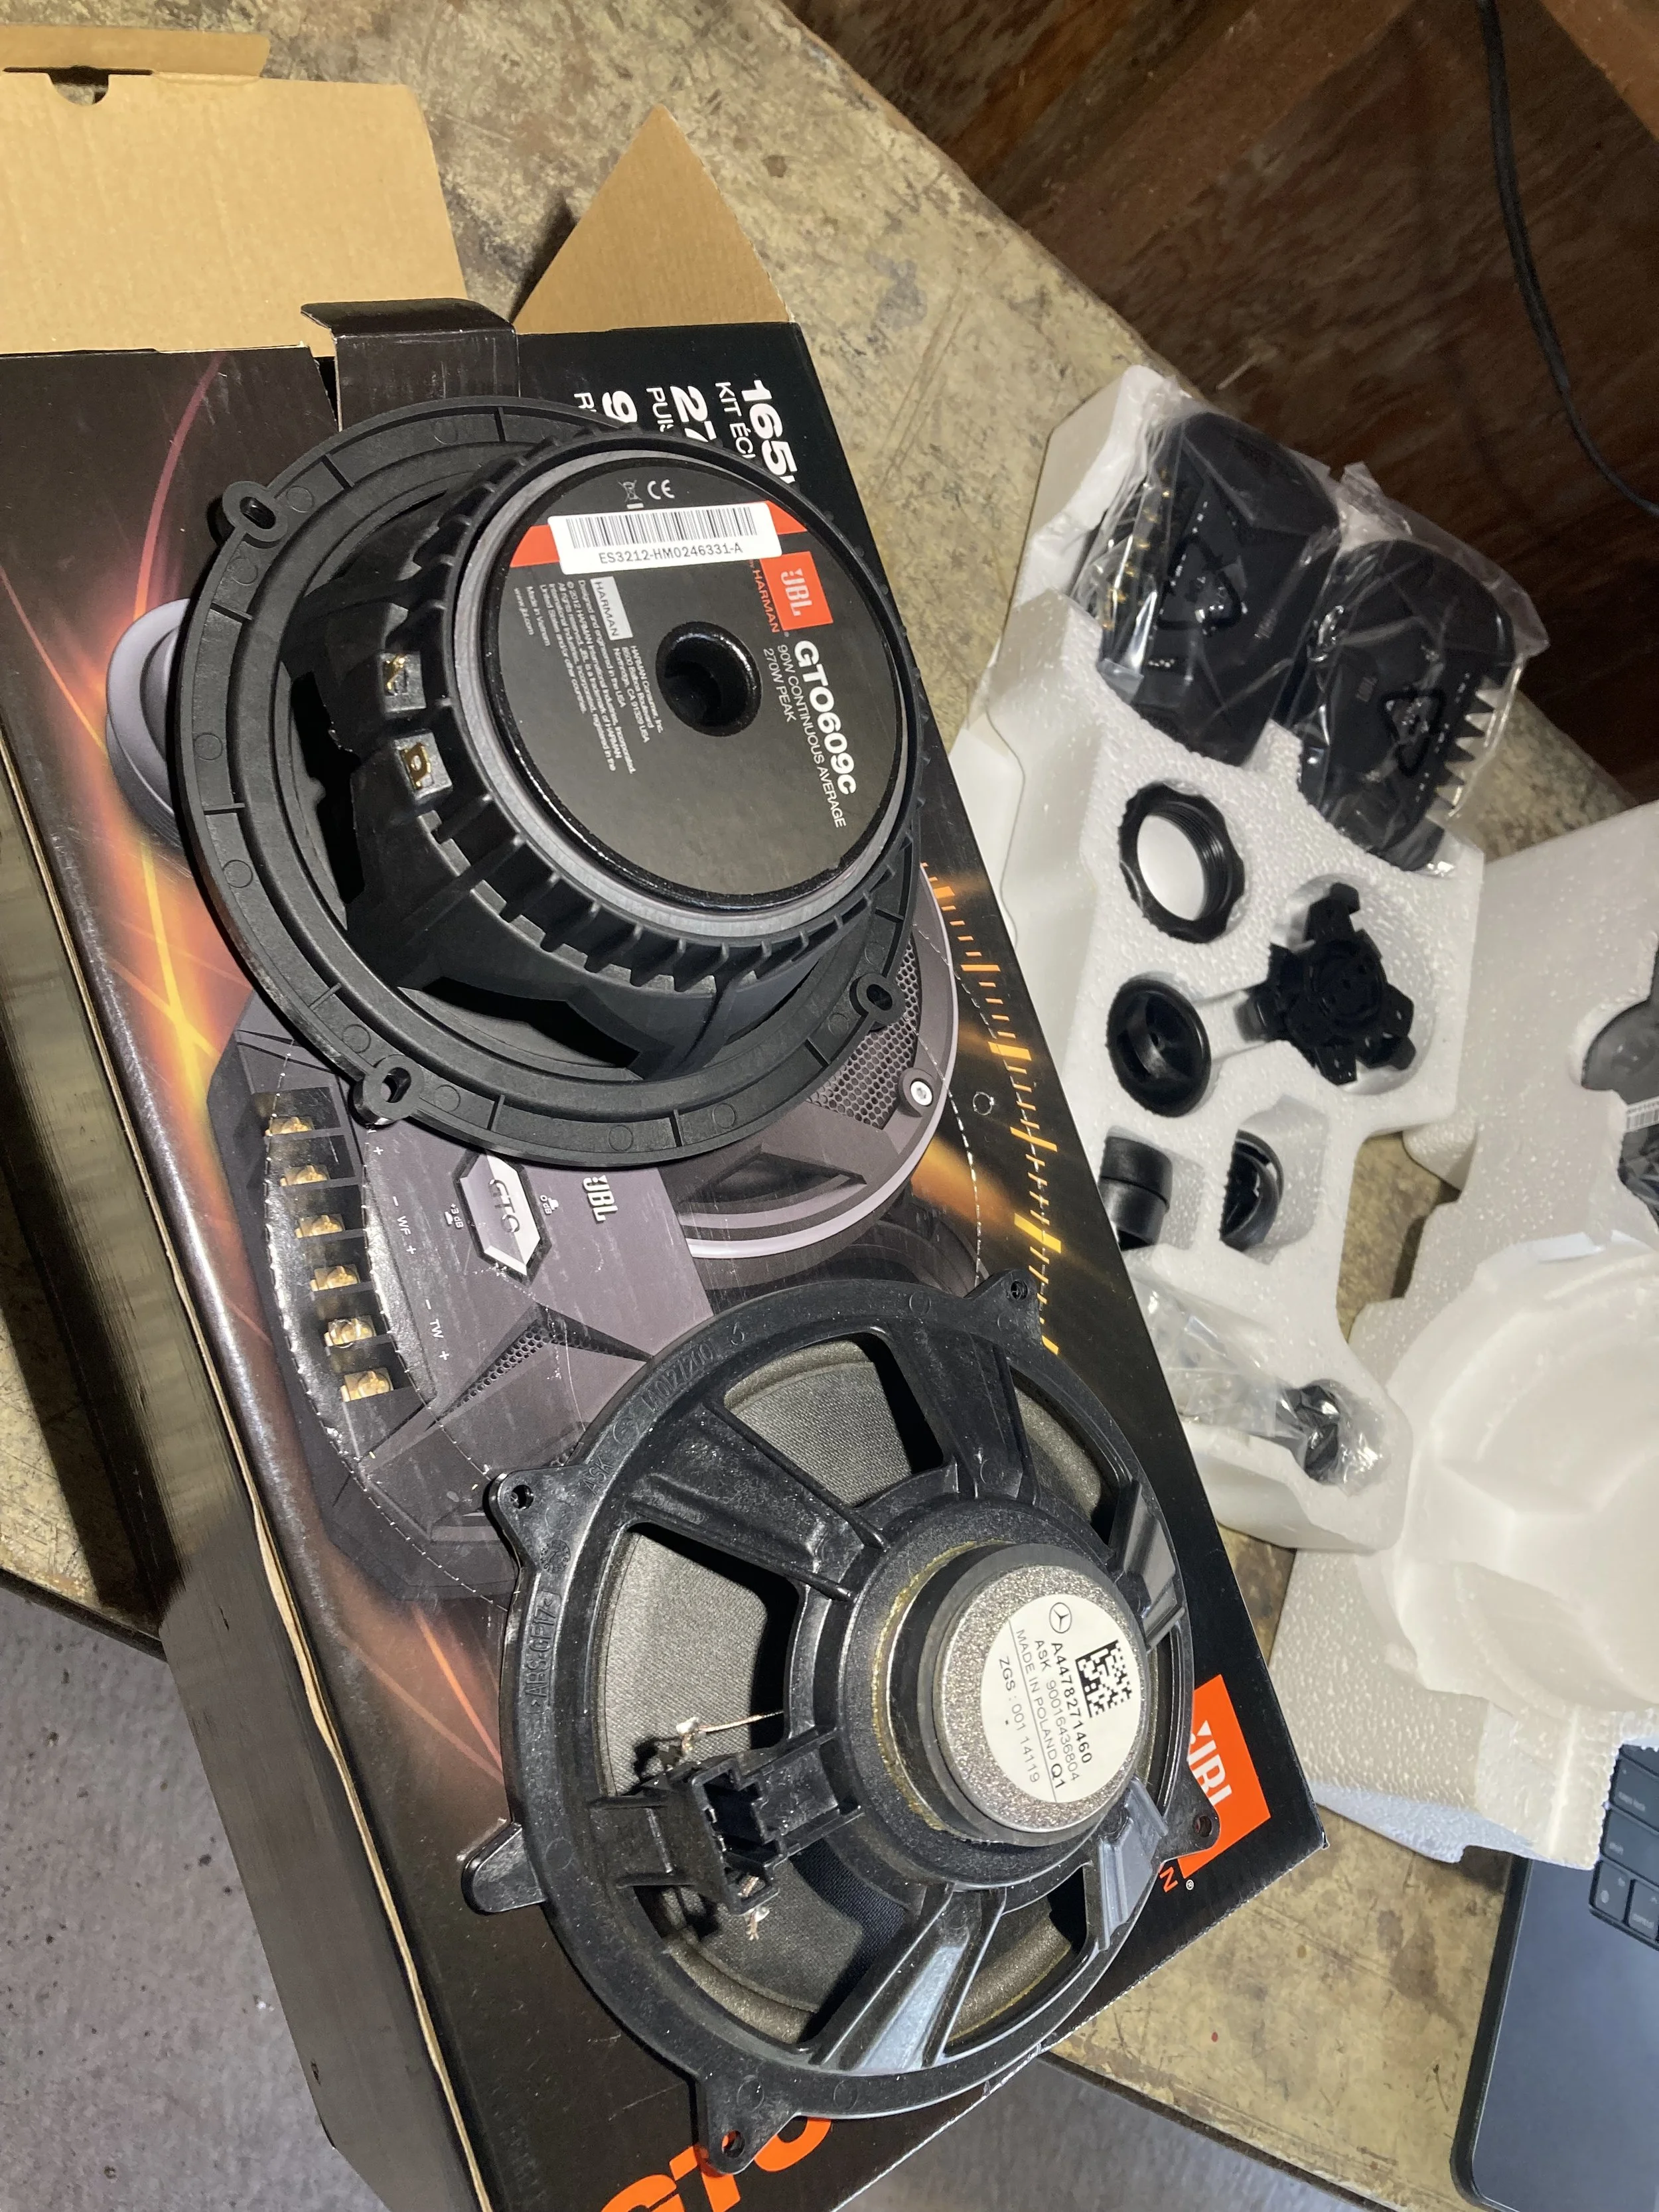
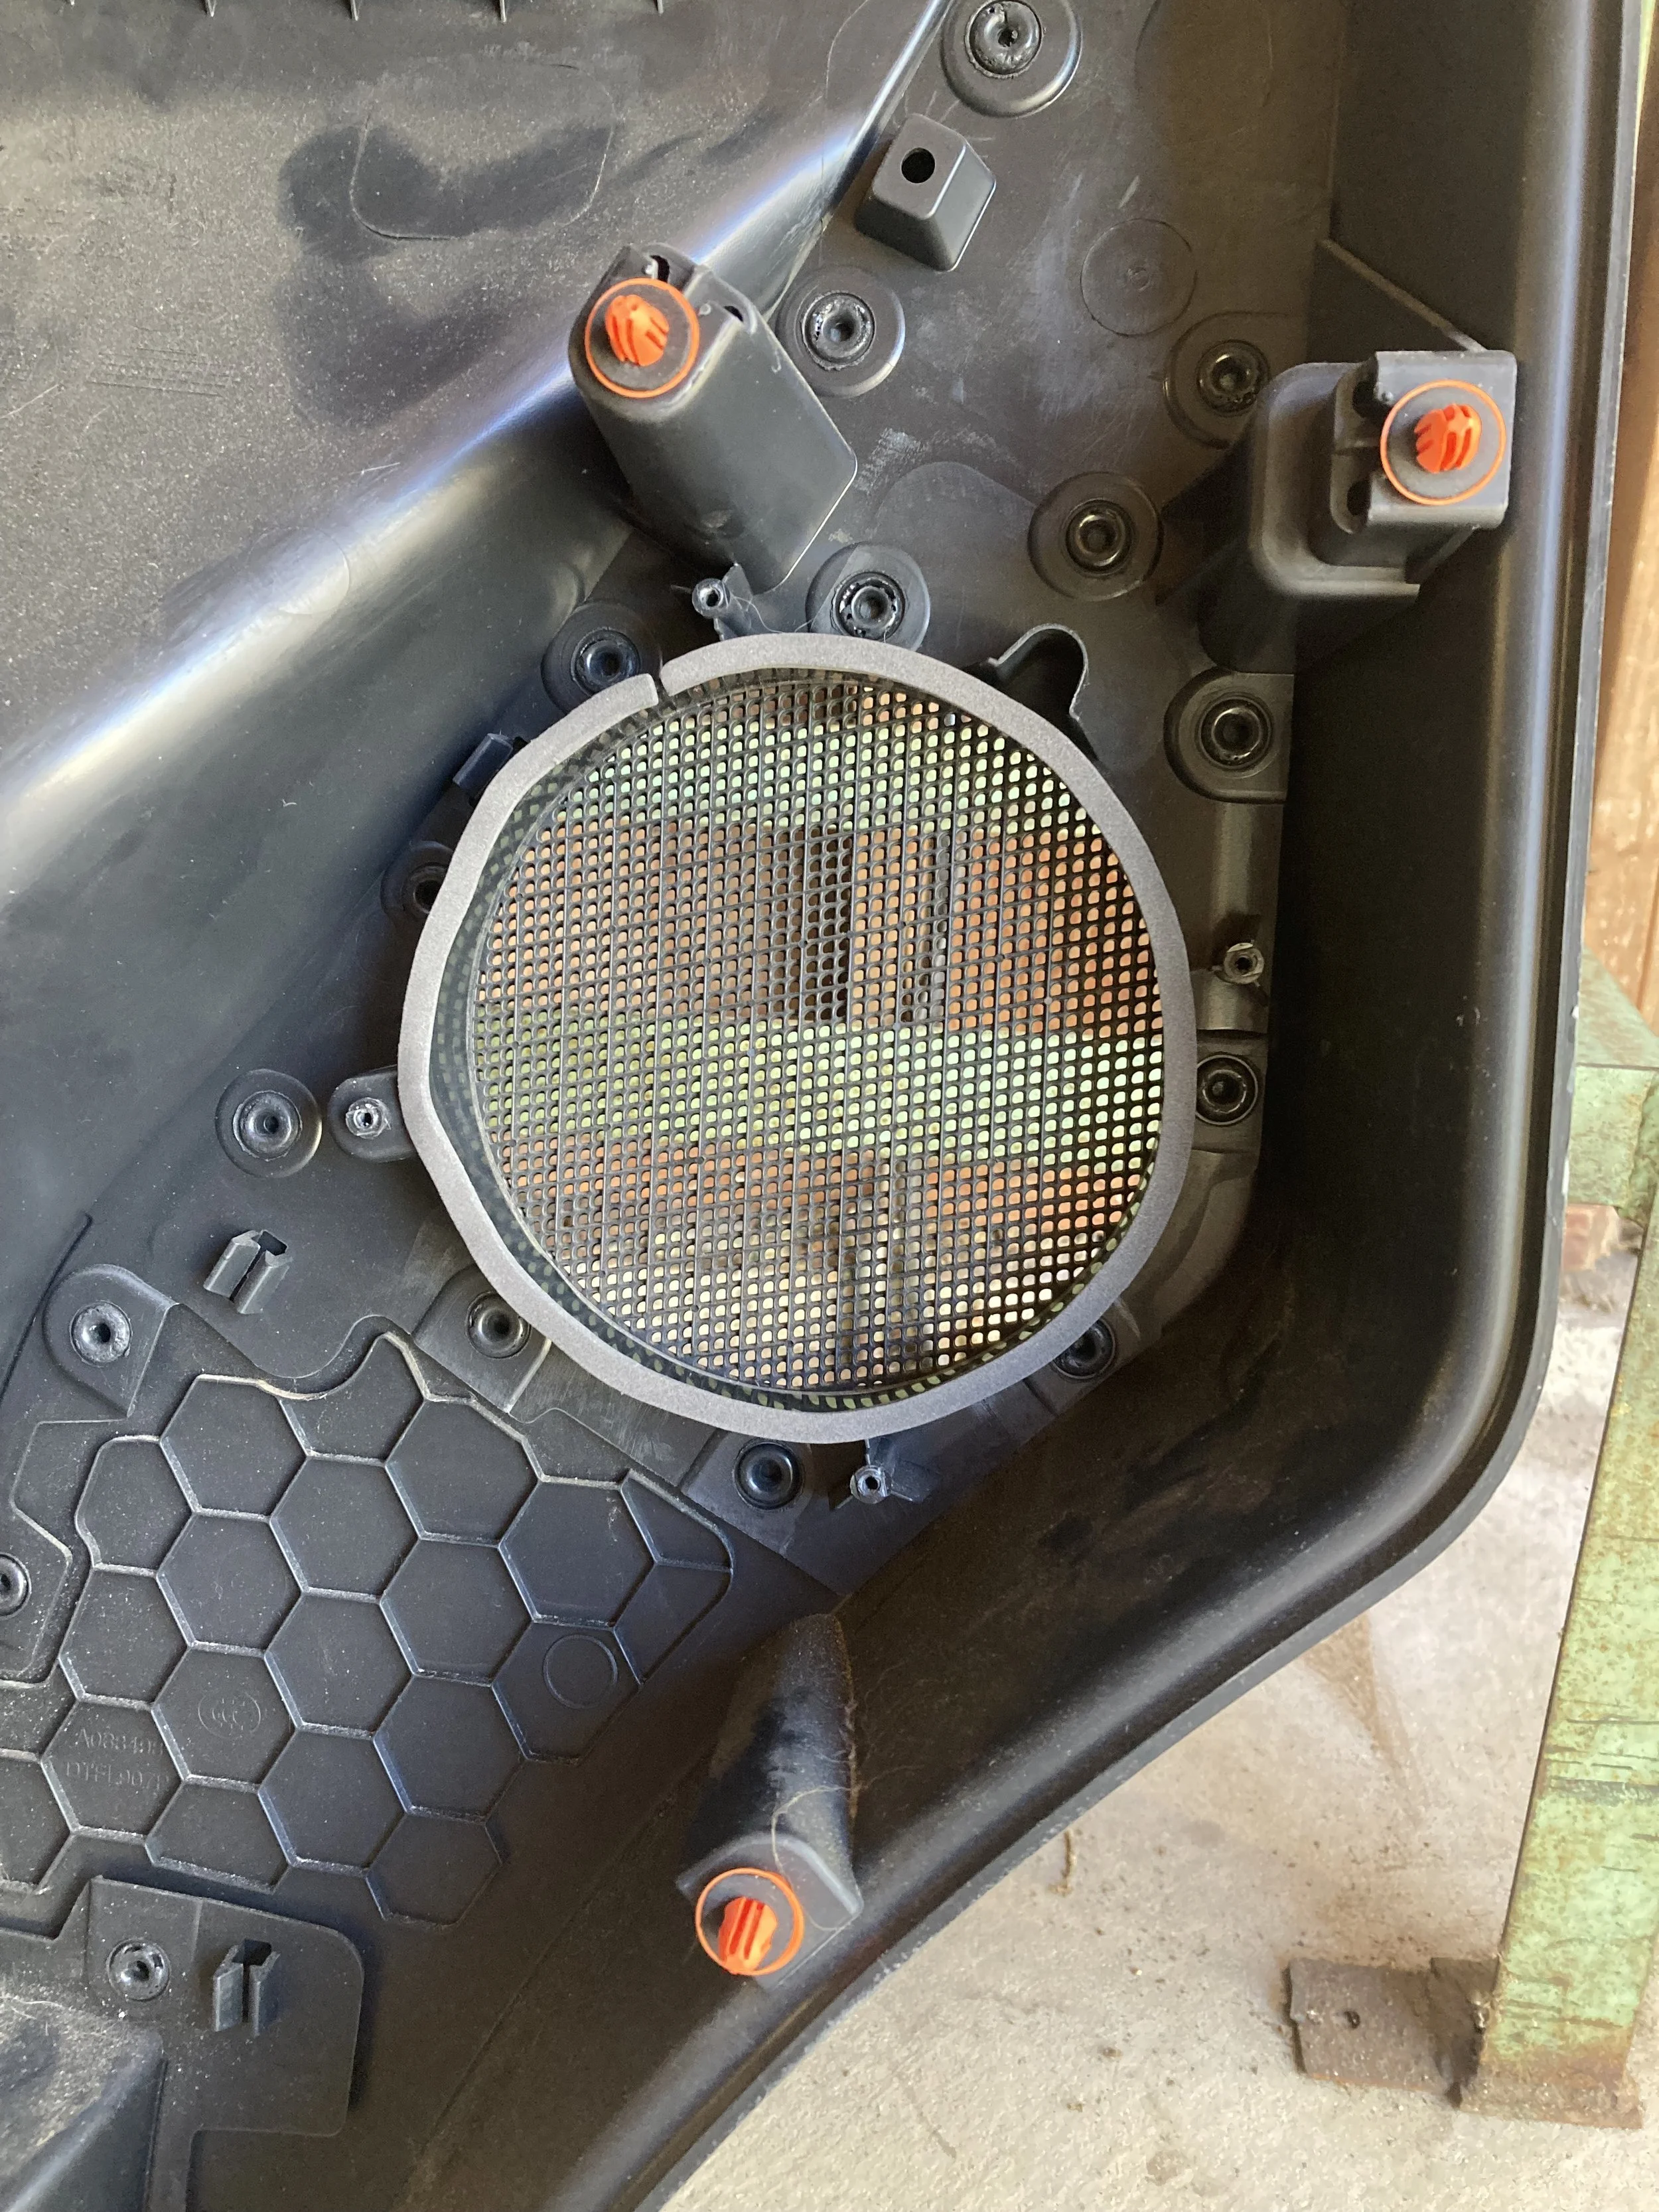
JBL speakers to replace the stock Mercedes door speakers
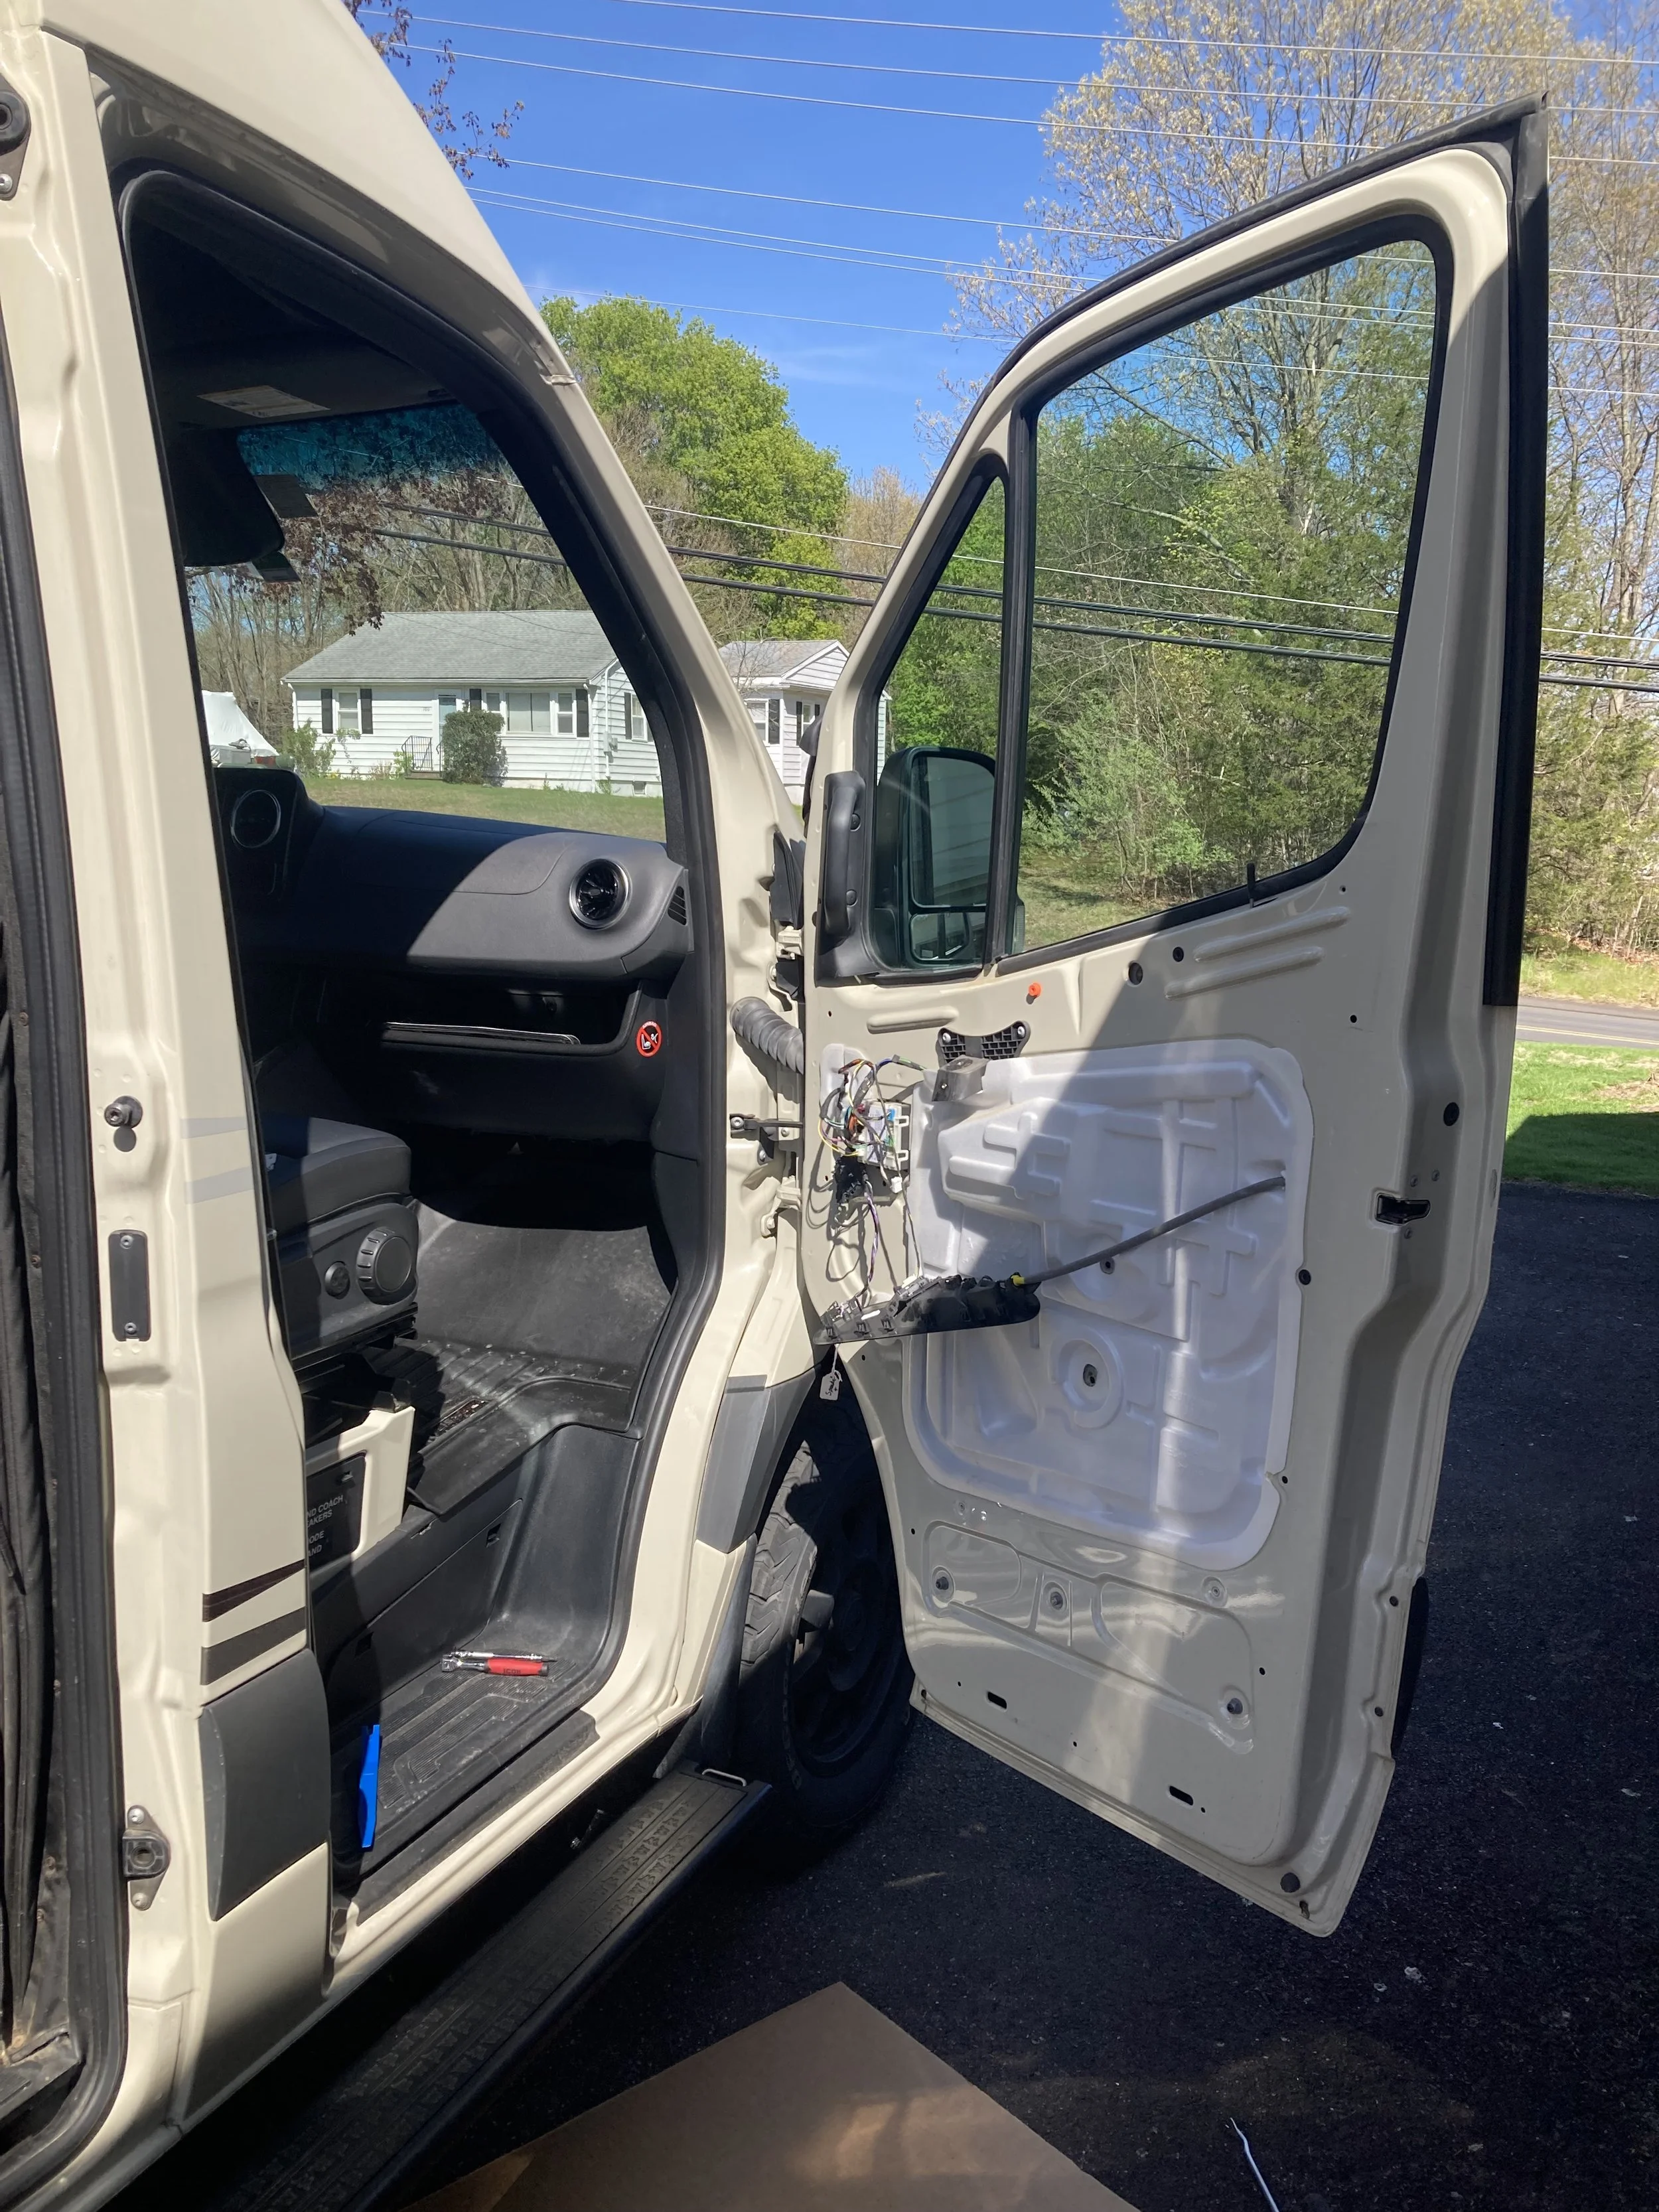
Added foam onto the door panel to help with door vibration at higher db
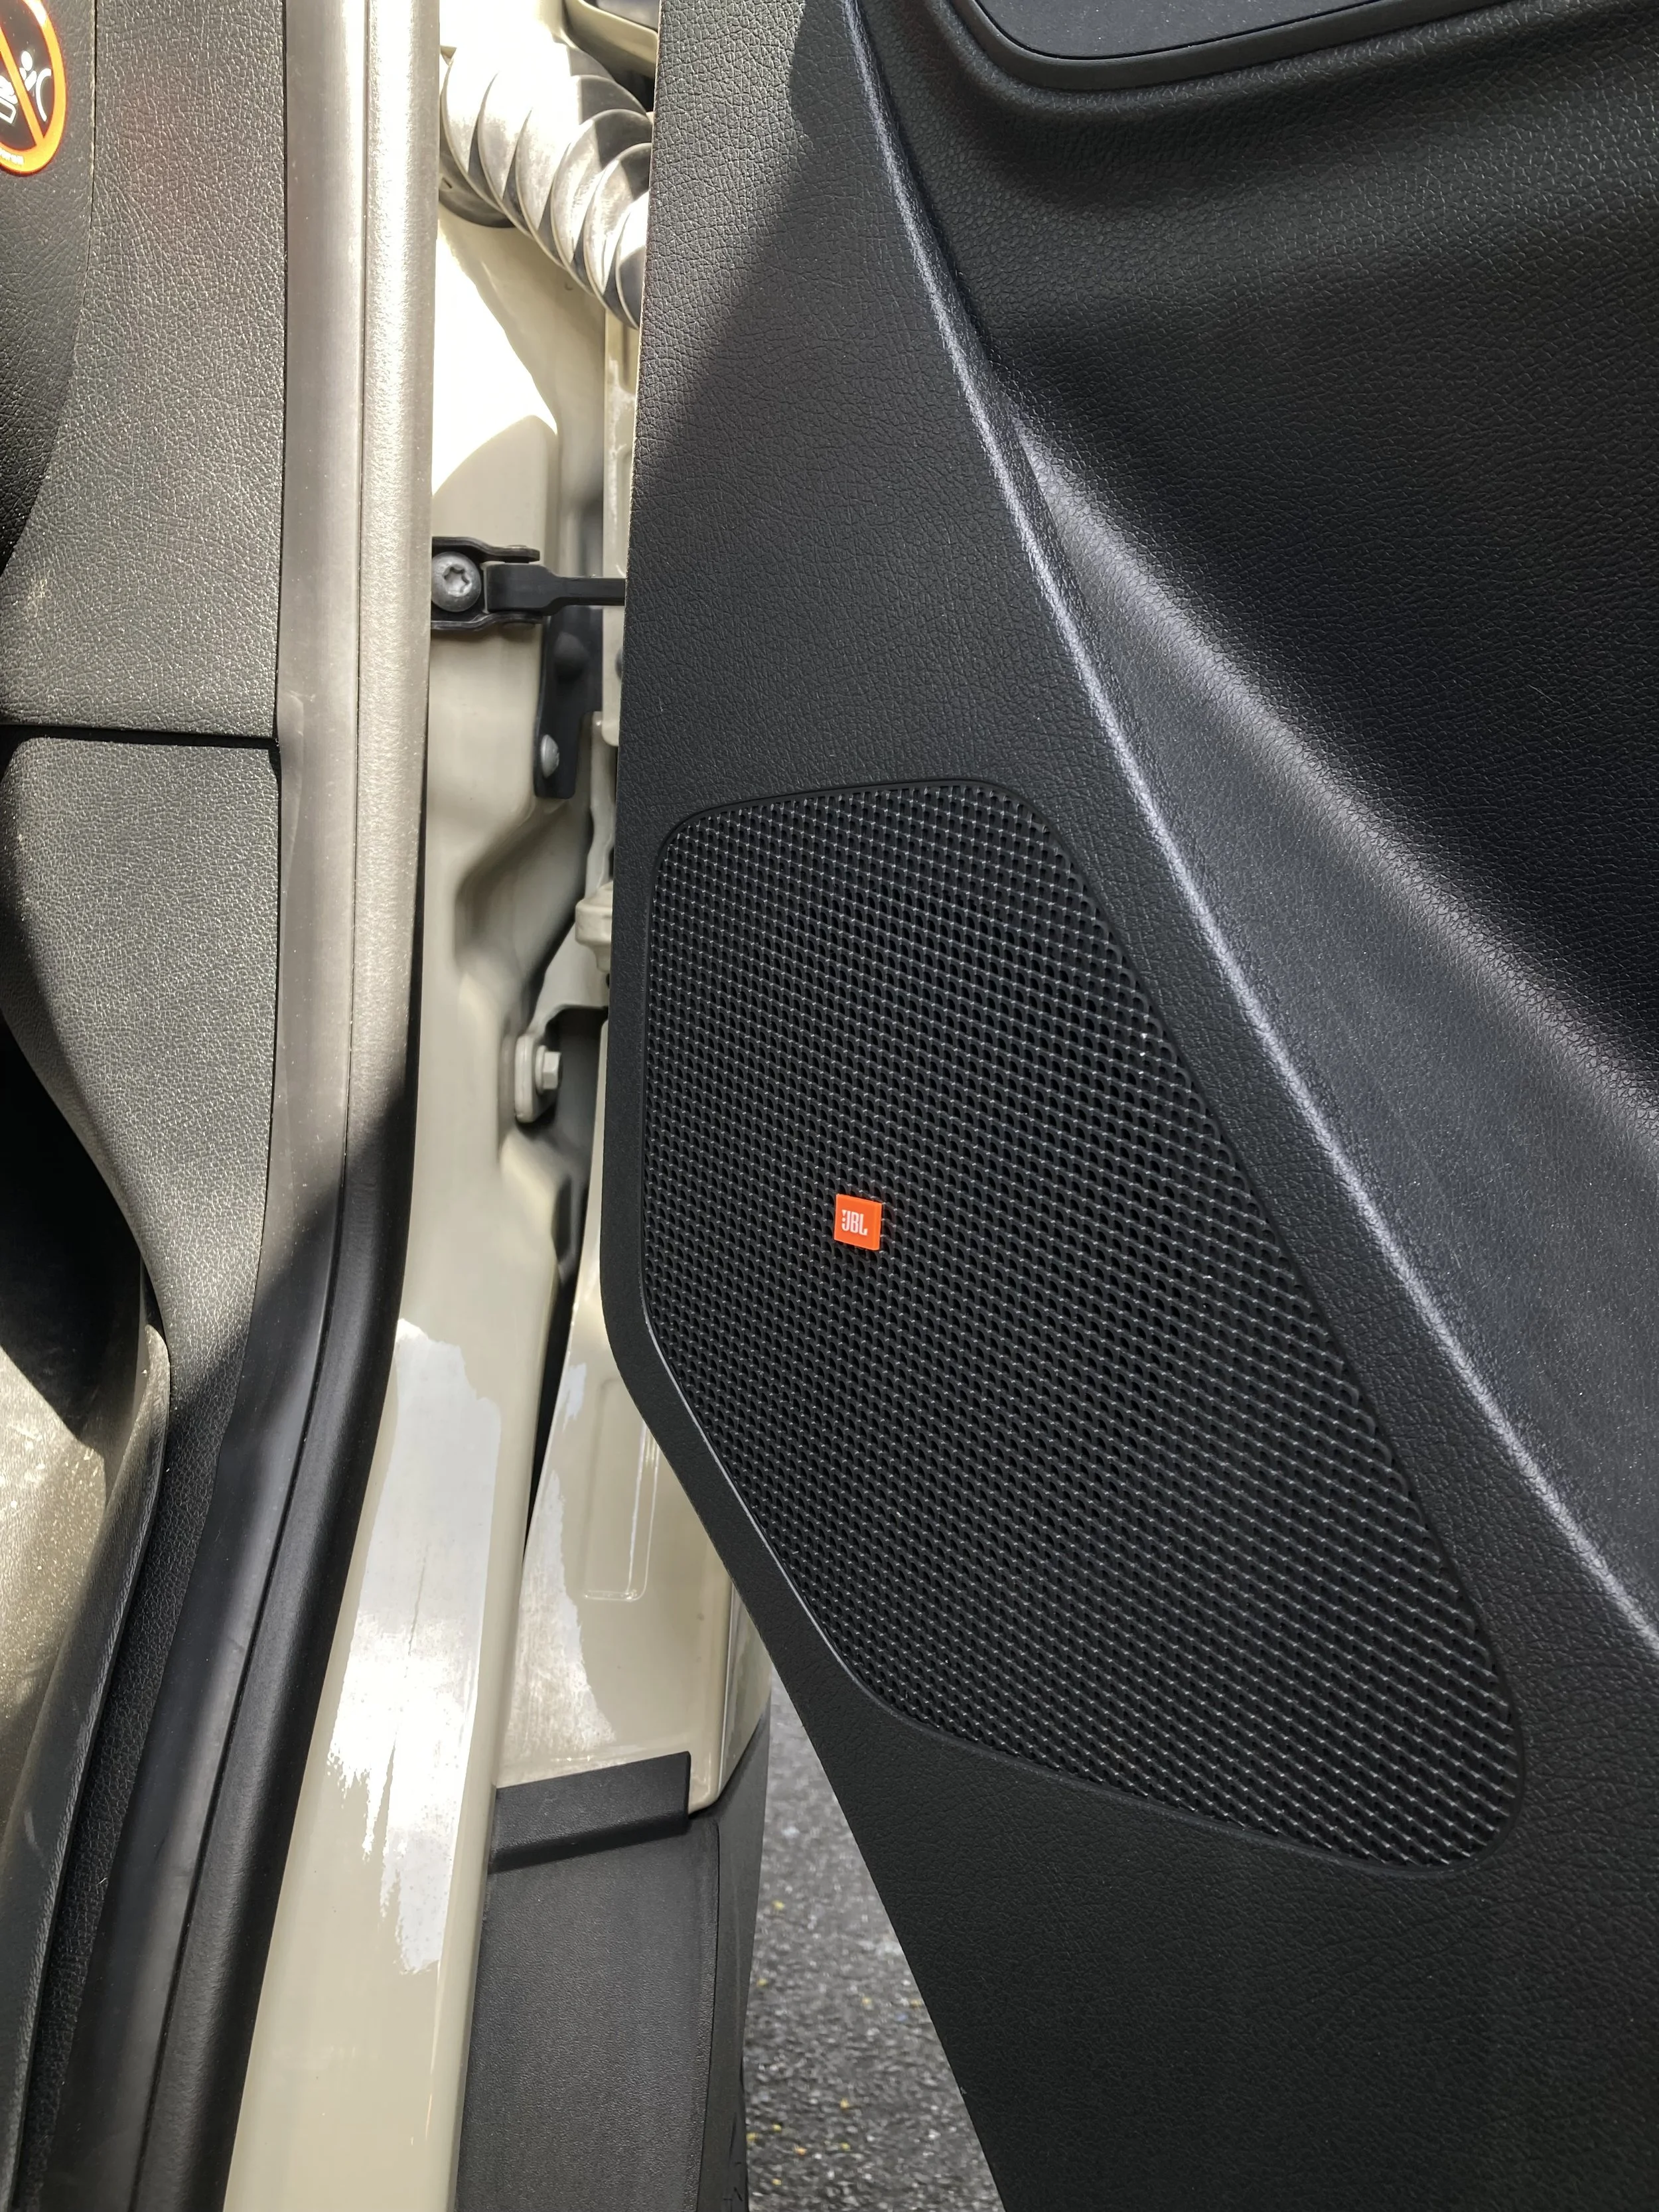
JBL badge added to the door panel
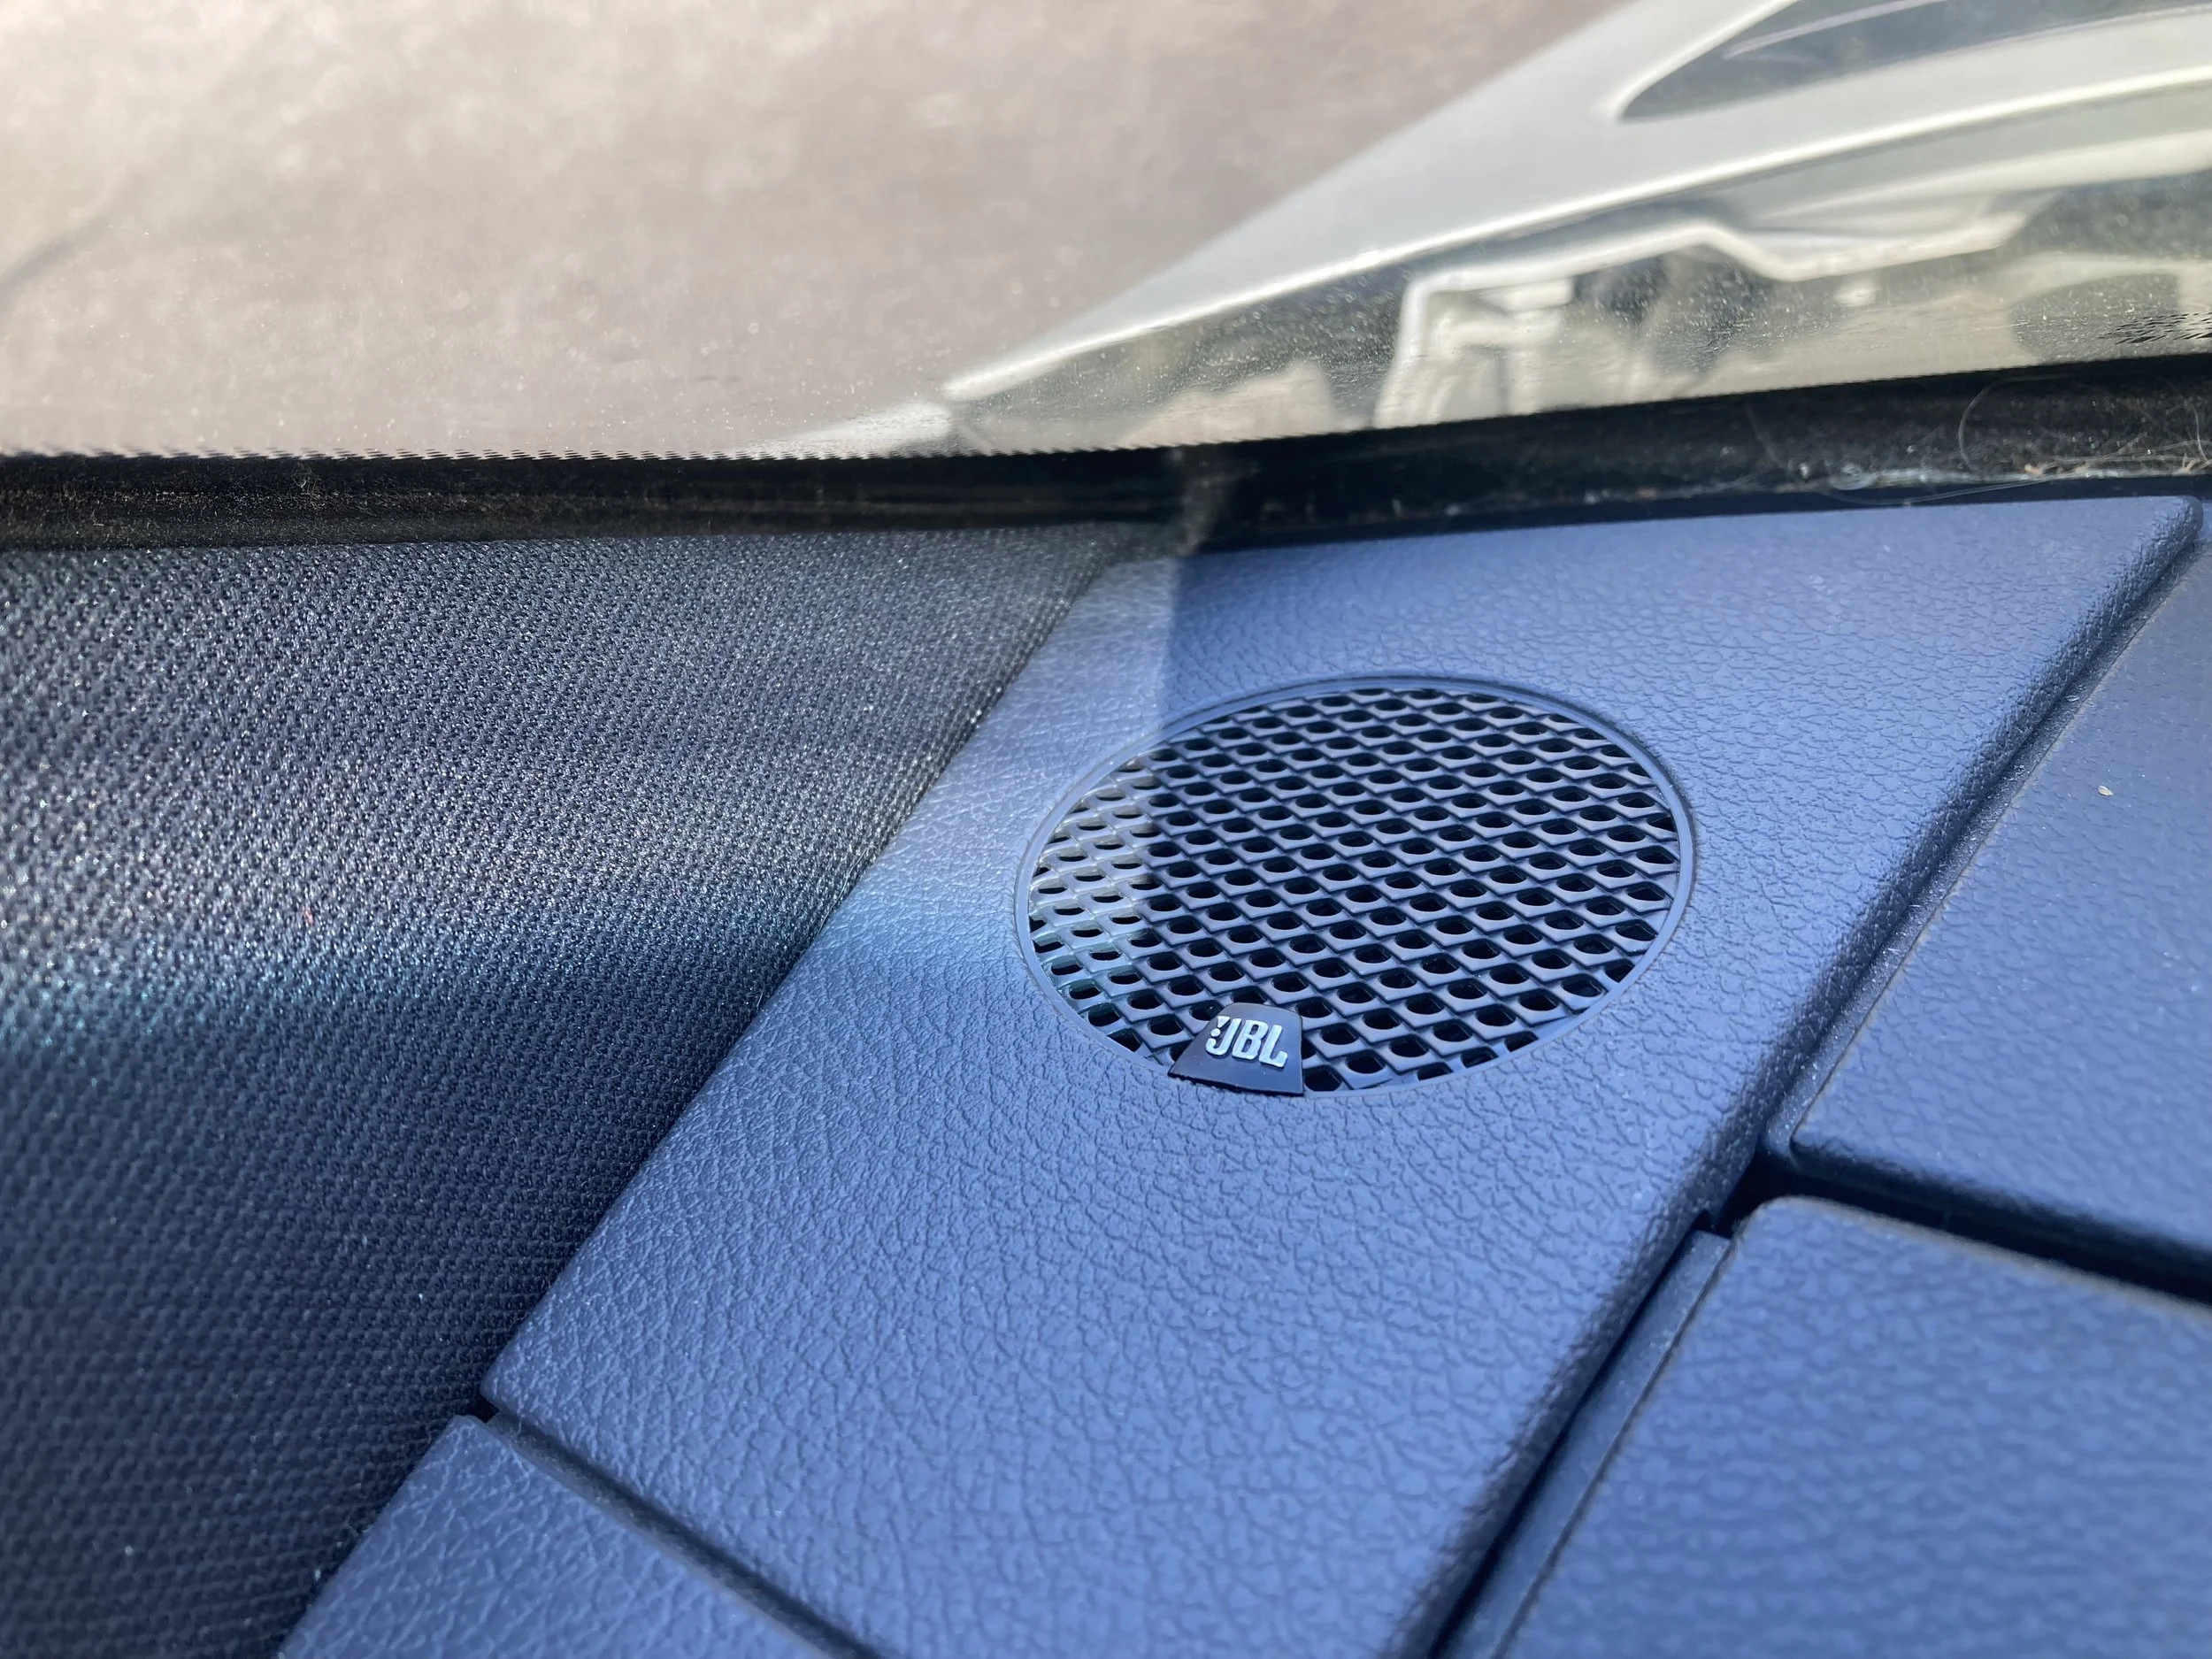
New Tweeters were also installed in the dash

Both door speakers and tweeters are wired to crossovers increase speaker efficiency by 2 db
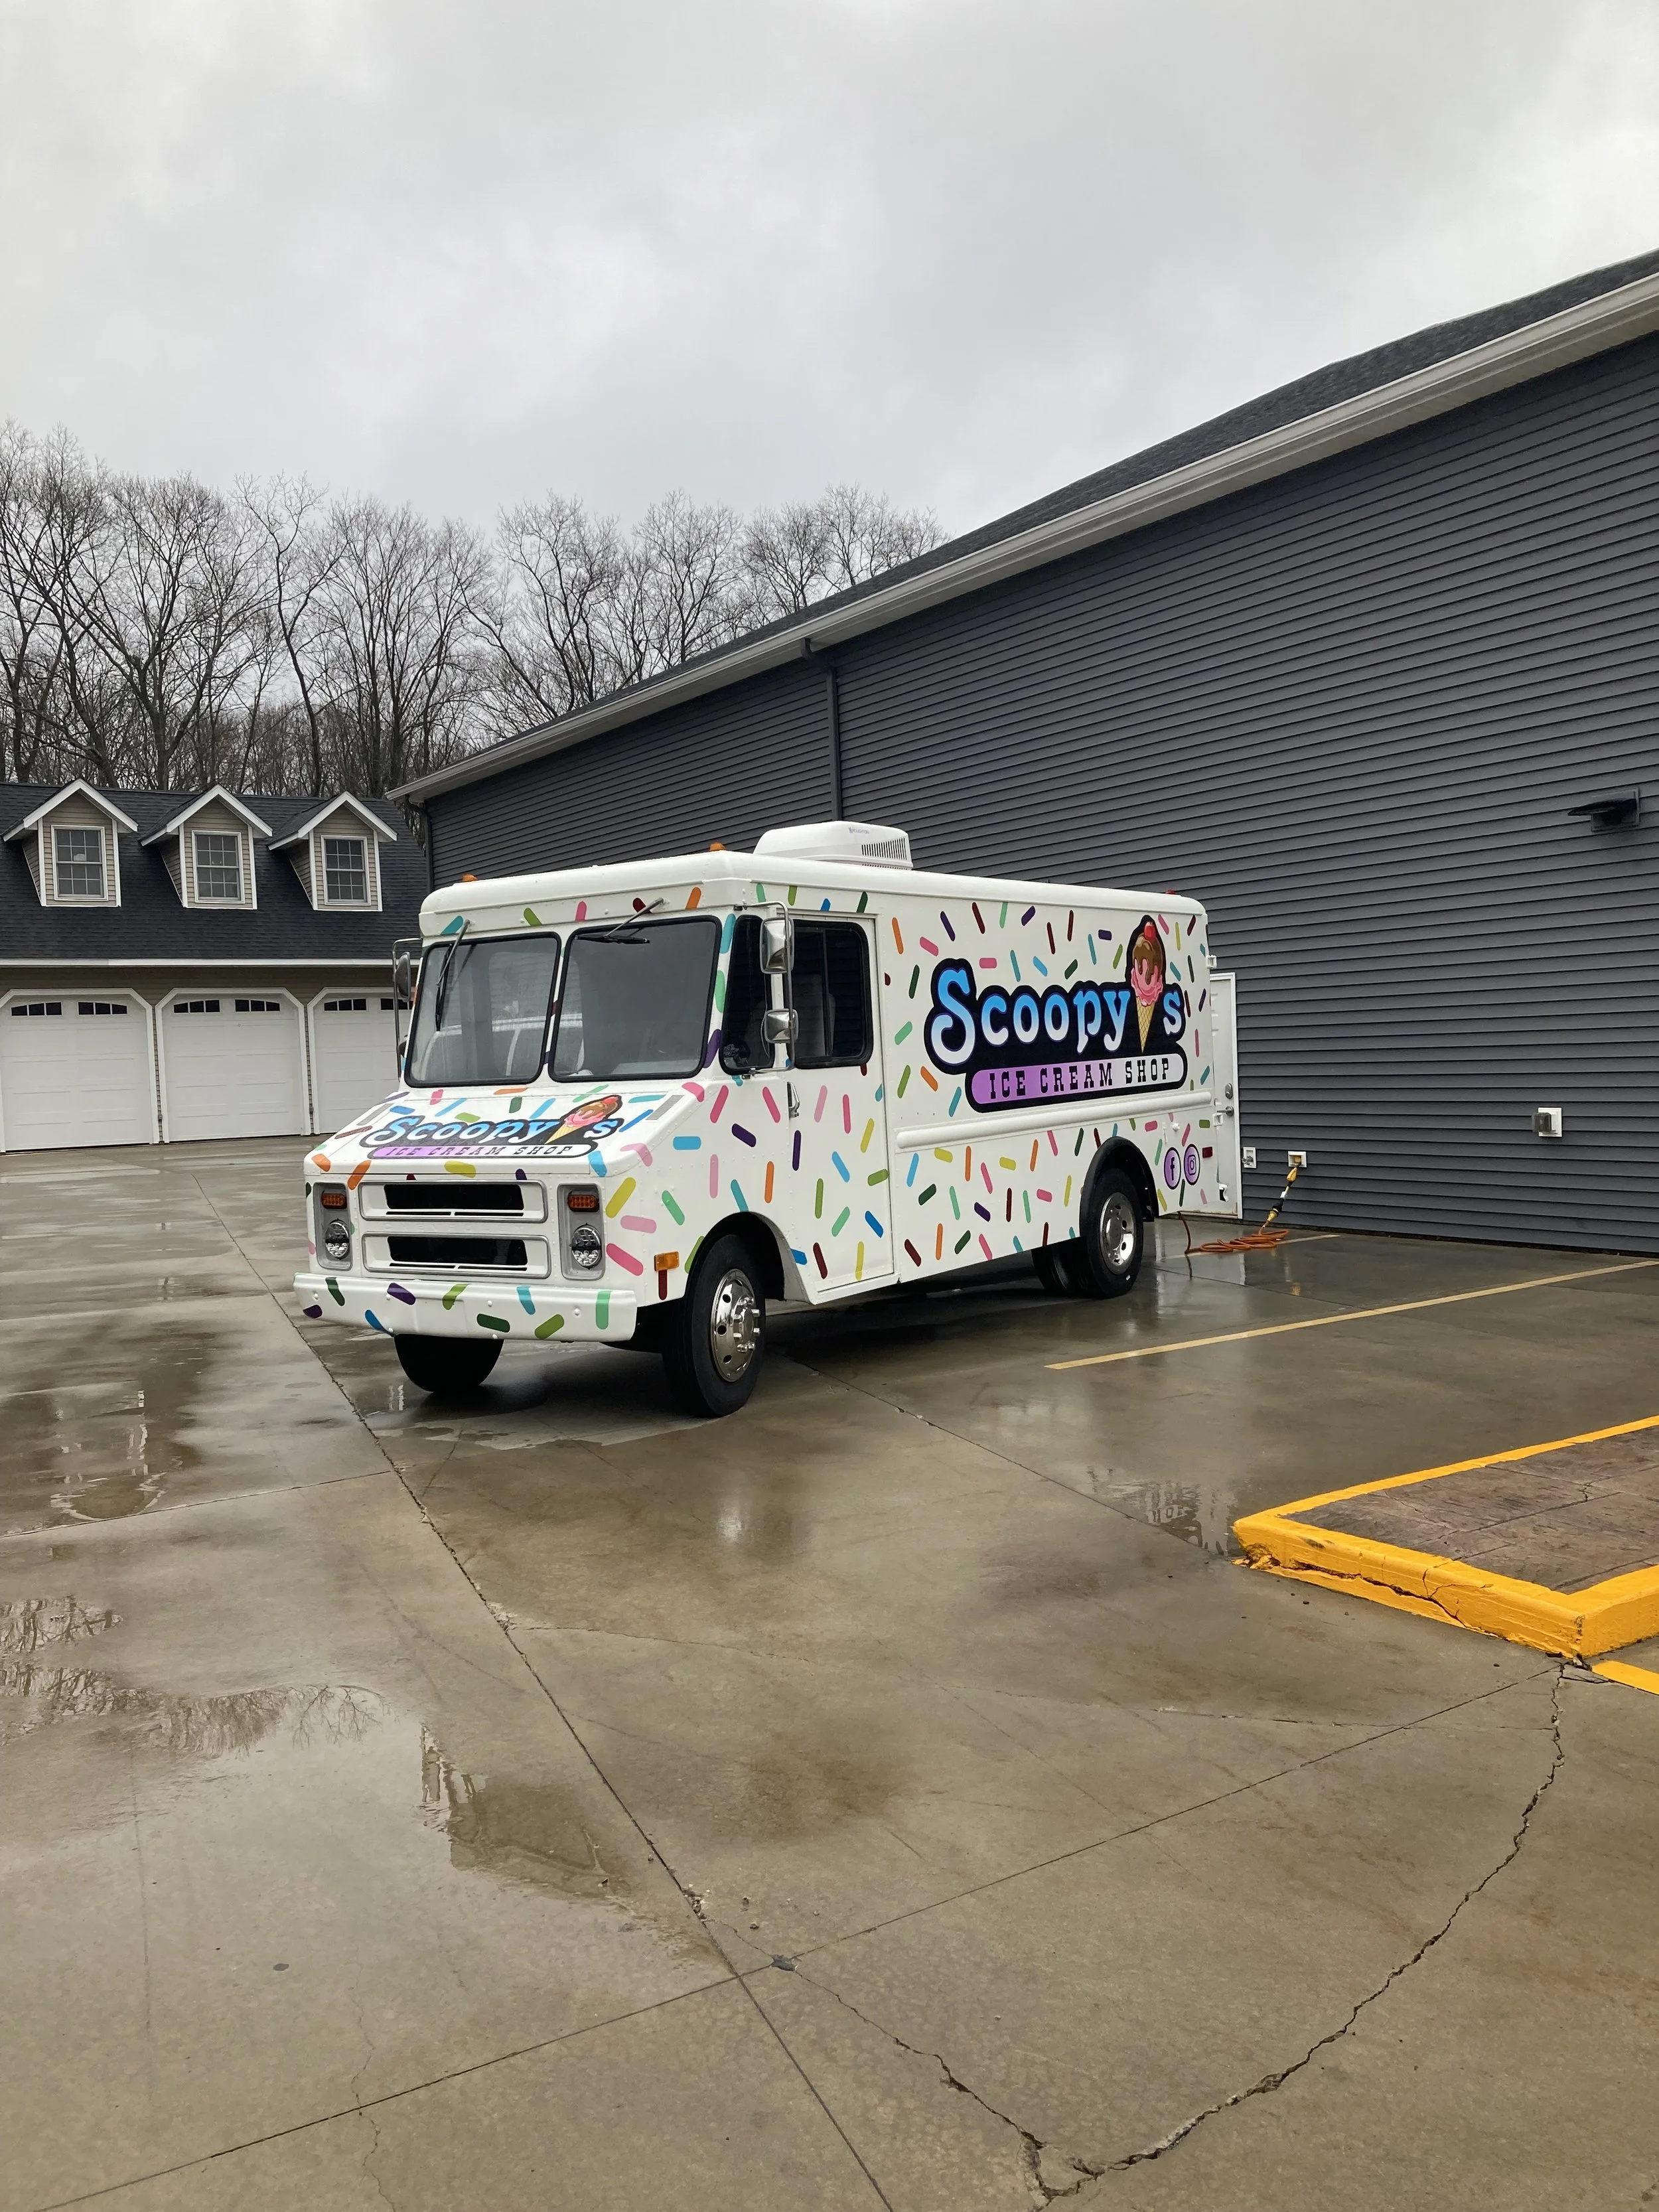
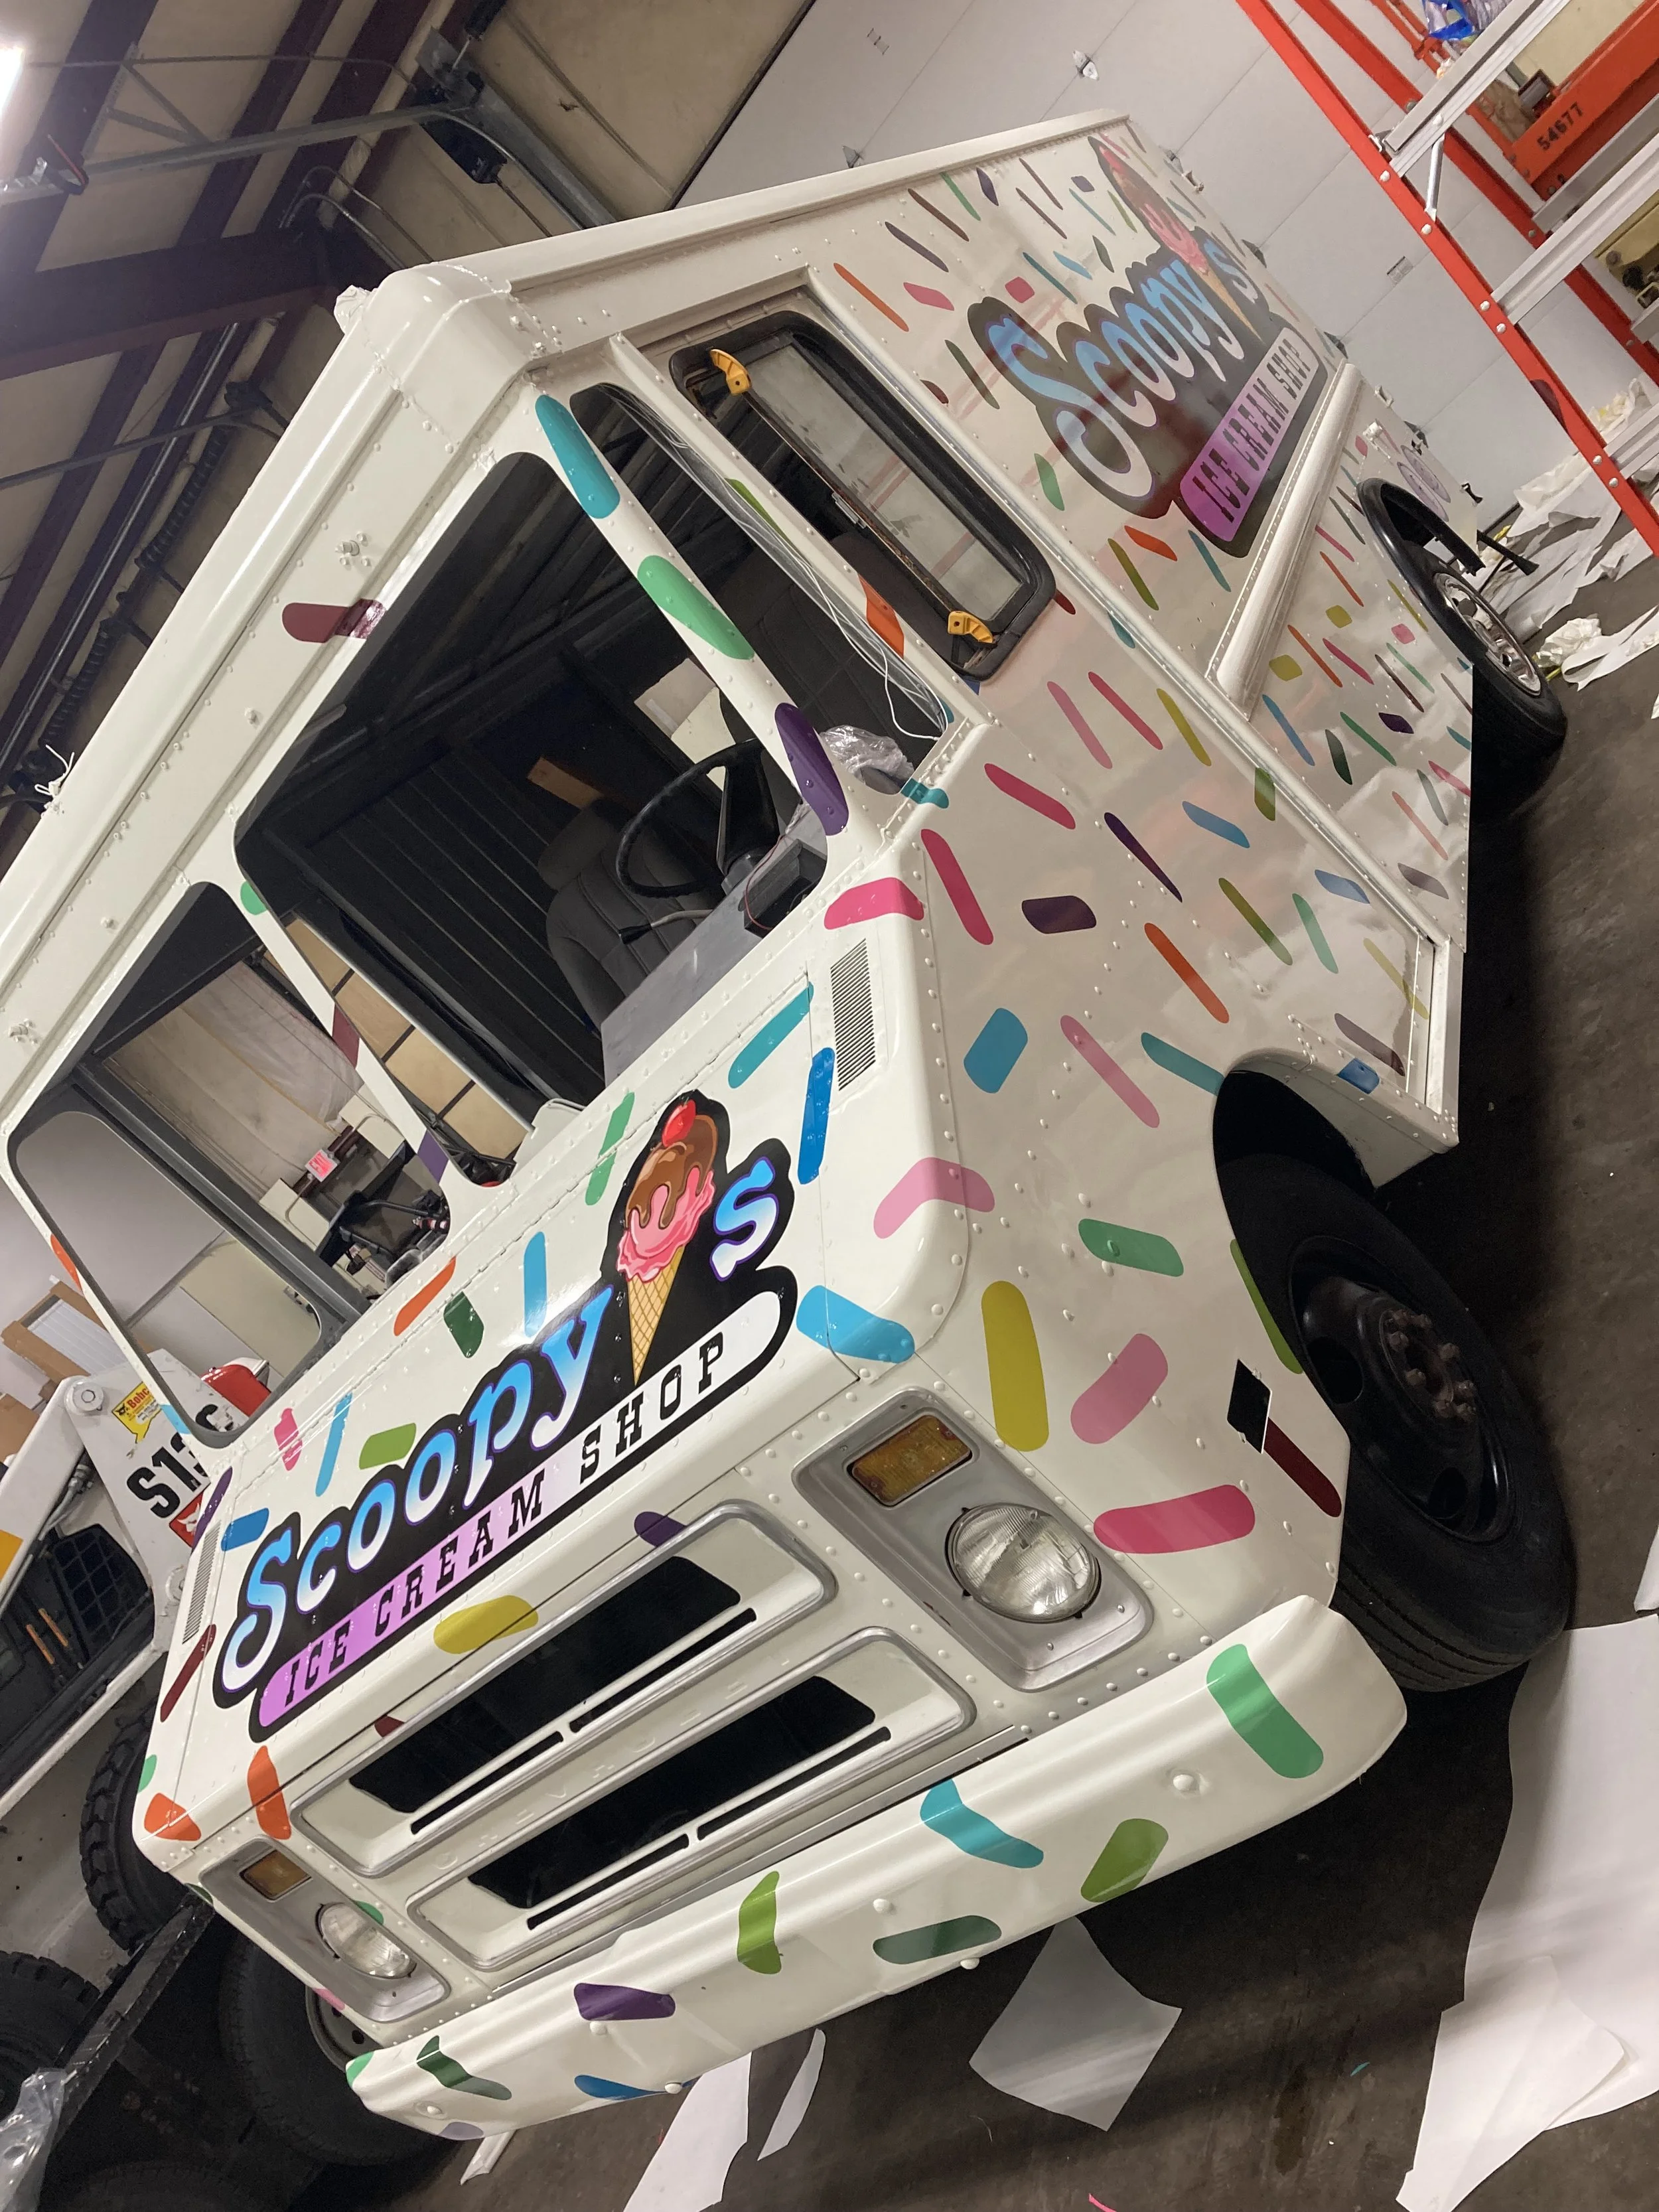
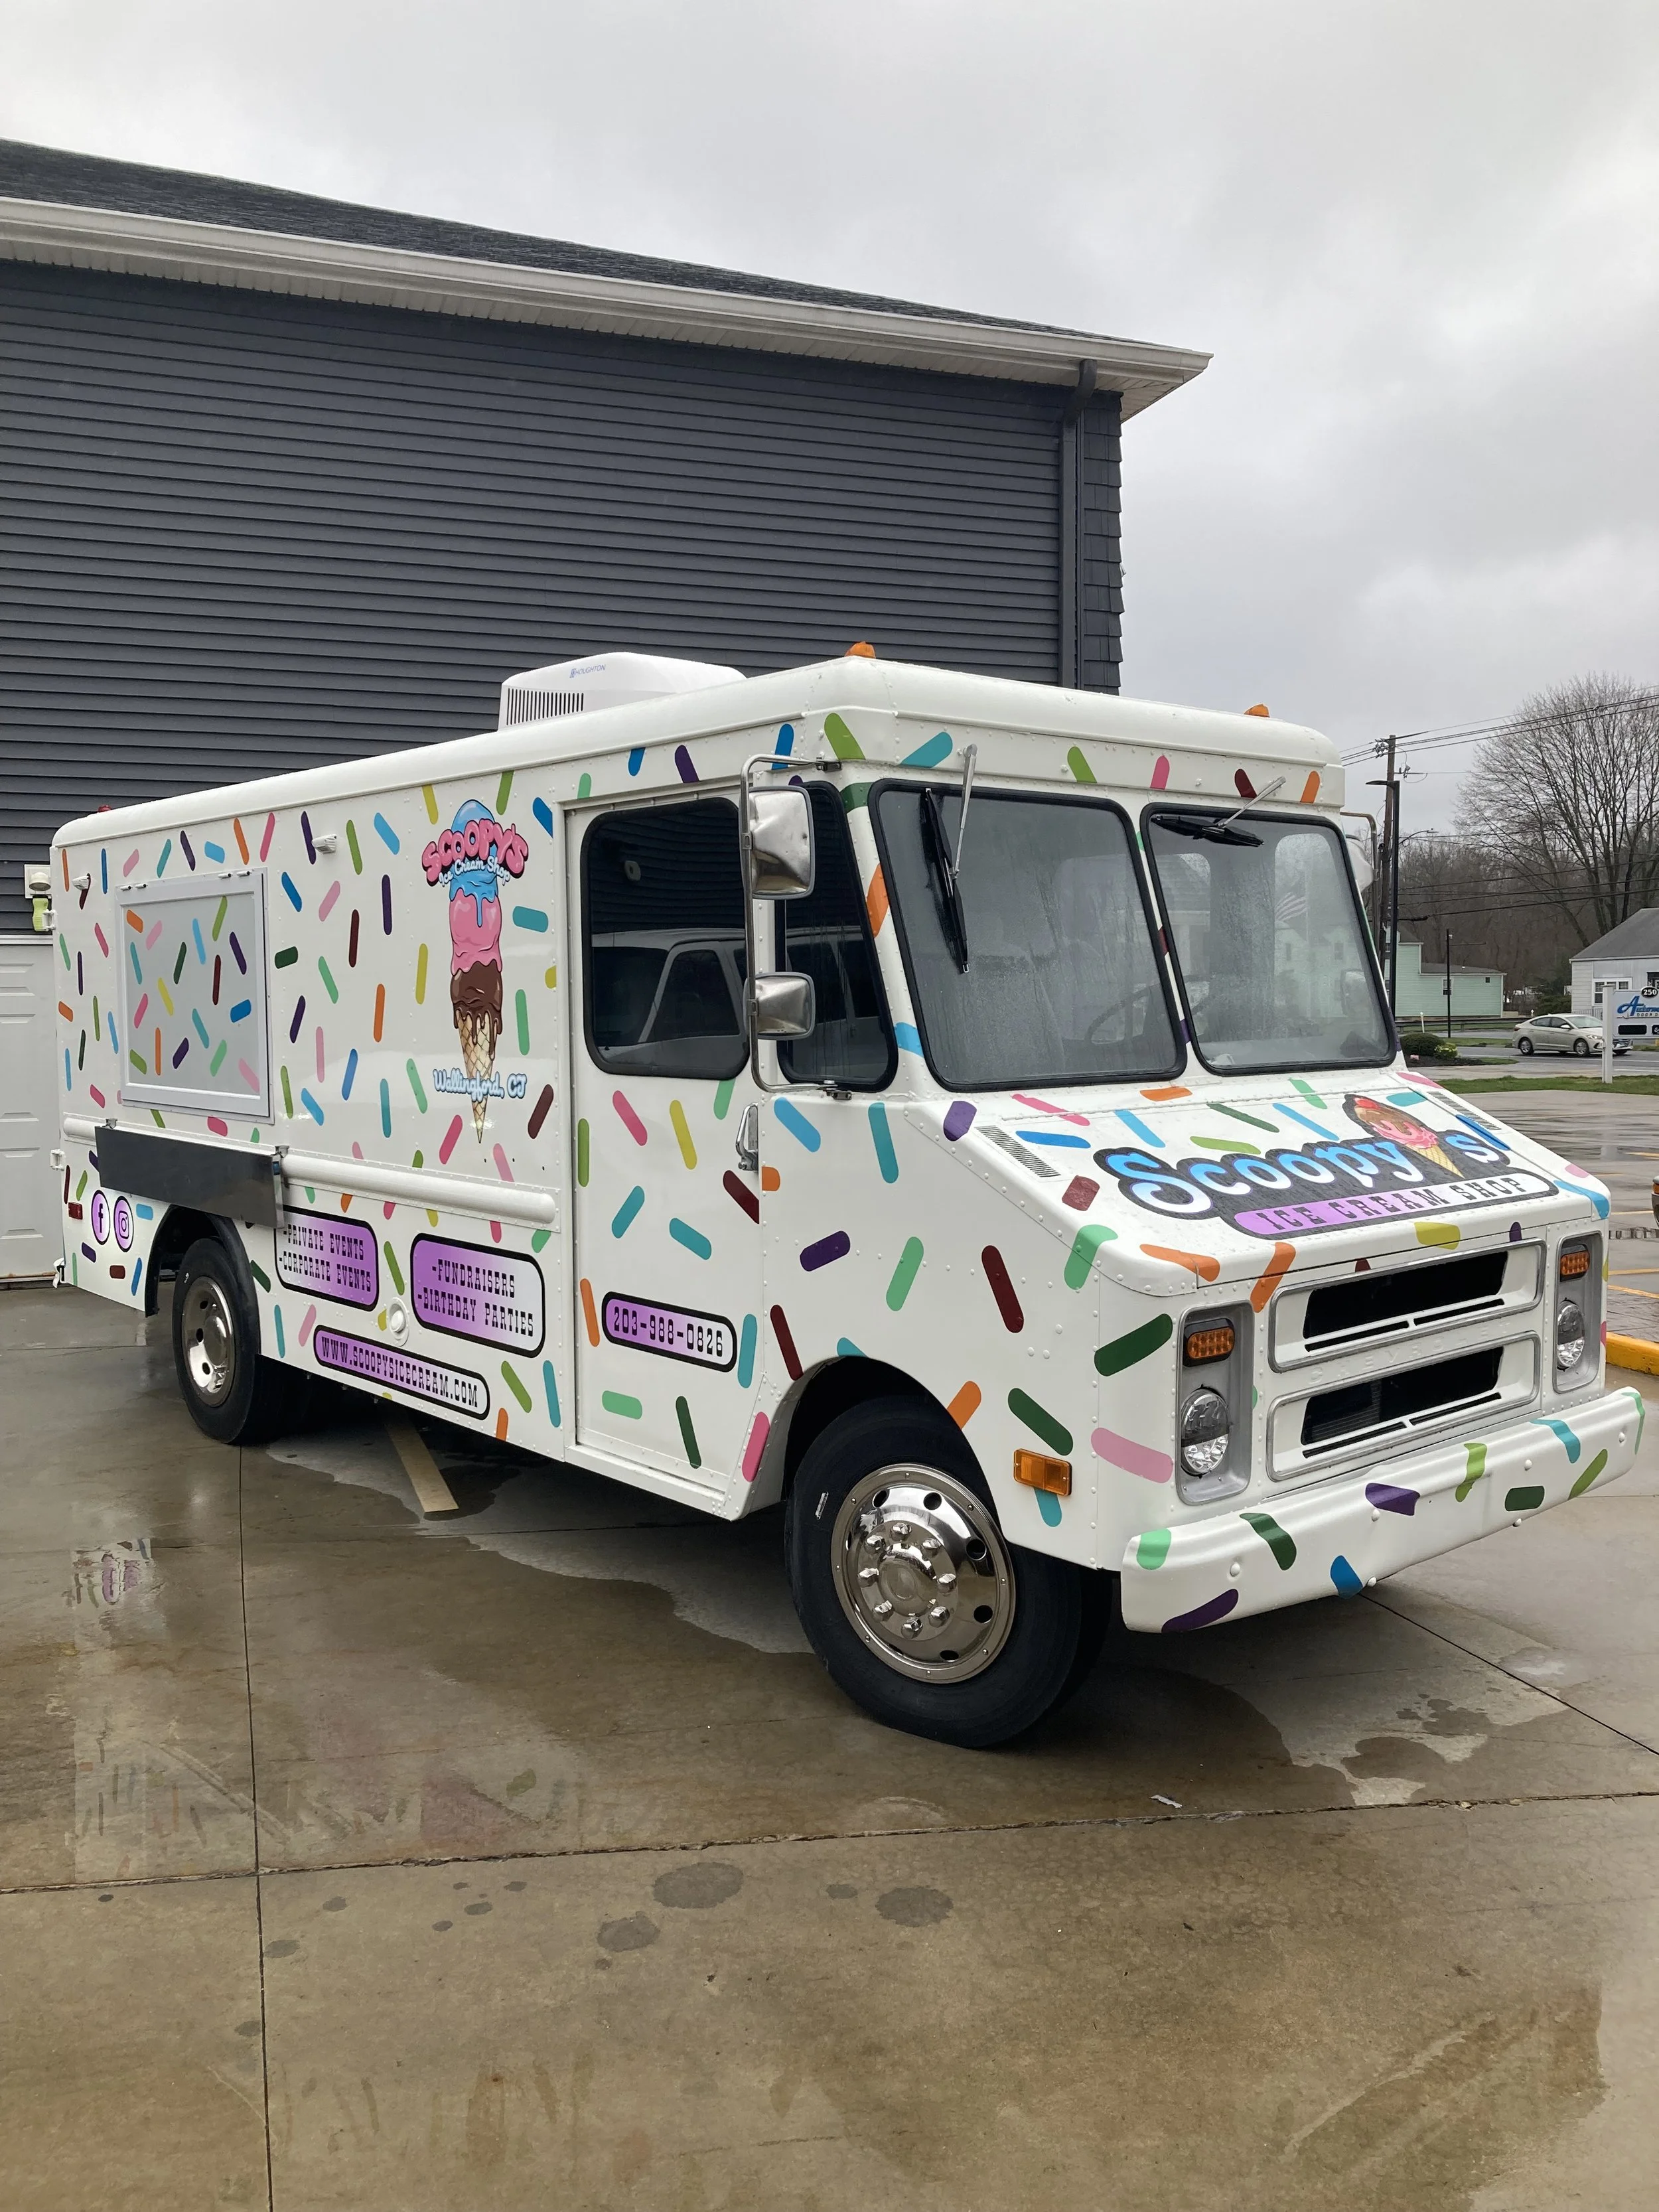
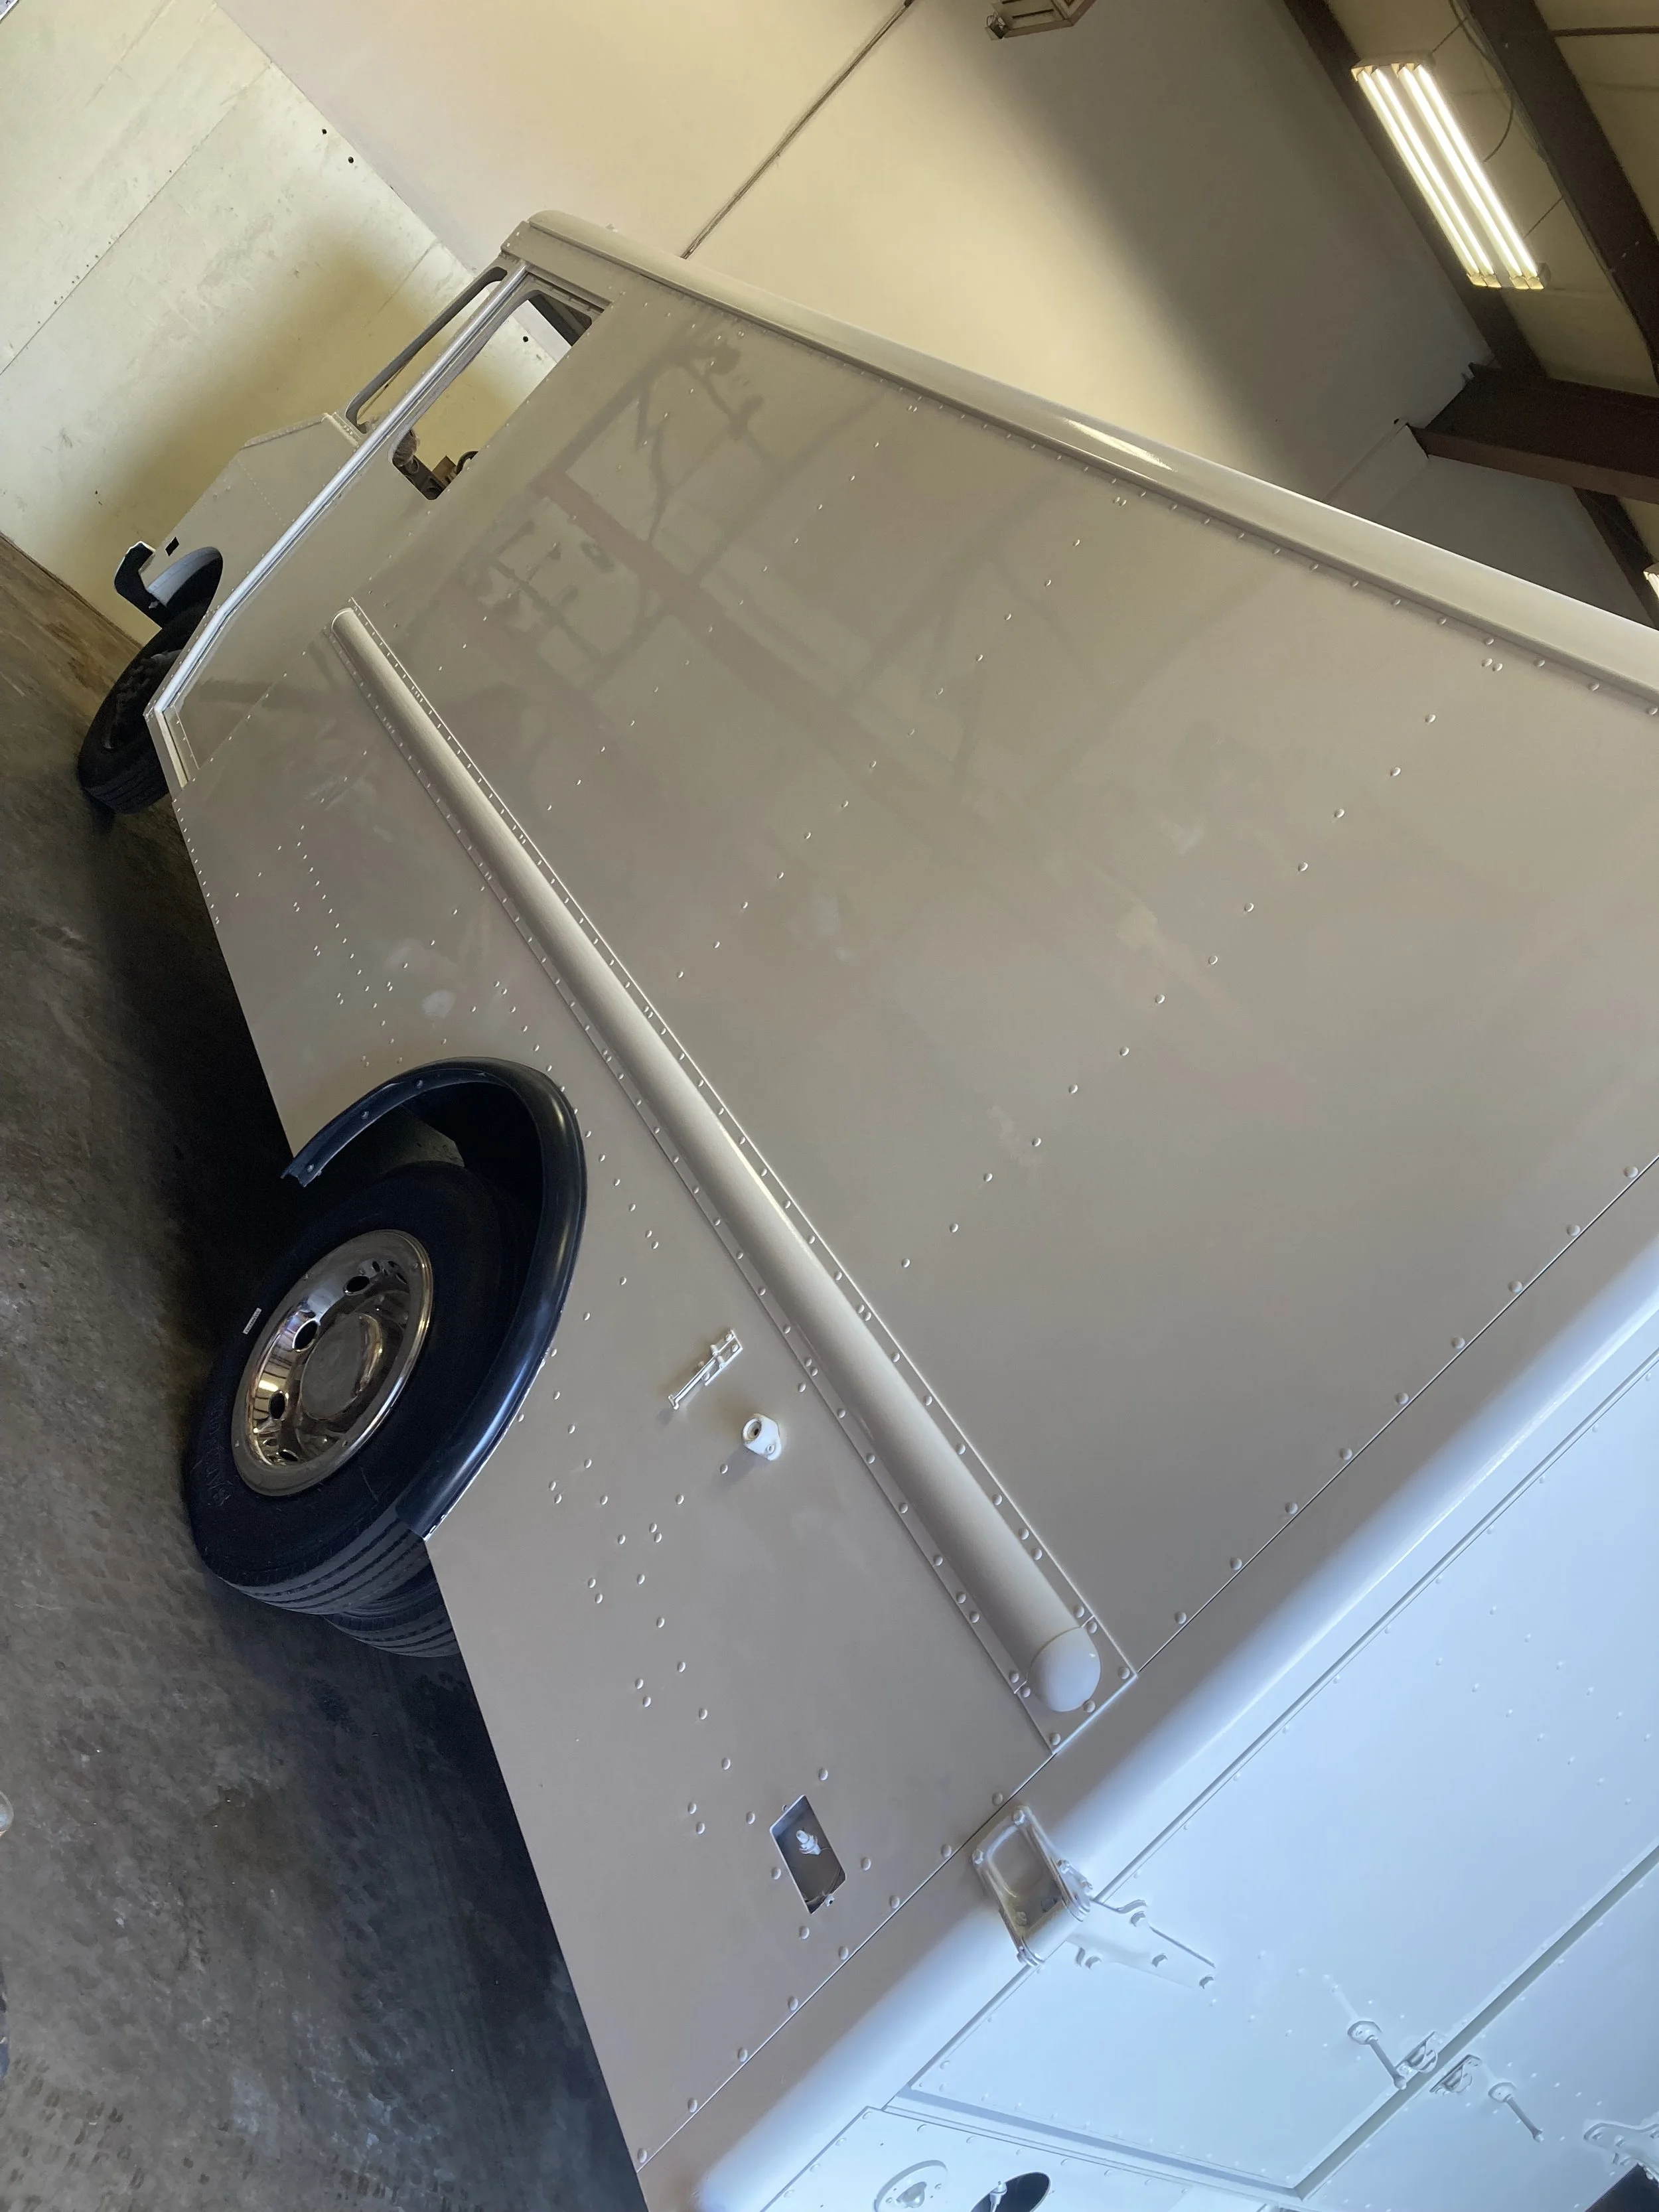
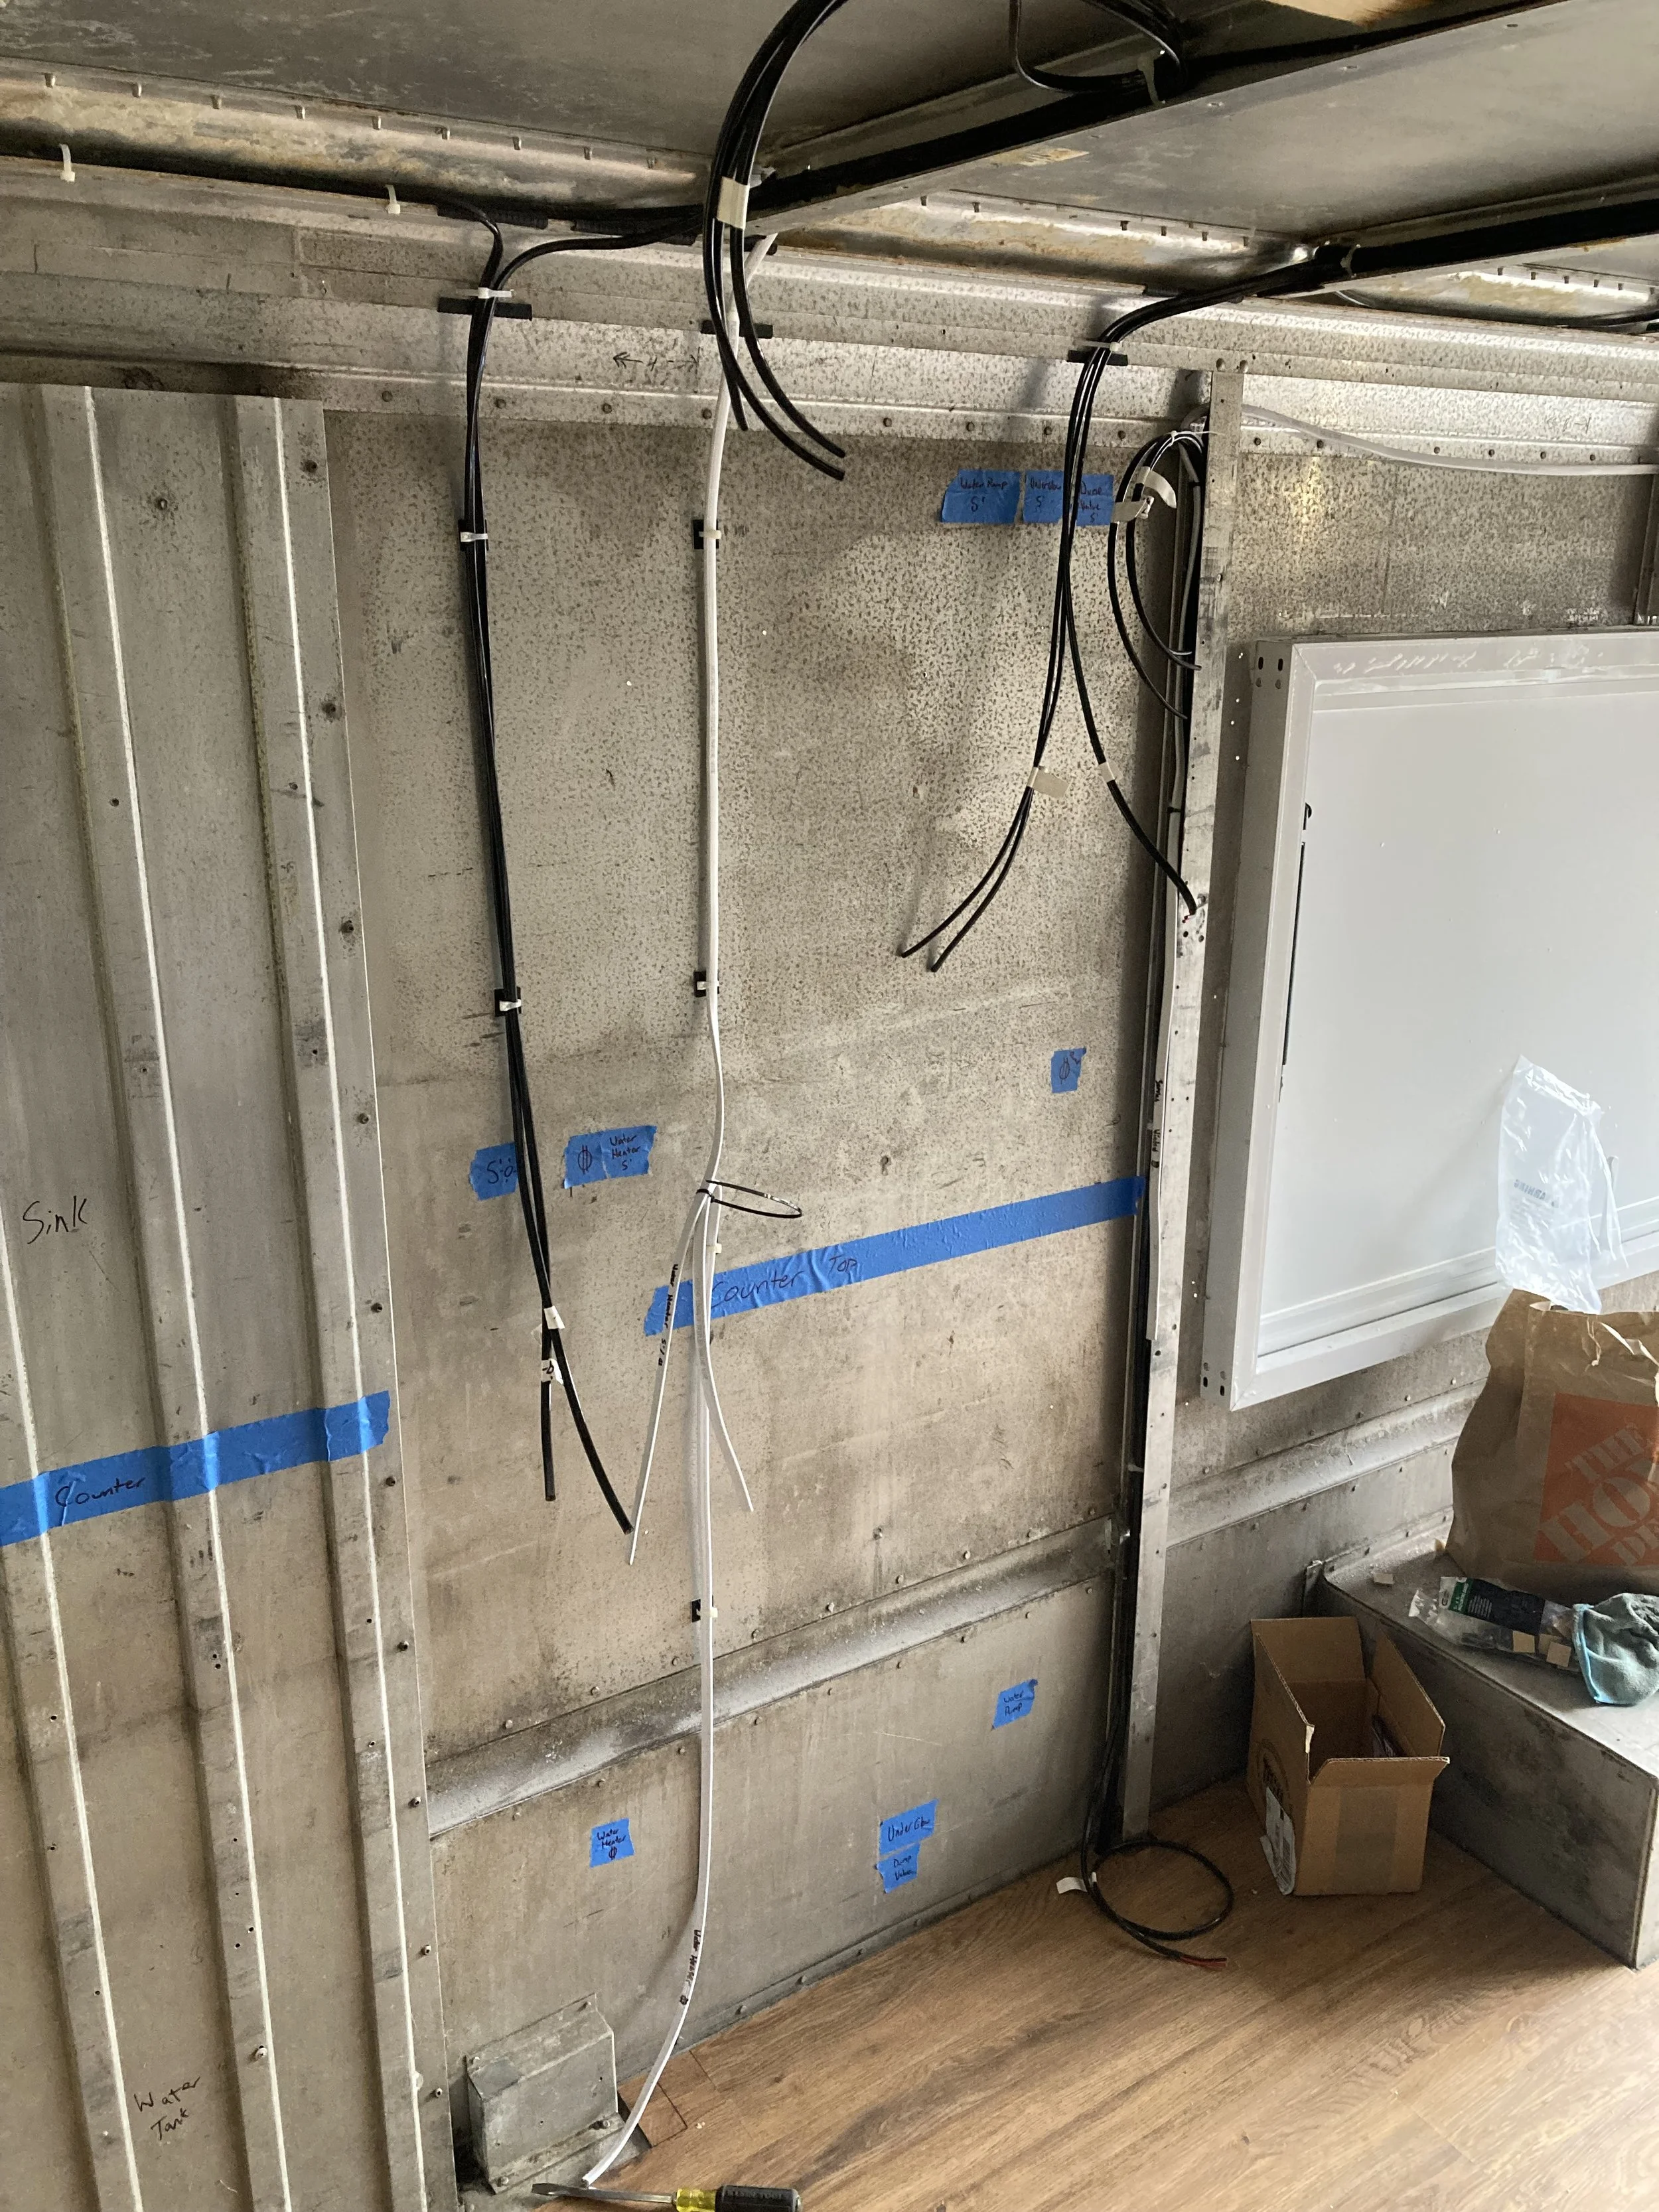
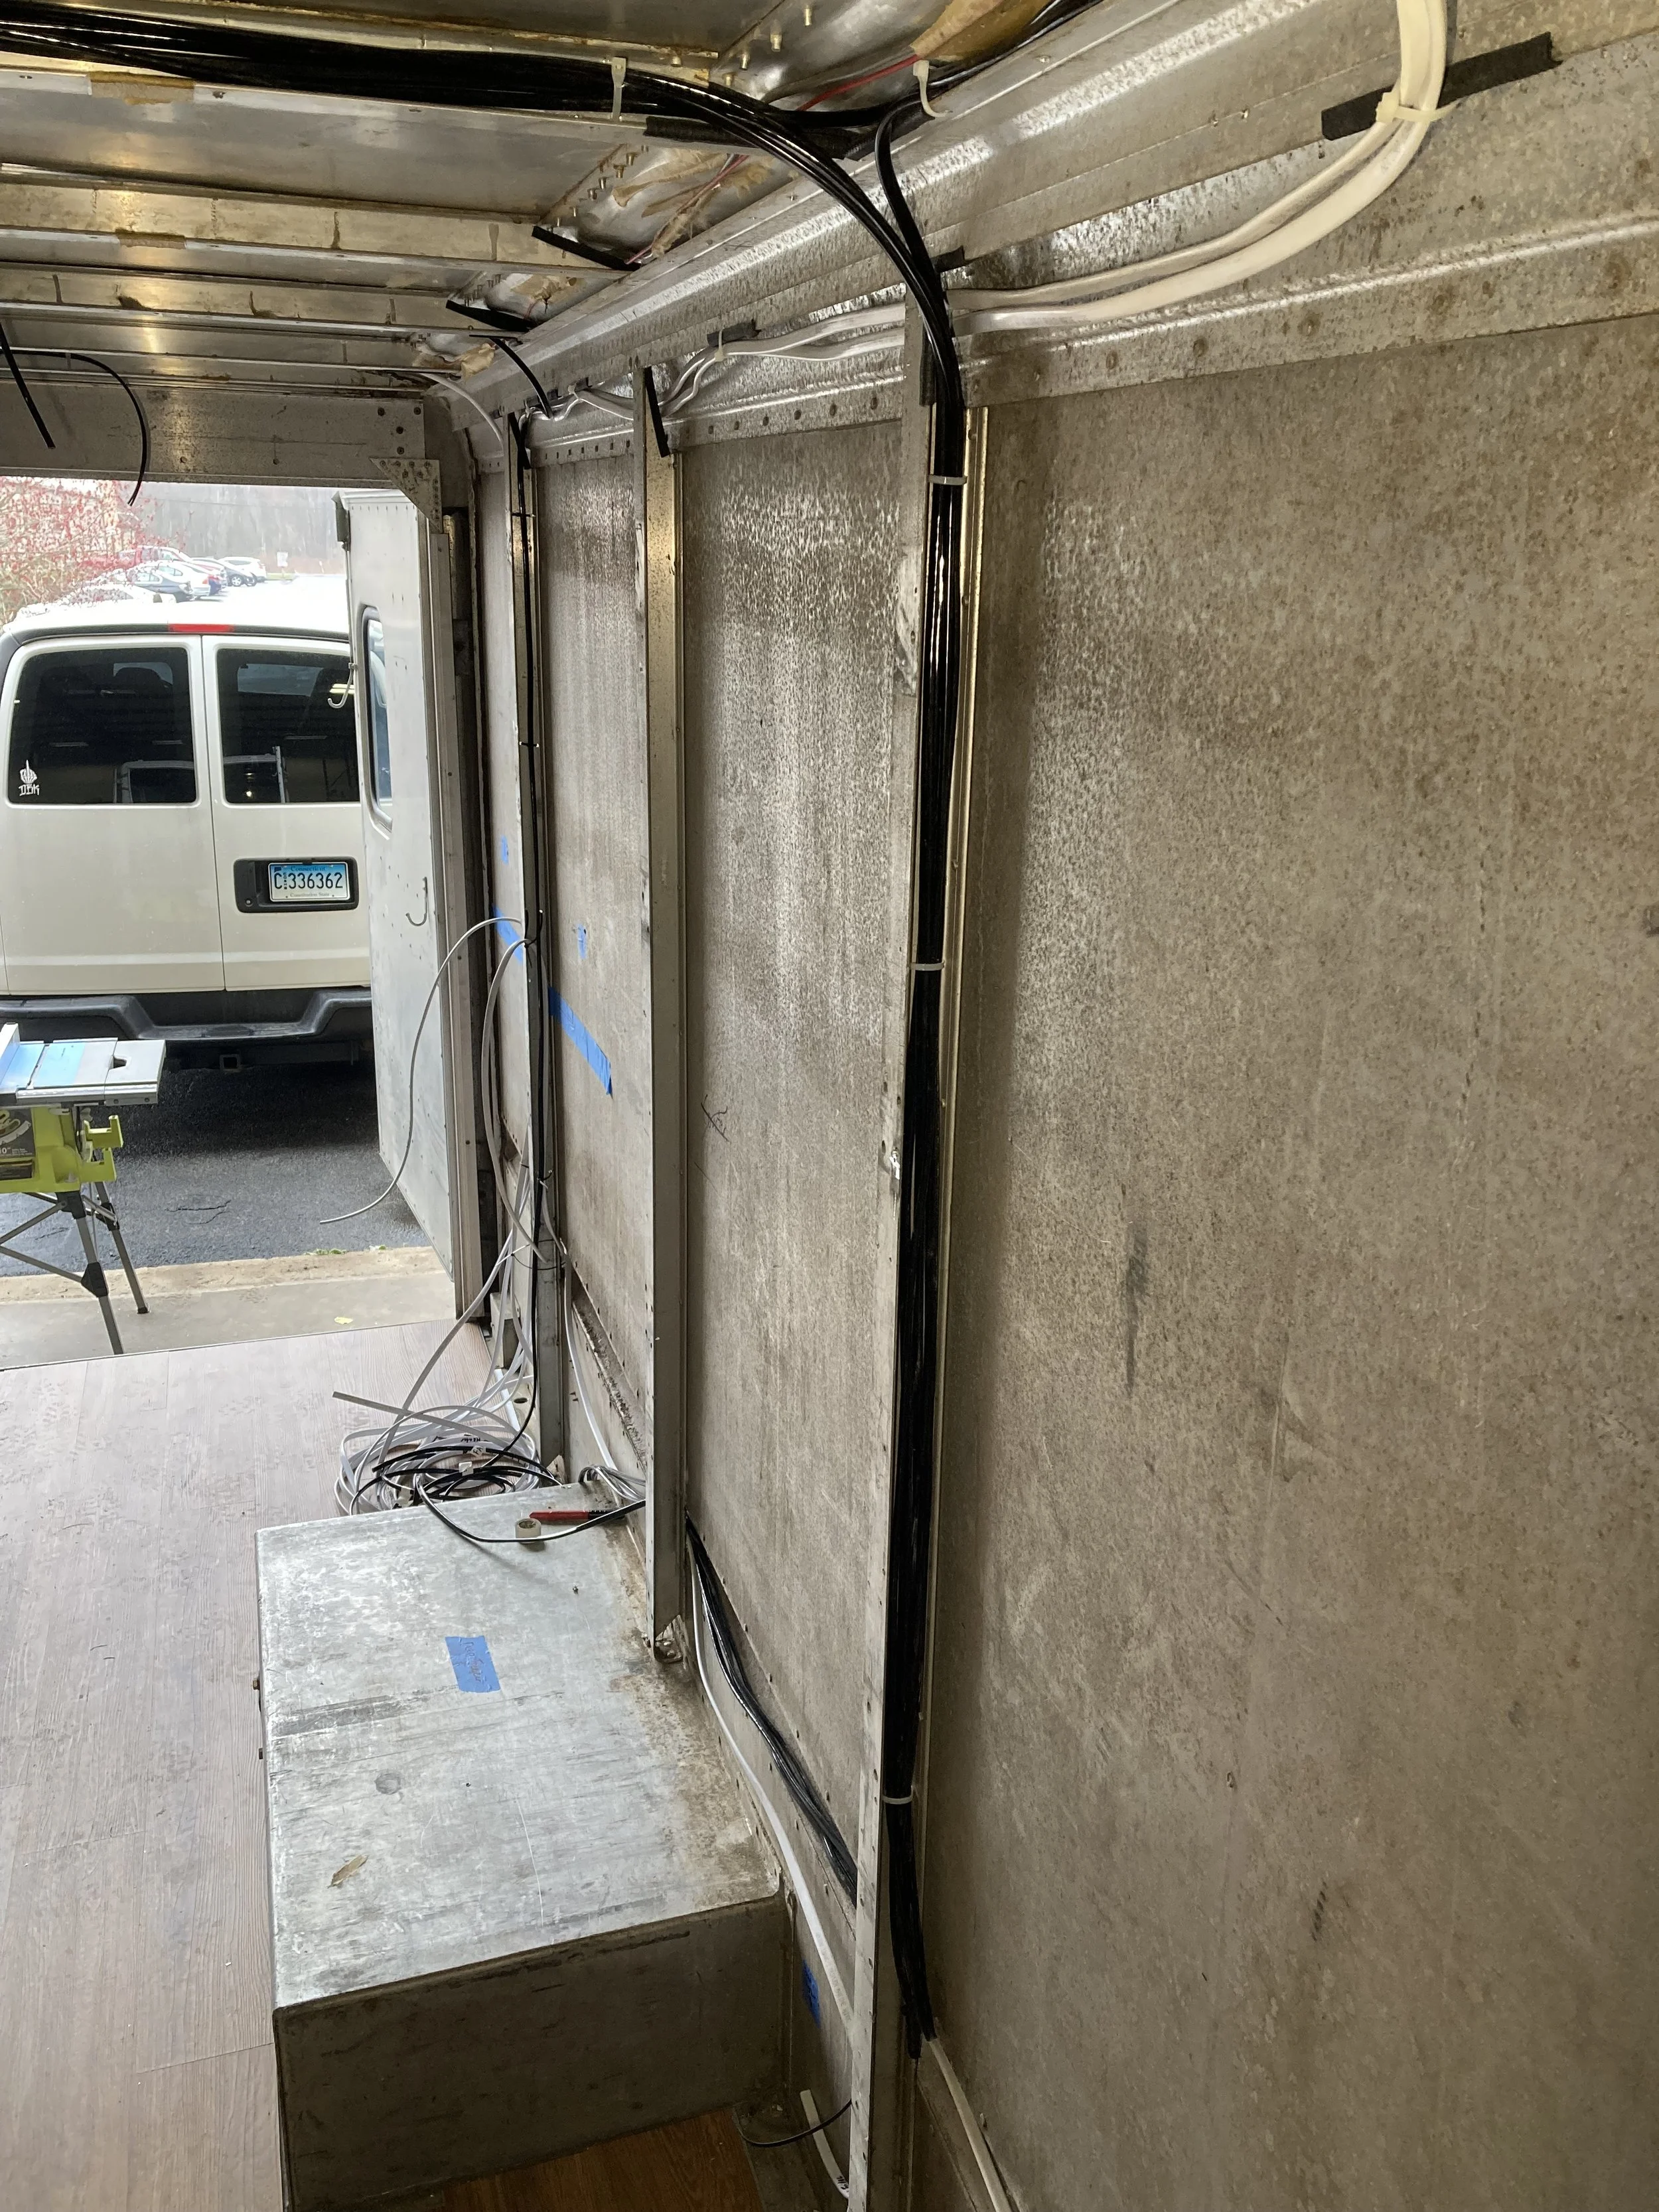
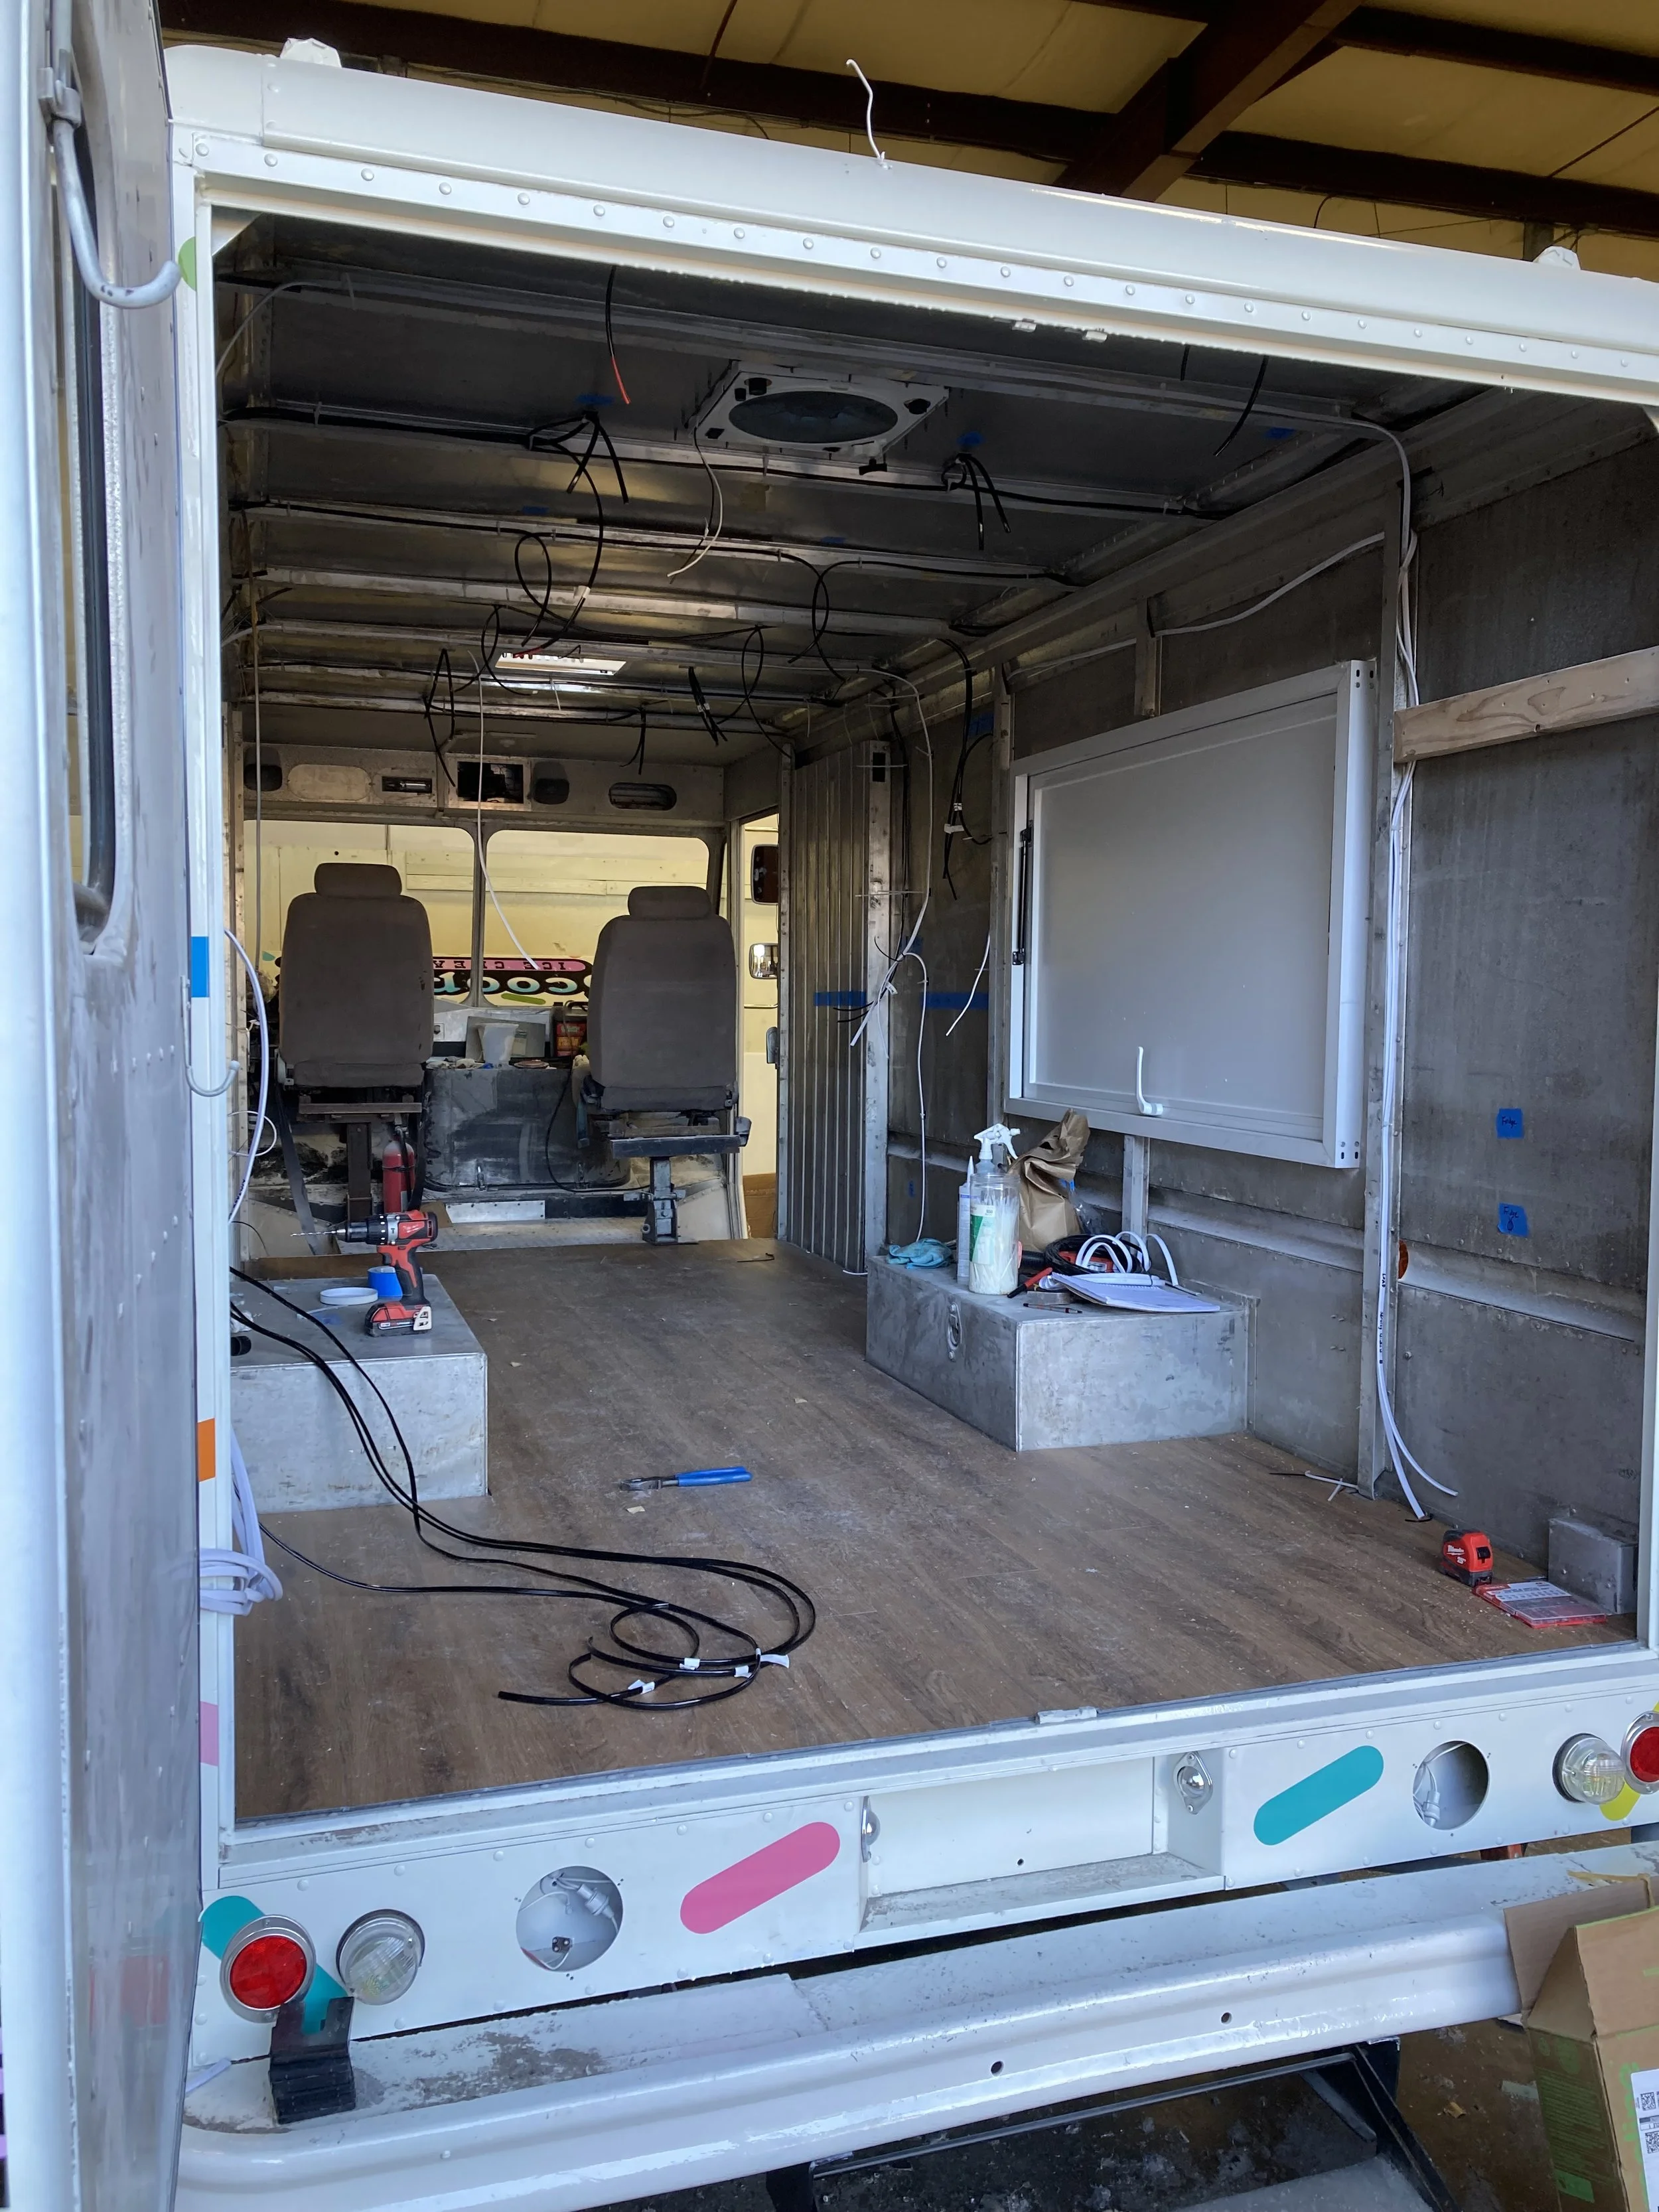
1975 Chevy Stepvan
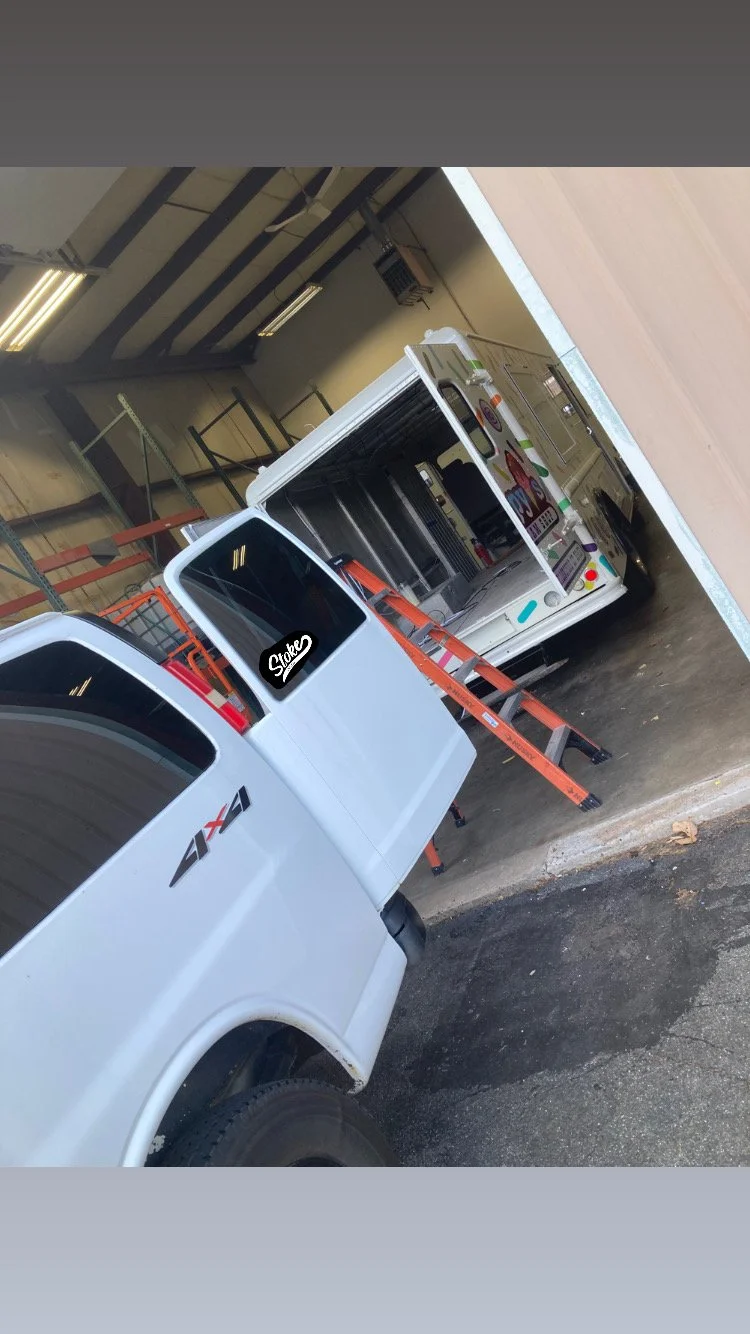
Worked out of the back of the shop Quigley for this build
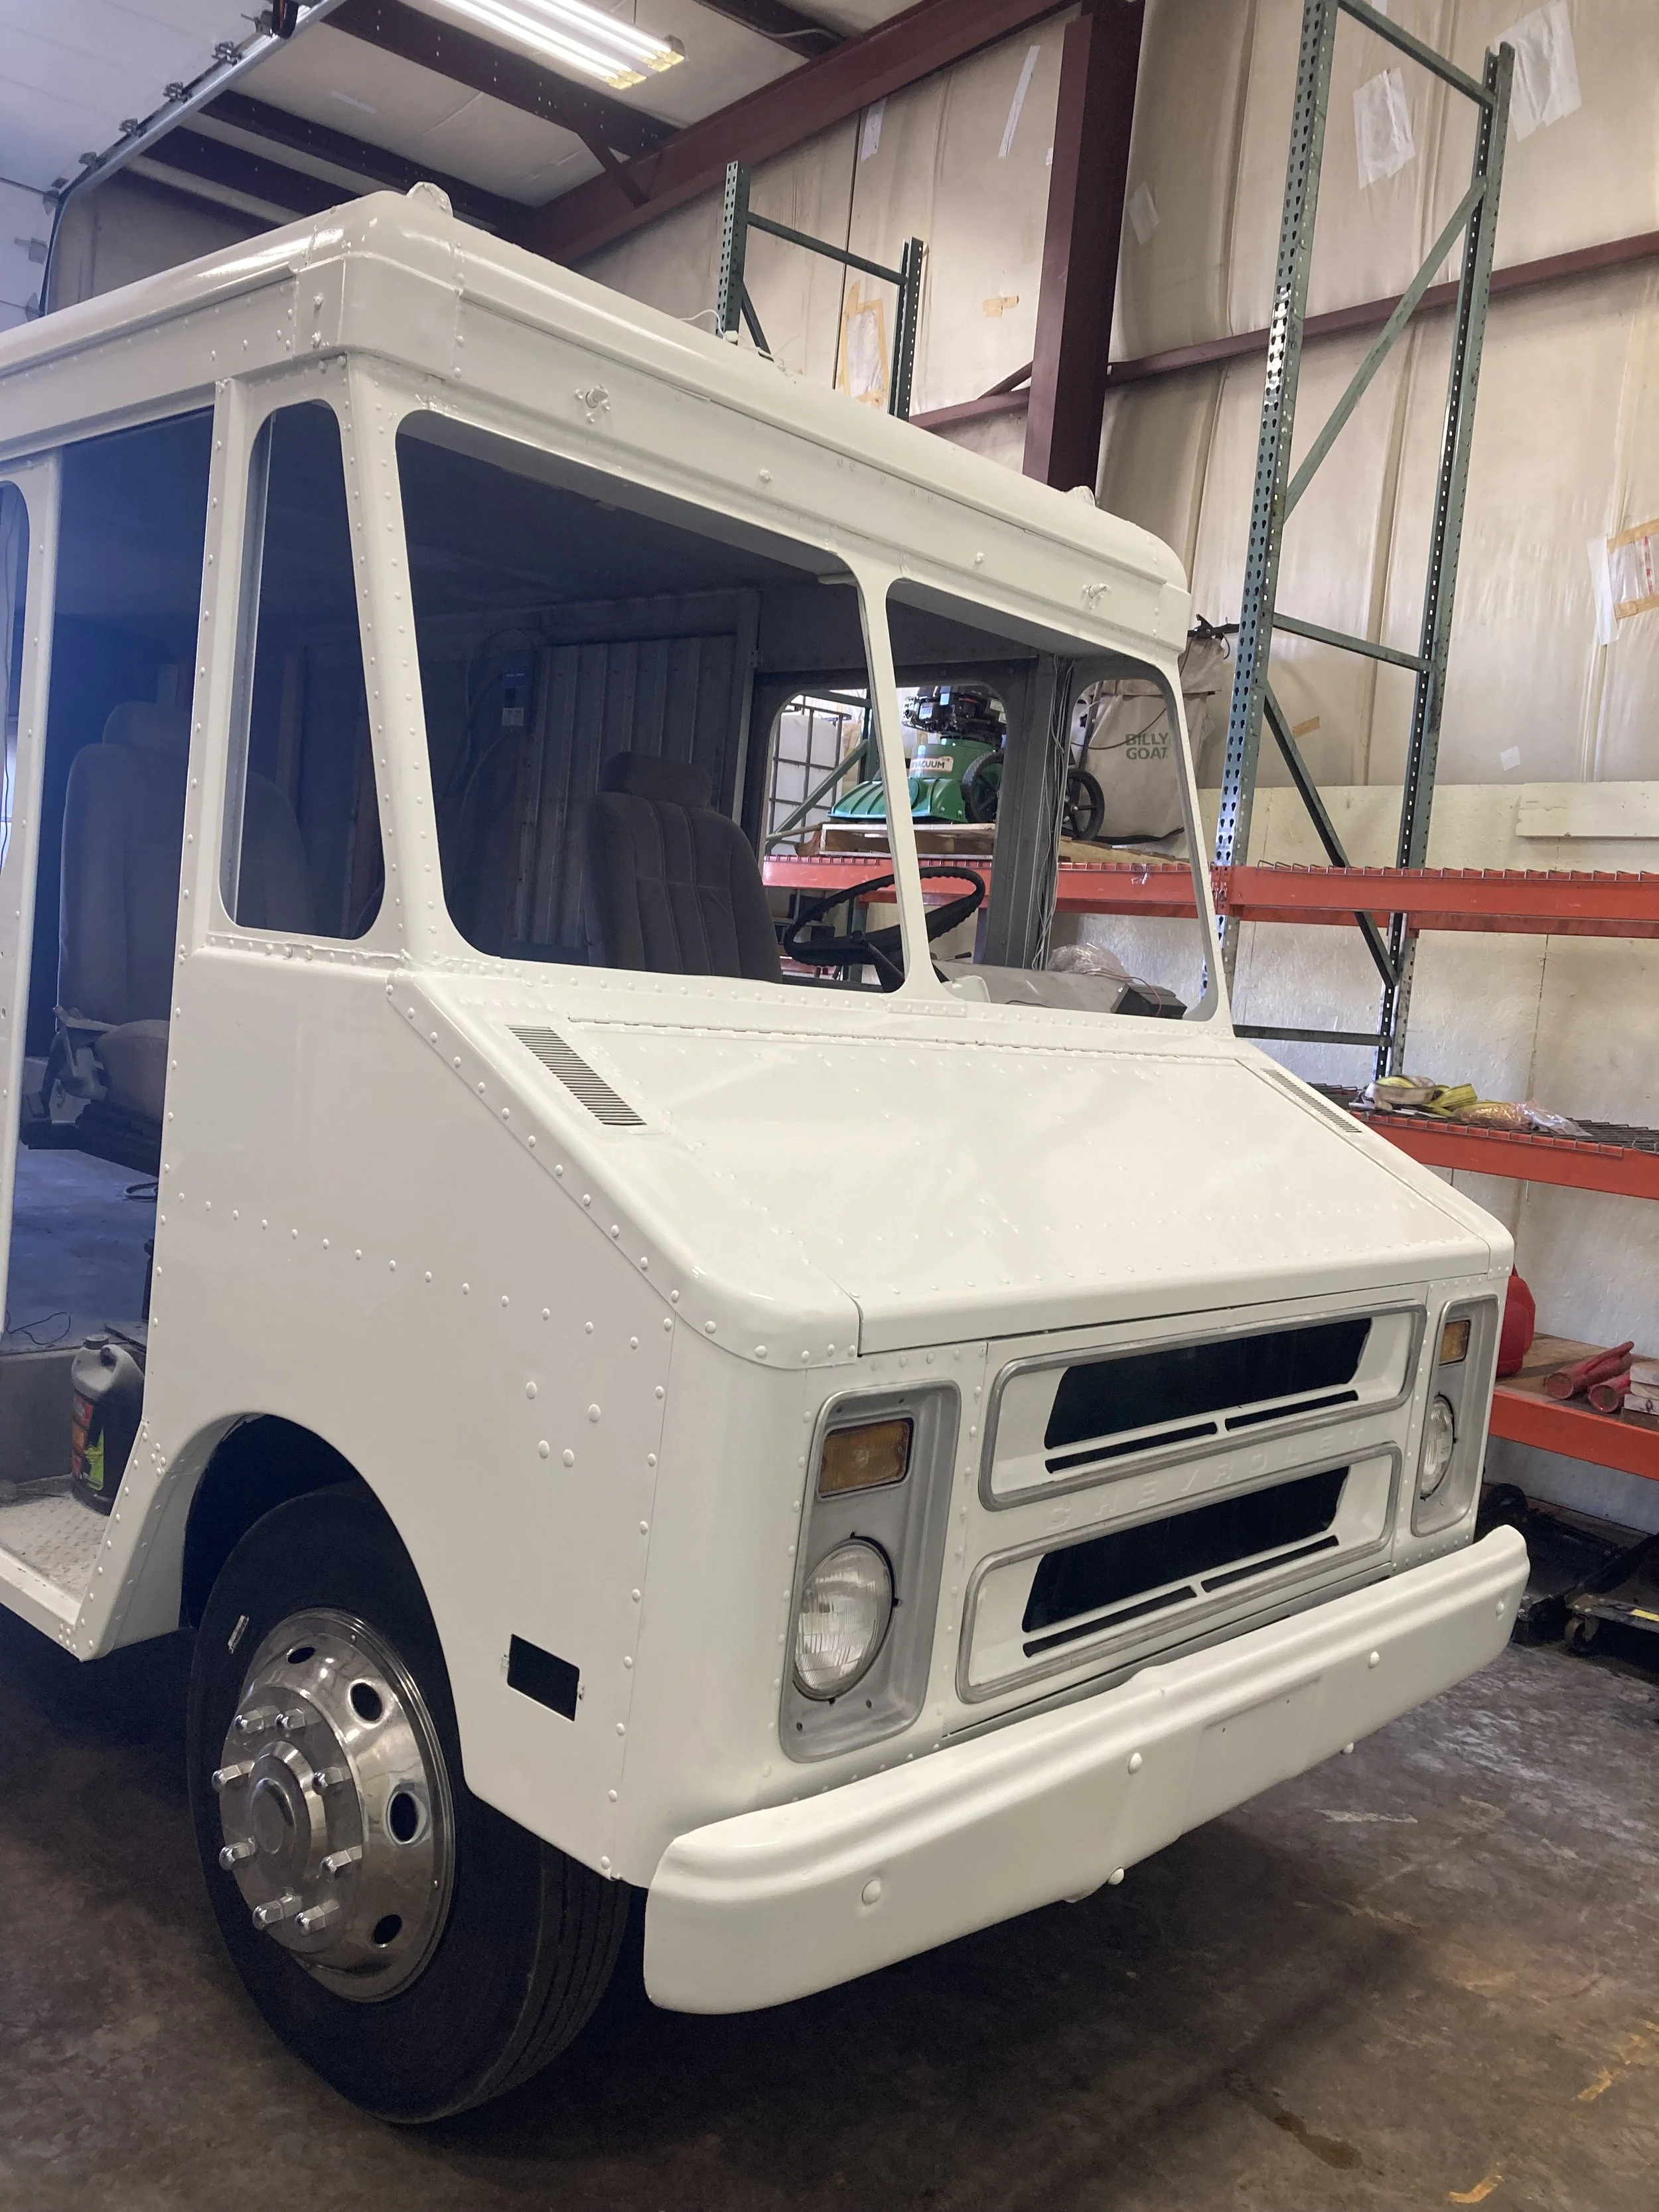
Customer had the van painted white. It was maroon when they picked it up on market place
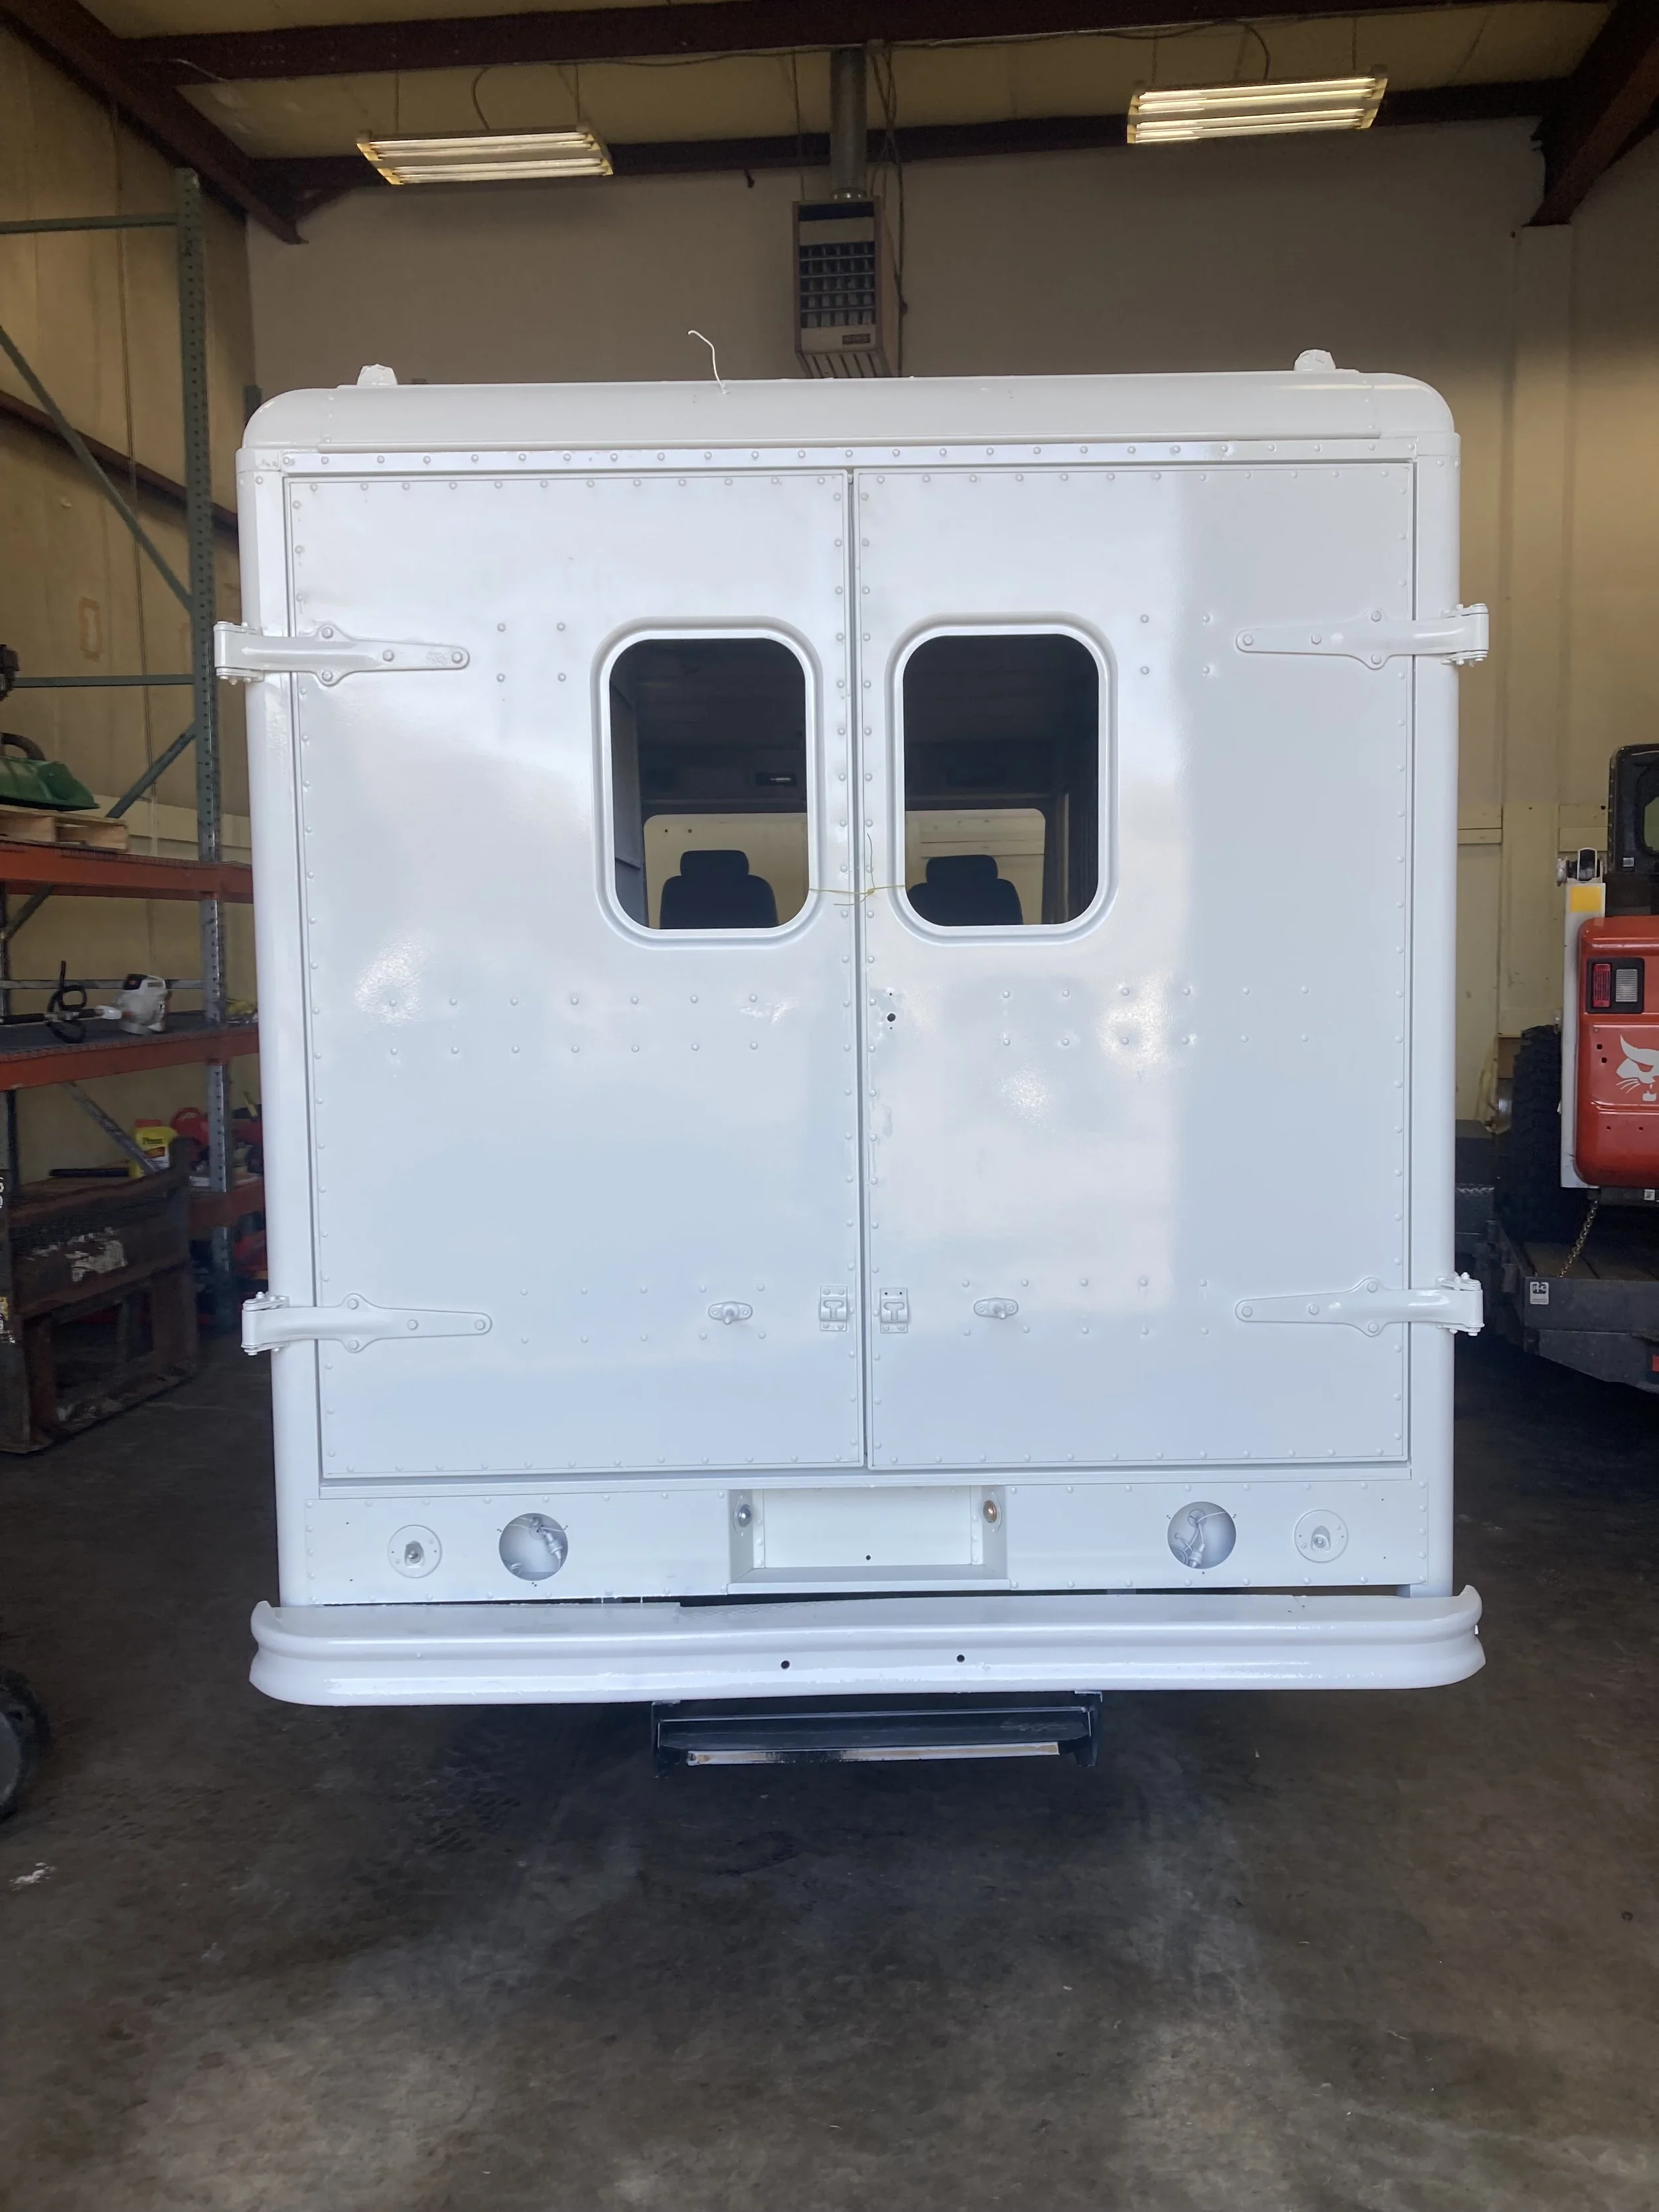

There was already a serving window due to it already being an ice cream truck. But we cleaned that up in order to fit in a new one
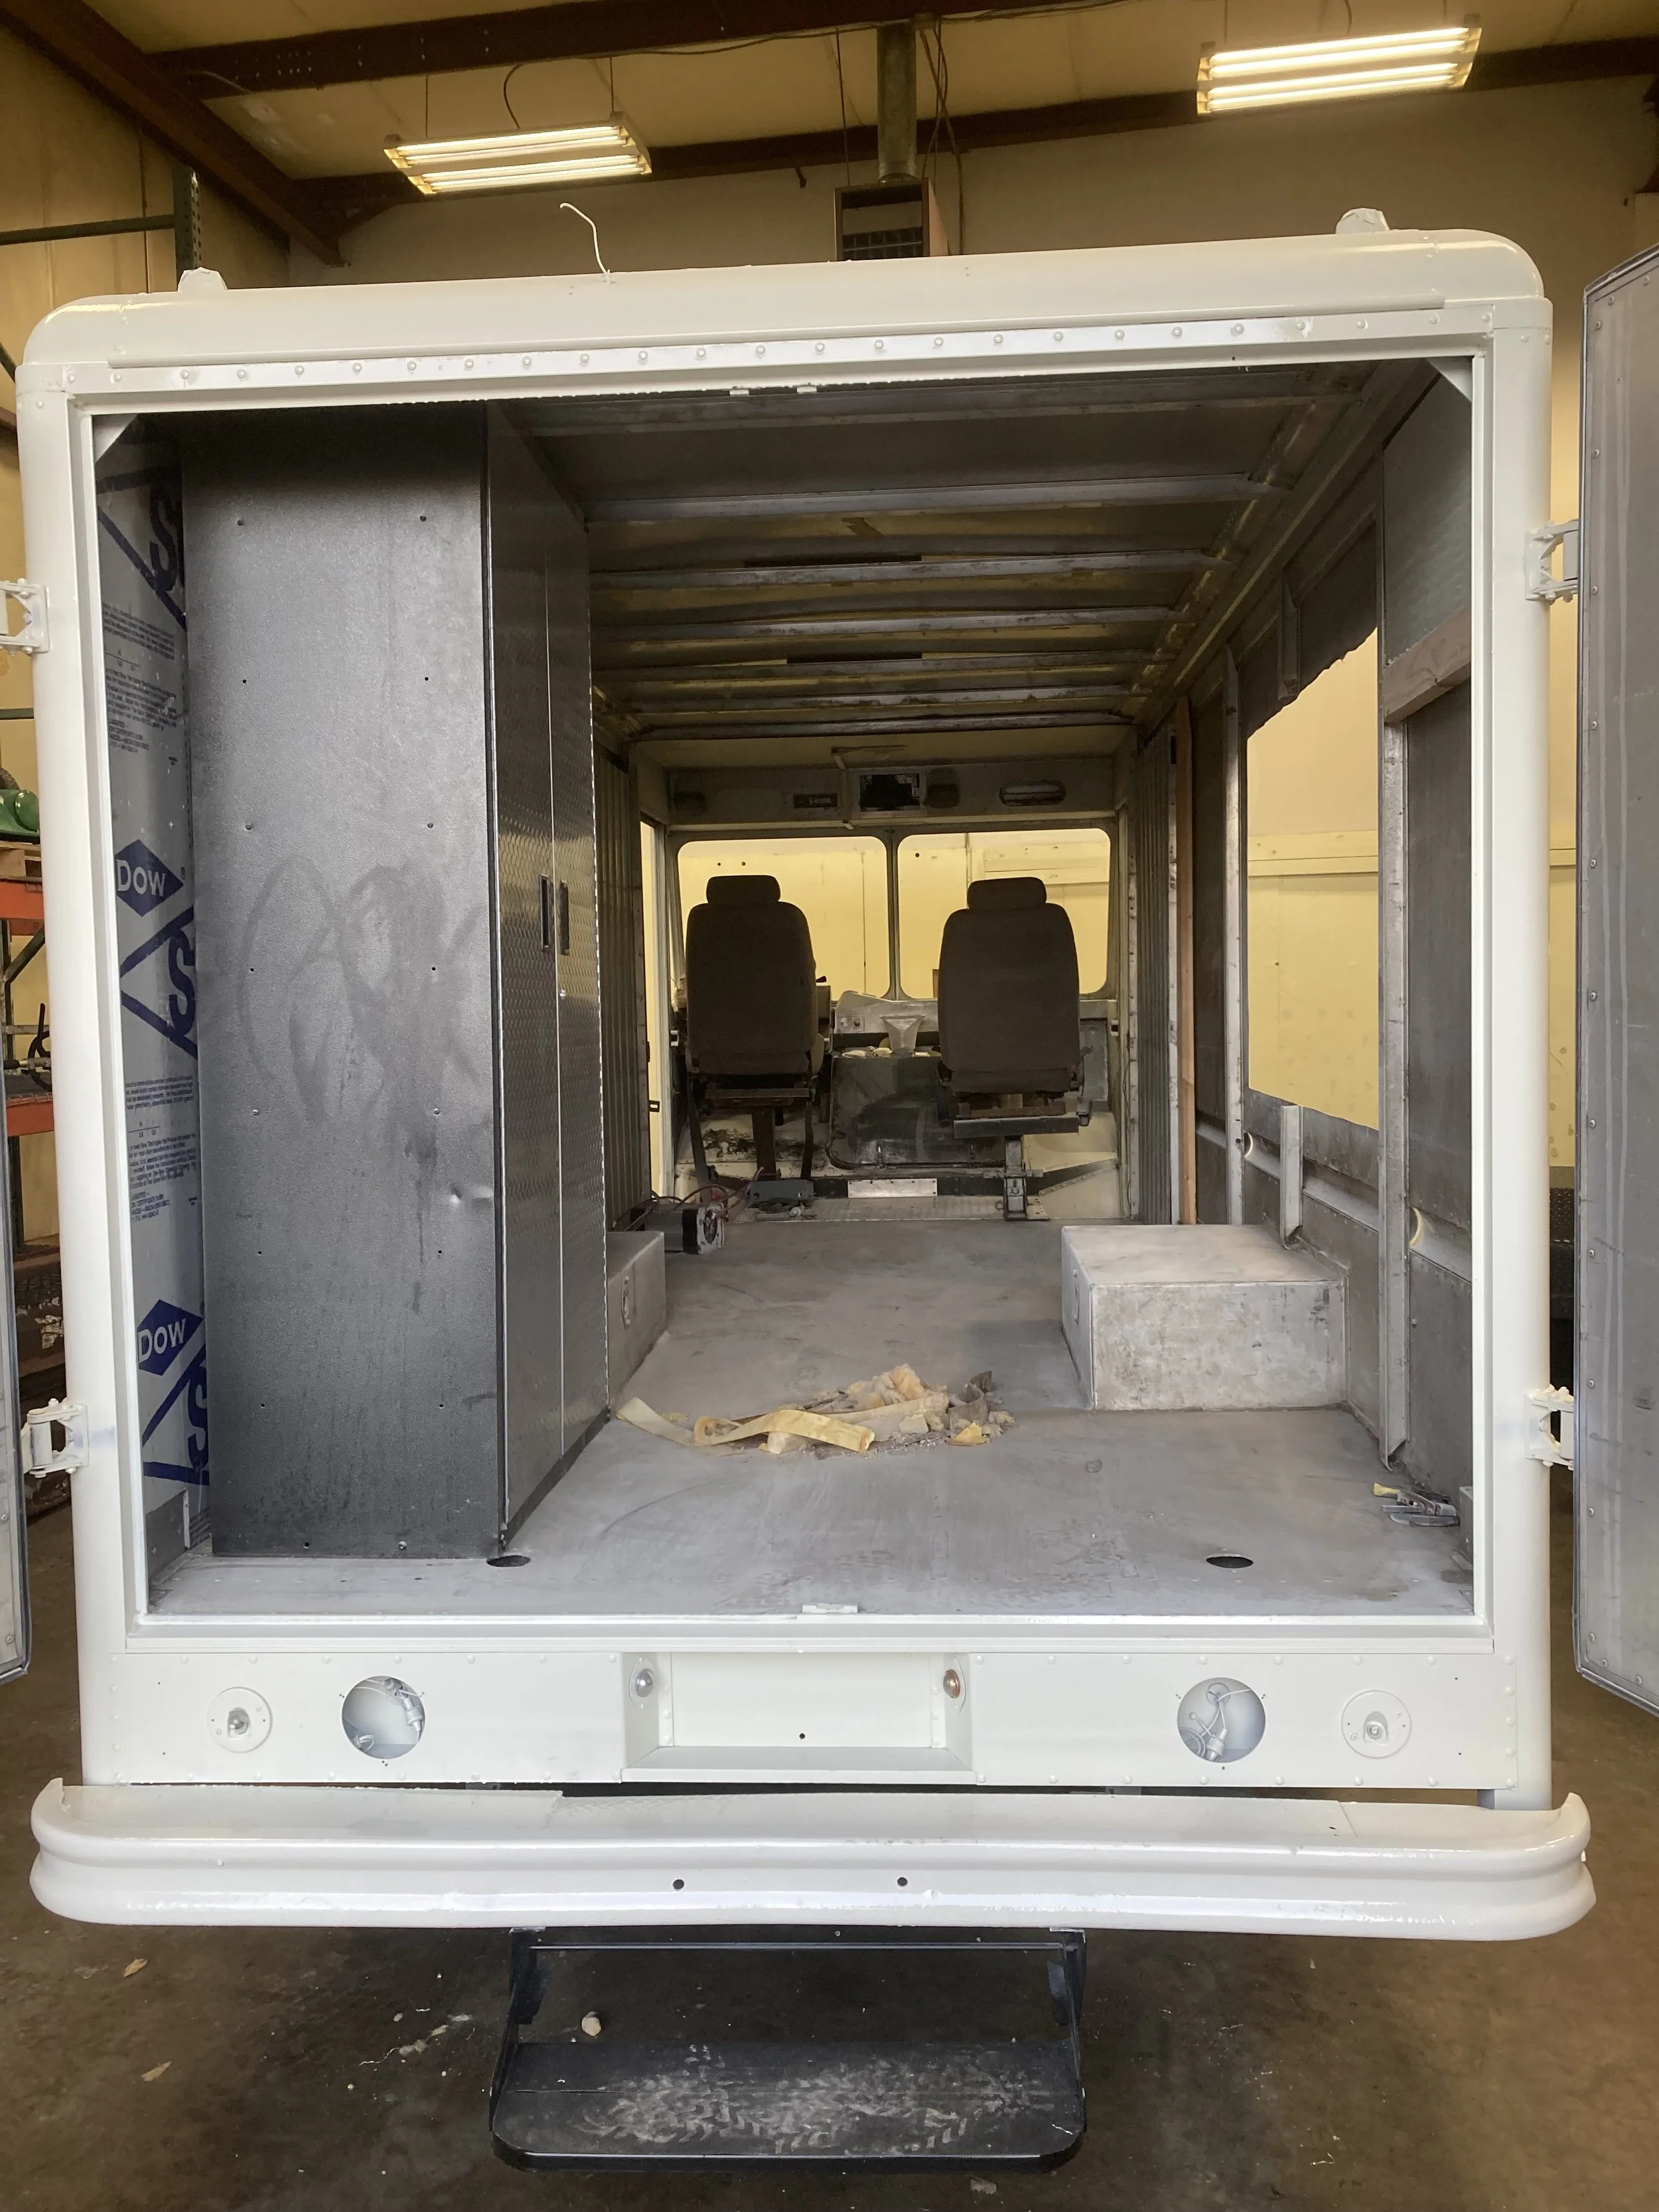
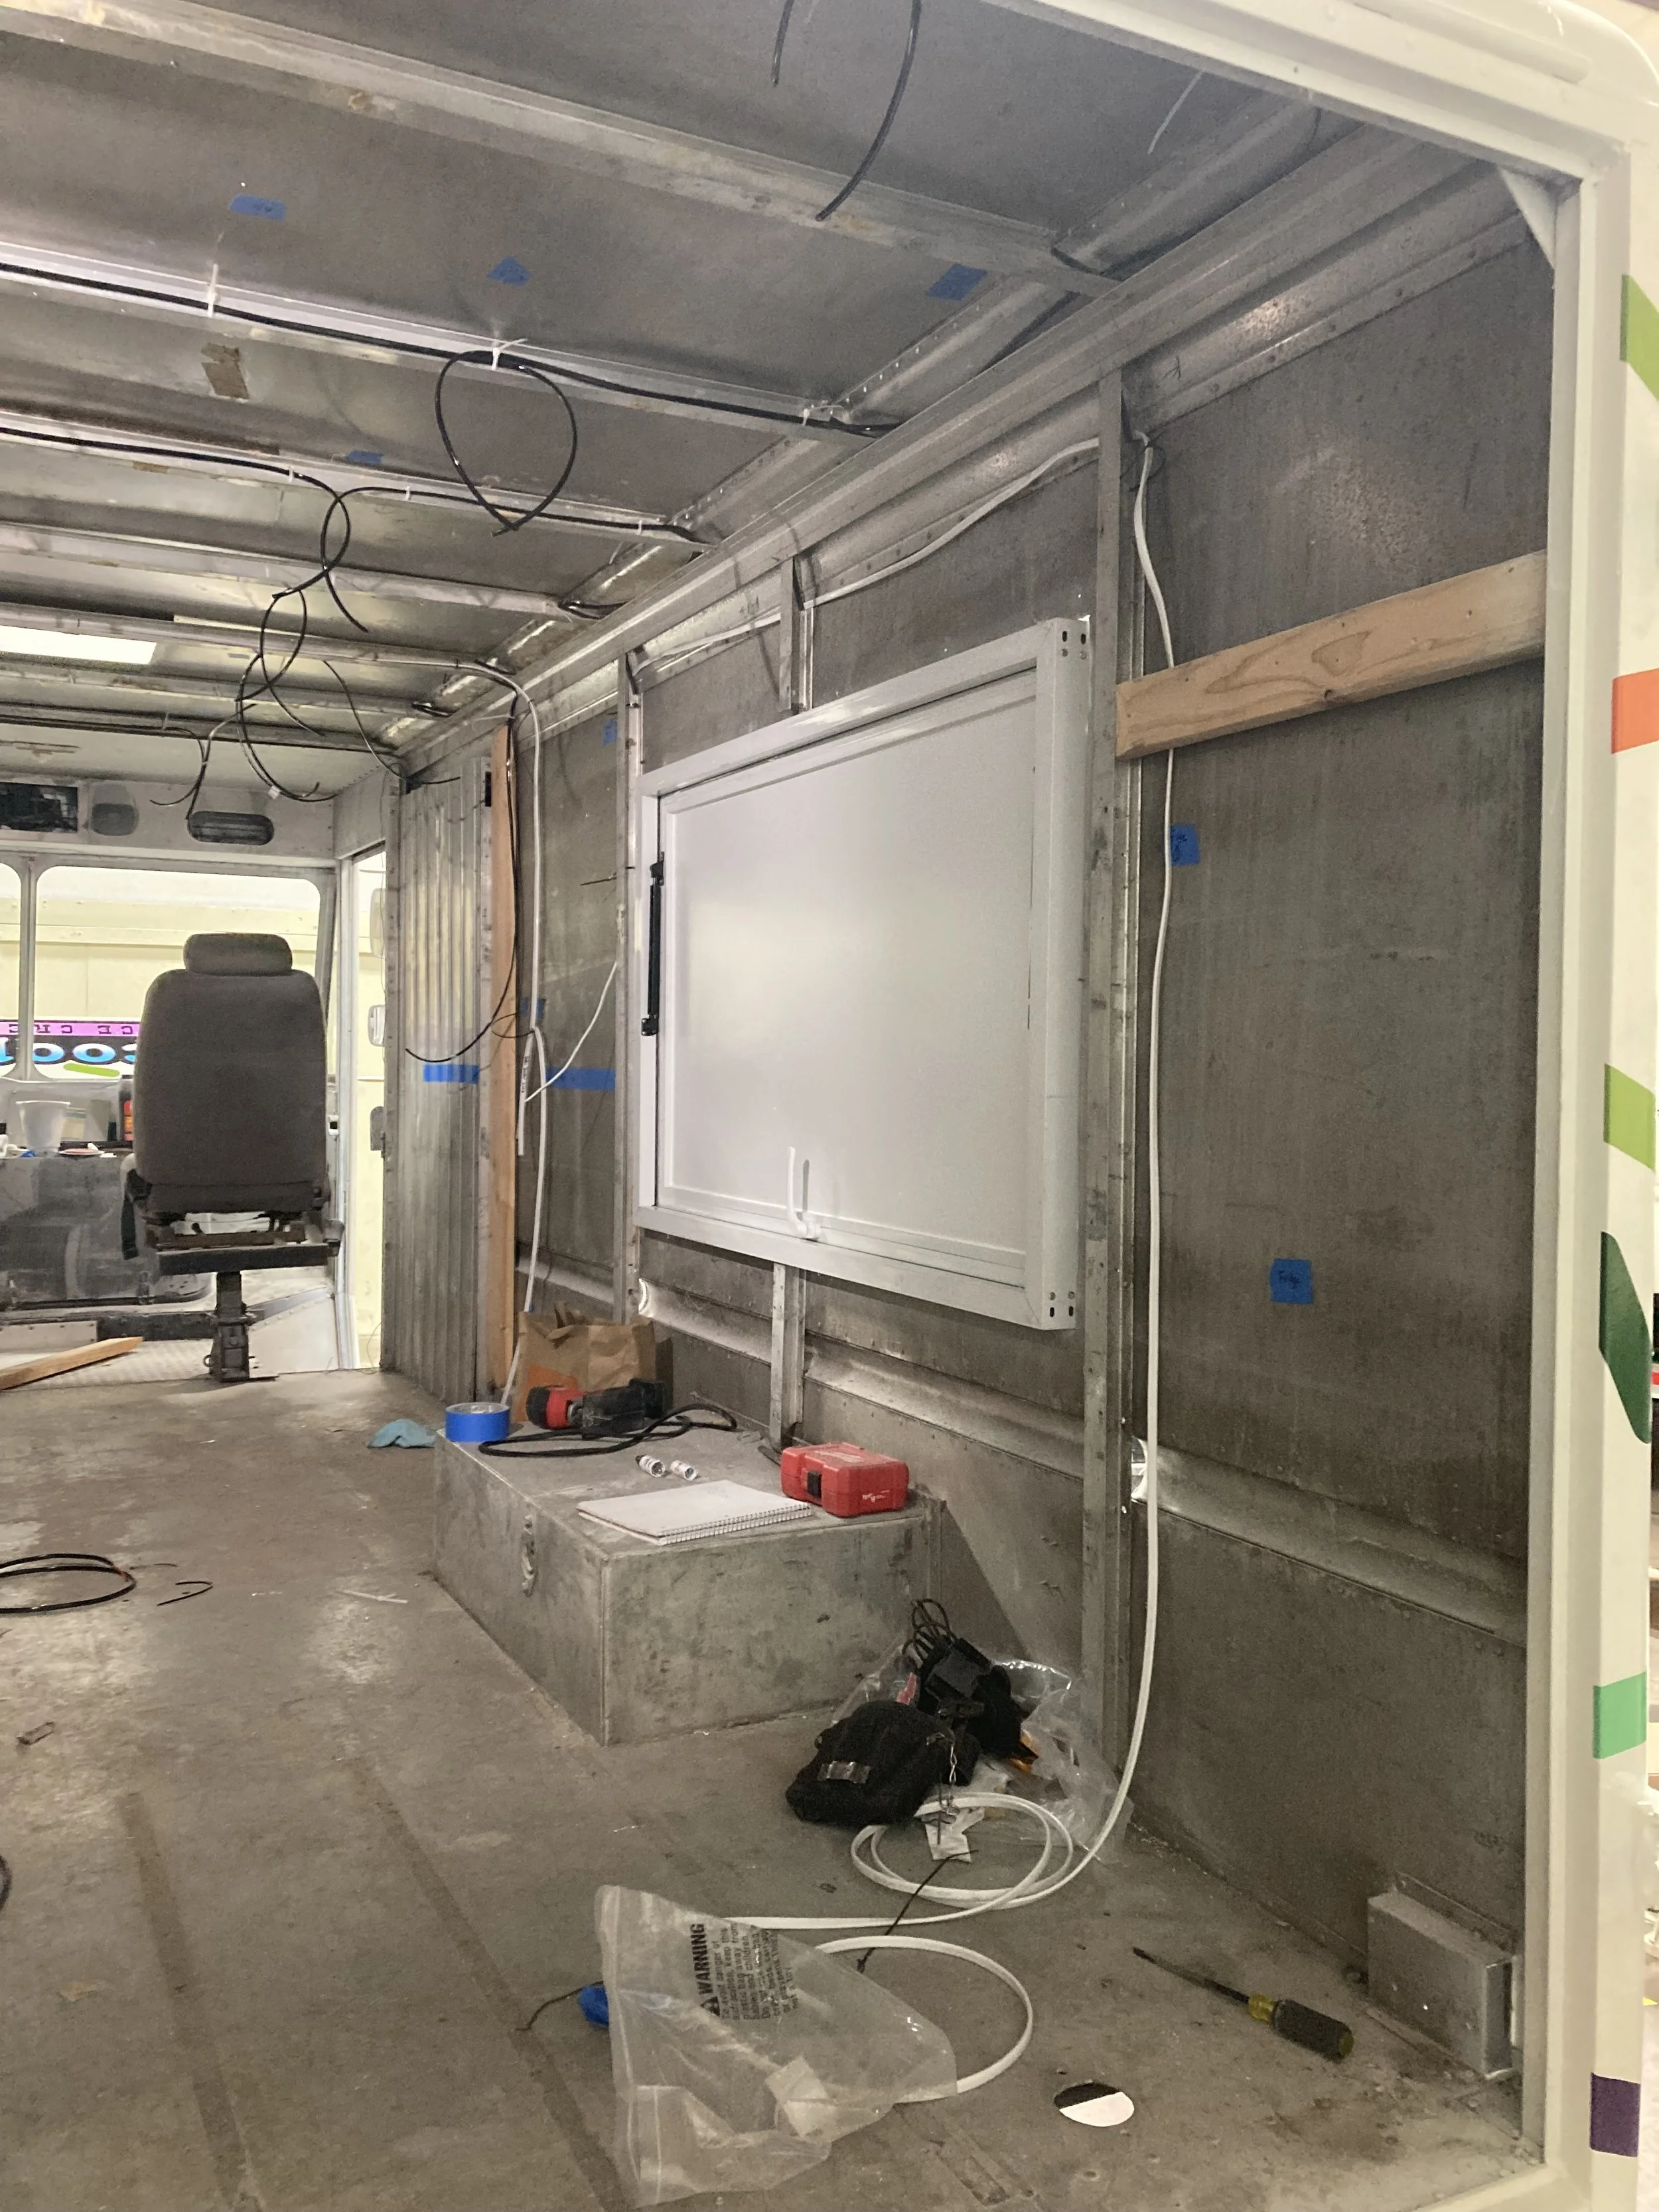
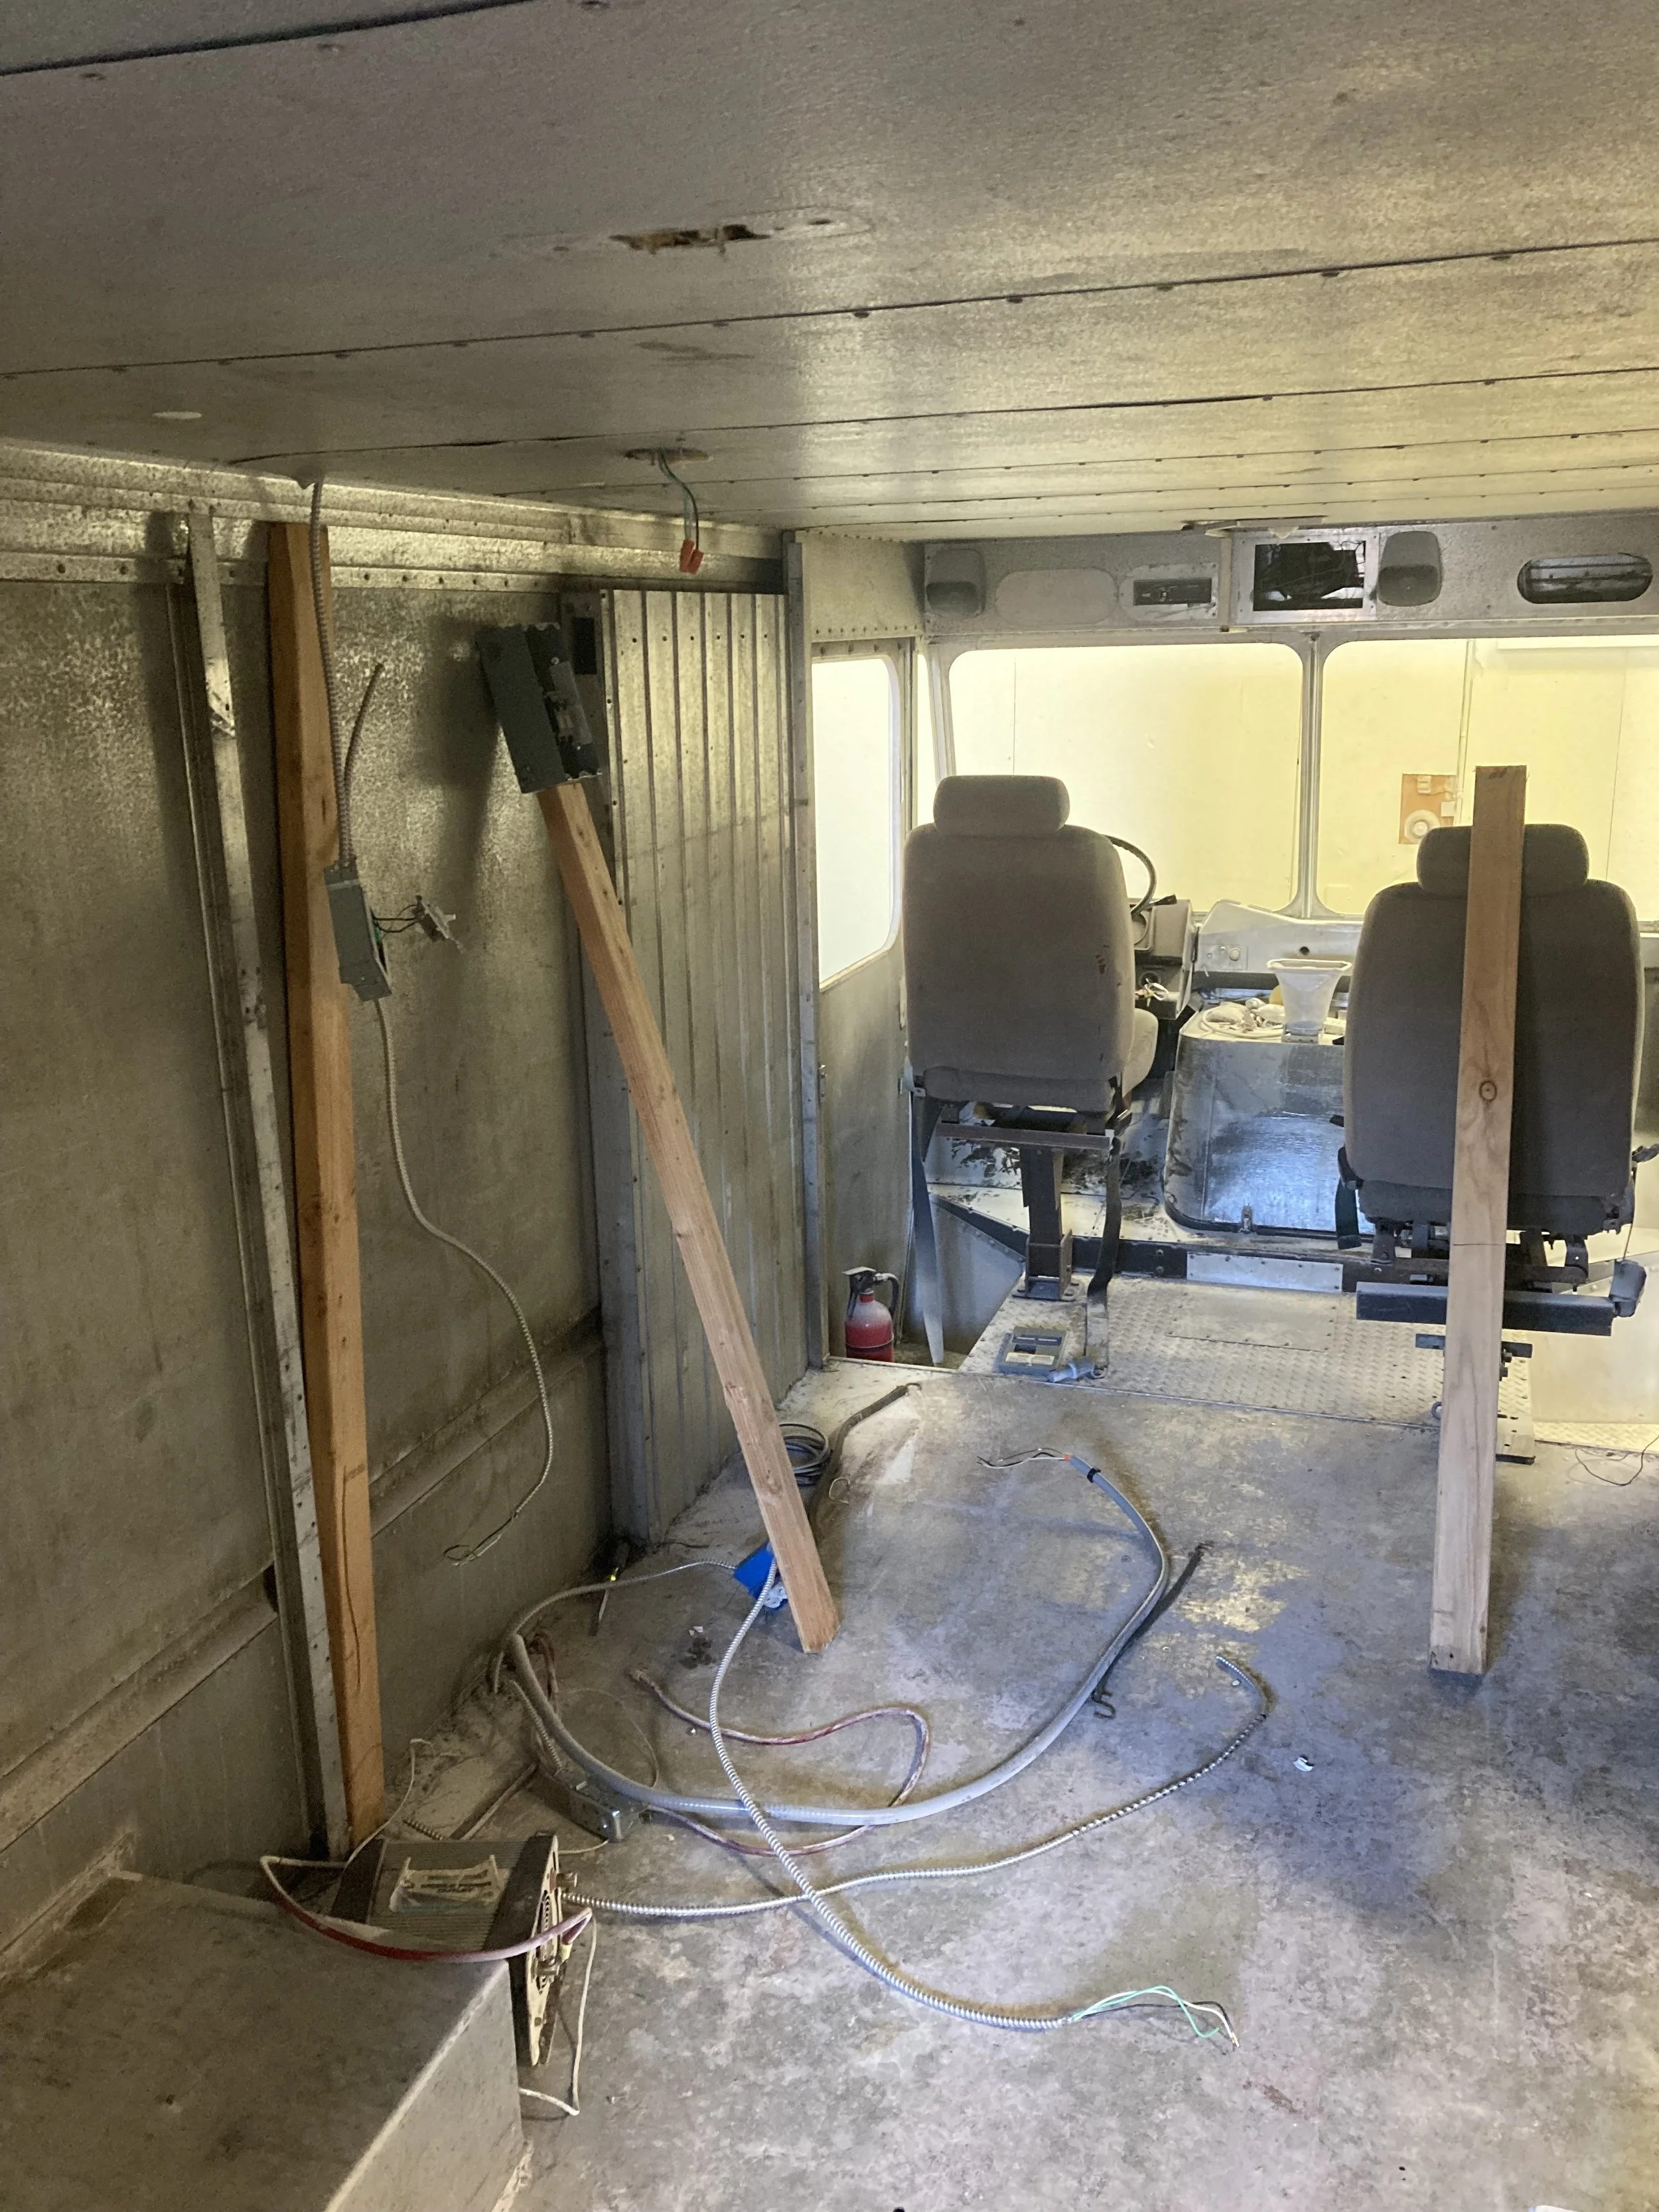
We gutted the old wiring, insulation, wall studs, and ceiling
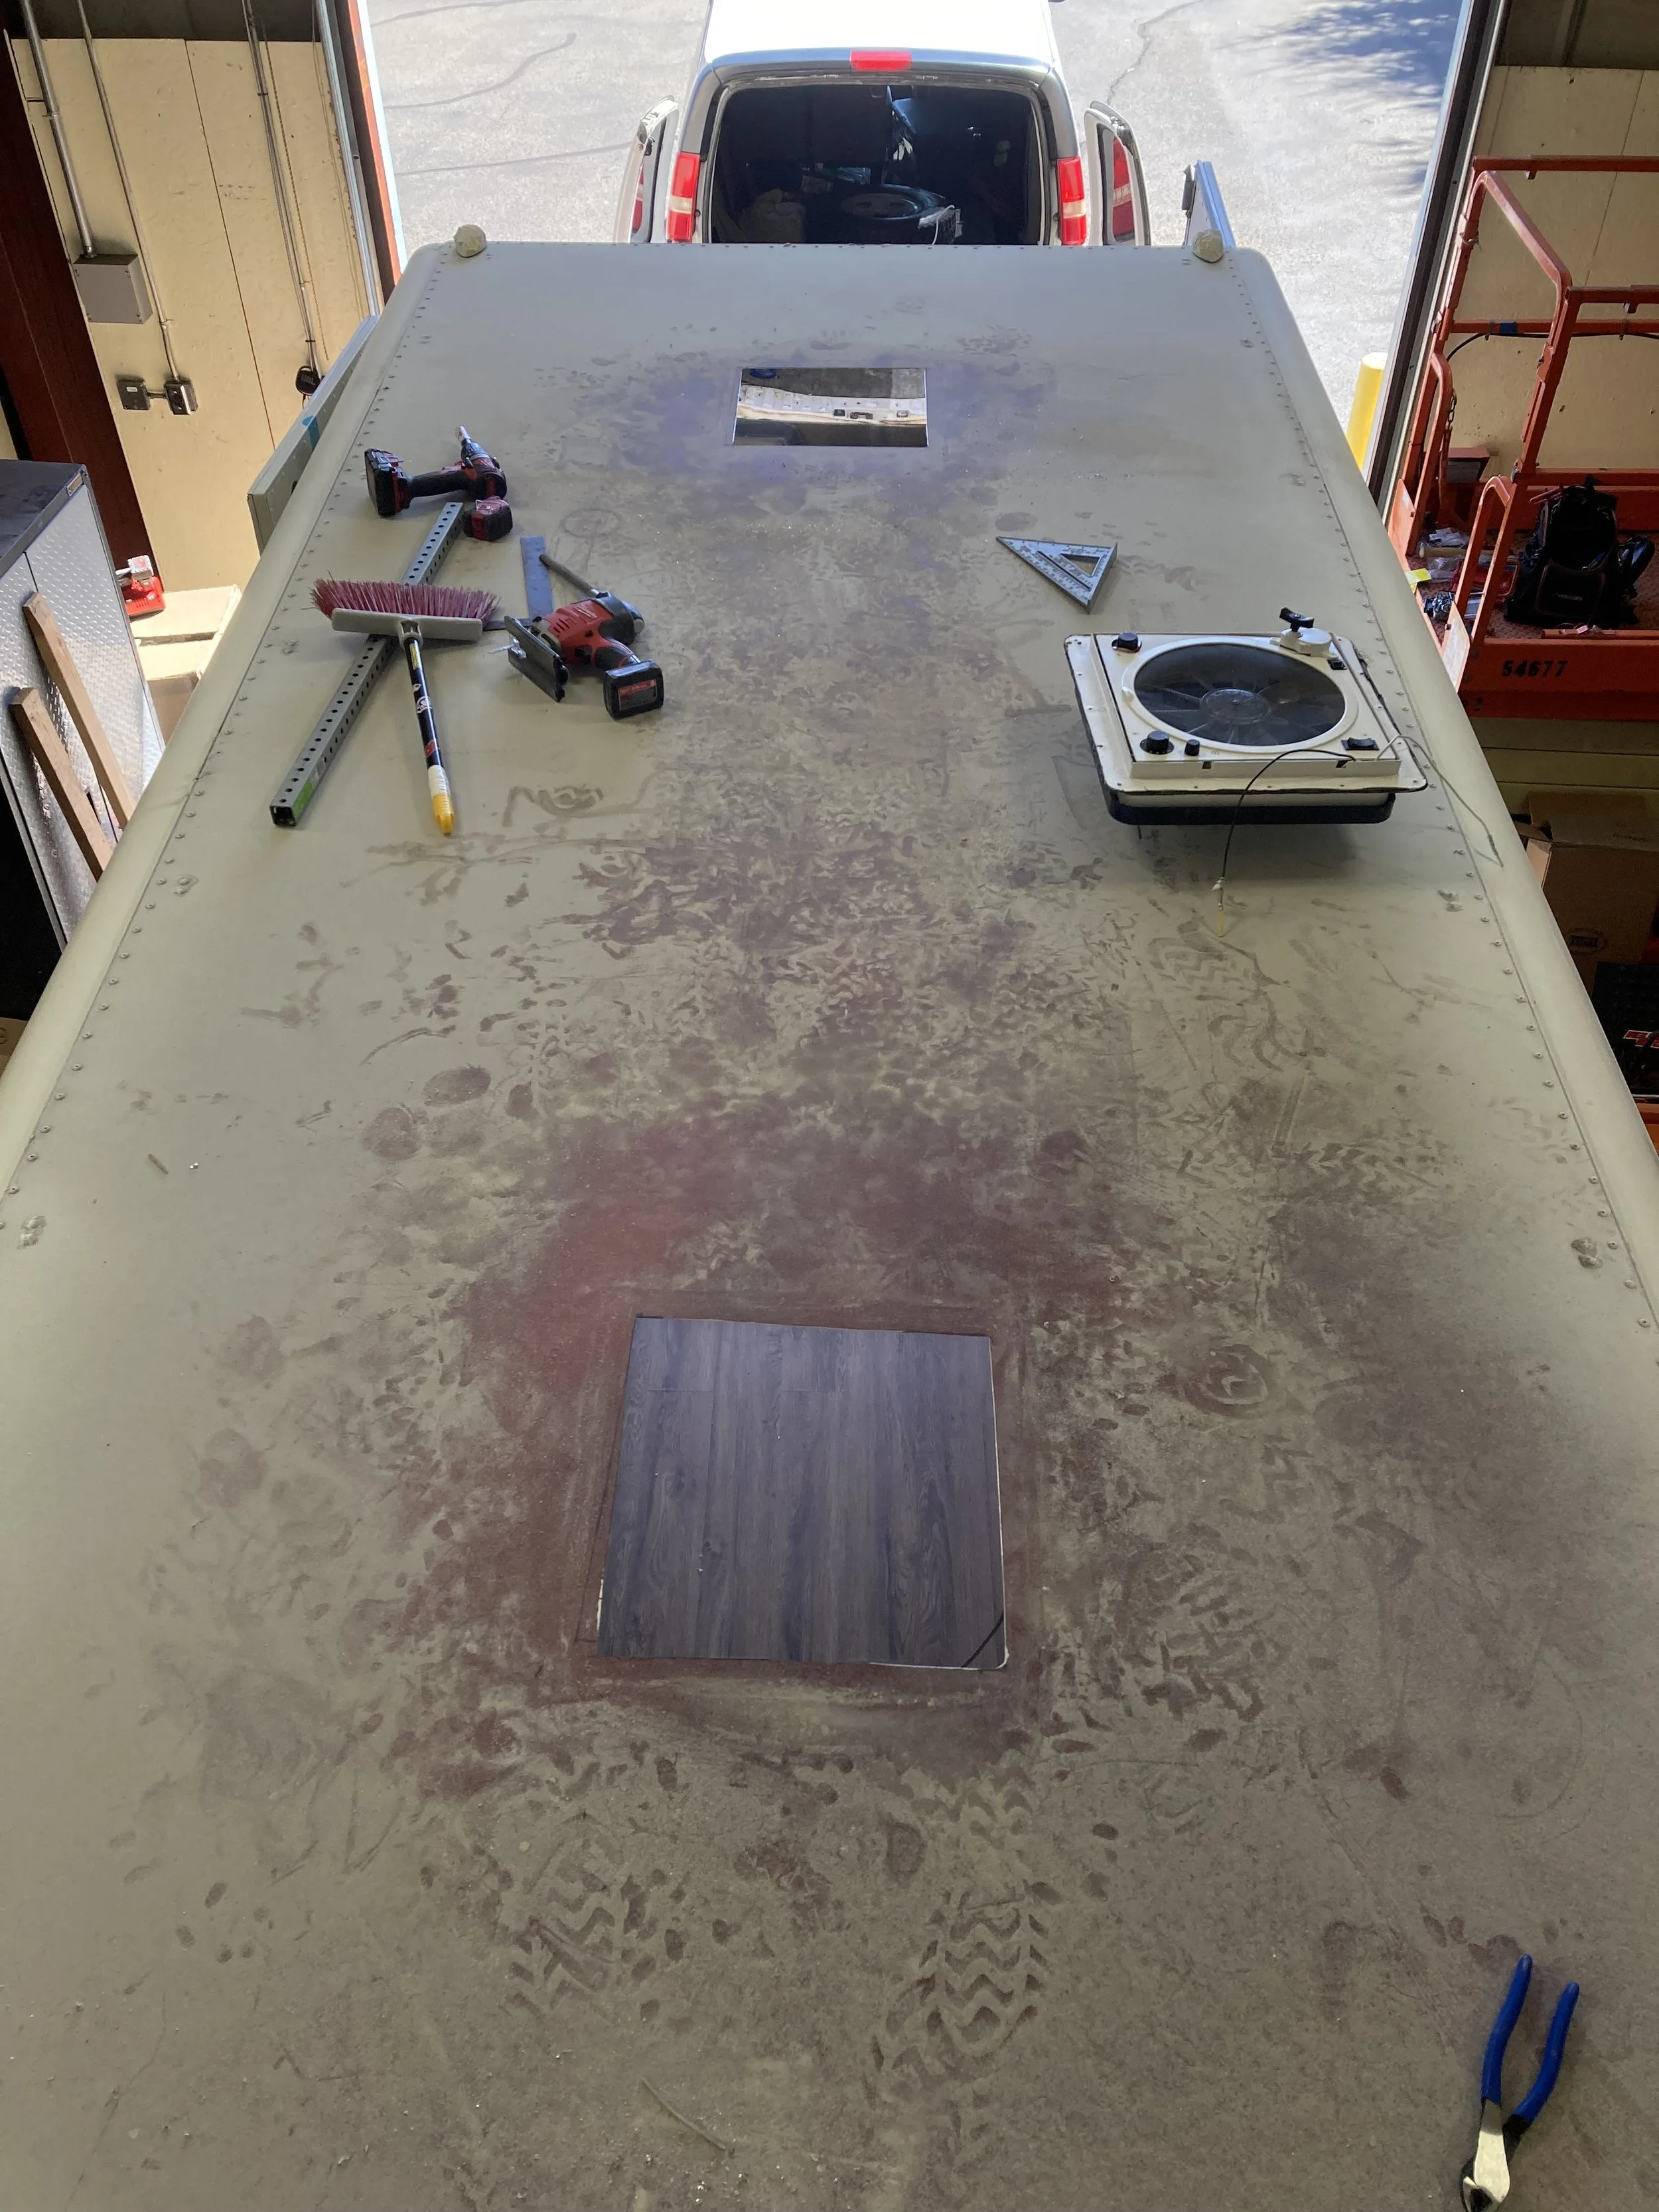
Cut in holes for an air conditioner and a ventilation fan
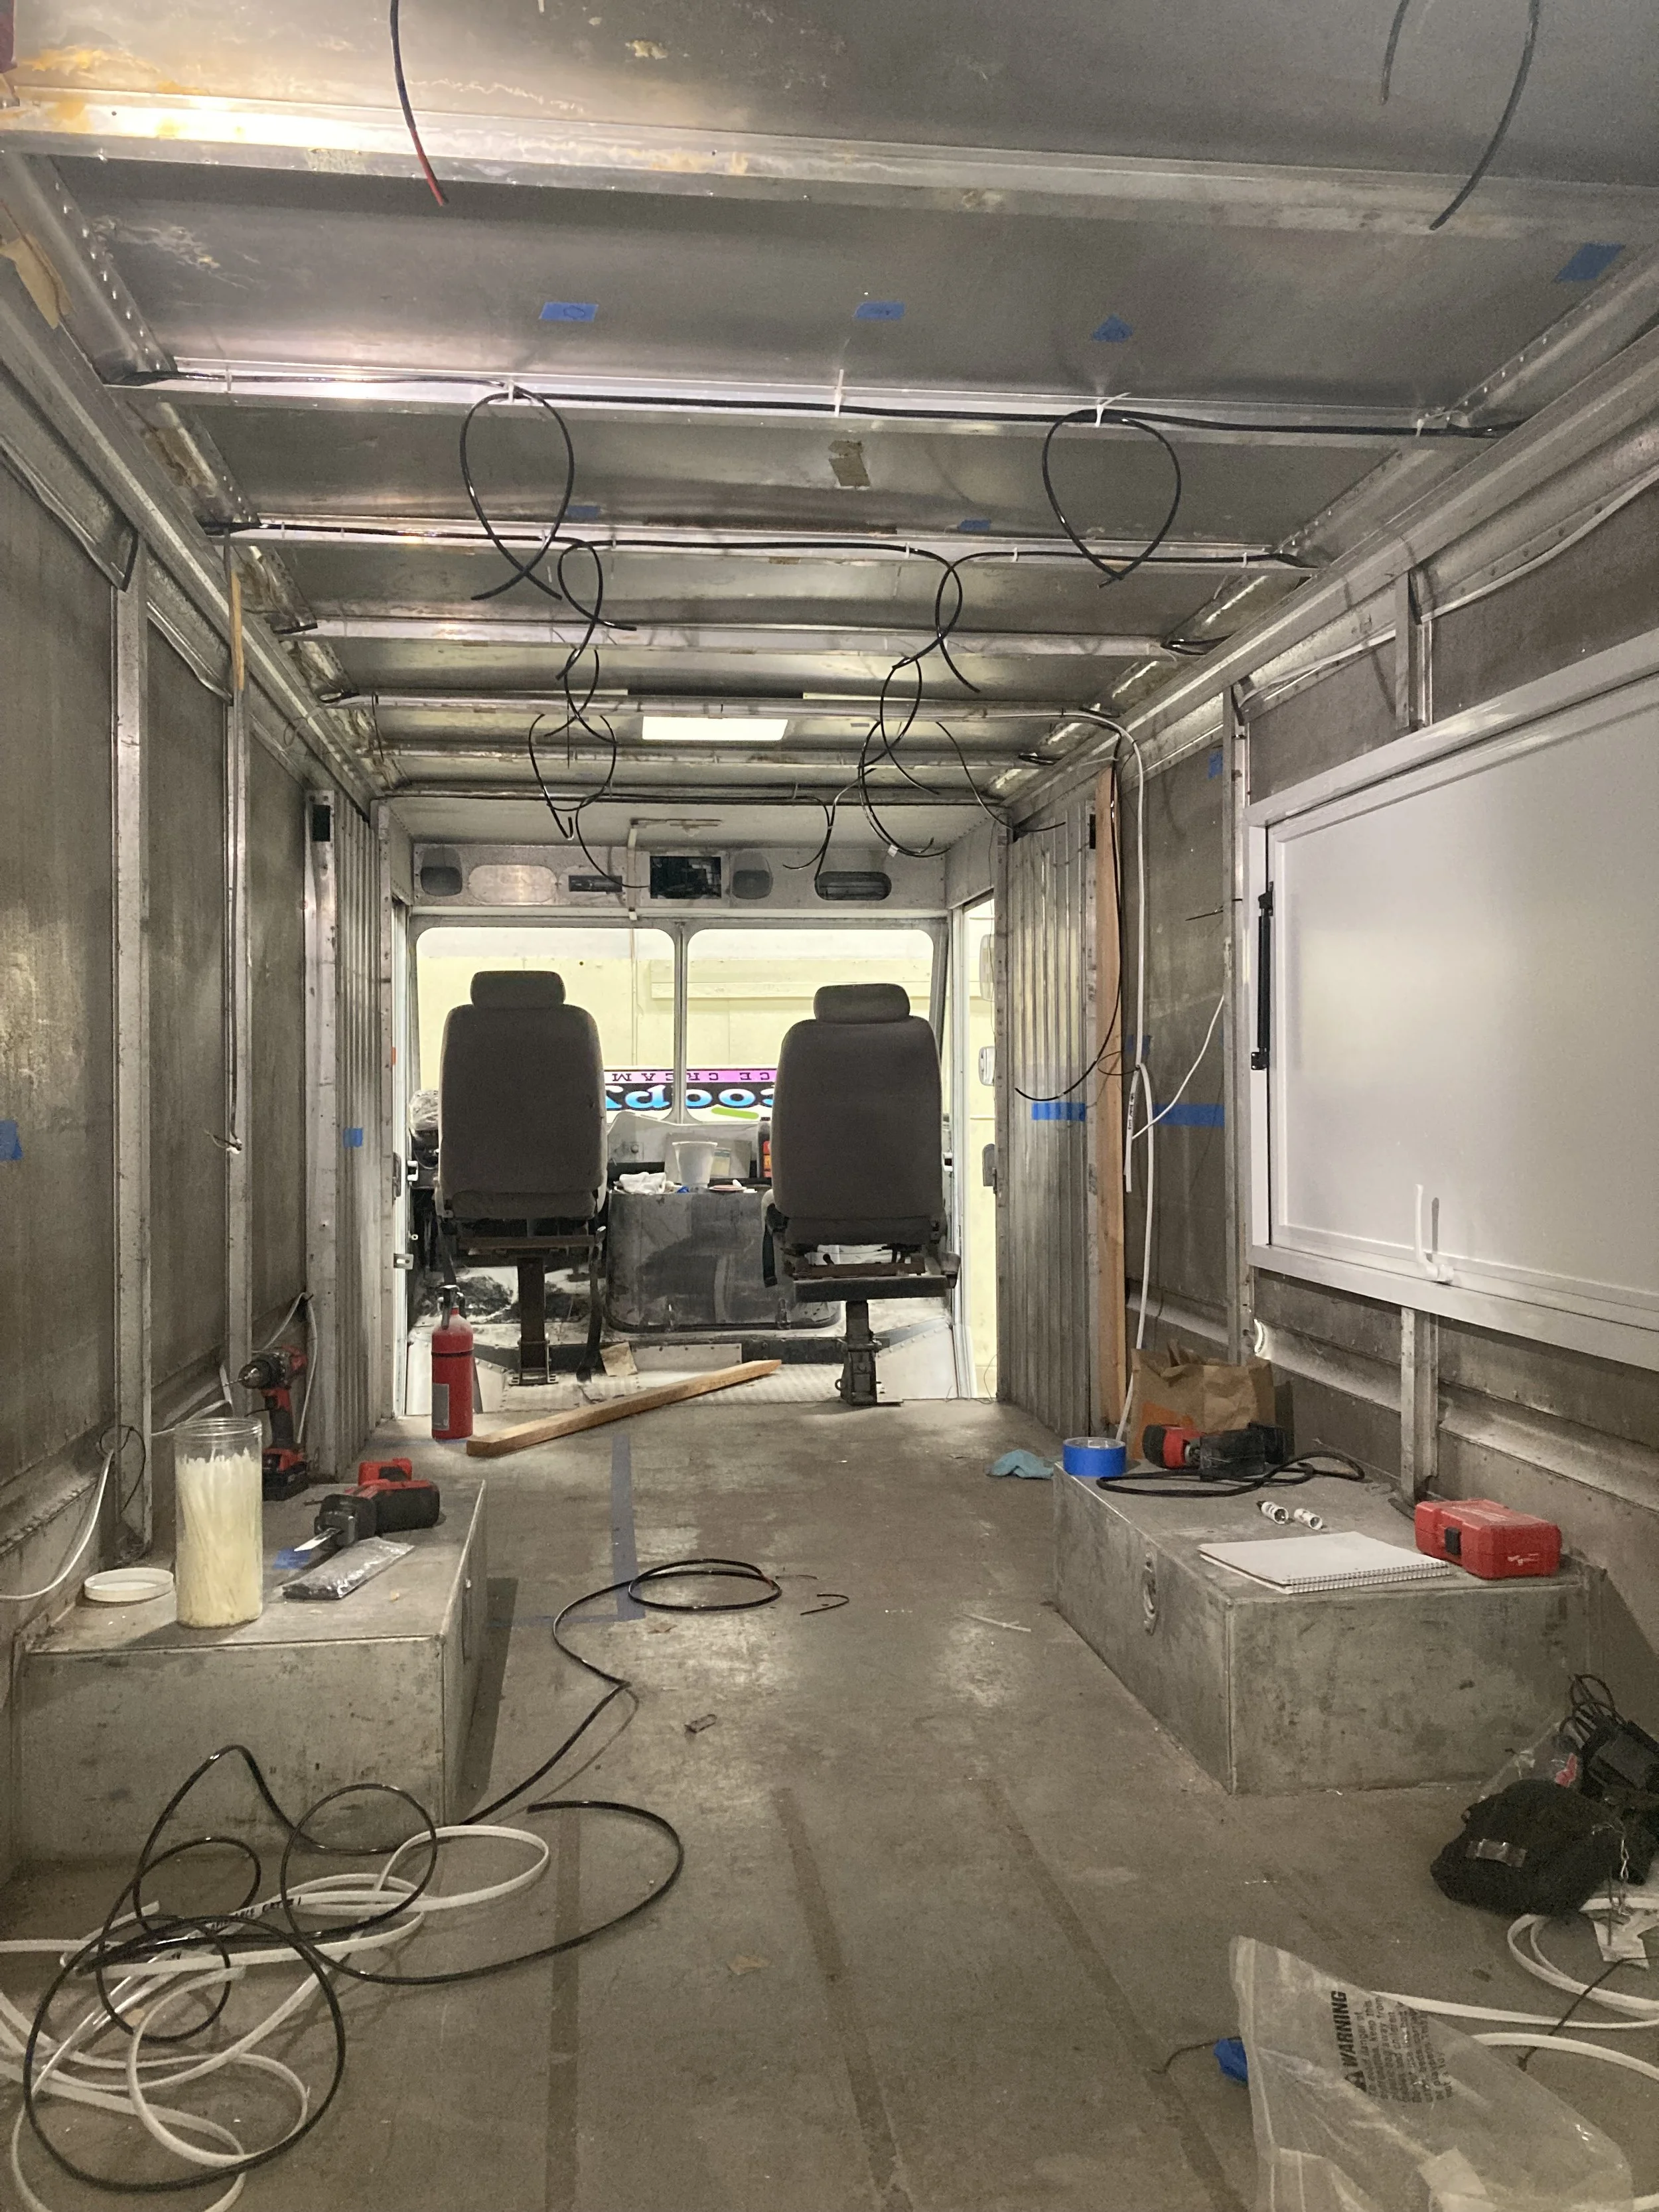
Wired it for lighting, running water, multiple freezers, a fridge, air conditioning and more
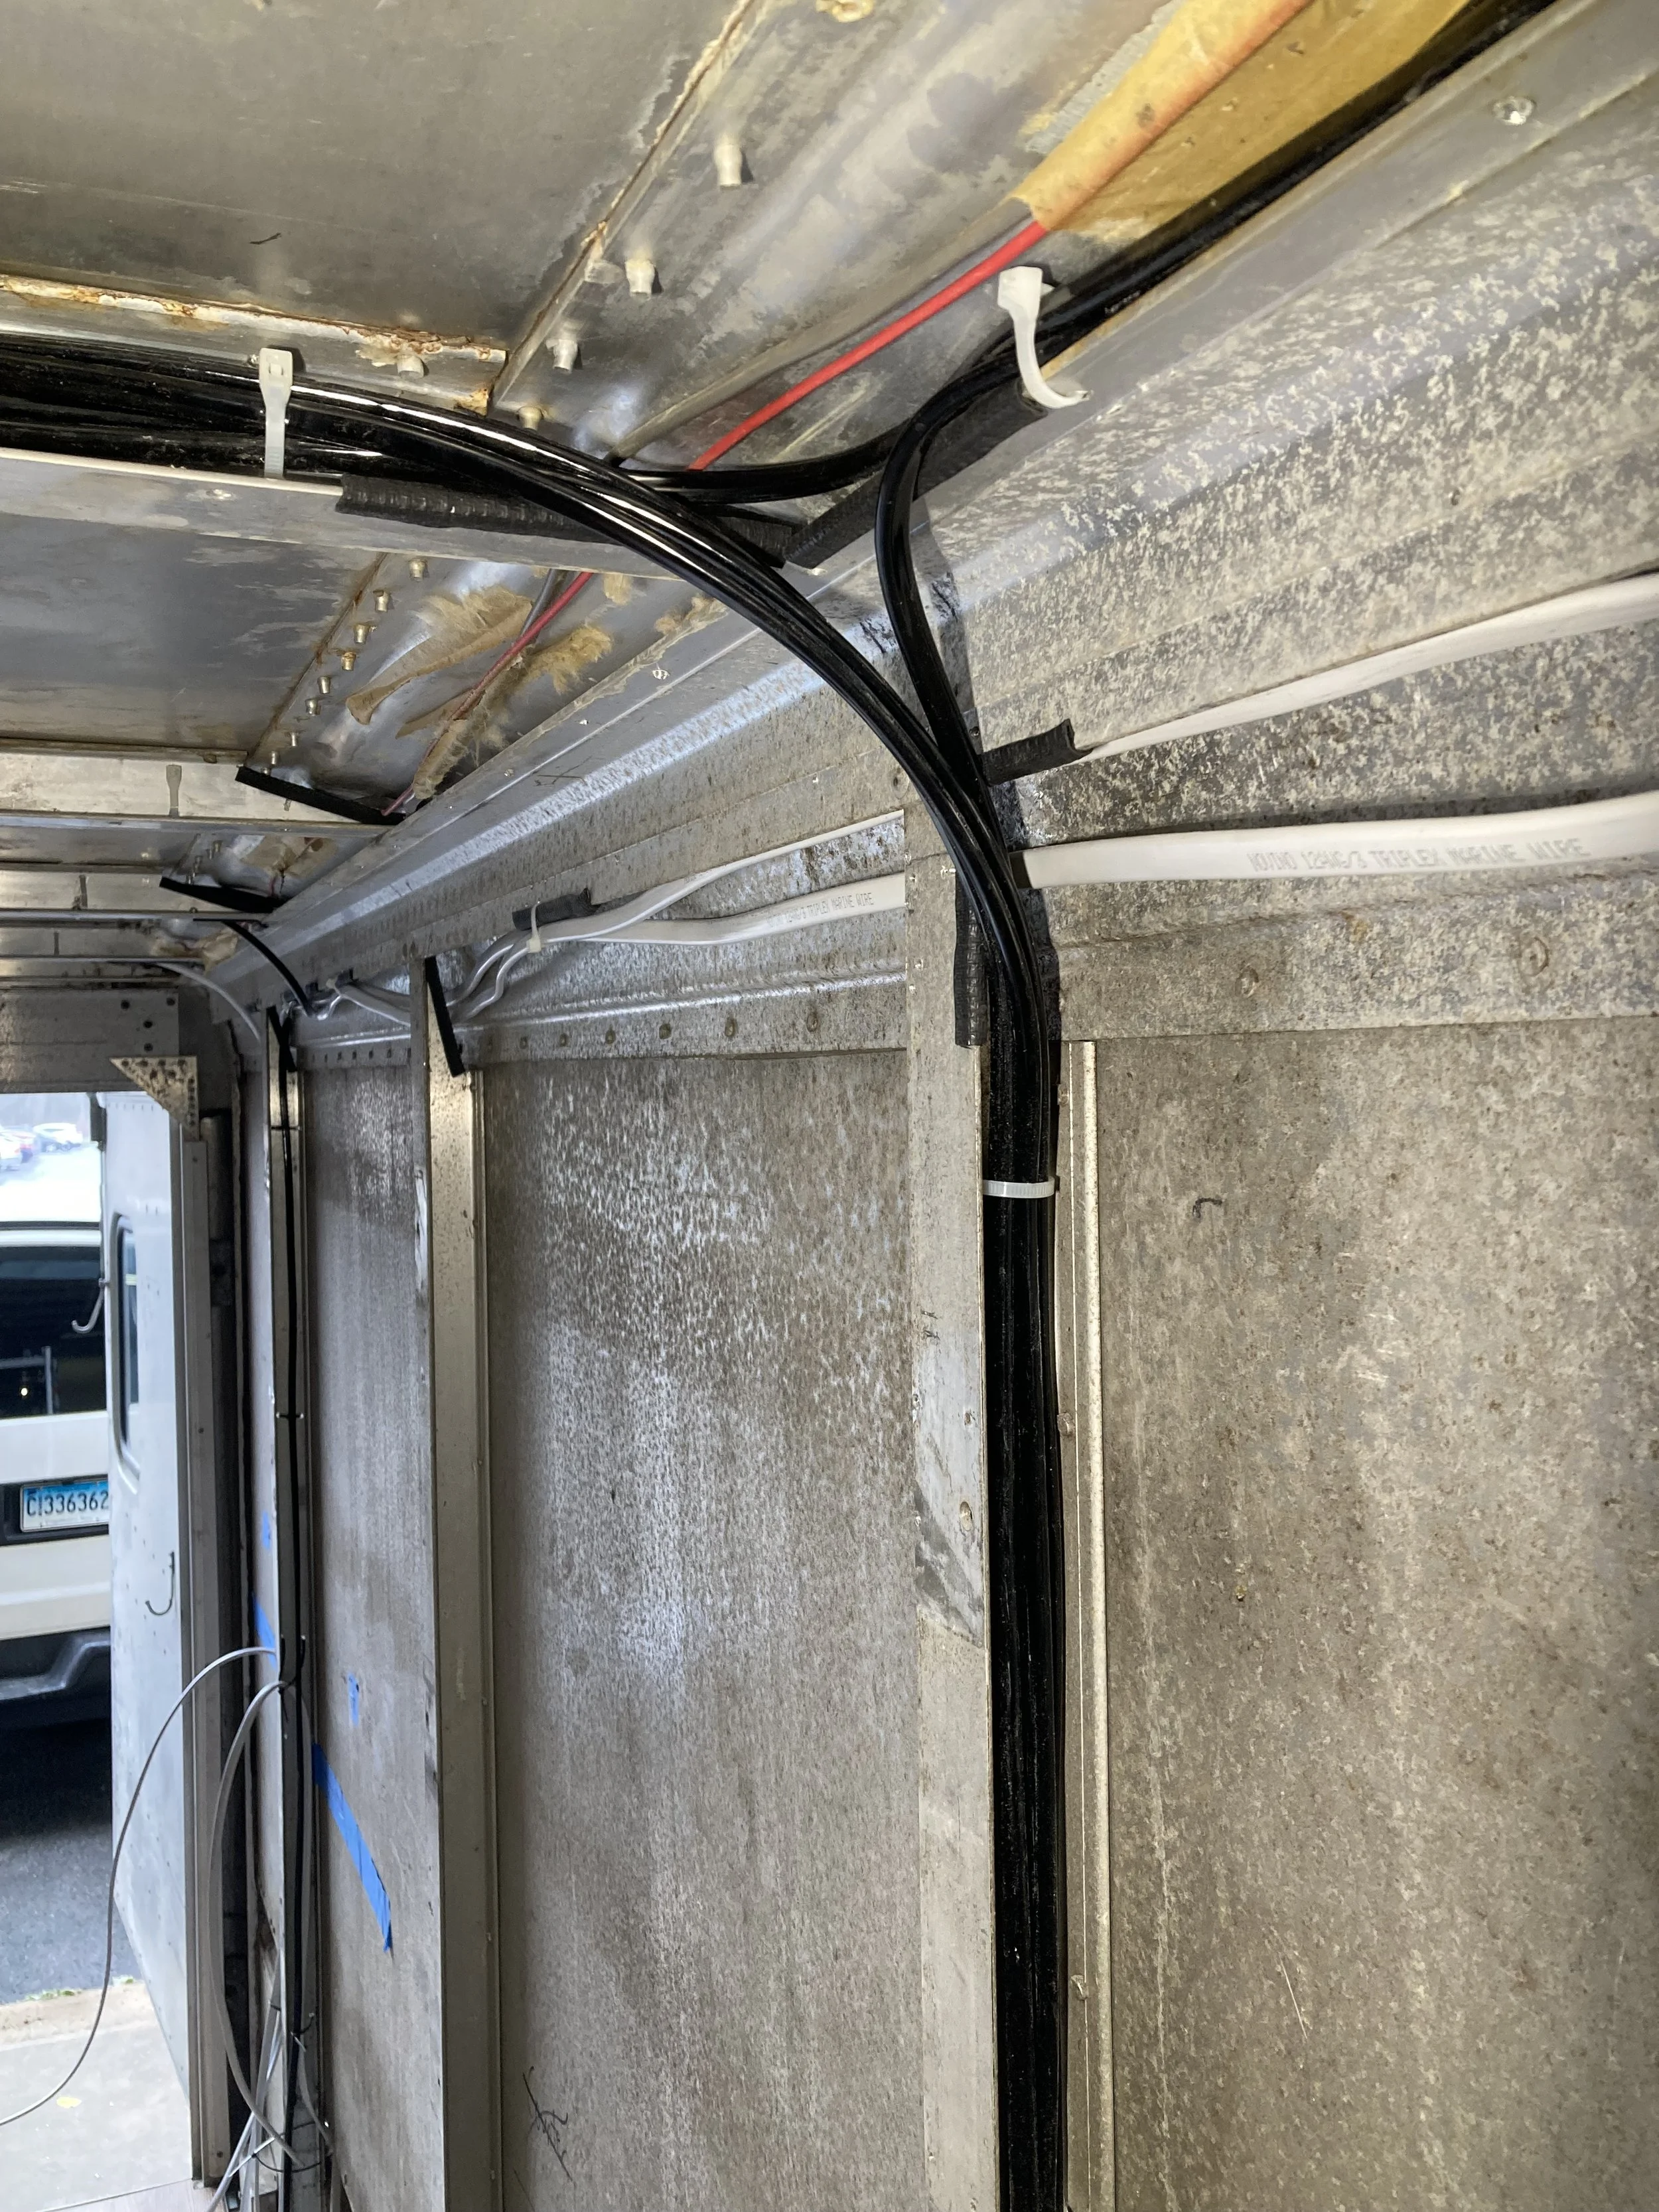
Used marine grade wire and installed rubber edging where it passed over metal edges
Installed flooring

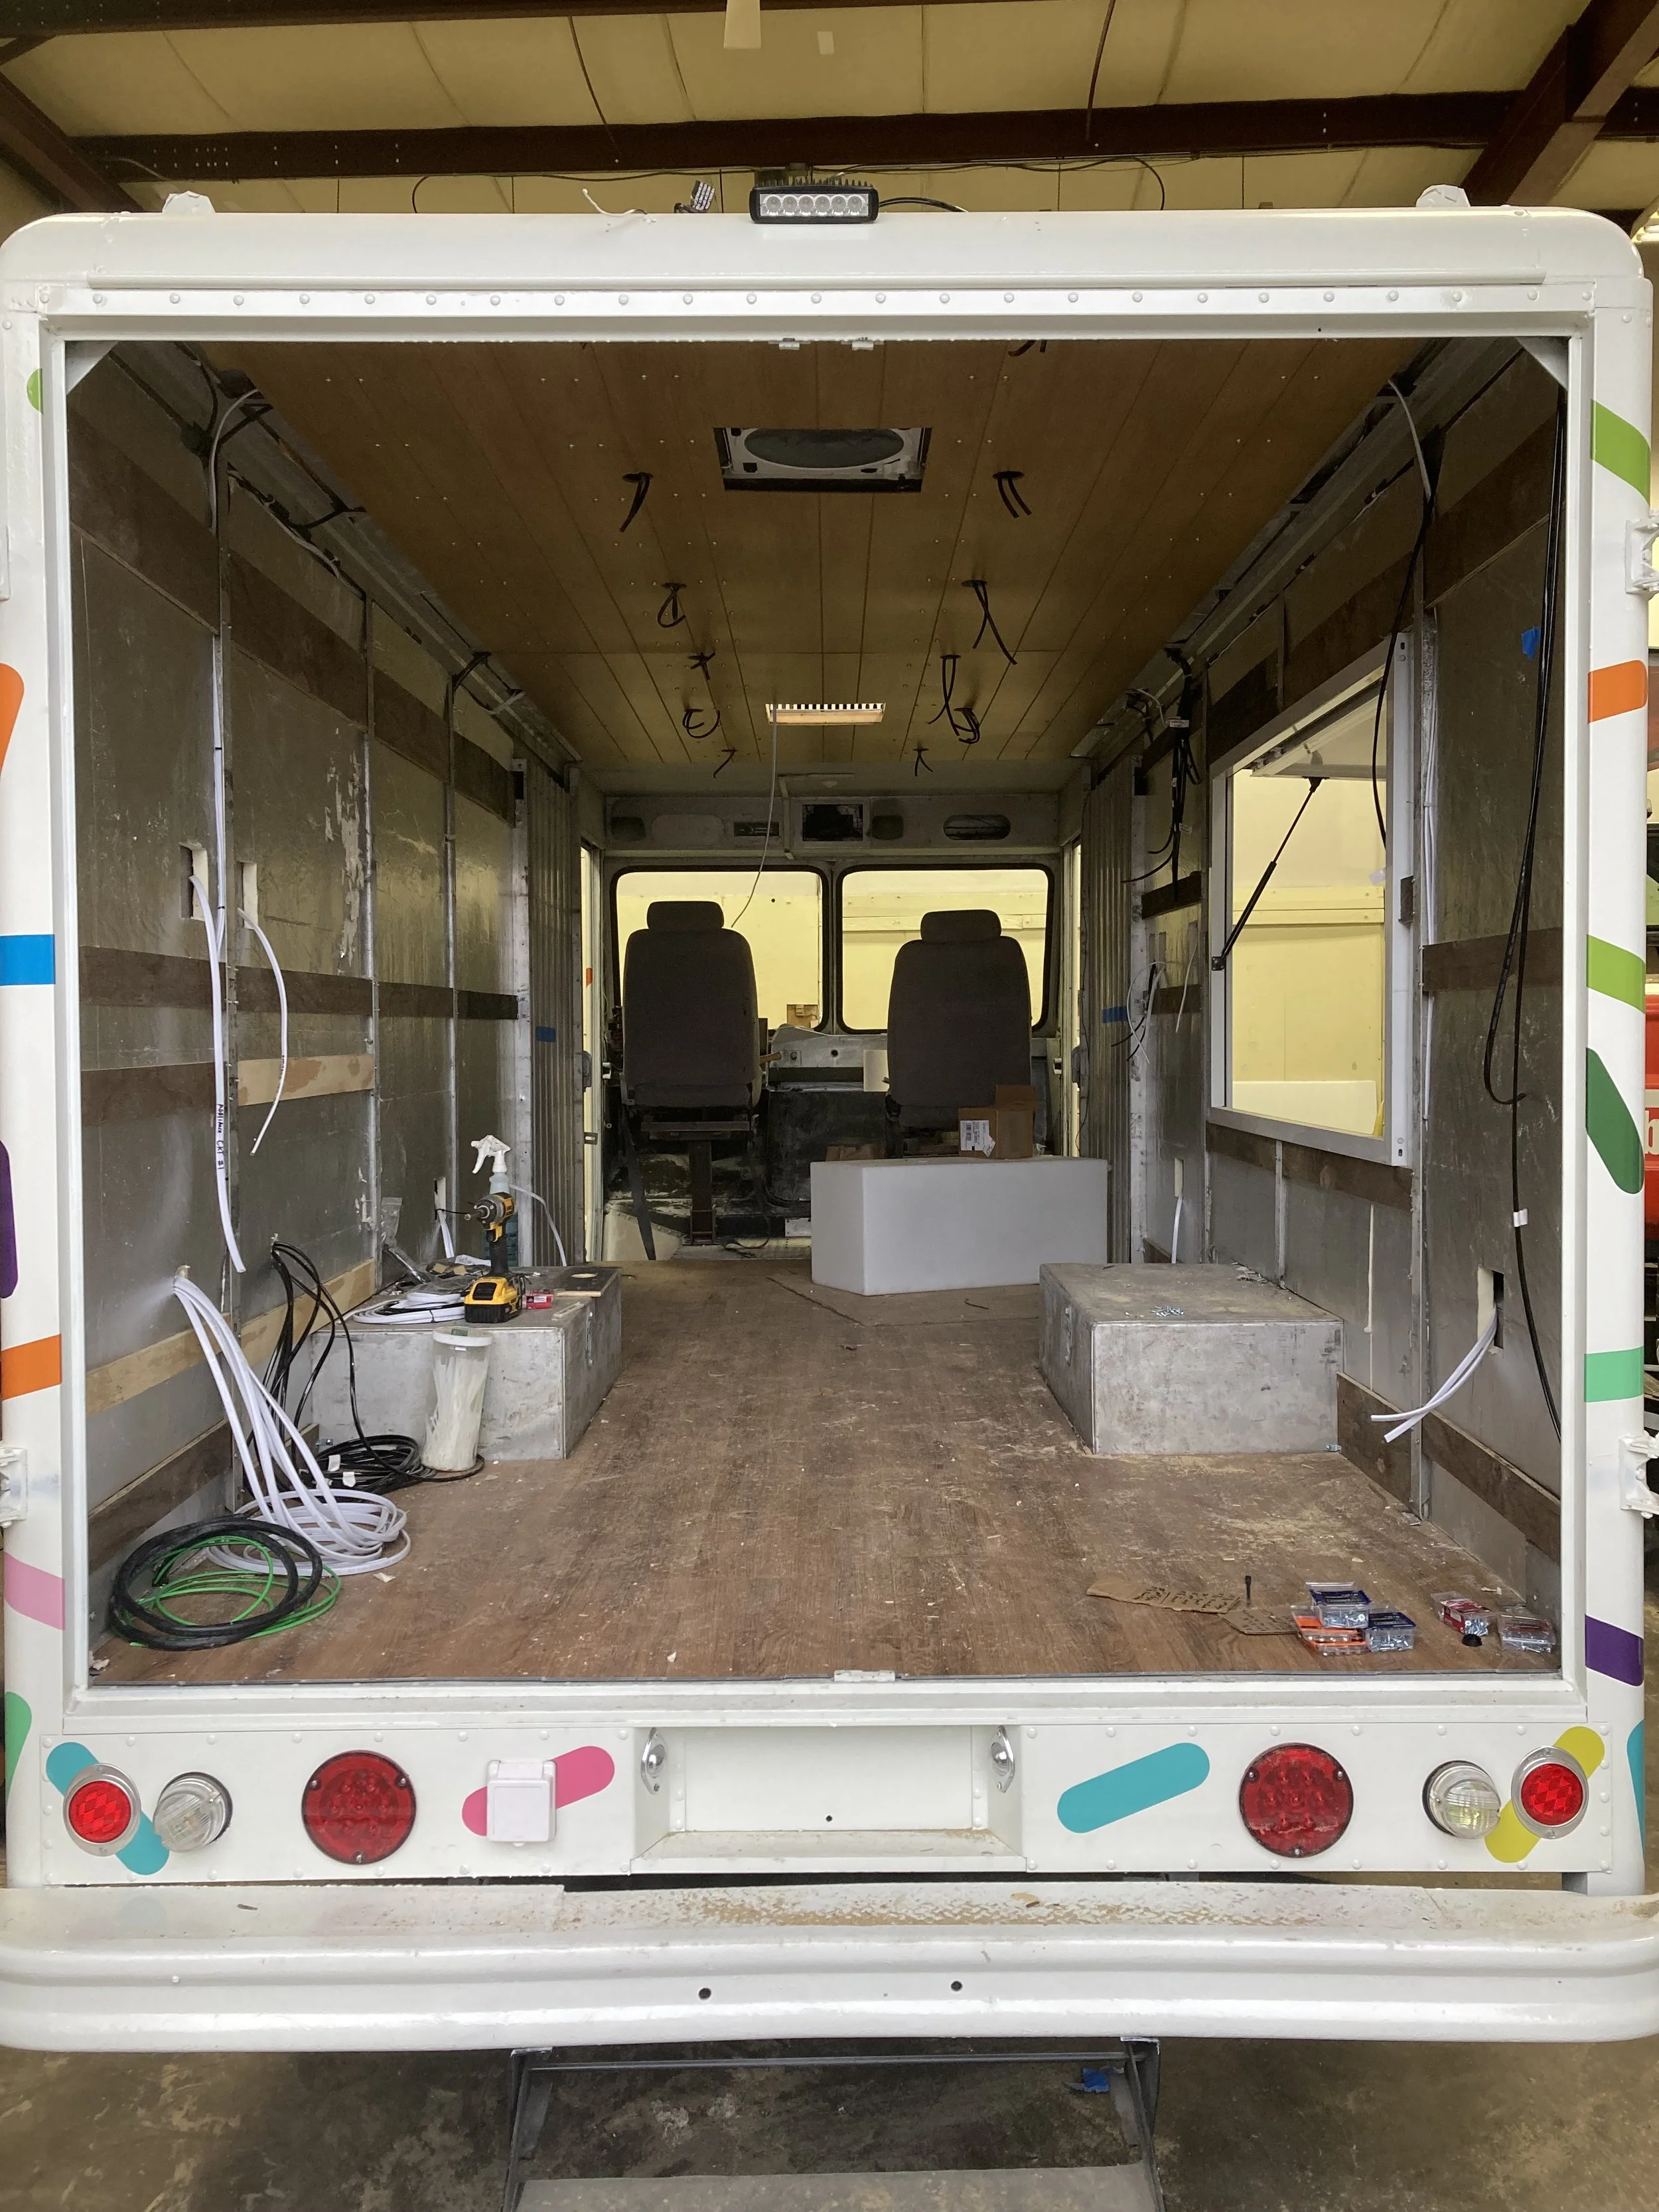
Insulated the walls and ceiling

Used FRP for the walls
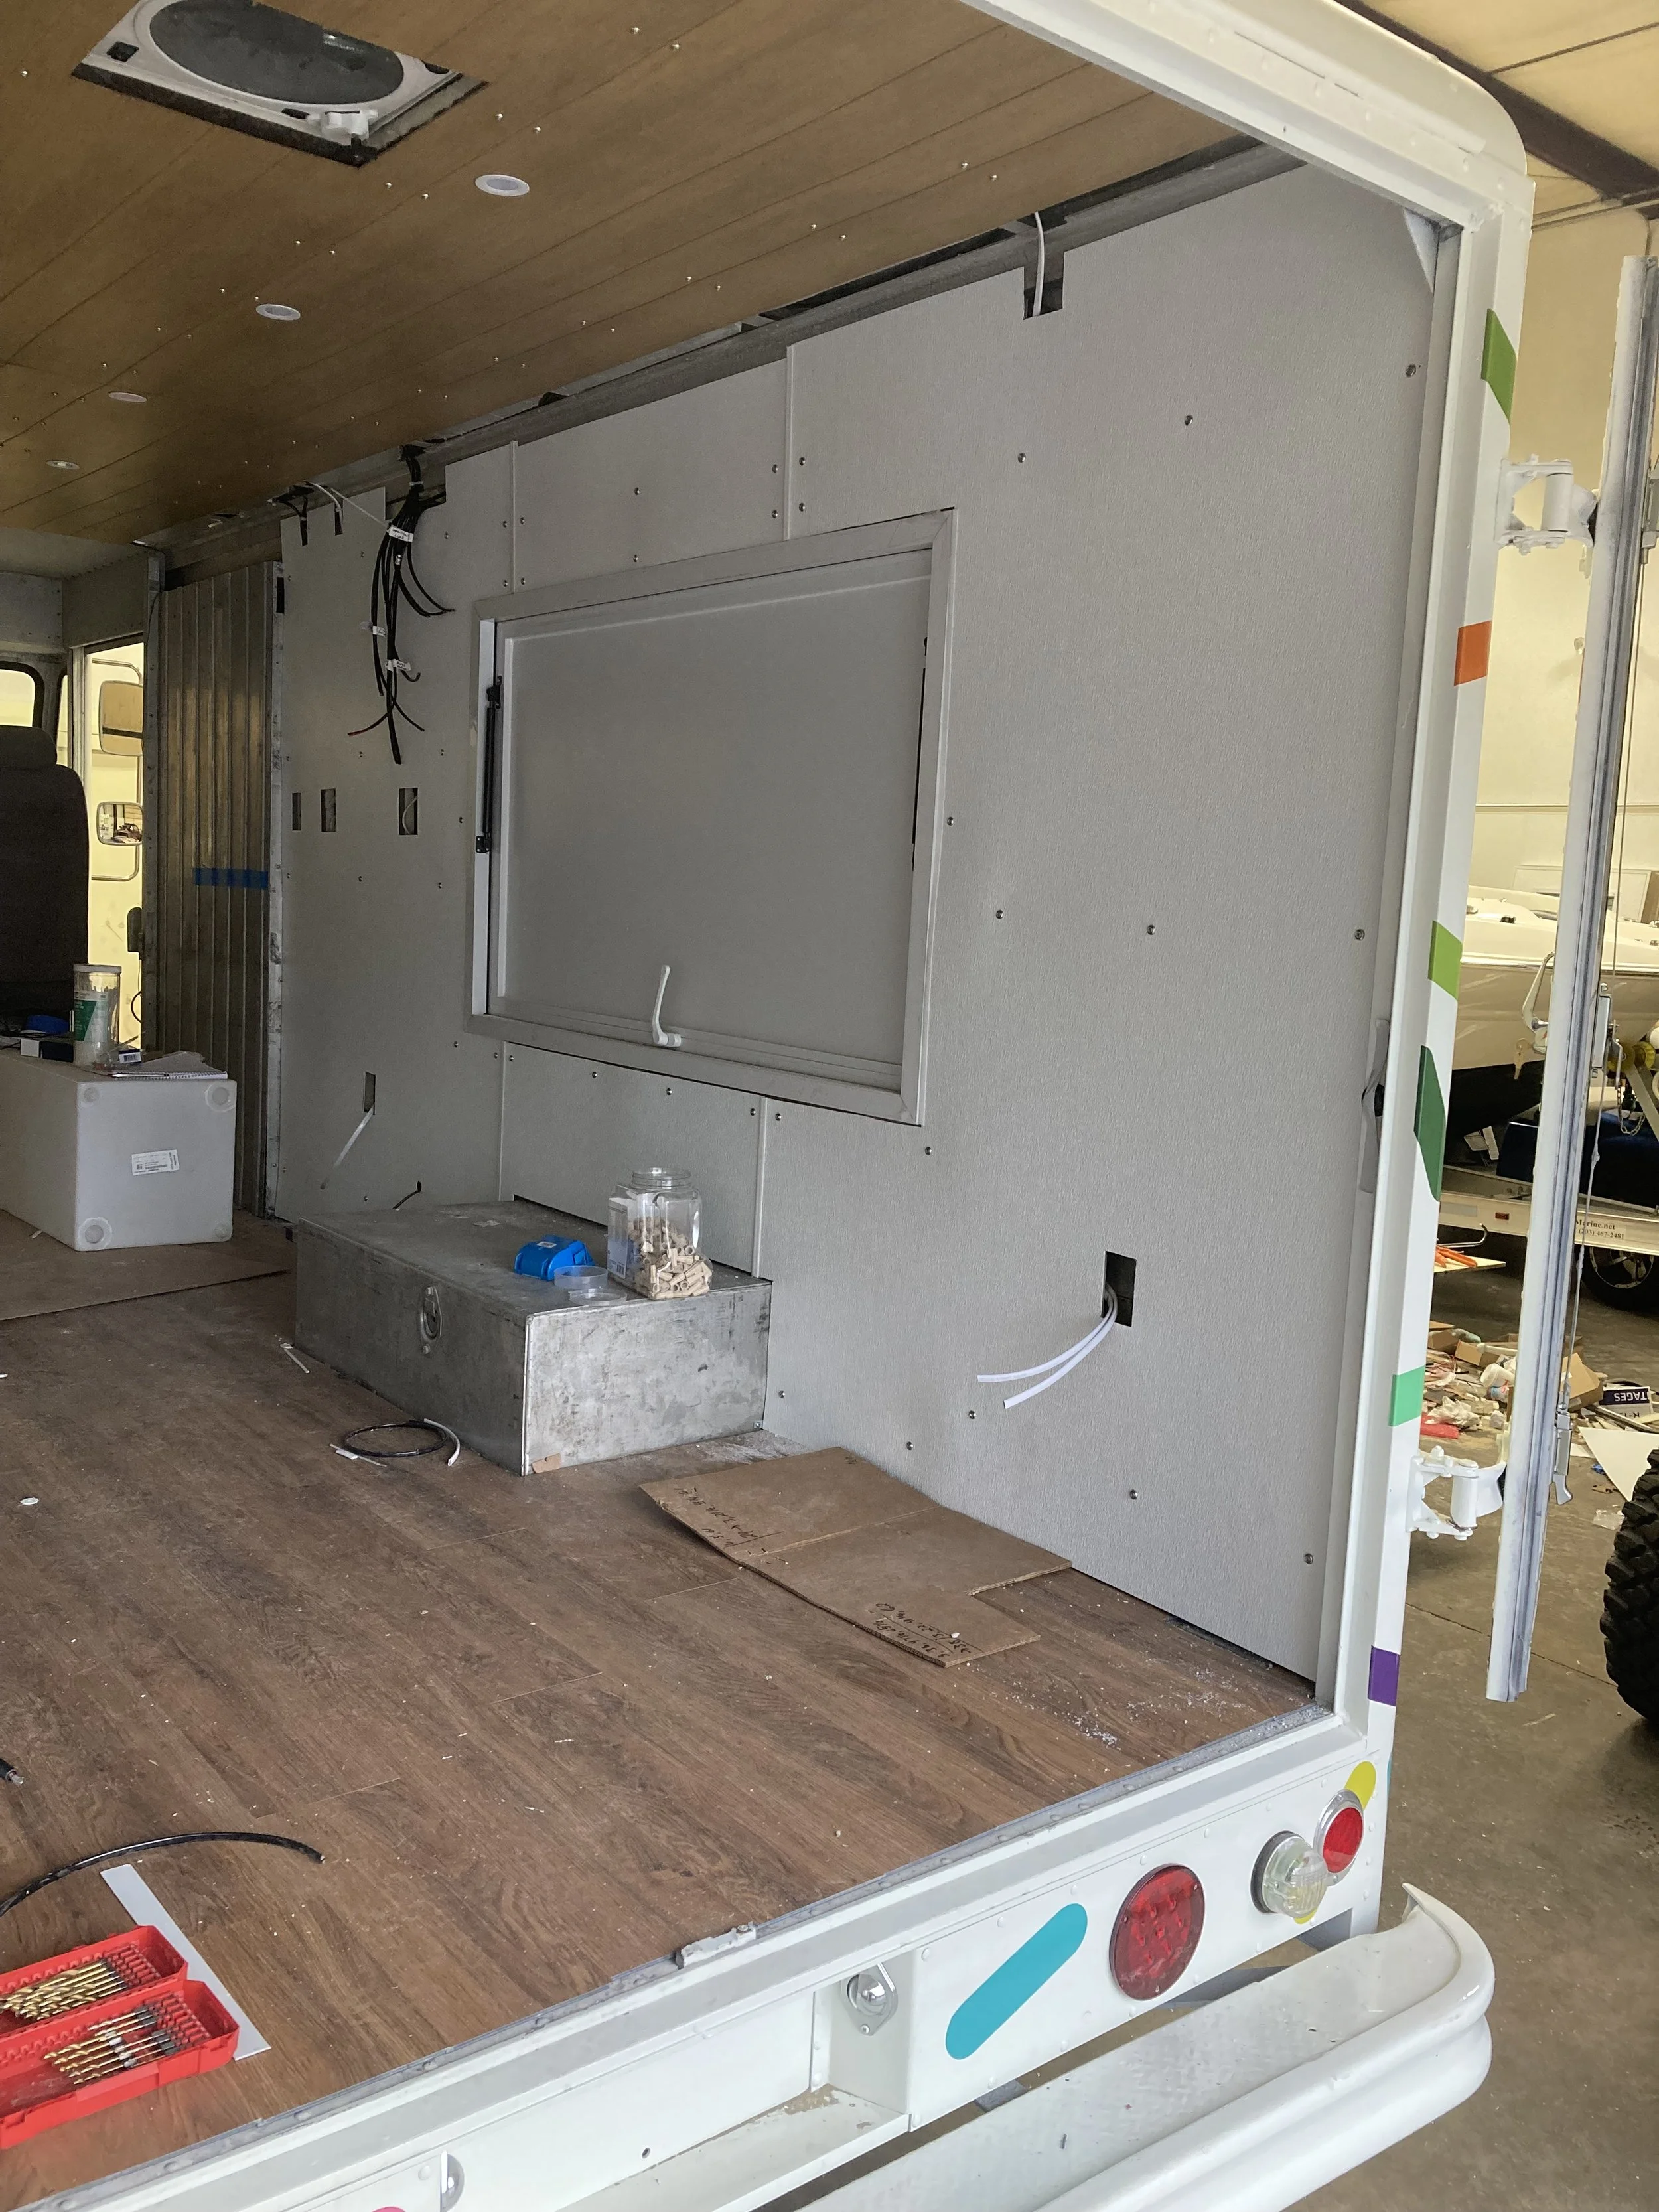

Built simple economical cabinetry that is later wrapped in white 1/16" brake metal for food truck regulations
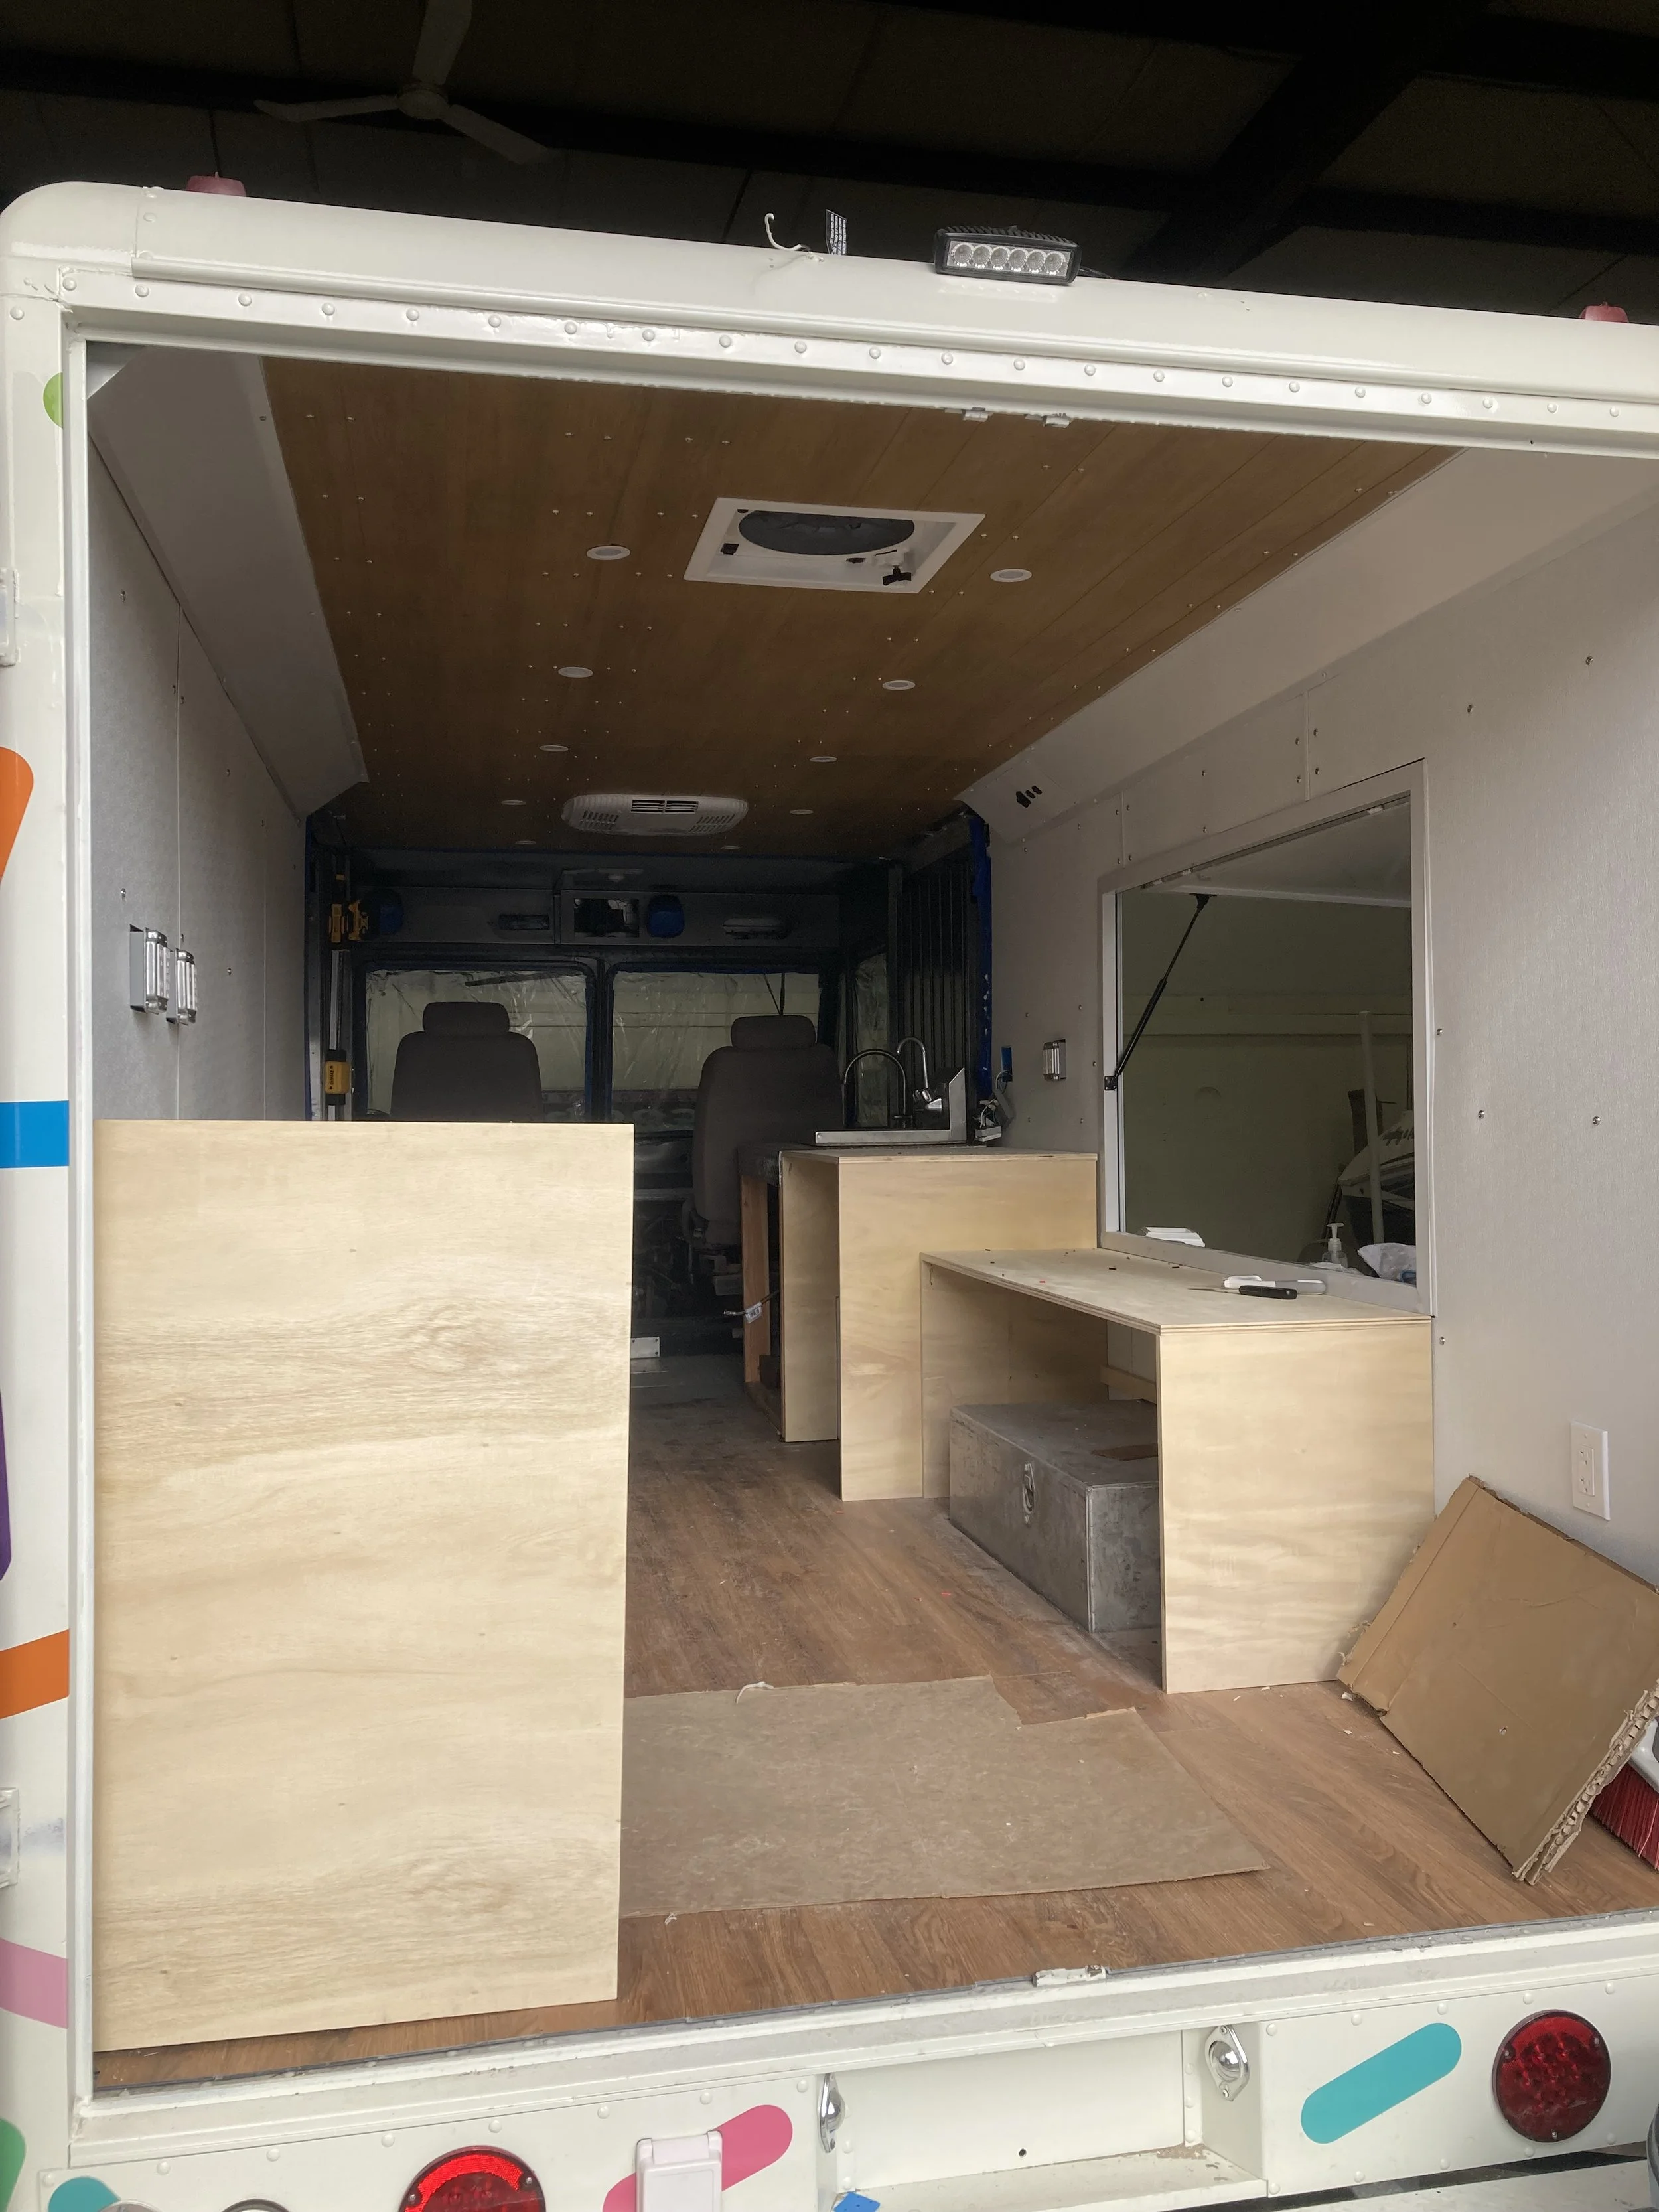
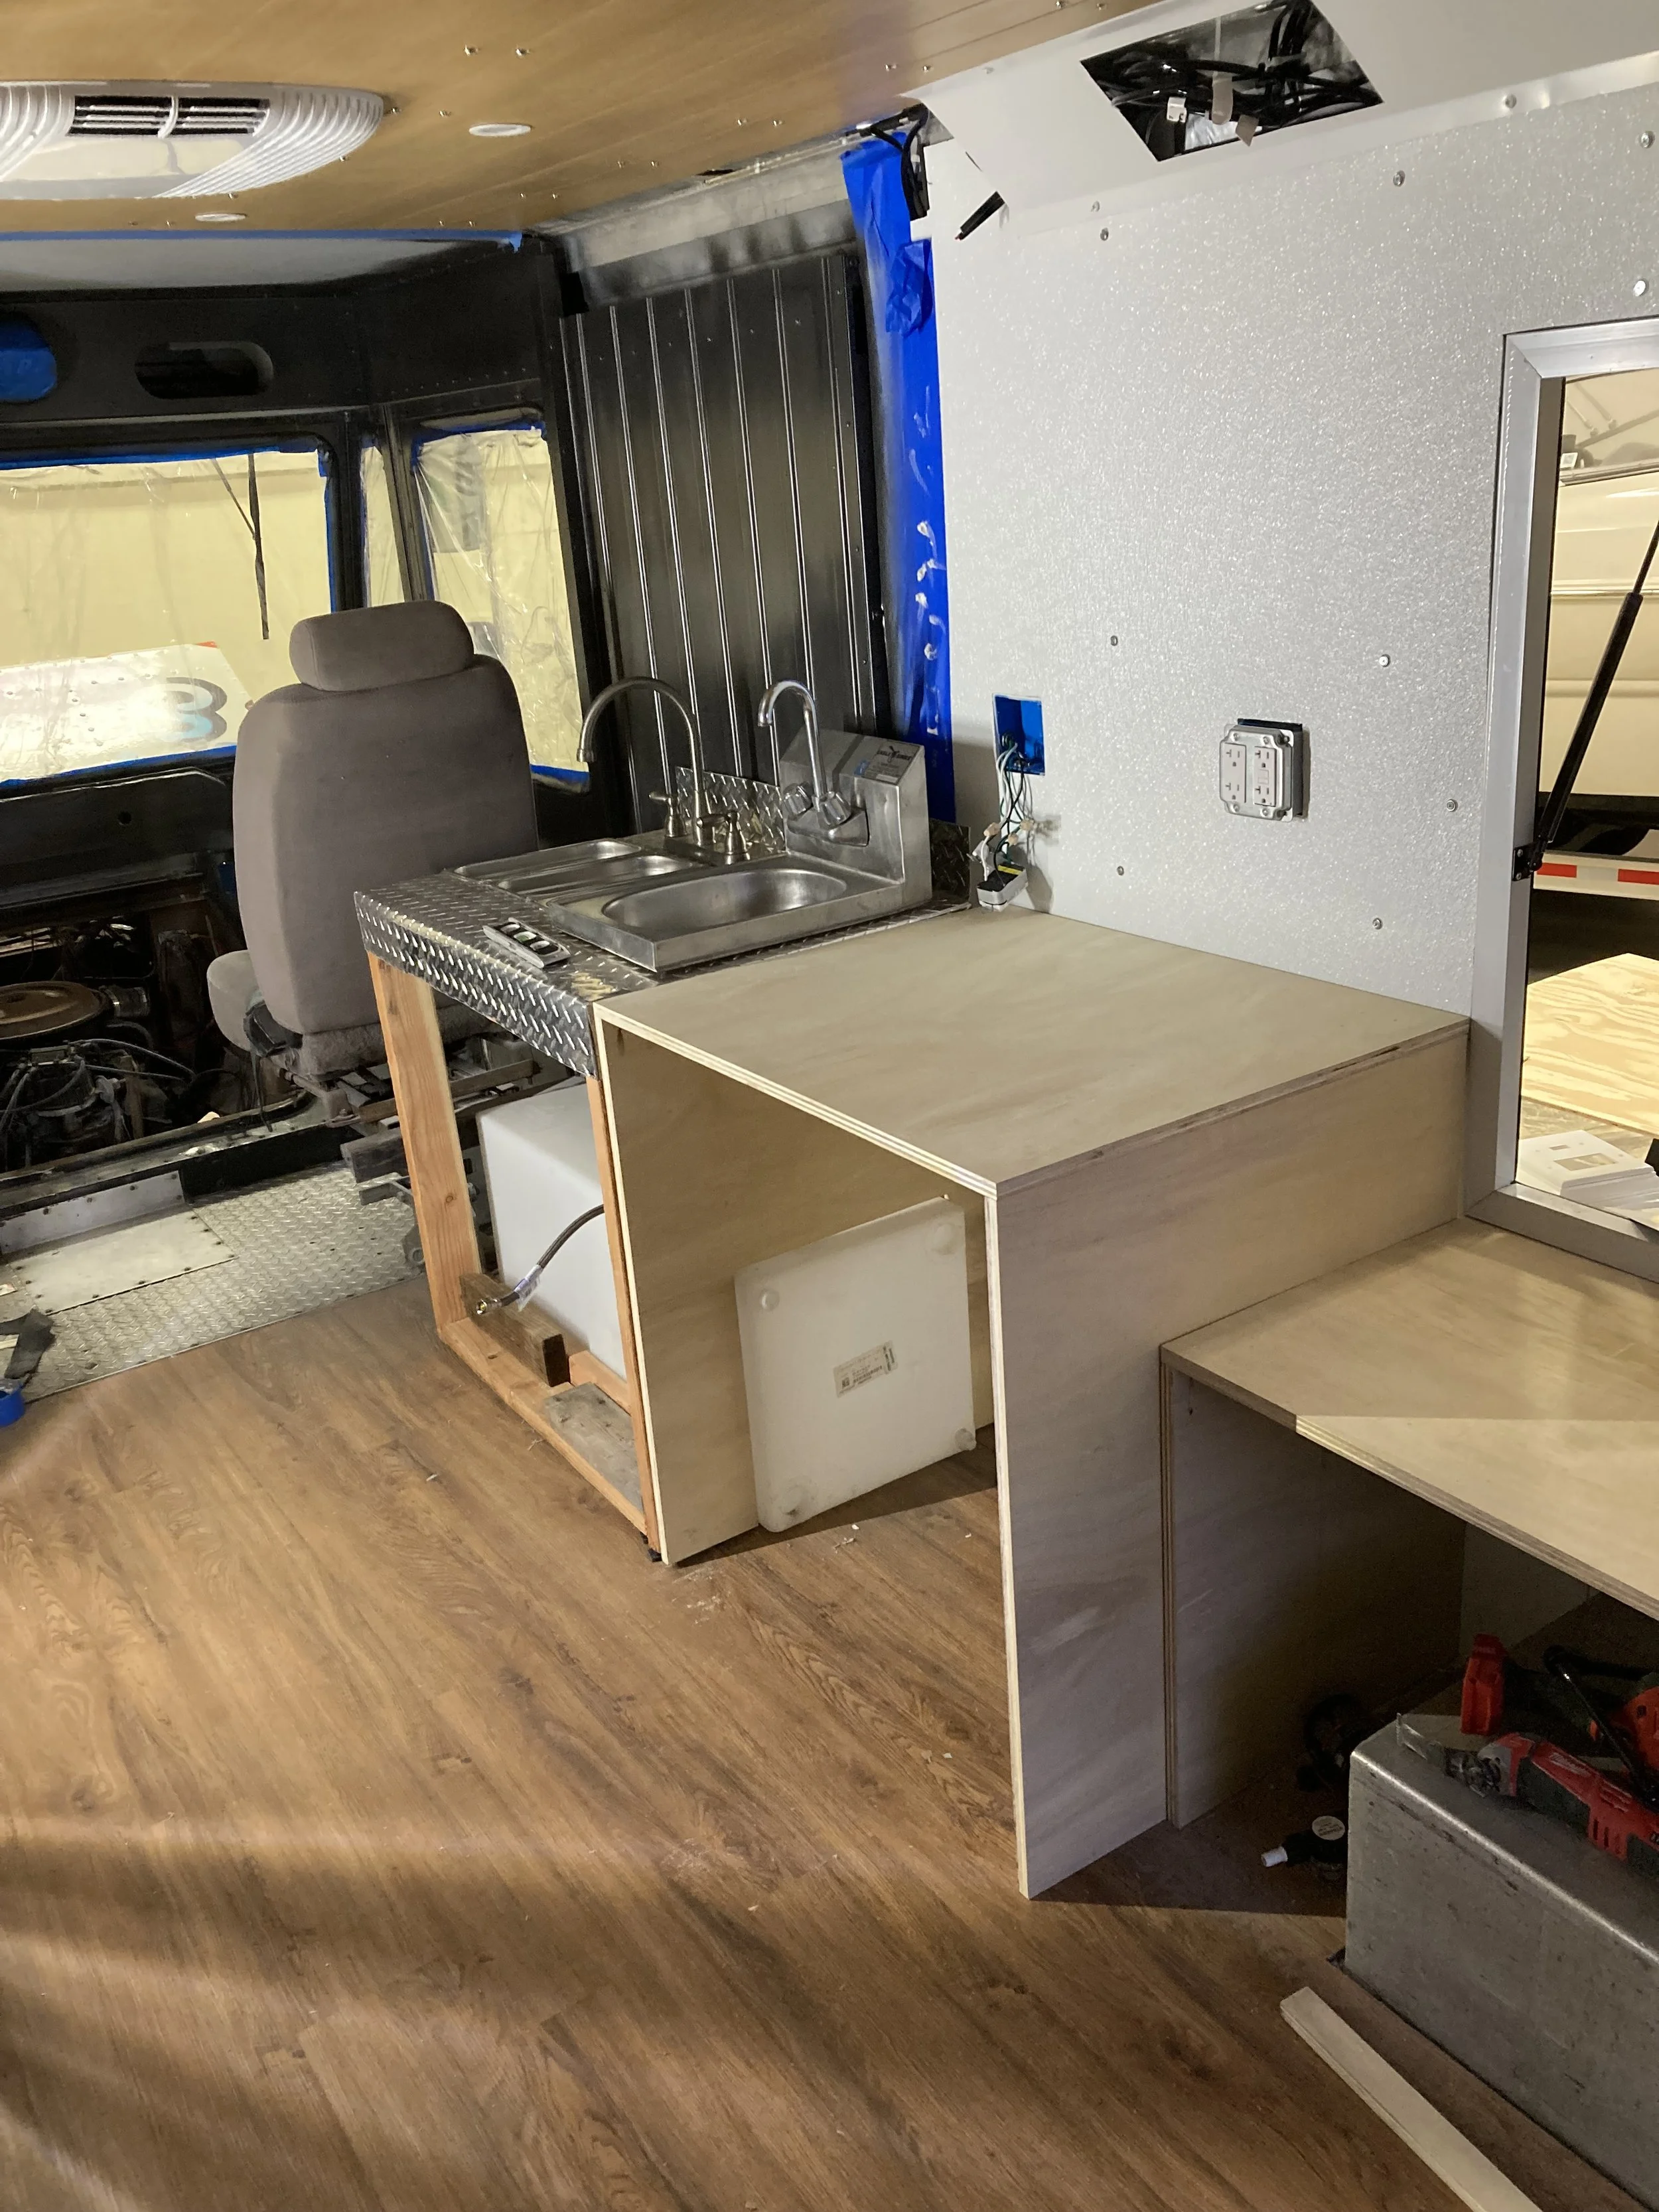
Customer wanted to use the old sink counter that was already in the van
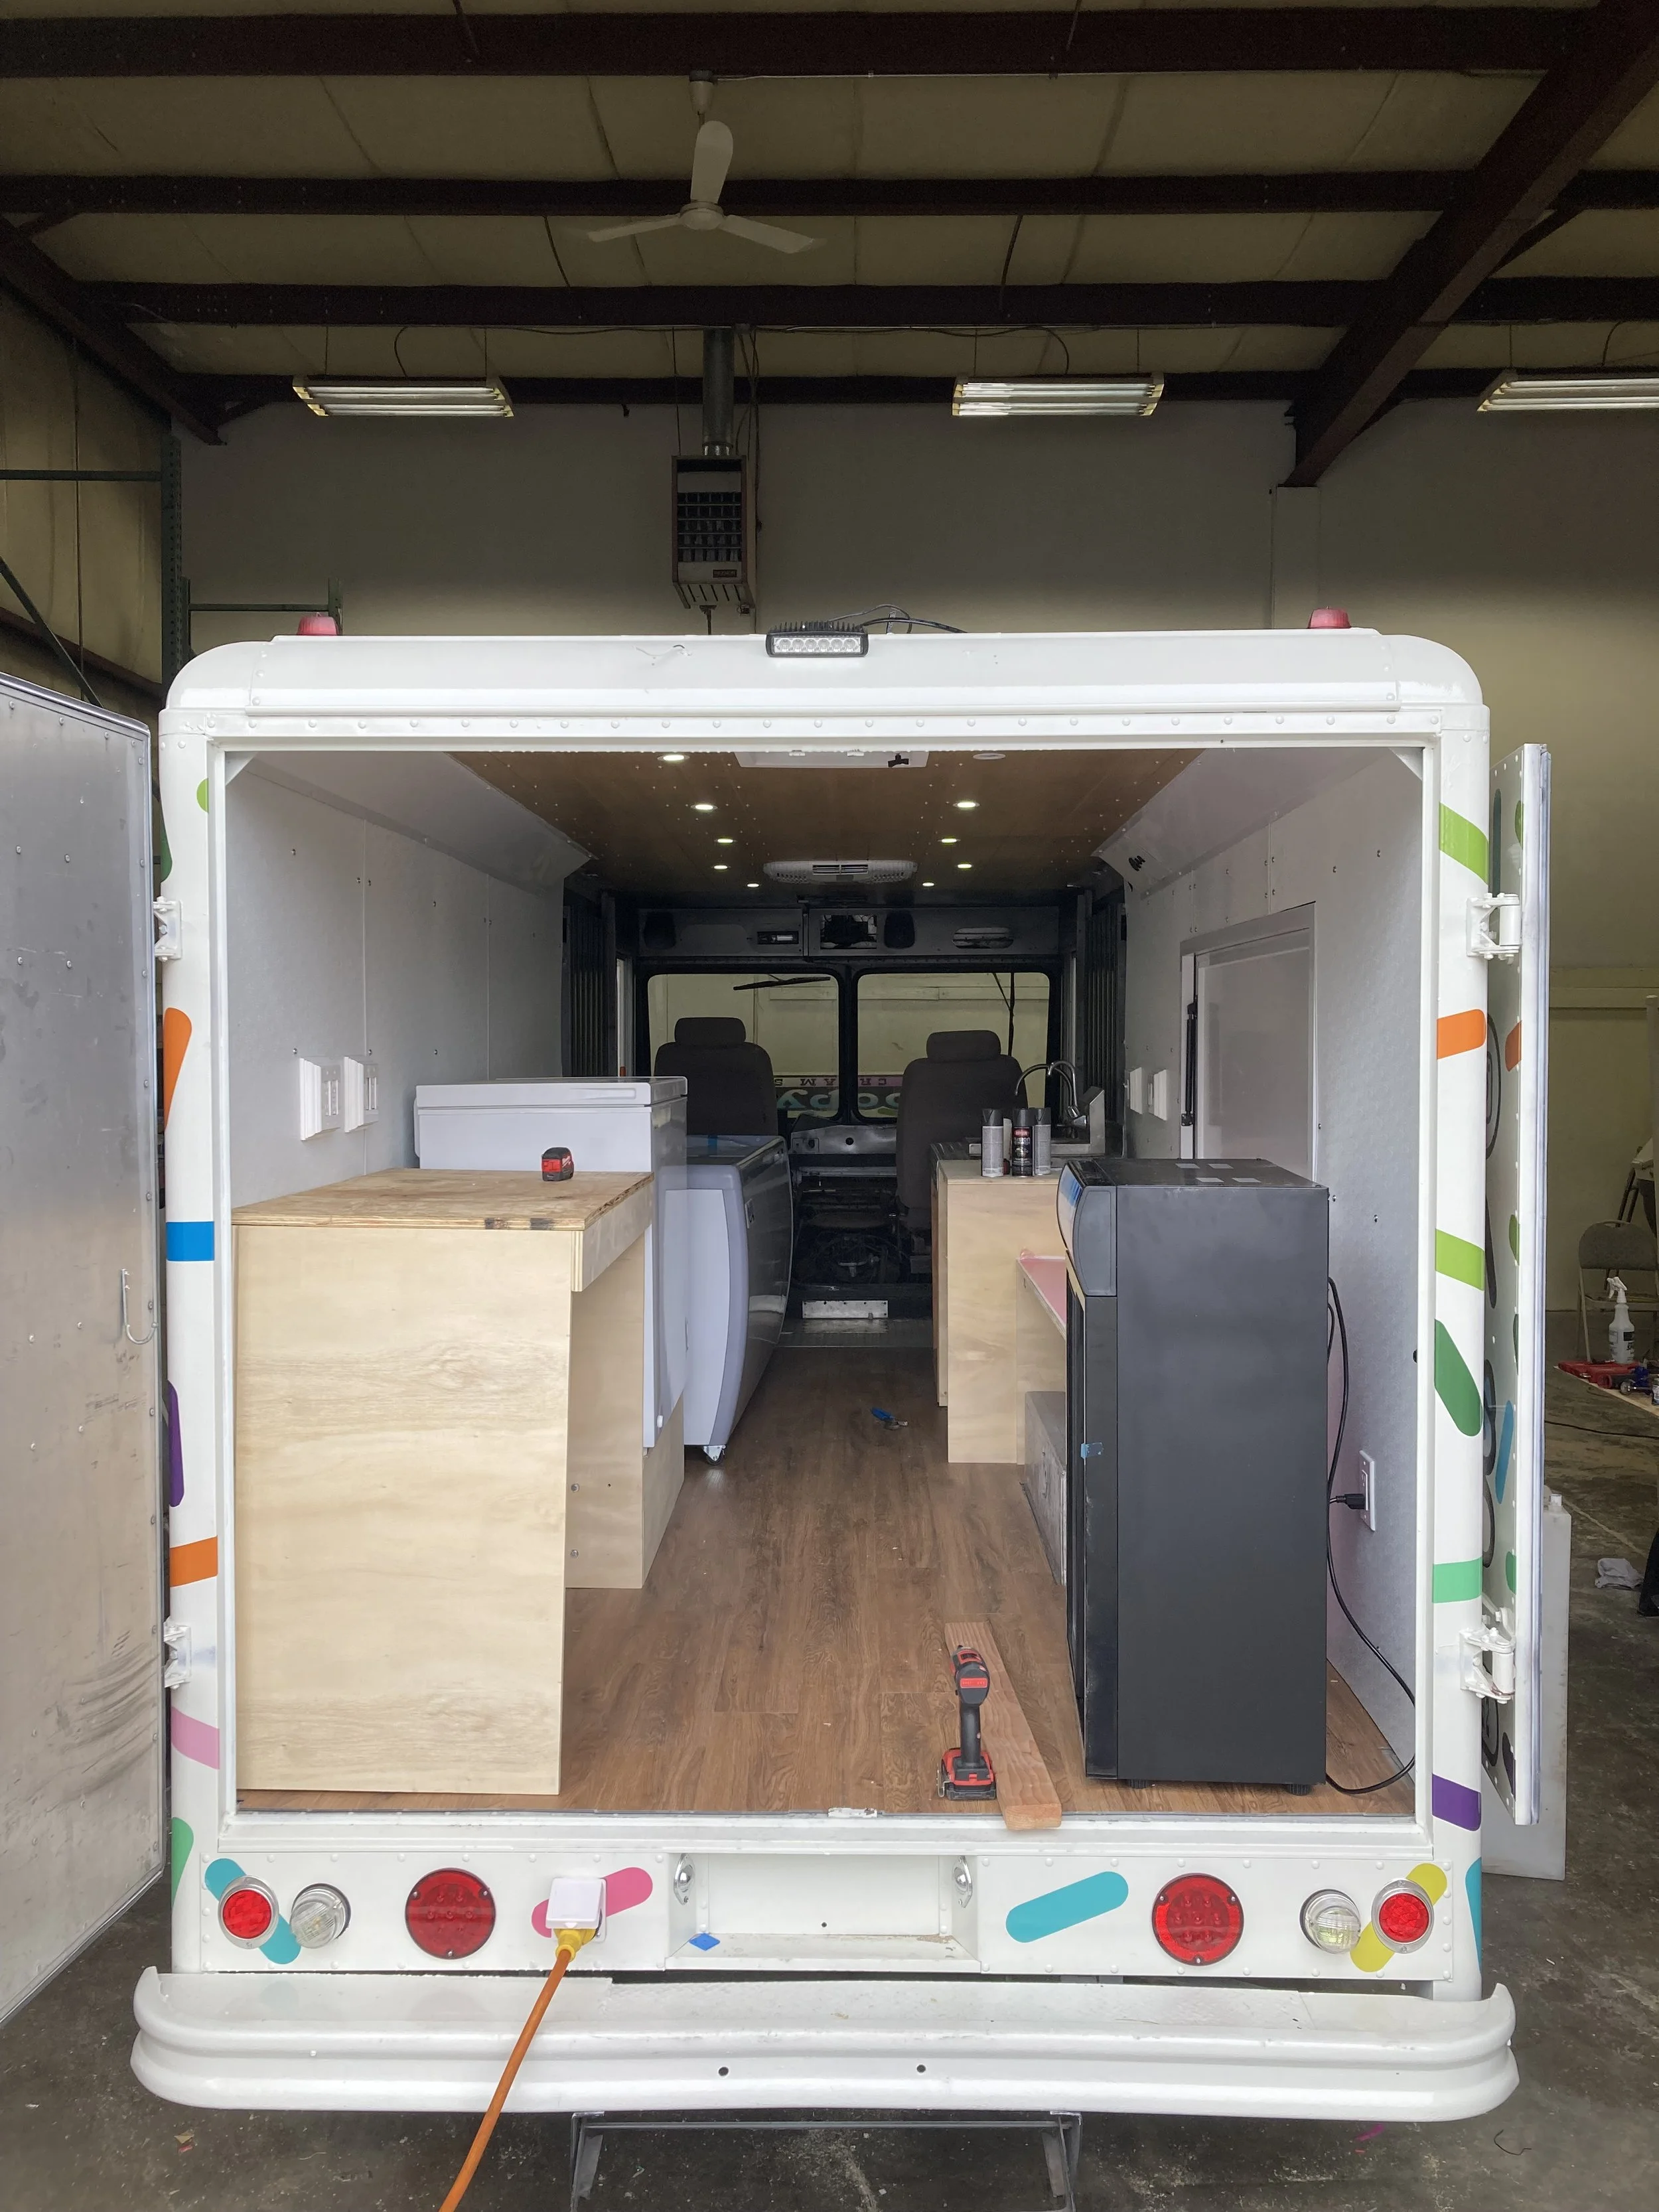
On the driver side there is a deep freezer, a 12 hole dipping cabinet, counter top for blenders and milkshake machines. On the passenger side is the sink, counter top for working space, serving window and a fridge for ingrediants.